xpPainter
xpPainter lets you interactively paint particles onto the surface of scene geometry and then manipulate those painted particles further.
Selecting xpPainter will not add anything to your Objects Manager, but your cursor will alter and there will be grayed-out settings in your Attributes Manager.
To use the tool, select an object in the Objects Manager.
You can drag an existing emitter into the Emitter field or, if you don’t do that, the tool will automatically create a new emitter for you.
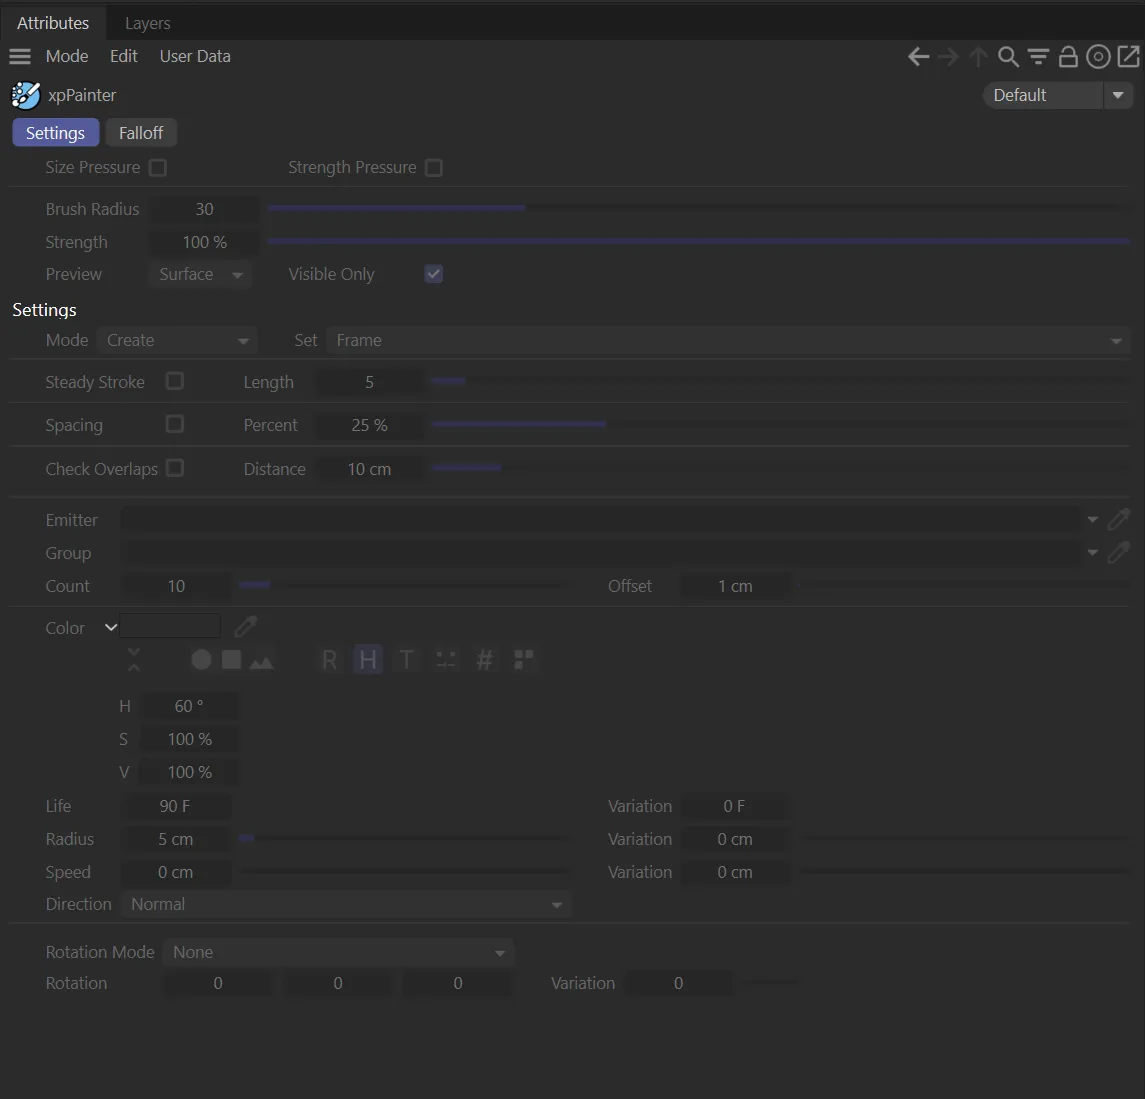
The ‘grayed-out’ settings in the Attributes Manager when xpPainter is first selected.
xpPainter will not work in frame zero; moving onto frame one (1) will activate the settings.
Whichever frame you move to, on playback, particles will only be emitted once the timeline reaches that frame.
You can paint on multiple different frames if desired.
When you start painting, particles will be created with the parameters in the tool’s interface - Color, Speed, etc.
You can also specify the particle group.
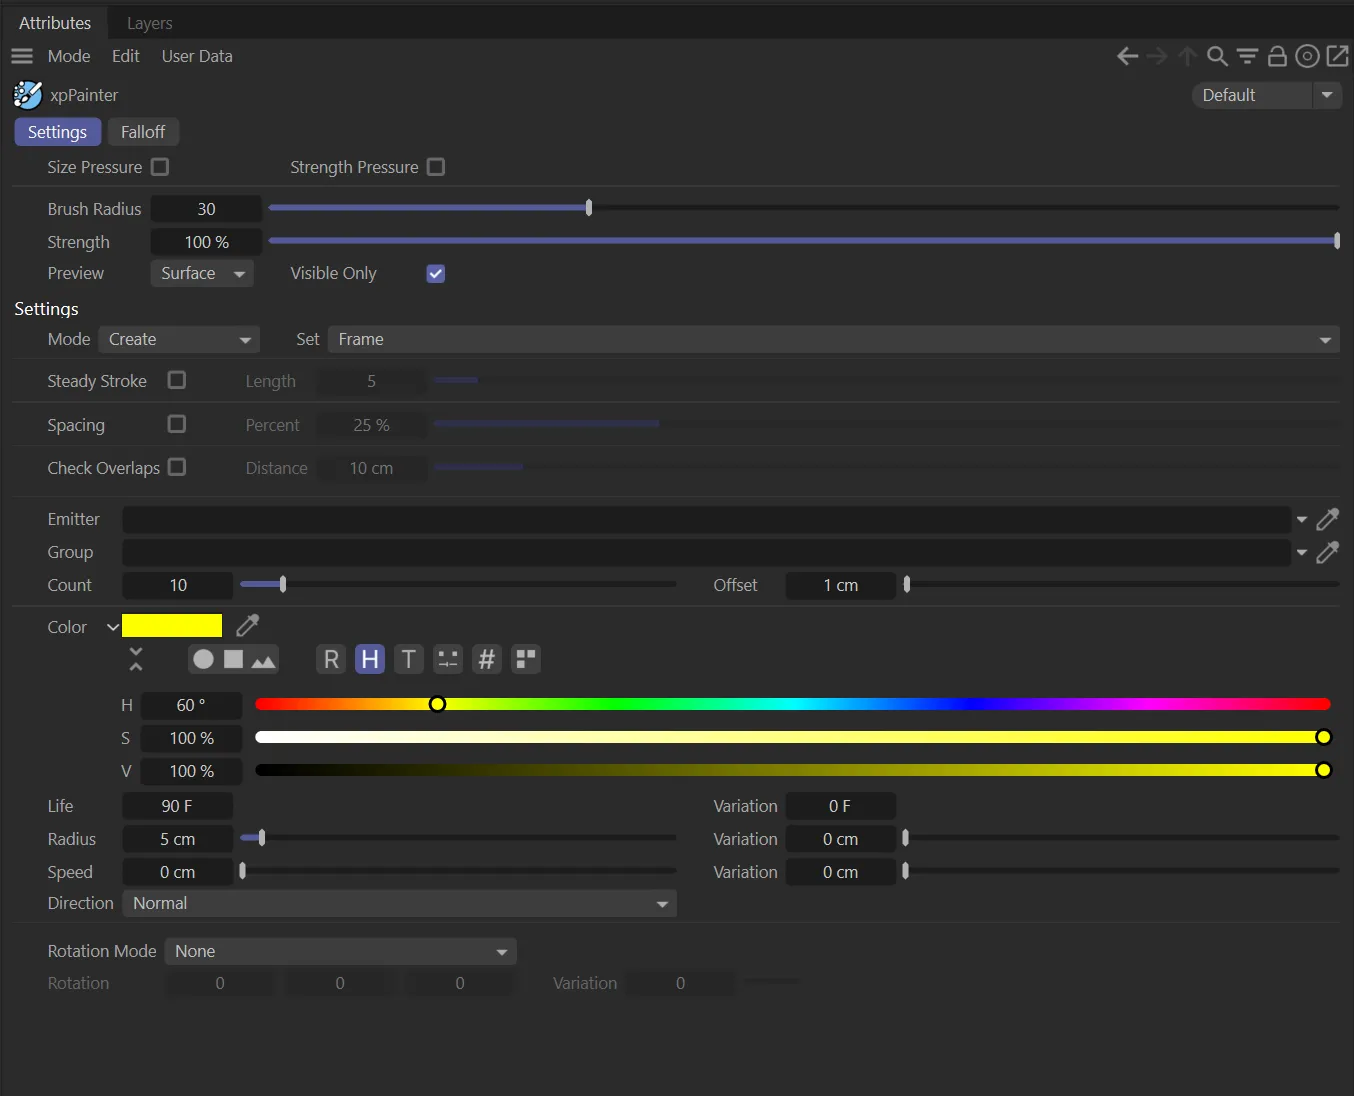
The ‘activated’ settings in the Attributes Manager.
Settings tab
Section titled “Settings tab”Size Pressure/Strength Pressure
Section titled “Size Pressure/Strength Pressure”These options are there should you have a tablet/laptop that is compatible to be able to utilize touch screen operations.
Brush Radius
Section titled “Brush Radius”Increase or decrease the radius of the brush.
Strength
Section titled “Strength”Sets the strength of the mode.
Preview
Section titled “Preview”Set as Surface, by default, the brush will alter its orientation depending on the angle of the surface.
This can be changed to None, which switches the Preview off, or Screen, which will continue to orientate the brush perpendicular to the screen.
Visible Only
Section titled “Visible Only”Enabled, by default, this will only paint particles on the geometry visible in the viewport - not those polygons out of view.
Settings
Section titled “Settings”By default, this is set to Create.
The other modes will edit and manipulate previously created particles.
These other options are: Delete Particles, Paint Life, Paint Color, Paint Speed, Paint Radius and Paint Rotation.
For all other settings, when you are editing existing particles, you must select the emitter in the Objects Manager; this is essential because, at that point you are editing the particle data which is held by the emitter.
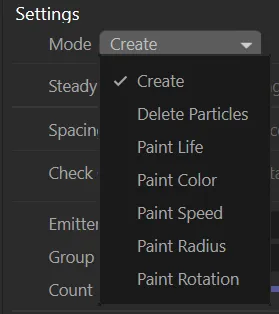
The Mode menu.
Create
Section titled “Create”This mode lets you create particles, by painting, based on the settings you have selected.
Simply select an object and paint on it, to create the particles.
The number to create, as you paint, is given in the Count parameter.
When you create new particles, they are given the settings in the Color, Life, Radius, Speed, Direction and Rotation settings.
Holding CTRL during painting with Create will remove any particles creates by the paint tool.
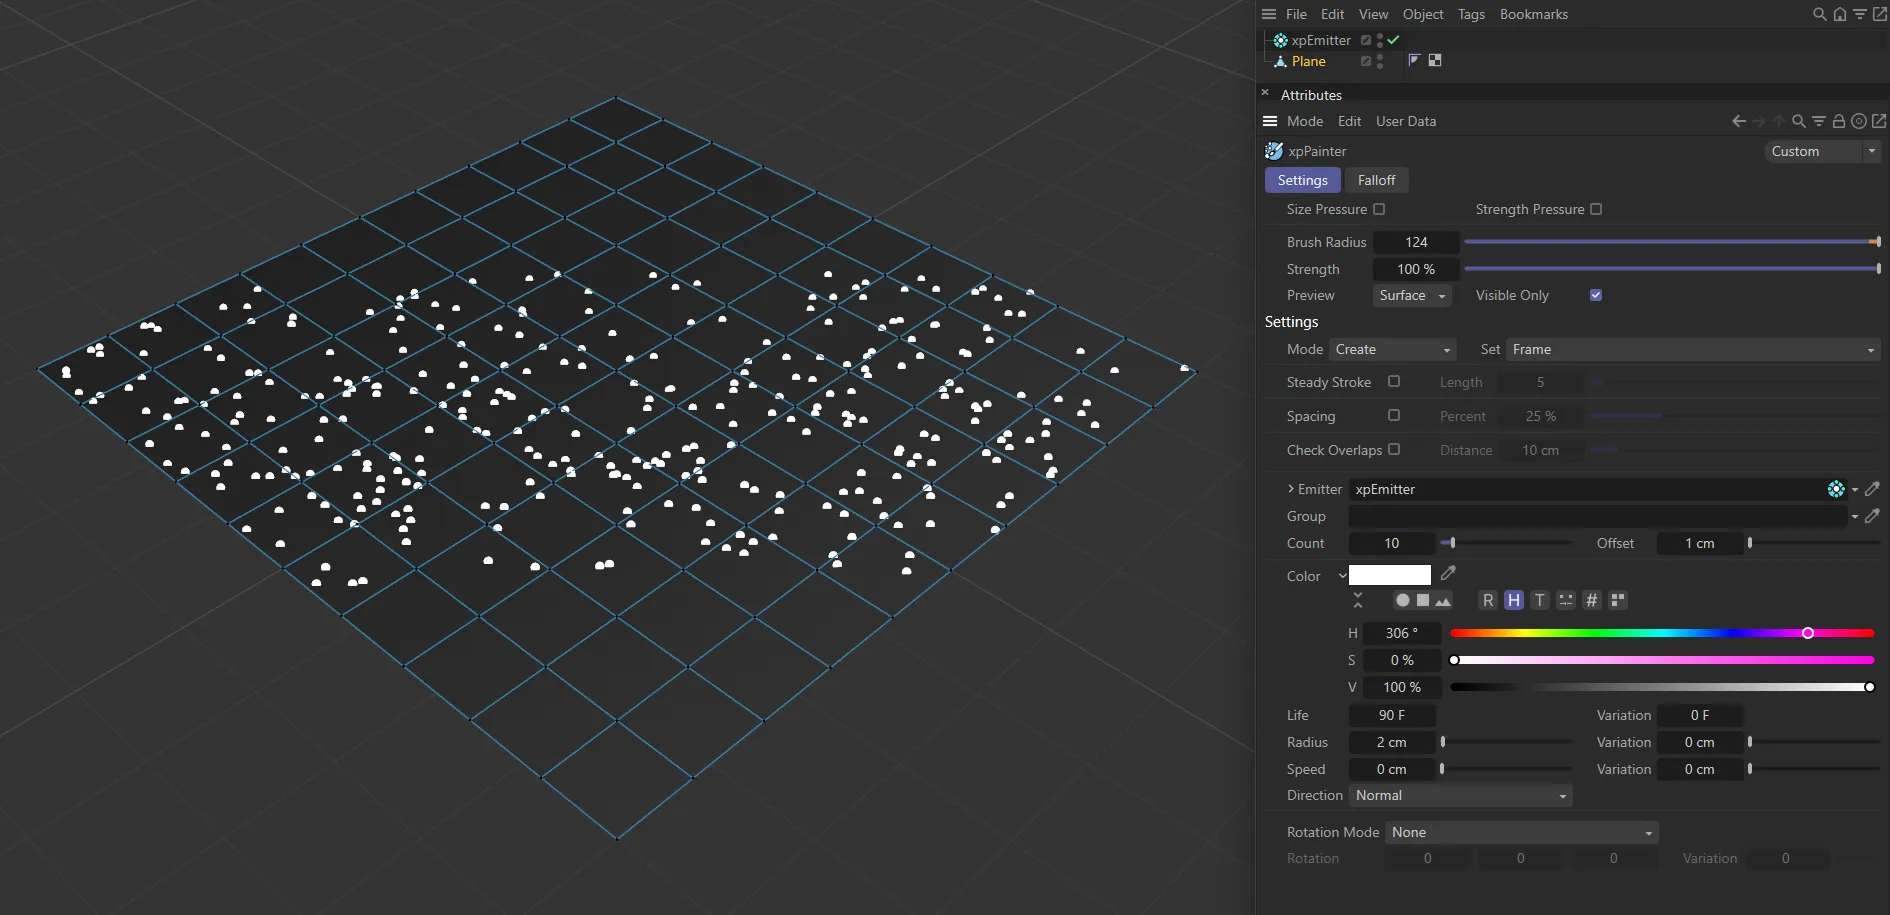
In this image, with the Mode set to Create, white particles have been created with a Radius of 2cm. The Editor Display, in the xpEmitter, is set as Circle (Filled), in order that the size is visible.
Delete Particles
Section titled “Delete Particles”Deletes particles by painting at your set frame.
Holding CTRL during painting with Delete Particles will undelete the particles so, on the next playback, the particles are available again.
To see deleted particles you need the Show Deleted parameter enabled in the emitter; you will need to replay the animation if the particles are already deleted.
Paint Life
Section titled “Paint Life”This setting changes the lifespan of the particles to the value in the Life setting.
Paint Color
Section titled “Paint Color”This option allows you to paint color onto the particles you have already created, to the value in the Color setting.
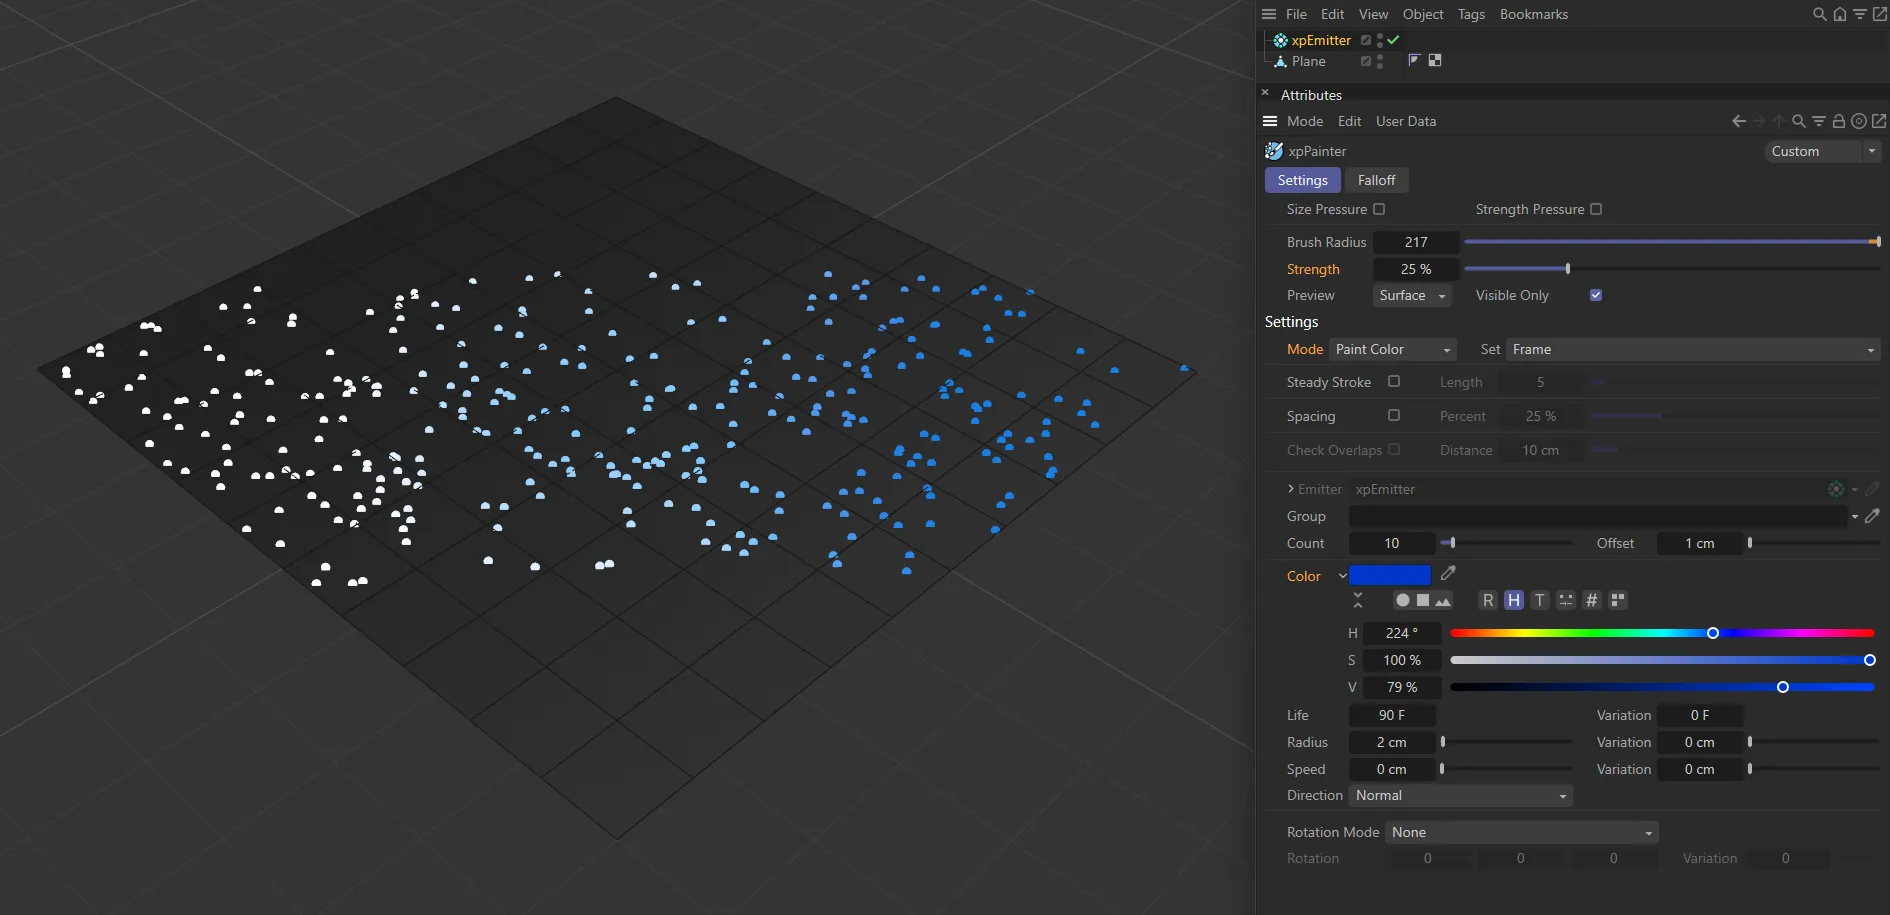
The Mode is now Paint Color, with the Strength at 25% and Color set to blue. The particles have been manually painted in a gentle color gradient, from white to blue.
Paint Speed
Section titled “Paint Speed”Gives the particles a speed value, by painting at a specific frame setting, to the value in the Speed setting.
Paint Radius
Section titled “Paint Radius”Changes the radius of the particles at your specific frame setting, to the value in the Radius setting.
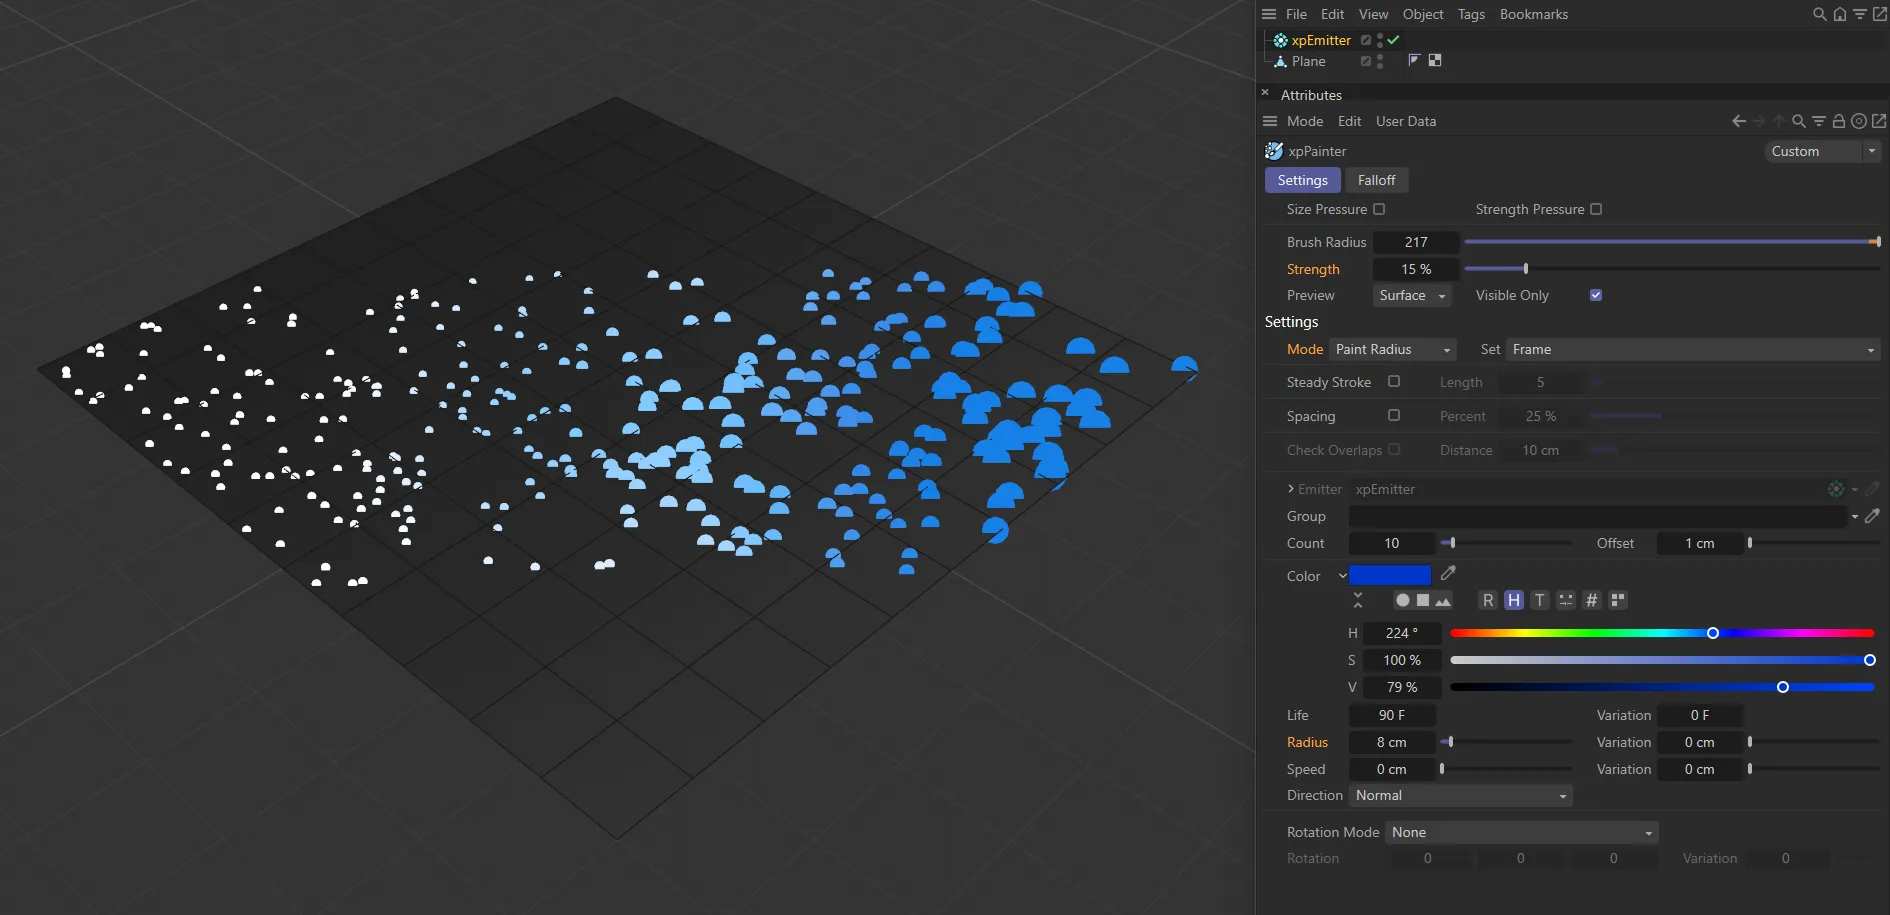
Here, the Mode is Paint Radius, with the Radius value of 8cm and Strength set to 15%, allowing manual painting, increasing the particle size.
Paint Rotation
Section titled “Paint Rotation”This setting will rotate the particles, by painting at your chosen frame, to the value in the Rotation setting.
By default, Frame is selected.
This can be changed to Birth.
Will paint particles to the setting (dependent on the Mode setting) during, or after, a specific frame.
Birth mode will paint to the settings selected (dependent on Mode) immediately; ie from birth.
Steady Stroke
Section titled “Steady Stroke”Using the distance in the Length setting, Steady Stroke will only begin painting particles once you have moved the mouse that distance, to avoid any erratic starts caused by the effects of inertia, making the painting more steady.
Length
Section titled “Length”Sets the distance for the Steady Stroke setting.
Spacing
Section titled “Spacing”Taking its cue from the Percent setting, this feature will ‘stamp’ particles as a percentage of the radius of the brush, spacing out the particles within the radius of the brush strokes.
Percent
Section titled “Percent”Sets the percentage of the radius of the brush, to work with the Spacing setting in order to space out particles.
Check Overlaps
Section titled “Check Overlaps”Enabling this will mean that, before a particle is born, it will check to see whether there is already a particle within the Distance setting, to avoid overlapping.
This will result in an evenly spaced painting of particles.
Distance
Section titled “Distance”Sets the distance for the Check Overlaps setting, to prevent overlapping of particles.
Emitter
Section titled “Emitter”If you don’t already have an emitter in your scene, simply begin painting and xpPainter will automatically create an emitter for you.
You can also drag and drop your own emitter into this link field.
If you drag an X-Particles Group object into this field, new particles will belong to this group.
Determines the number of particles, that will be created with each left-click, within the brush radius.
If can also be set to a fractional value for finer painting control (for example, less than 1.0)
Offset
Section titled “Offset”Sets how far from the object’s surface the particles will be offset by.
This simply sets the color of the particles.
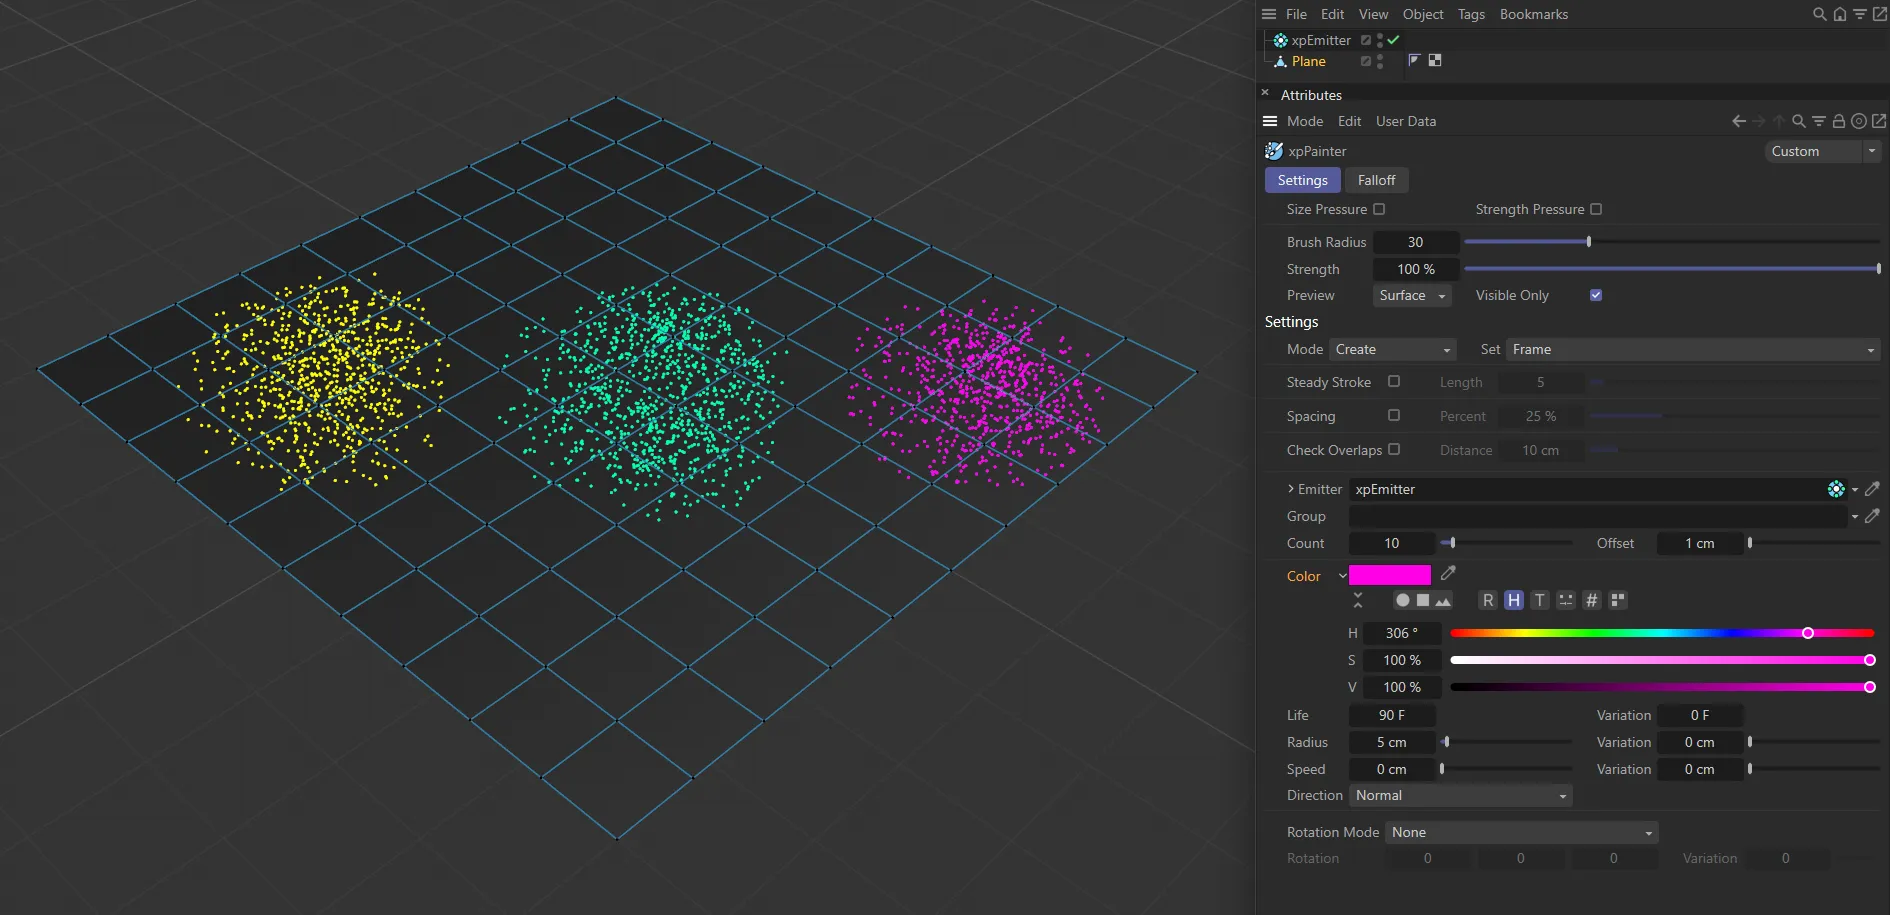
Yellow, green and pink particles have been painted in this scene, with the Color currently pink in the User Interface (UI).
By default, this is set at 90 frames, which is the lifespan of the particles in your scene.
Variation
Section titled “Variation”Adds a variation in the lifespan of the particles.
Radius
Section titled “Radius”Increase or decrease the size of the particles from the default setting of 5cm.
Variation
Section titled “Variation”Sets a variation in the Radius value of the particles.
At the default setting of 0 (zero) cm, the particles are not moving.
This can be increased to add some animation.
Variation
Section titled “Variation”Adds a variation to the Speed setting of the particles.
Direction
Section titled “Direction”This is set to Normal, by default.
Other options are: Random, World +X, World +Y, World +Z, World -X, World -Y, World -Z, Object +X, Object +Y, Object +Z, Object -X, Object -Y, Object -Z and Normal.
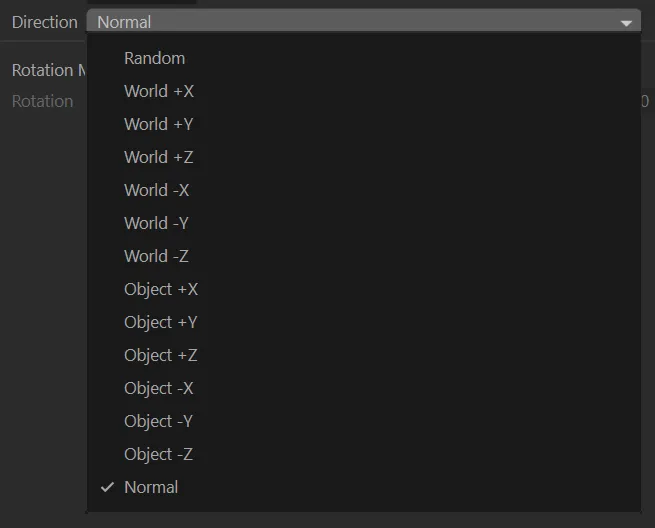
The Direction menu.
Normal
Section titled “Normal”The particles have the direction of the normal of the surface from which they were emitted.
Random
Section titled “Random”The particles have a random direction.
World (+X,+Y,+Z, -X, -Y, -Z)
Section titled “World (+X,+Y,+Z, -X, -Y, -Z)”The particles follow the corresponding direction along one of the 3D world axes.
Object (+X,+Y,+Z, -X, -Y, -Z)
Section titled “Object (+X,+Y,+Z, -X, -Y, -Z)”The particles follow the corresponding direction along one of the object axes.
Rotation Mode
Section titled “Rotation Mode”By default, this is set to None.
It can be changed to: Align Normals or Custom.
There is no rotation.
Align Normals
Section titled “Align Normals”The particles are rotated so that they are aligned with the surface normal.
This will cause any geometry linked to the particle to be rotated accordingly.
Custom
Section titled “Custom”Allows you to custom select the rotation of the particles, by using the X, Y and Z settings below.
Rotation
Section titled “Rotation”In Custom mode, choose the X, Y and Z rotation settings.
Variation
Section titled “Variation”Gives some variation to the Rotation setting of the particles up to the values selected in Rotation.
Falloff tab
Section titled “Falloff tab”All the settings are the same as the ones in Settings tab, until you get to the Falloff spline curve.
Falloff
Section titled “Falloff”The X-axis is the radius, with the left-hand side being the center of the brush and the right-hand side being the outer of the radius setting.
The Y-axis is the strength of the setting.
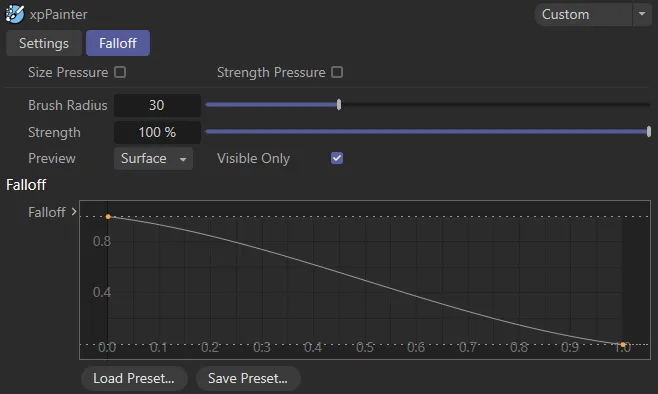
Falloff curve with the brush set on full strength in the center of the brush, falling off along the radius.
Copyright © 2026 INSYDIUM LTD. All rights reserved.