xpVortex
xpVortex enables you to move particles to form a whirling vortex.
General tab
Section titled “General tab”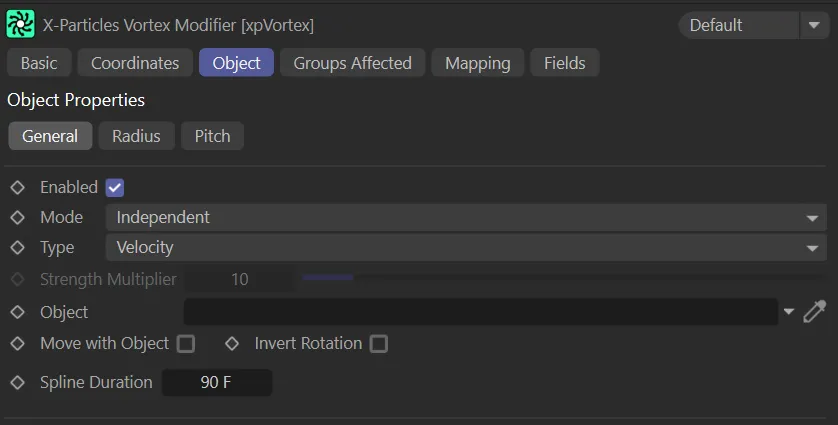
xpVortex General tab menu.
Enabled
Section titled “Enabled”Checking this box activates xpVortex.
Set at Independent, by default.
You can change this to Action-Controlled.
Independent Mode
Section titled “Independent Mode”In this mode, particles will be affected if they come into the field of effect of the modifier.
Action-Controlled Mode
Section titled “Action-Controlled Mode”When in the Action-Controlled Mode setting, the modifier will only act on a particle when told to do so by an action.
Set as Velocity, by default.
The alternatives are Force and Helix.
Velocity
Section titled “Velocity”Here, the modifier takes complete control of the particle movement and, if you add another modifier which also influences particle speed and direction (e.g. xpTurbulence), you will find that it has little or no effect on the particle.
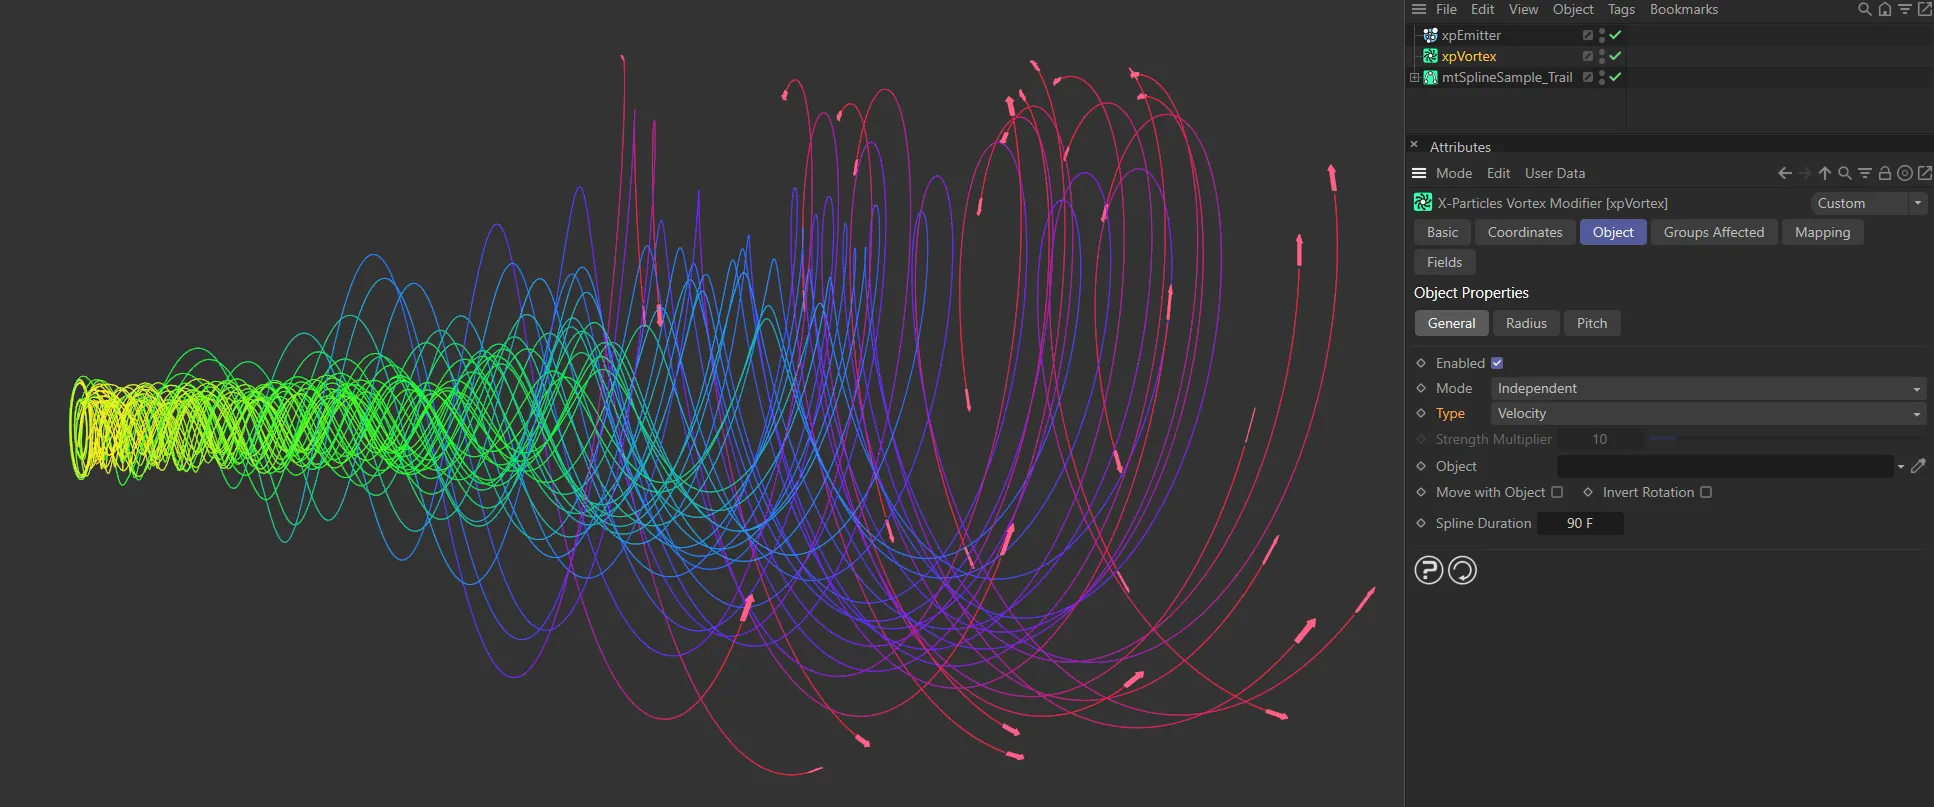
The Type is set to Velocity, in this image.
In this mode the change in velocity caused by this modifier contributes to, but does not control, the final particle velocity.
Adding a modifier such as xpWind or xpTurbulence will also contribute to the final result.
This is the mode to use if you want to add some other kind of movement to the particle as well as rotation.

Type set to Force.
This mode causes the particle to move in a perfect helix.
You can control the radius and amplitude of the helix from the controls which appear when this mode is selected.
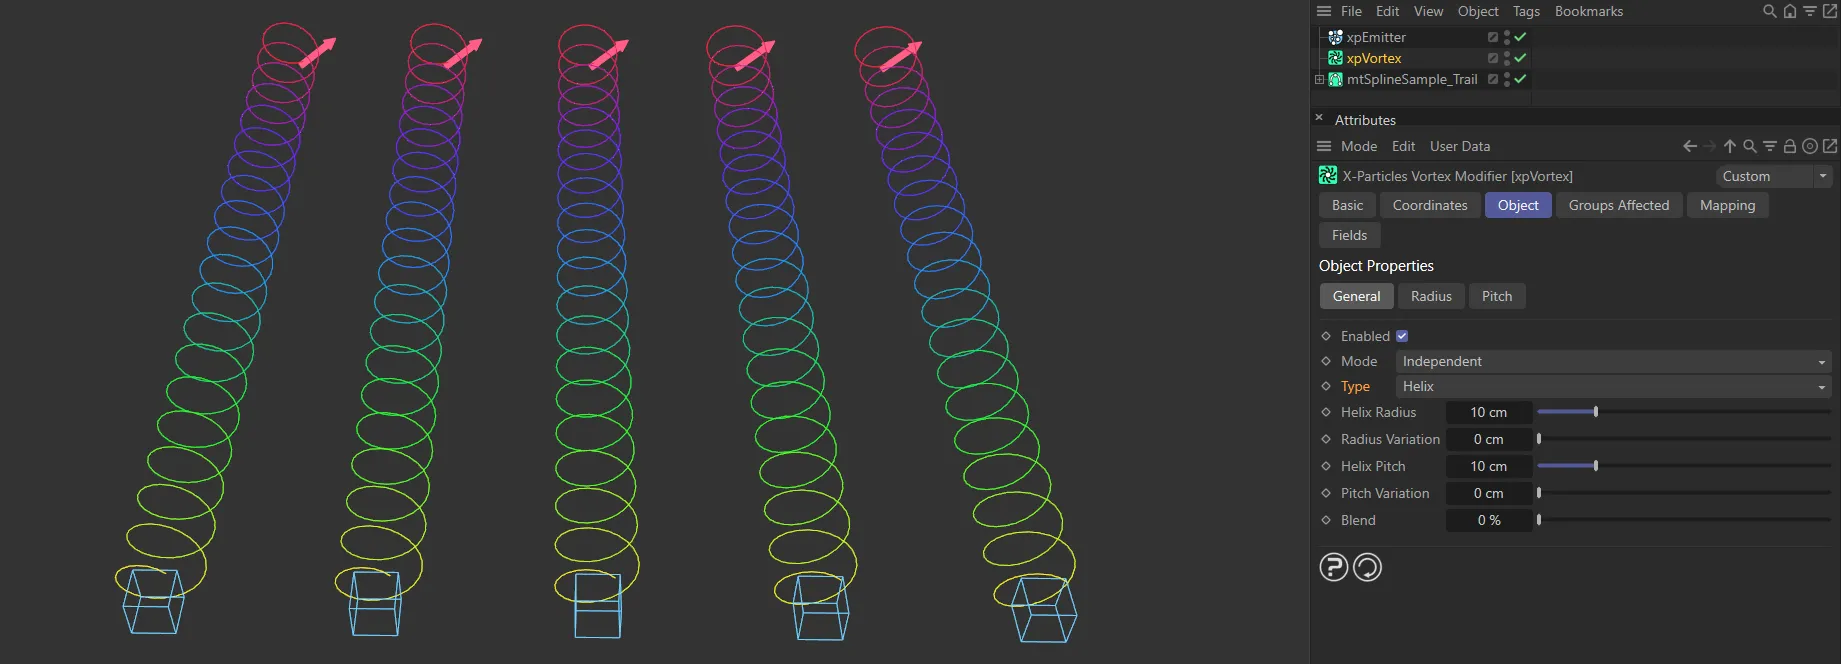
Helix Type setting.
Strength Multiplier
Section titled “Strength Multiplier”If Type is set to Force, this control becomes available.
It enables you to change the strength of the Force effect.
Object
Section titled “Object”If this field is clear and you are emitting directly from an emitter rather than an object, the vortex axis is along the Z axis of the emitter.
If you drop an object into this field, the vortex axis will be along the Z axis of the object in the field.
If the object is not at the same location as the emitter or has a different rotation, the particles will move in a circle around the linked object.
If you don’t, the axis of the vortex will be along the Z axis of the emitter.
If the emitter is not at the same location as the emitting object or has a different rotation, the particles will move in a circle around the emitter.
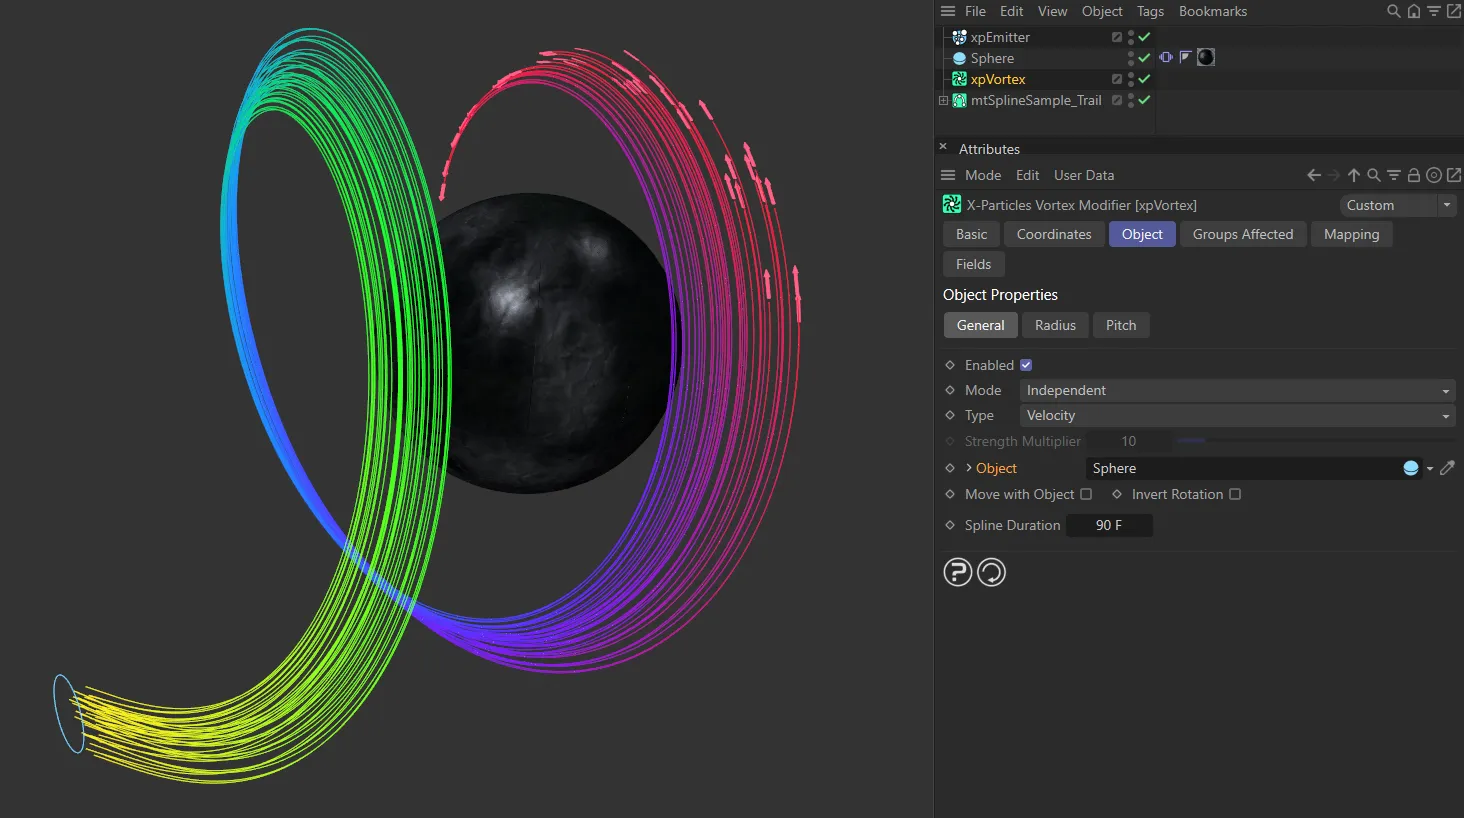
In this image, a Sphere has been dropped into the Object field, with particles circling around it as a result.
Move with Object
Section titled “Move with Object”If you are emitting from an emitter (not an object) and you move the emitter, new particles are generated from the emitter position but existing ones stay where they are.
If you want a tornado to move over the ground, enabling this parameter will make the existing vortex move with the emitter; in this case, make sure the Object field is clear.
If you are emitting from an object, you can get the same effect with this parameter, but ensure that the Object field contains the object you are emitting from.
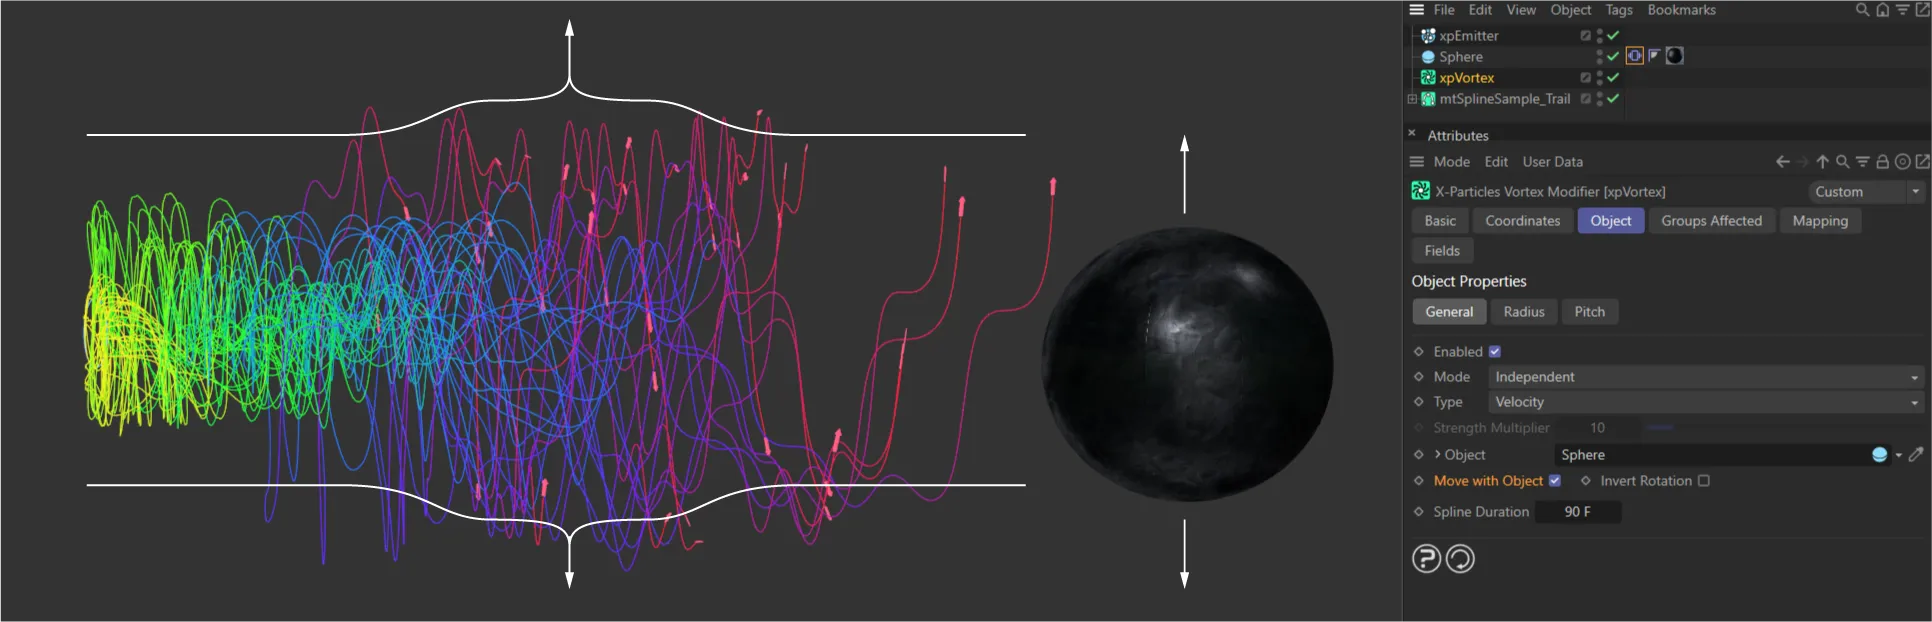
In this scene, the Sphere has a Vibrate tag, which is animating the Sphere to move up and down, over time. The xpVortex modifier has Move with Object enabled and, so as particles twist away from the emitter, they also inherit the motion from the sphere. You can see that inherited motion reflected in the particle trails.
Invert Rotation
Section titled “Invert Rotation”If you are looking along the vortex axis from the emitter (or emitting object), the particles travel in a counter-clockwise rotation.
To make them travel clockwise instead, check this box.
Spline Duration
Section titled “Spline Duration”This is the length of time over which the radius and pitch splines extend.
The longer the time, the more gradual the change in radius and/or pitch.
Helix type controls
Section titled “Helix type controls”When Type is set to Helix, the interface changes, with additional parameters becoming available.
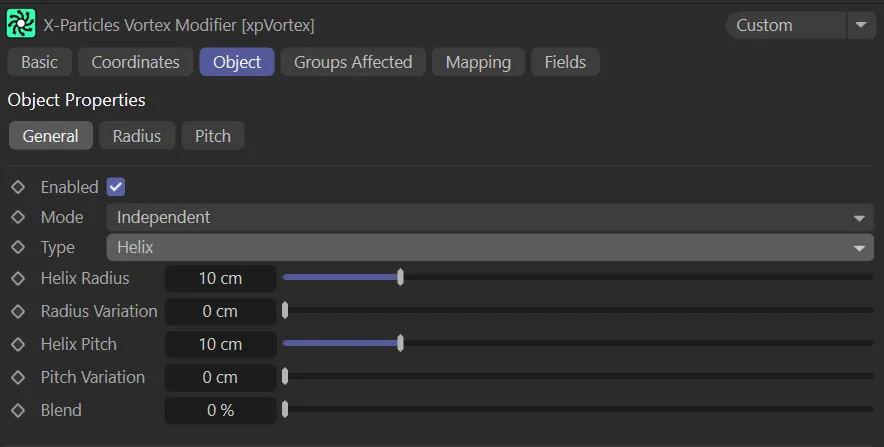
Menu in General tab, with Type set as Helix.
Helix Radius
Section titled “Helix Radius”This parameter sets the radius (i.e. the amplitude) of the helix.
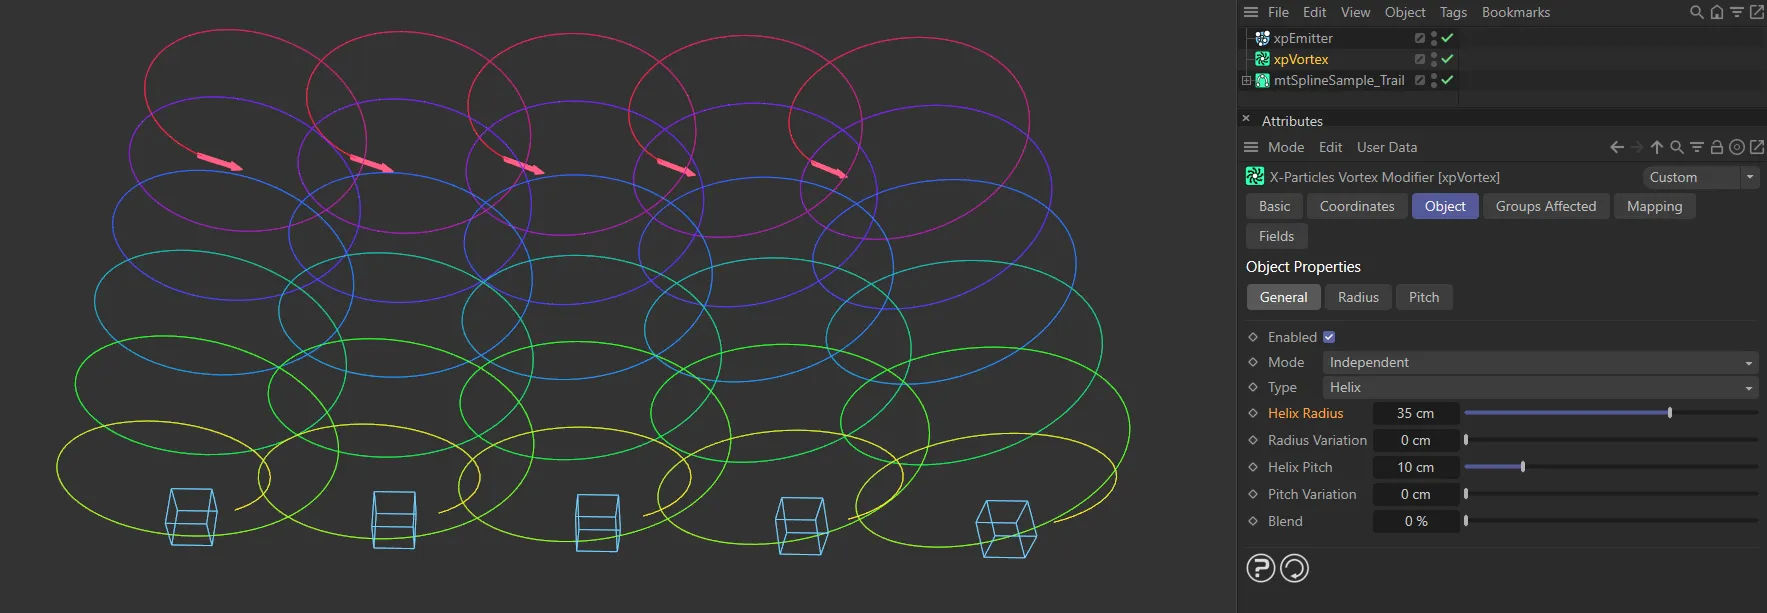
The Helix Radius is set at 35cm, here.
Radius Variation
Section titled “Radius Variation”With this setting, you can add variation to the radius for different particles.
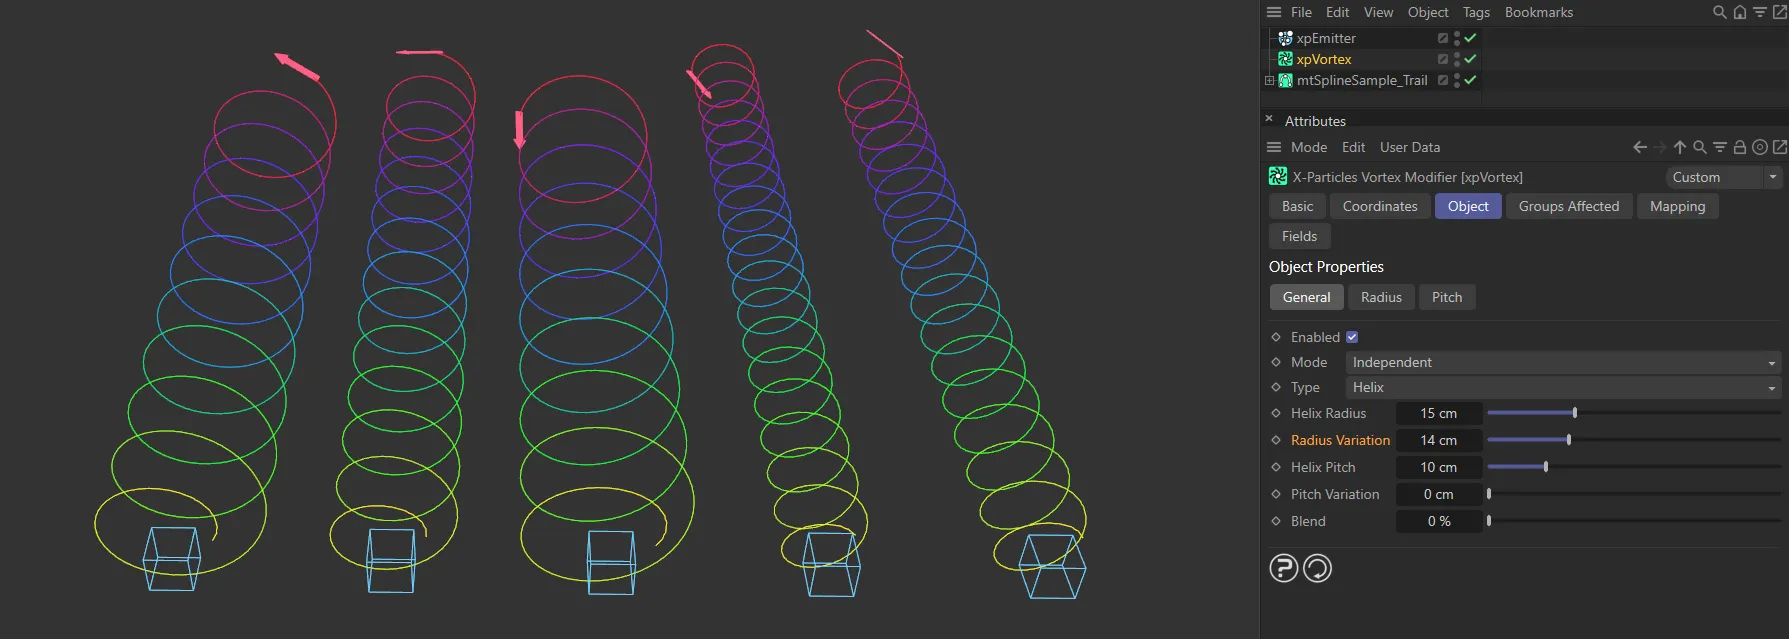
Helix Radius at 15cm, with a Radius Variation of 14cm.
Helix Pitch
Section titled “Helix Pitch”This sets the pitch (i.e. the wavelength) of the helix.
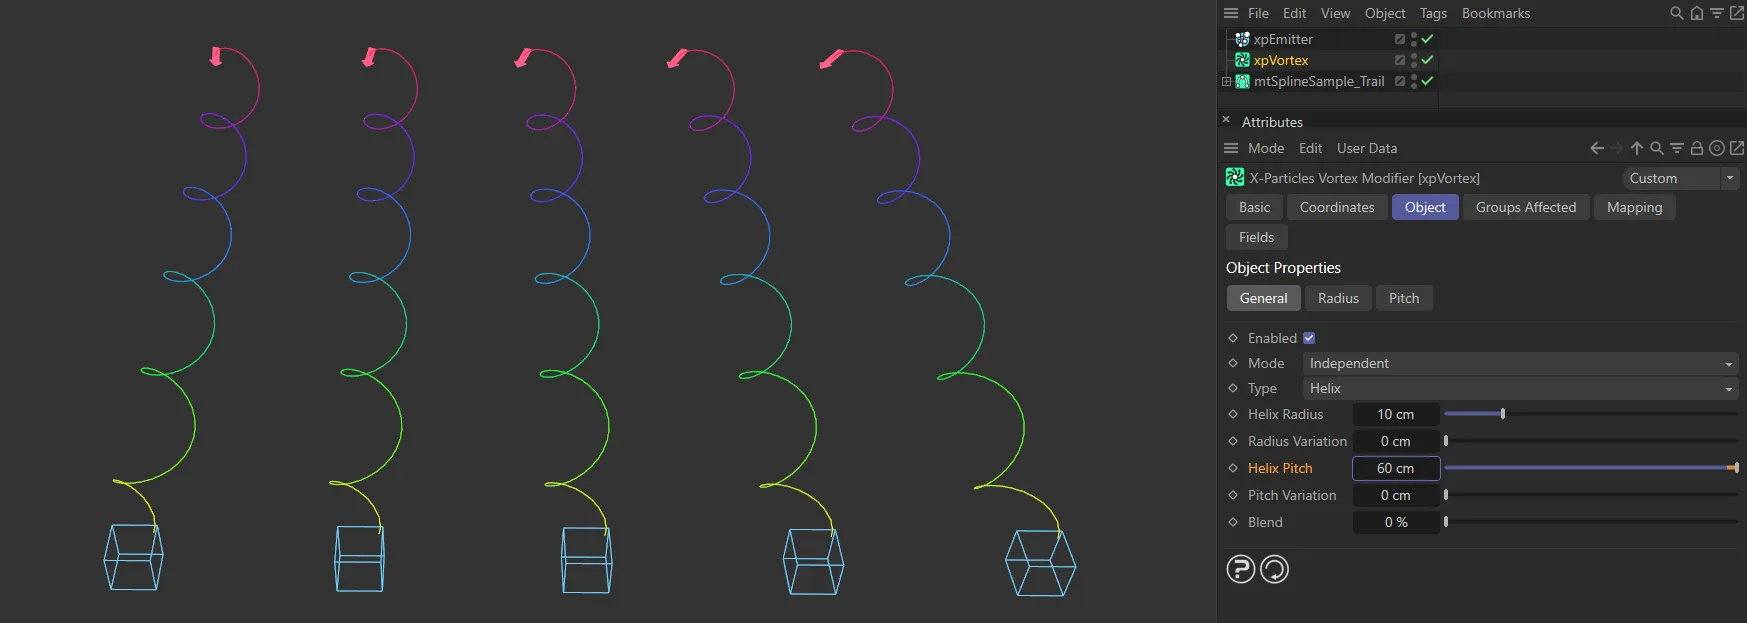
In this image, the Helix Pitch is 60cm.
Pitch Variation
Section titled “Pitch Variation”With this setting, you can add variation to the pitch for different particles.
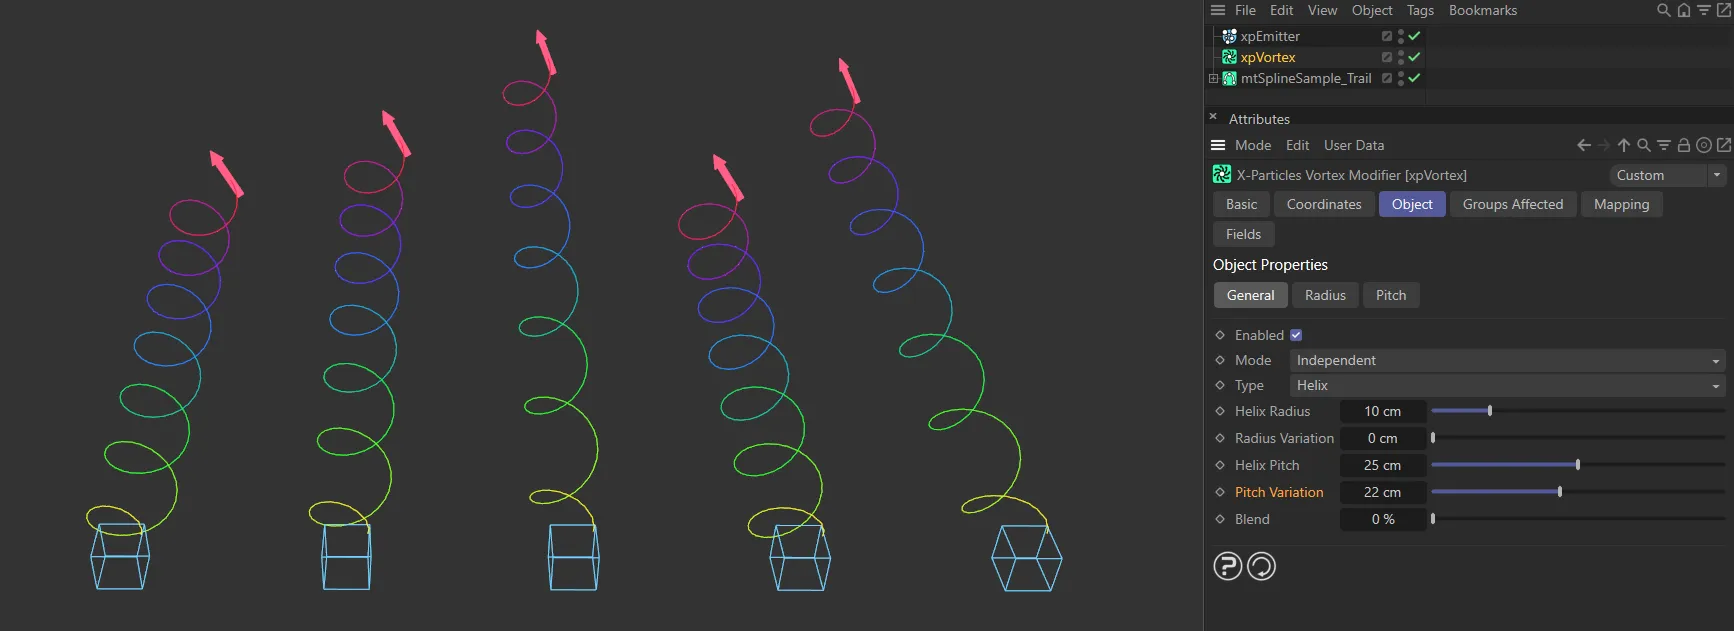
Helix Pitch at 25cm, with a Pitch Variation of 22cm.
This setting lets you blend the particle’s current direction of movement with that calculated for movement in a helix.
You can use this to blend the helix effect with movement generated by other modifiers.
To do that, make sure that the helix is the lowest of all the modifiers in the object manager.
Modifiers are carried out for each particle in the order found in the object manager, so this will let other modifiers (such as xpWind or xpTurbulence) alter the particle movement, then apply a helical component to the result.
If you blend modifiers like this, note that the Strength setting, if there is one, of the other modifiers may need to be increased.
The Blend setting in this modifier may also need to be turned up to a high value - perhaps 80% or higher.
If the value is set at 0 (zero) %, there is no blending and the helix takes over completely.
At 100% there is no helical effect at all and the existing direction is followed without change.
Radius tab
Section titled “Radius tab”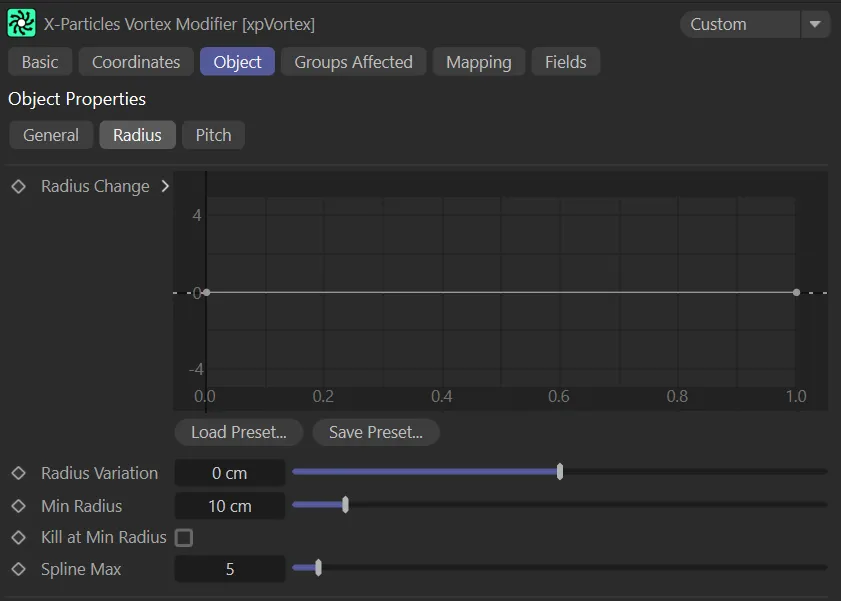
xpVortex Radius tab menu.
Radius Change
Section titled “Radius Change”This spline governs the rate of change of the vortex radius; it is not an absolute setting for the radius.
The Y axis represents the vortex radius (particle distance away from the center of the vortex) and the X axis, the particle distance.

The Radius Change spline is at the default setting, with no changes in radius. This produces a tube-like vortex.
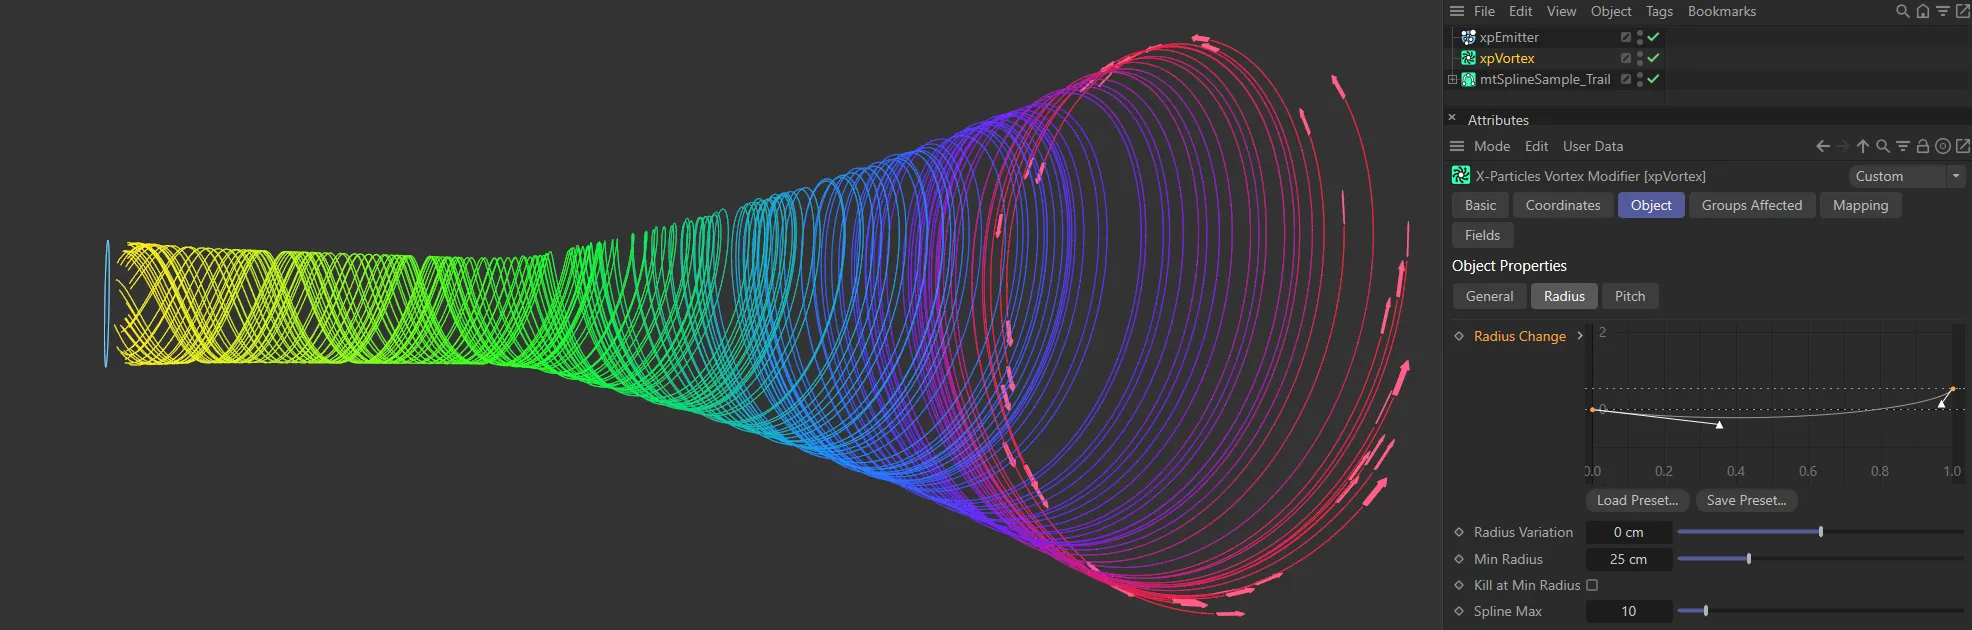
This custom Radius Change spline directs a more distinct tornado style, which widens towards the end of the vortex.
Radius Variation
Section titled “Radius Variation”Adding variation to the change in radius will add some ‘thickness’ to the vortex and make it more realistic.
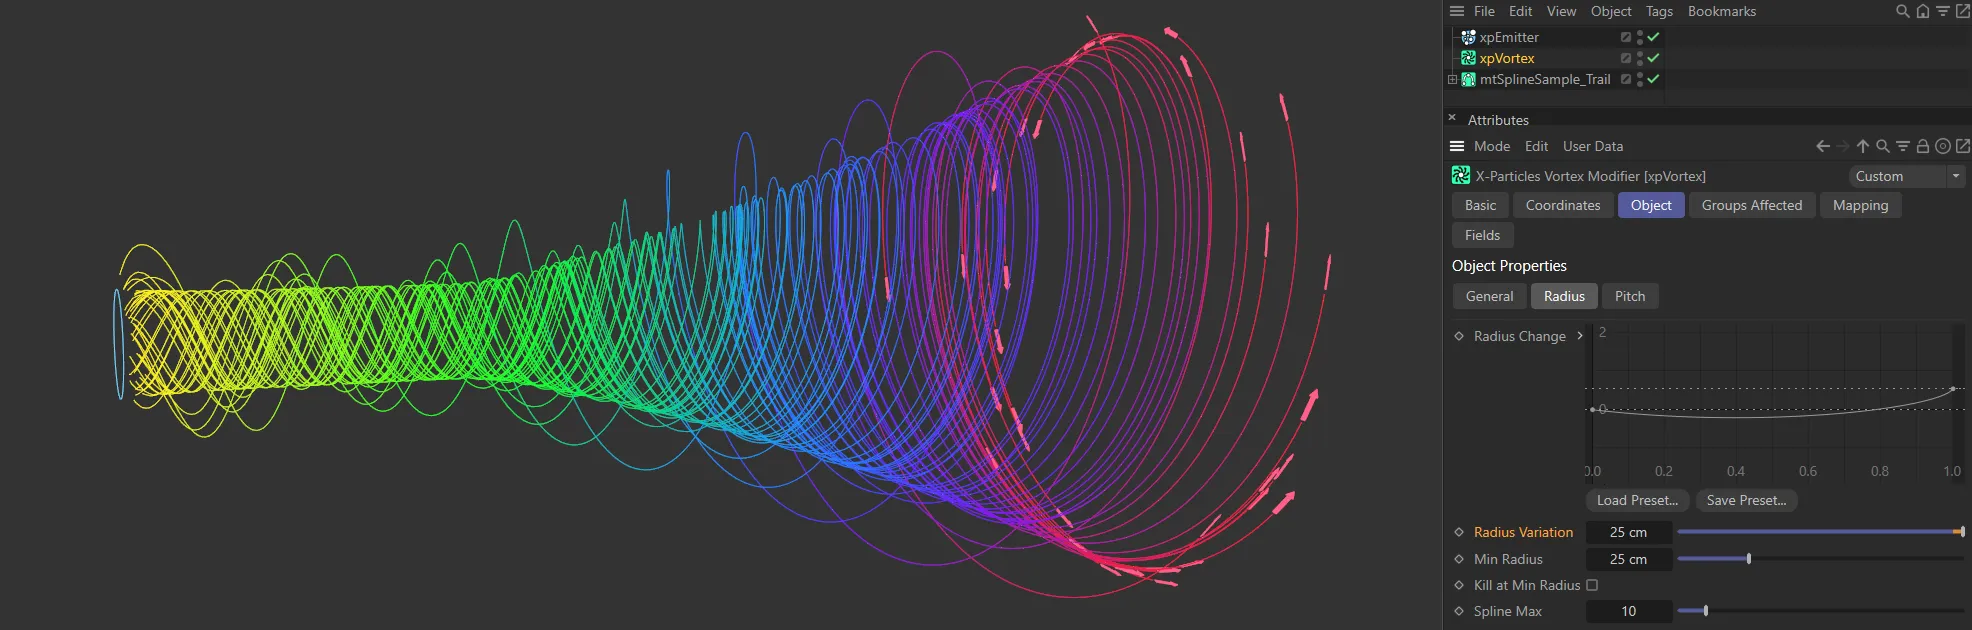
A Radius Variation of 25cm brings some thickness to the vortex shape.
Min Radius
Section titled “Min Radius”If you reduce the radius using the spline, you can set this value, which is the minimum radius the vortex can have.
Kill at Min Radius
Section titled “Kill at Min Radius”If enabled, this will cause the modifier to kill any particles which reach the minimum vortex radius.
Spline Maximum
Section titled “Spline Maximum”This is the maximum value allowed by the spline.
You can change it to allow larger values if required.
Pitch tab
Section titled “Pitch tab”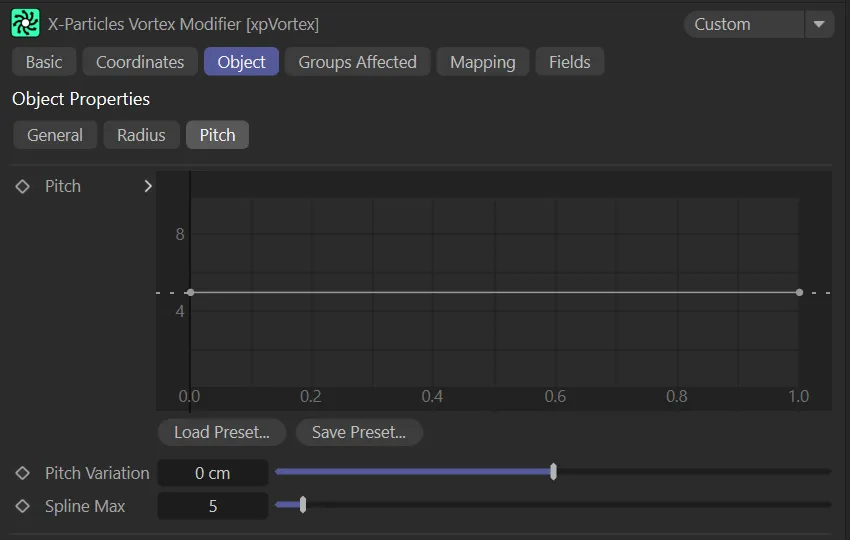
xpVortex Pitch tab menu.
This spline governs the pitch of the vortex - how fast the particles move along the axis of the vortex; unlike the radius spline, this is an absolute setting.
The Y axis, here, represents the distance the particle has traveled and the X axis, the pitch (particle height) along the length of the spline.
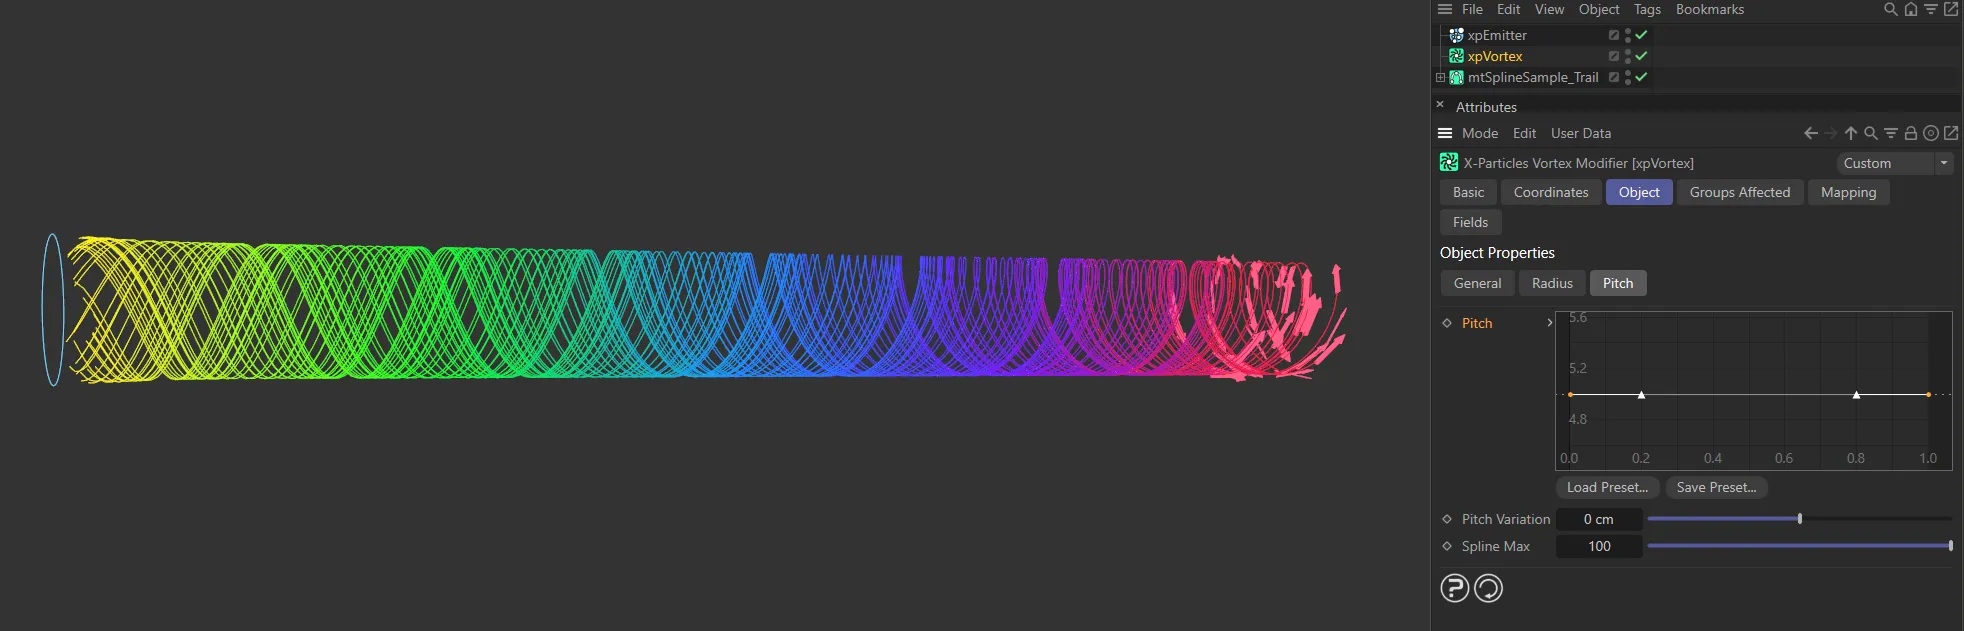
The Pitch spline, with a 5.0 setting, produces this vortex look.

A custom, downwards Pitch spline setting gives a different look.
Pitch Variation
Section titled “Pitch Variation”This setting enables some variation to be added to the pitch for each particle.
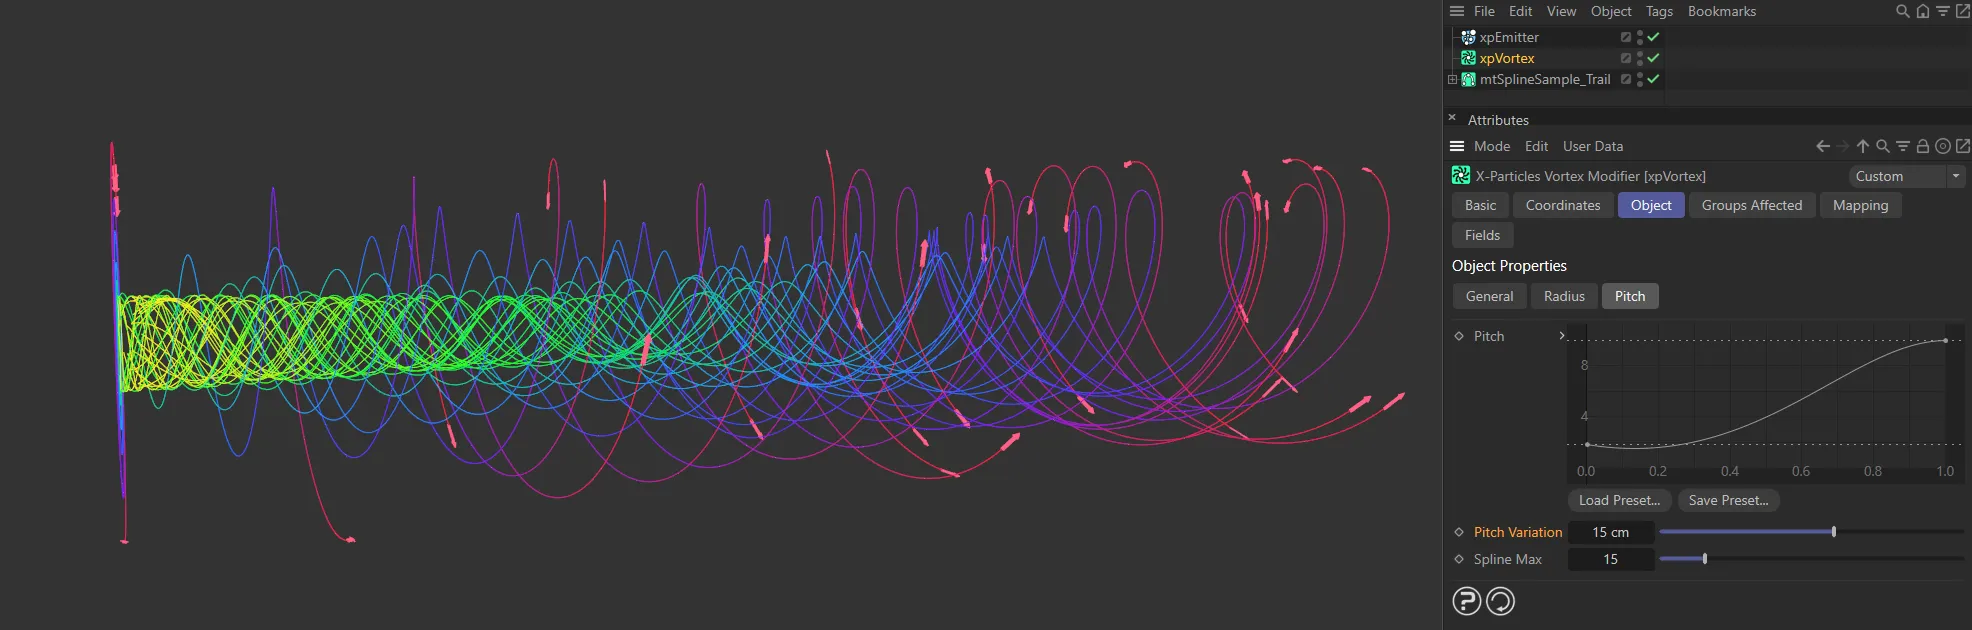
Adding a Pitch Variation, of 15cm, varies particle distance from the emitter over time, as well as the speed of each particle.
Spline Maximum
Section titled “Spline Maximum”This is the maximum value allowed by the spline.
You can change it to allow larger values if required.
Groups Affected tab
Section titled “Groups Affected tab”Groups
Section titled “Groups”To specify the group, drag and drop the desired Group object into this field.
This setting is useful if you want to ensure that the spawned particles are, or are not, affected by xpVortex.
Mapping tab
Section titled “Mapping tab”The modifier’s settings can be mapped to particle data.
Use the dedicated manual page, below, for instructions on how this works.
Fields tab
Section titled “Fields tab”You can use the Fields options to control where xpVortex operates.
Copyright © 2026 INSYDIUM LTD. All rights reserved.