xpAttractor
xpAttractor attracts particles to itself or to other objects.
General tab
Section titled “General tab”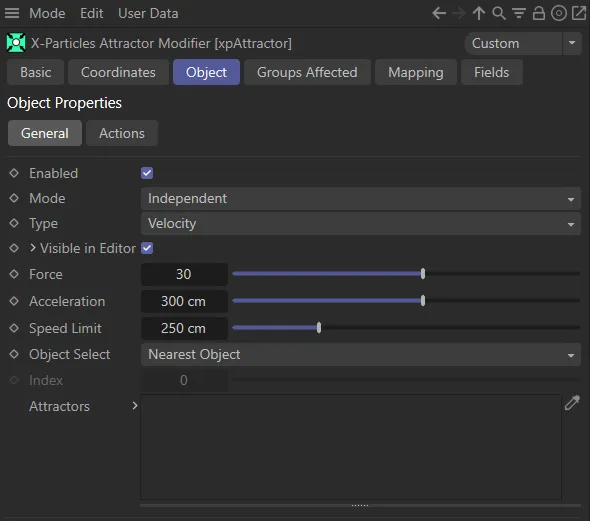
General tab menu for xpAttractor.
Enabled
Section titled “Enabled”Checking this box activates xpAttractor.
Set at Independent, by default.
You can change this to Action-Controlled.
Independent Mode
Section titled “Independent Mode”In this mode, particles will be affected if they come into the field of effect of the modifier.
Action-Controlled Mode
Section titled “Action-Controlled Mode”When in the Action-Controlled Mode setting, the modifier will only act on a particle when told to do so by an action.
There are two types of operation: Velocity (the default) and Force.
Velocity
Section titled “Velocity”In this mode, the modifier will take complete control over the speed of the particles.
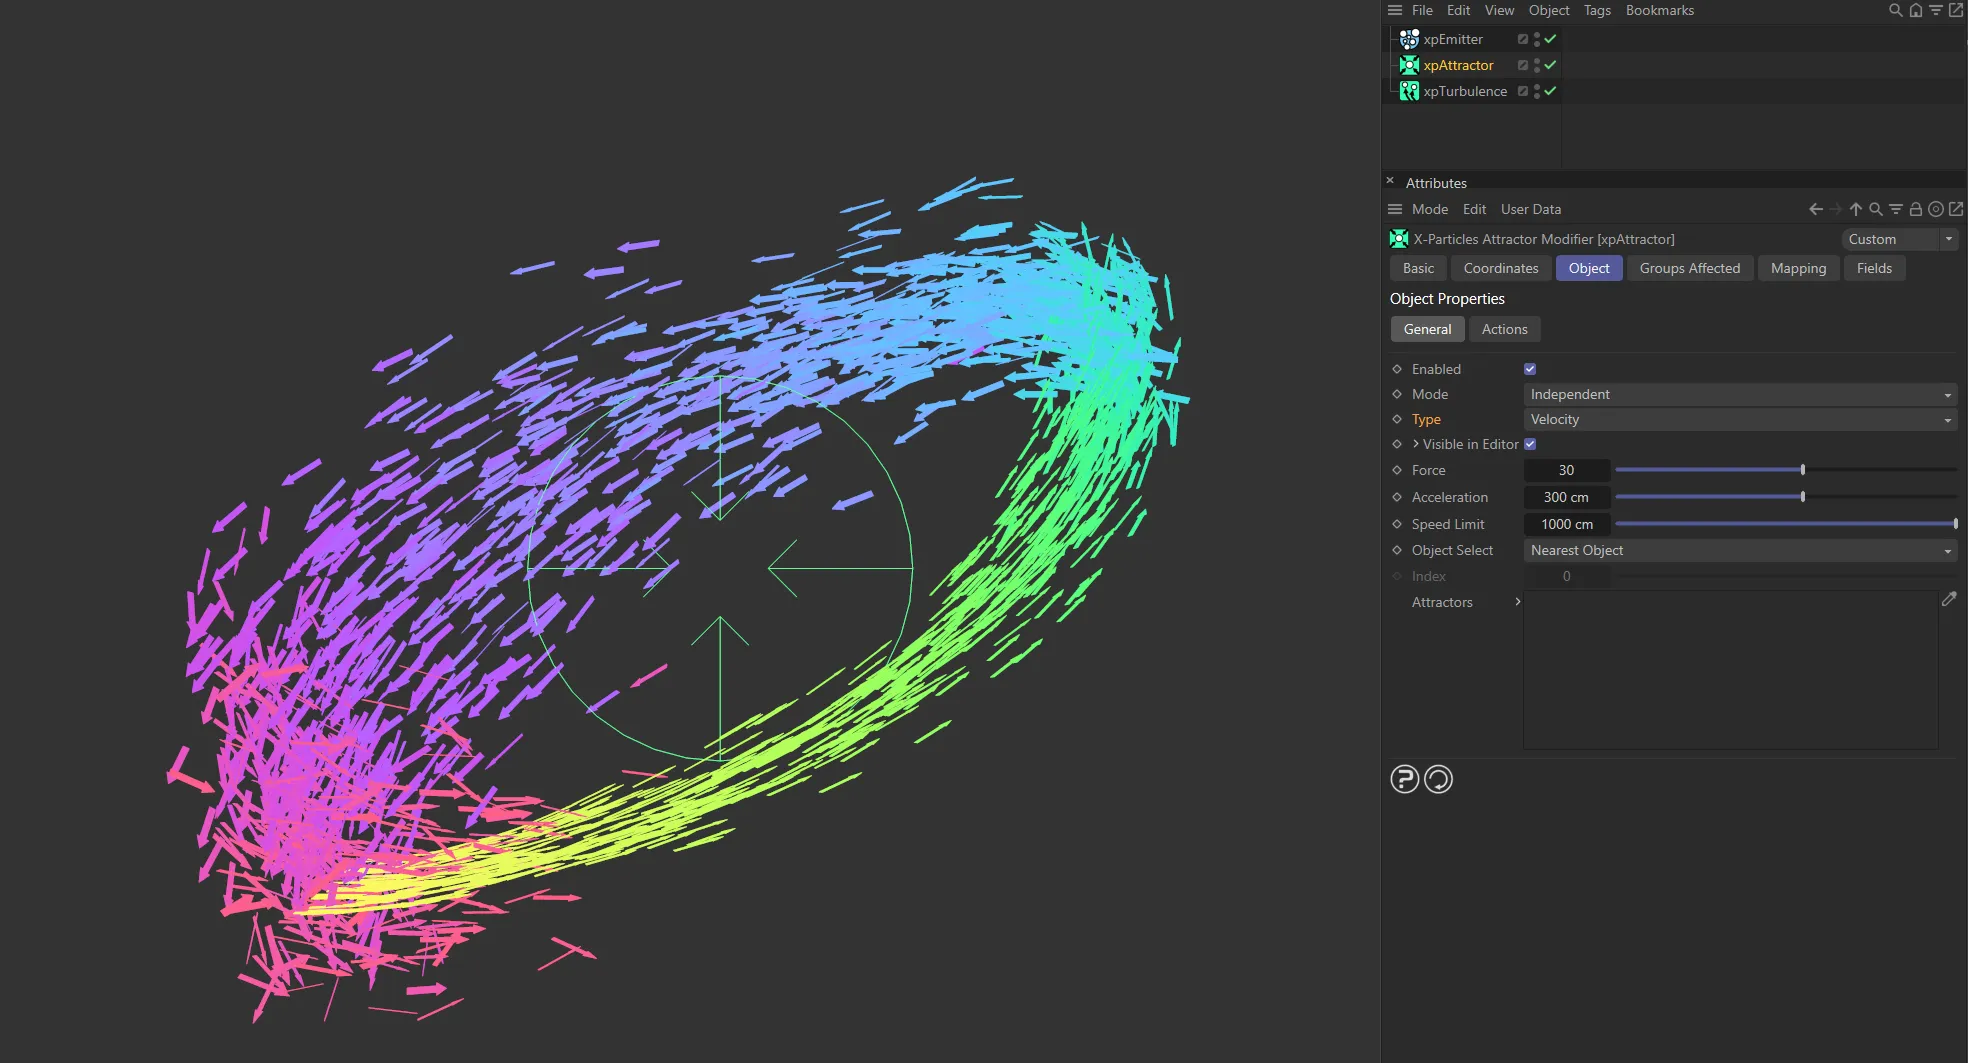
Type set to Velocity.
There is also an effect over the speed of the particles, but the Force mode can also be used in conjunction with other modifiers to contribute to the final result.
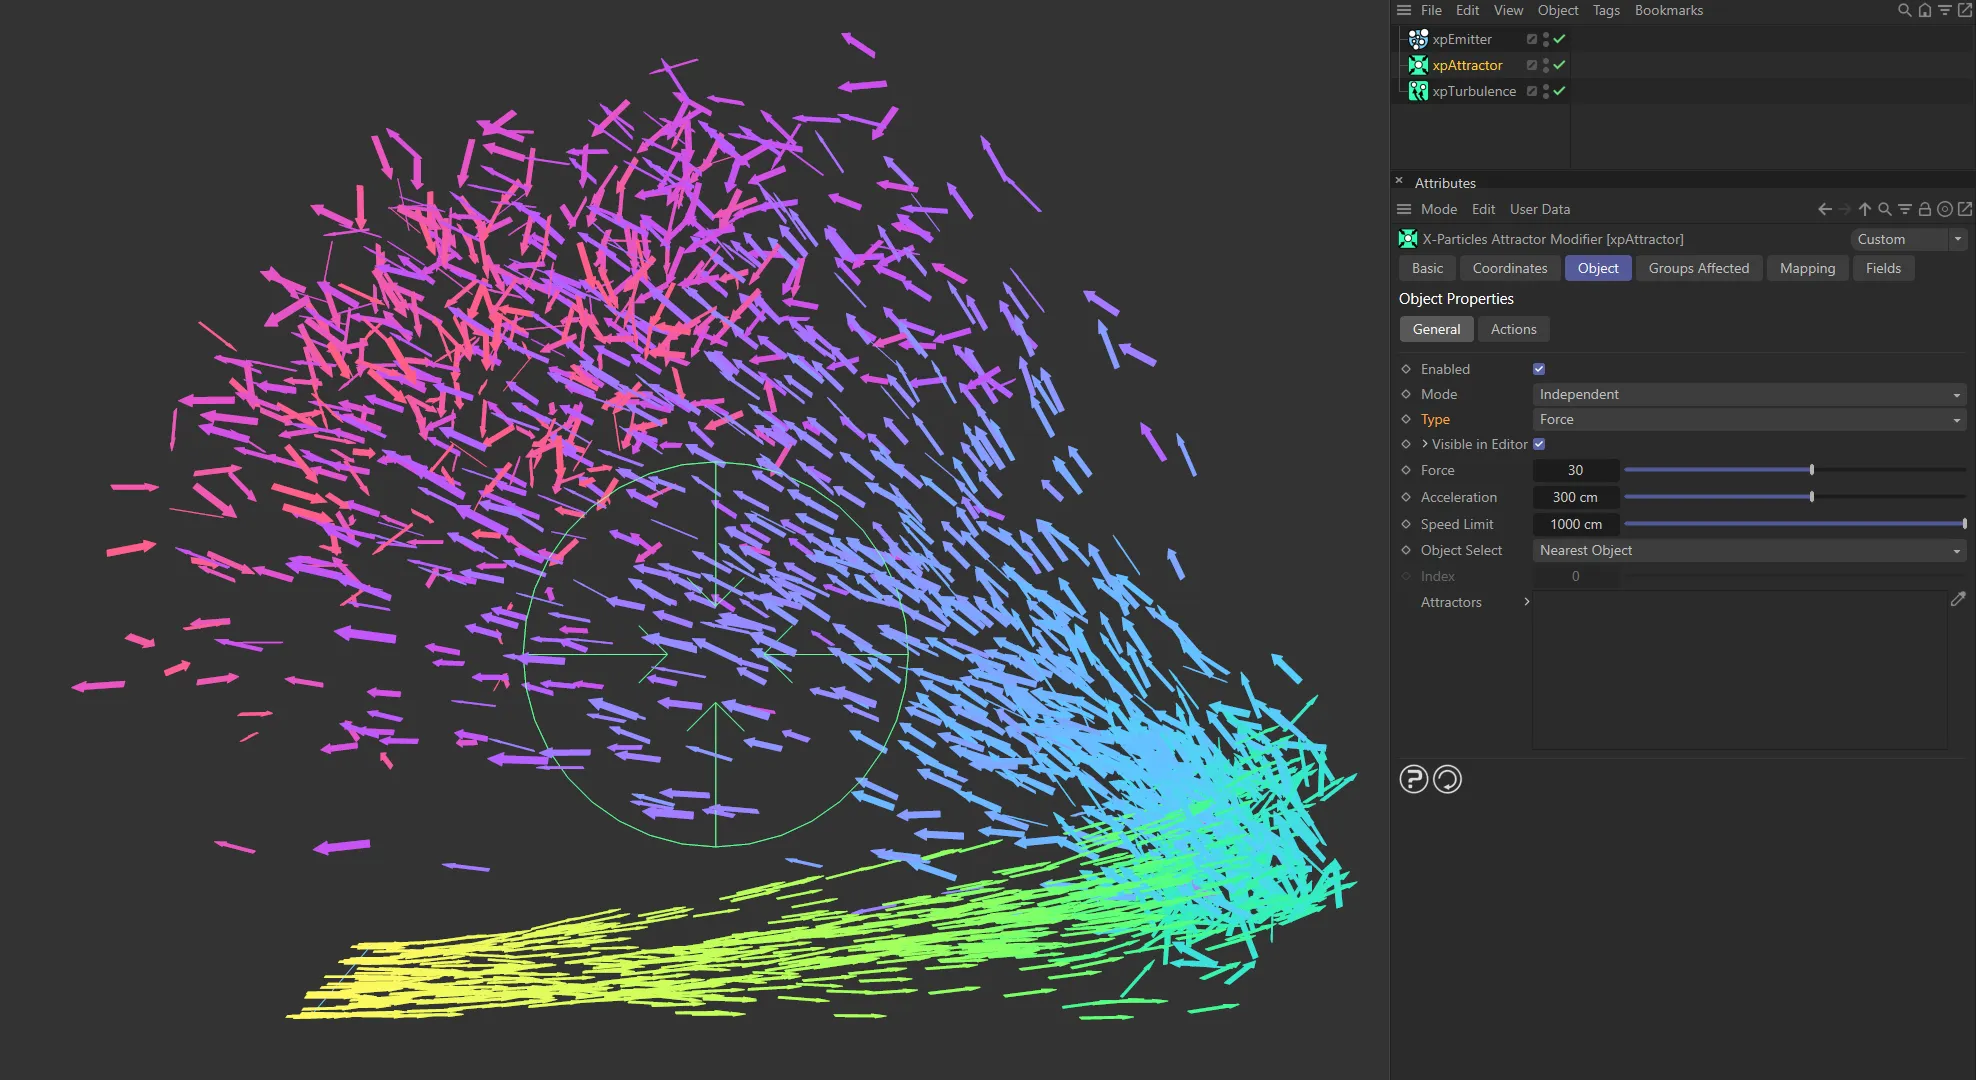
Type set to Force, allowing the xpTurbulence to affect the particles.
Visible in Editor
Section titled “Visible in Editor”When enabled, the attractor will appear in the viewport, to give you visual feedback.
This attractor icon can then be modified, using the options below, accessed from the small arrow to the left of Visible in Editor.
Icon Size
Section titled “Icon Size”Sets the radius of the attractor icon.
Animation to show how to change the xpAttract icon appearance, using the Icon Size and Barb Offset parameters*.*
Barb Offset
Section titled “Barb Offset”This slider moves the four barbs from the center of the attractor icon, either closer to or further away from the center.
Controls the amount of force, that is put on the particles, to attract them to the modifier.
This animation illustrates how increasing the Force value increases the overall attraction force towards the attraction point.
Acceleration
Section titled “Acceleration”Speeds up or slows down the particles as they move towards the modifier.
In this animation, the Acceleration value is increased from 30cm to 400cm, adding more velocity towards the attraction point.
Speed Limit
Section titled “Speed Limit”Sets the maximum speed that the accelerated particles will reach.
Animation to demonstrate how reducing the Speed Limit setting affects the maximum particle speed of all living particles.
Object Select
Section titled “Object Select”By default, this is set to Nearest Object.
The other options are: Furthest Object, Average, Object Index and Random Object.
Nearest Object
Section titled “Nearest Object”The particles will be attracted to the nearest object.
This animation demonstrates the Nearest Object setting.
Furthest Object
Section titled “Furthest Object”The particles will be attracted to the object furthest away from them.
Again, this can vary during an animation.
In this animation Object Select has been changed to Furthest Object.
Average
Section titled “Average”The positions of all the objects in the Attractors list are averaged and the particles will be attracted to the resulting location.
Animation showing the particles finding the average position in the Average setting.
Object Index
Section titled “Object Index”The particles will be attracted to a specific object in the list, where the first object in the list has an index of 0 (zero), the second an index of 1, and so on.
Use the Index parameter to select which object to use.
With Object Select set to Object Index, this animation demonstrates how changing the Index value alters the particles’ attraction to different primitive objects in the scene.
Random Object
Section titled “Random Object”Each individual particle will be attracted to a randomly-selected object from the objects in the Attractors list.
Finally, this animation illustrates the Random Object setting, with particles attracted to a random scene object.
Grayed out unless Object Index has been selected from the Object Select parameter.
This is where you can select the specific object you want the particles to be attracted to.
Attractors
Section titled “Attractors”Drag and drop any objects, you want to use, into this link field.
Actions tab
Section titled “Actions tab”
Actions tab menu for xpAttractor.
Range Mode
Section titled “Range Mode”There are two options here: Range Less Than (the default) and Range More Than.
Range Less Than
Section titled “Range Less Than”The actions in the Actions list will be triggered while ever the particle is closer to the attractor than the value in the Range parameter.
Range More Than
Section titled “Range More Than”The actions in the Actions list will be triggered while ever the particle is further away from the attractor than the value in the Range parameter.
In this animation, with the Range value at 120cm and Range Mode set to Range More Than, the display mode of the particles changes when they cross the range limit.
The minimum distance the particle must be from the modifier for actions in the Actions list to be triggered.
Actions
Section titled “Actions”Drag and drop any action into this list.
Changing particle display with an Change Emitter Action when particles cross the Range value of 100cm.
Add Action
Section titled “Add Action”Clicking this button will add an action to the scene and drop it into the Actions list.
Groups Affected tab
Section titled “Groups Affected tab”Groups
Section titled “Groups”To specify the group, drag and drop the desired Group object into this field.
This setting is useful if you want to ensure that the spawned particles are, or are not, affected by xpAttractor.
Mapping tab
Section titled “Mapping tab”The modifier’s settings can be mapped to particle data.
Use the dedicated manual page, below, for instructions on how this works.
Fields tab
Section titled “Fields tab”You can use the Fields options to control where xpAttractor operates.
Copyright © 2026 INSYDIUM LTD. All rights reserved.