Preview tab
In the Preview tab, you can see the 2D height map, that you have generated, to better understand how the terrain is being generated.
Black represents zero altitude, with the brightest, white areas being full altitude, controlled by the Gain value in the Operator tab.
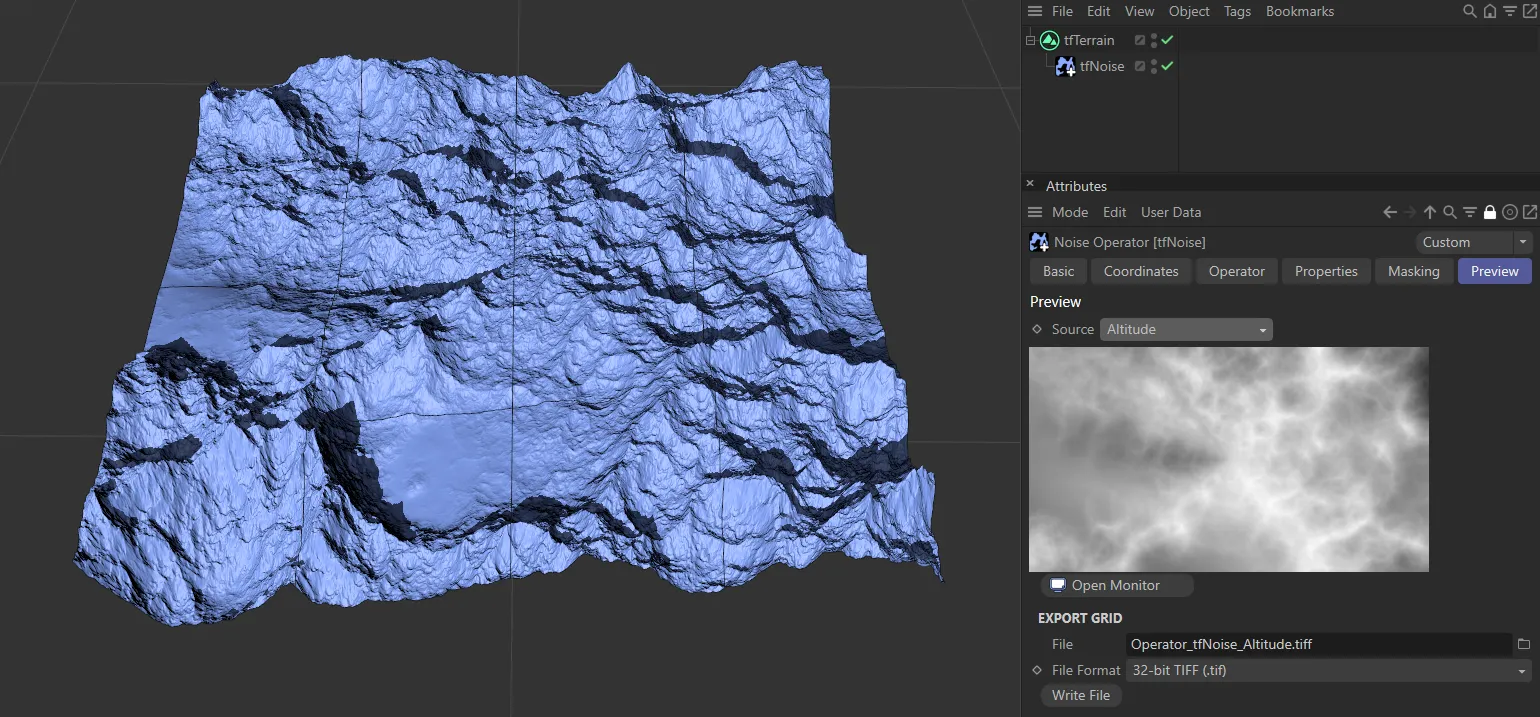
The Preview tab in tfNoise.
Source
Section titled “Source”There are seven types of Source available for every Generator operator: Altitude, which is set as default, Slope, Curvature, Bumps, Dents, 2D Fields Mask and Shader Mask.
tfGrid also has the Control Grid option and tfTrace, the Object Mask option.
Filter operators all have eight types of Source available, as they each also have the Difference Map option.
In addition, there are some operator specific modes, for example, the Hydraulic Erosion filter has Erode Map and Deposit Map options.
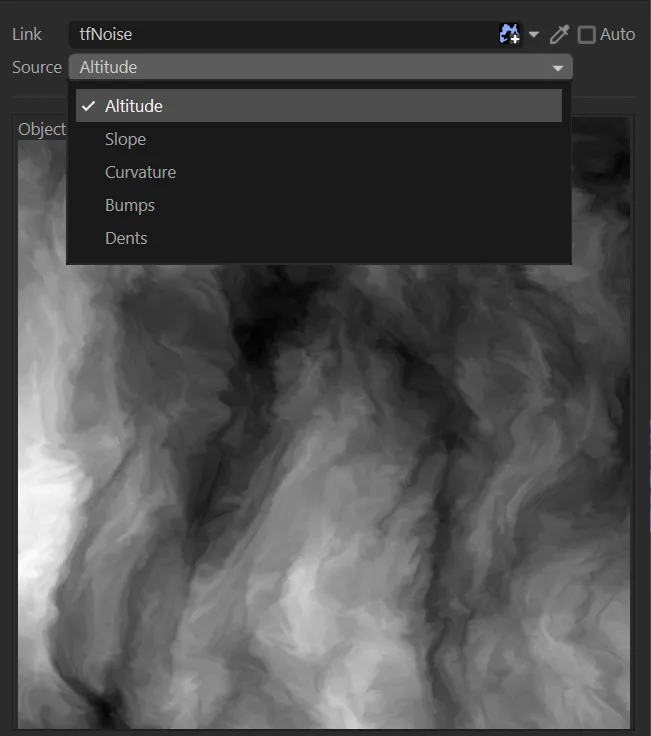
The Source drop-down menu with seven source type options.
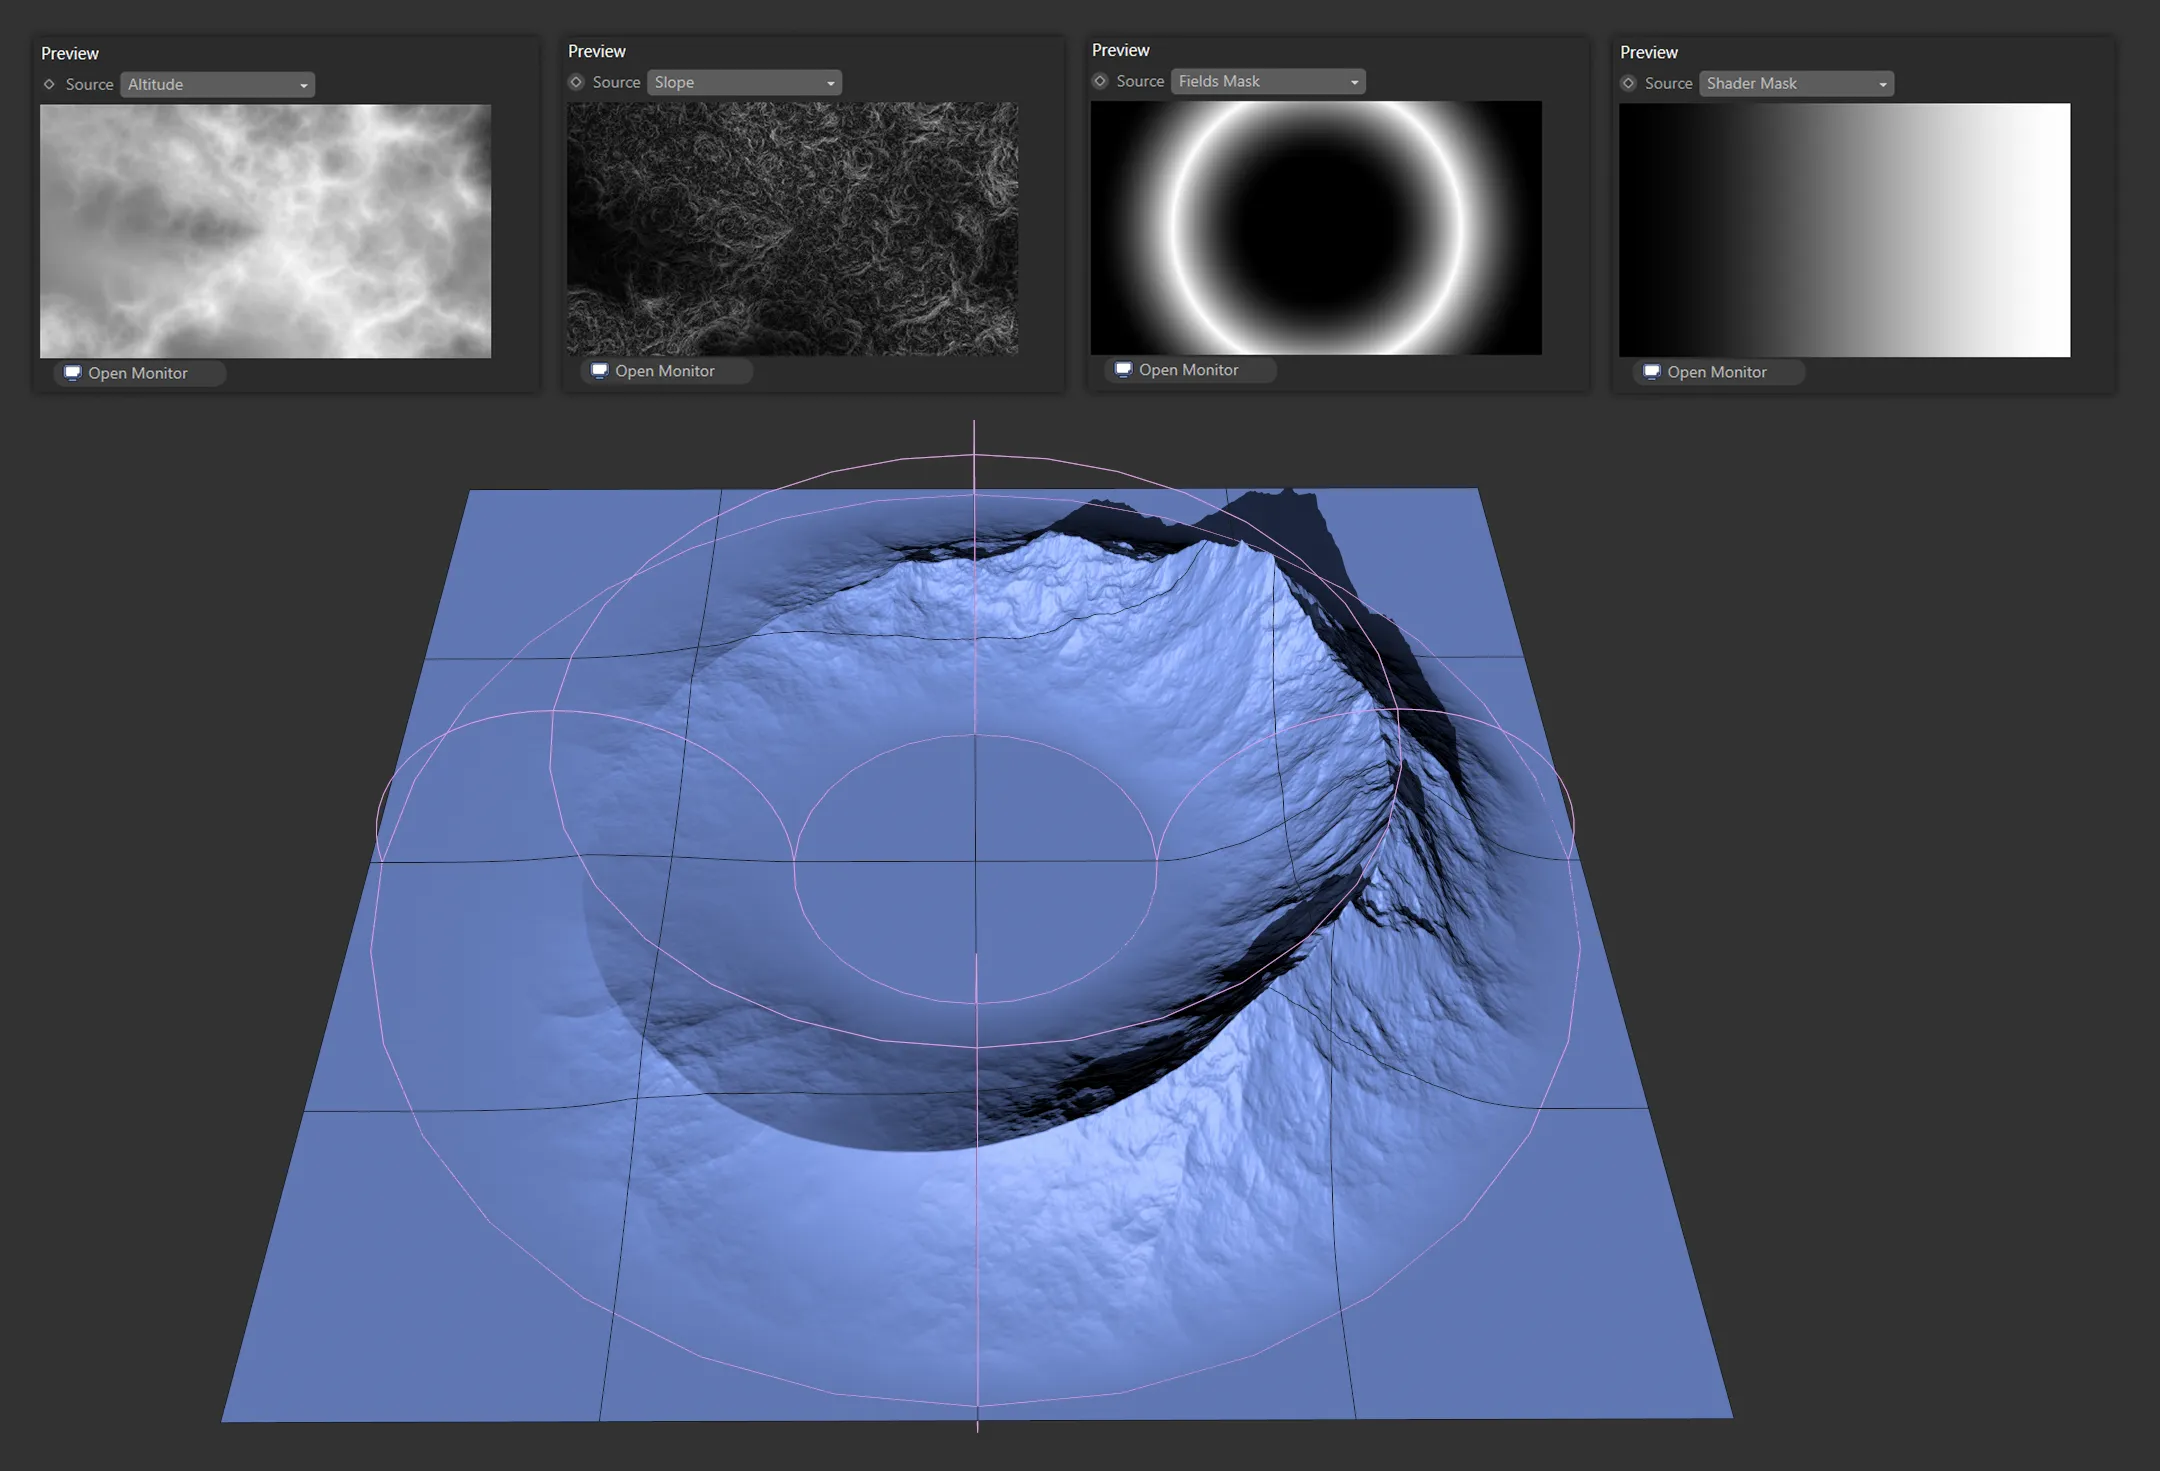
In this image, there are four Source types for the same terrain. From the left, Altitude, Slope, Fields Mask and Shader Mask, respectively.
Open Monitor
Section titled “Open Monitor”Opens the source preview in the Grid Monitor.
This is a dockable, floating window, which can display any operator preview source of your choice.
This enables you to view the 2D source preview in real time, even when making adjustments to operator settings and parameters.
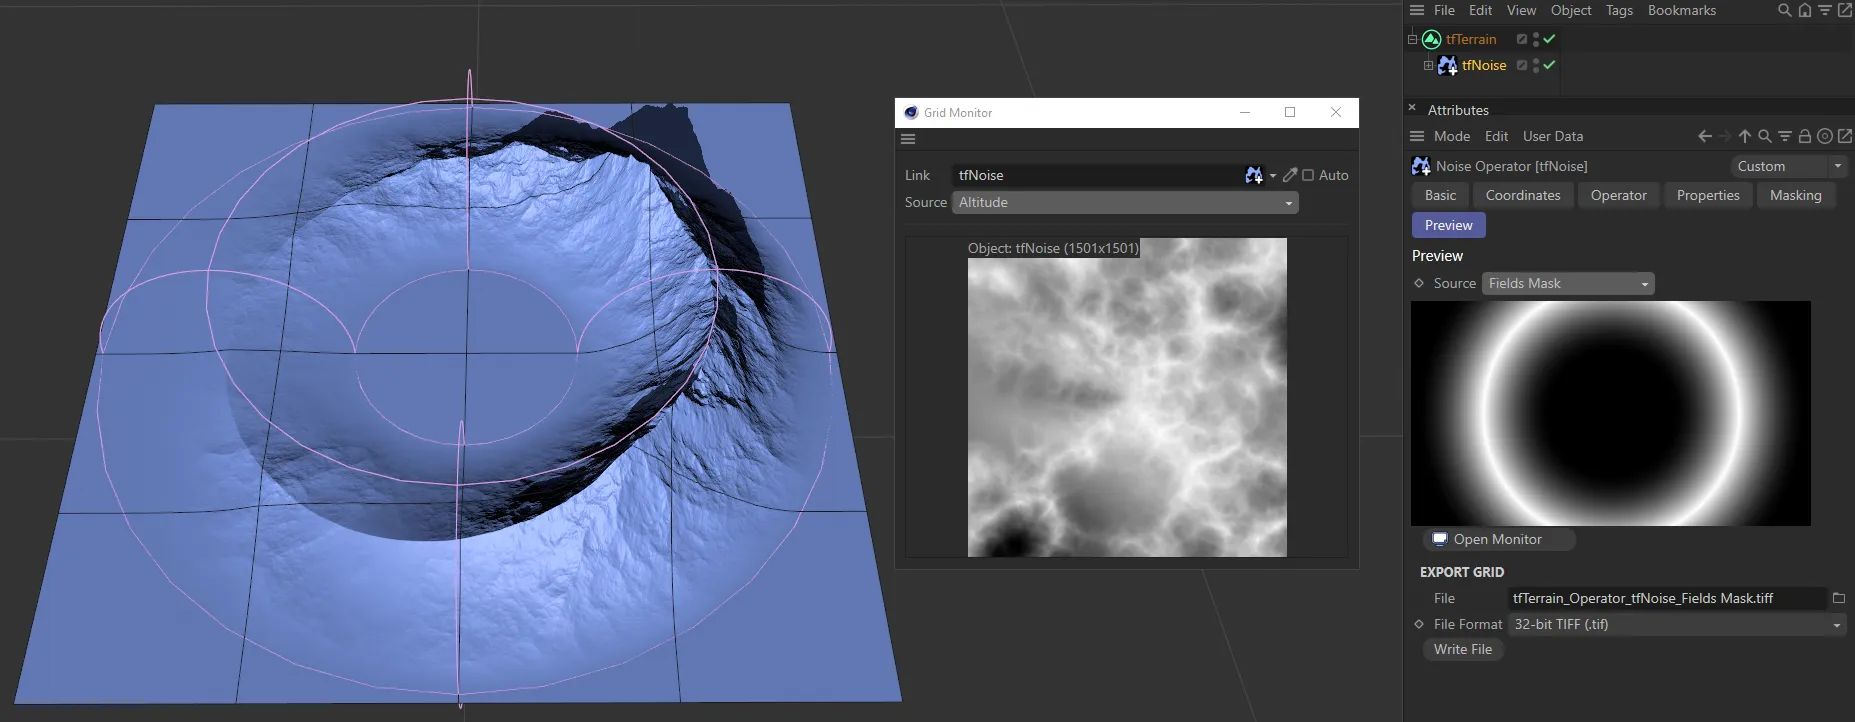
Grid Monitor floating window, giving a preview of the Altitude Source in the Grid Monitor and the Fields Mask in the Preview tab.
When opened from an operator’s Preview tab, the Grid Monitor will automatically bring up the height map from that operator.
The Source parameter will then be available, to select between Altitude or Slope settings or, in some cases, Control Grid (tfGrid), Difference Map (all the Filter operators), Flood Mask (tfFlood) or Warp Tension (tfWarp).
Changes in the Preview tab, will update in the Grid Monitor in real time.
With Auto enabled, simply clicking on the item in the Objects Manager will display the relevant height map in the Grid Monitor.
Alternatively, you can click and drag the operator from the Objects Manager into the Link field.
Finally, the eye-dropper can be used to accomplish the same outcome.
Export Grid
Section titled “Export Grid”Each 2D height map can be exported, as a bitmap, and saved to your computer.
Simply click on the file icon, on the right, underneath the heightmap, selecting your destination and then clicking the Write File button.