tfSpline
tfSpline lets you create terrains by generating a height field, using samples along a linked spline.
Properties
Section titled “Properties”Spline
Section titled “Spline”You will need to add a spline to your scene to see the deformation from that spline in your scene.
You can drag and drop a spline into the Spline link field.
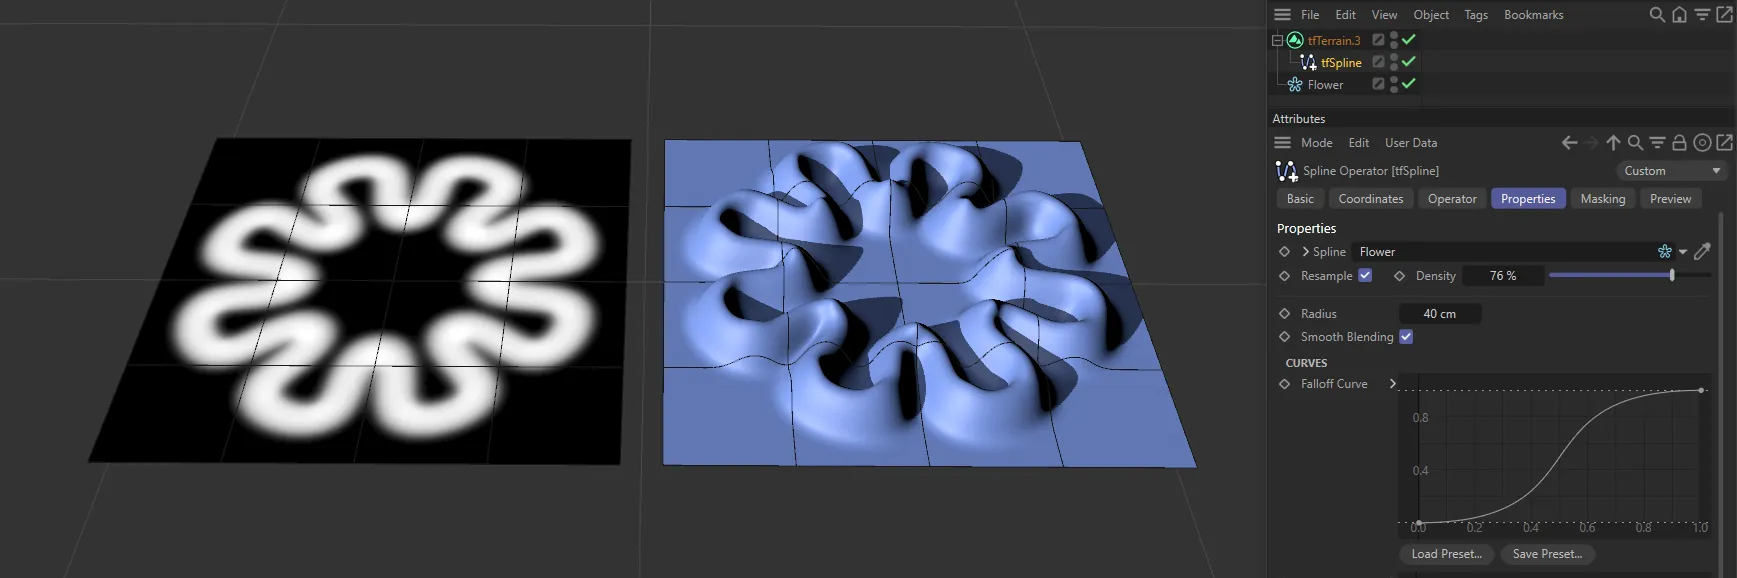
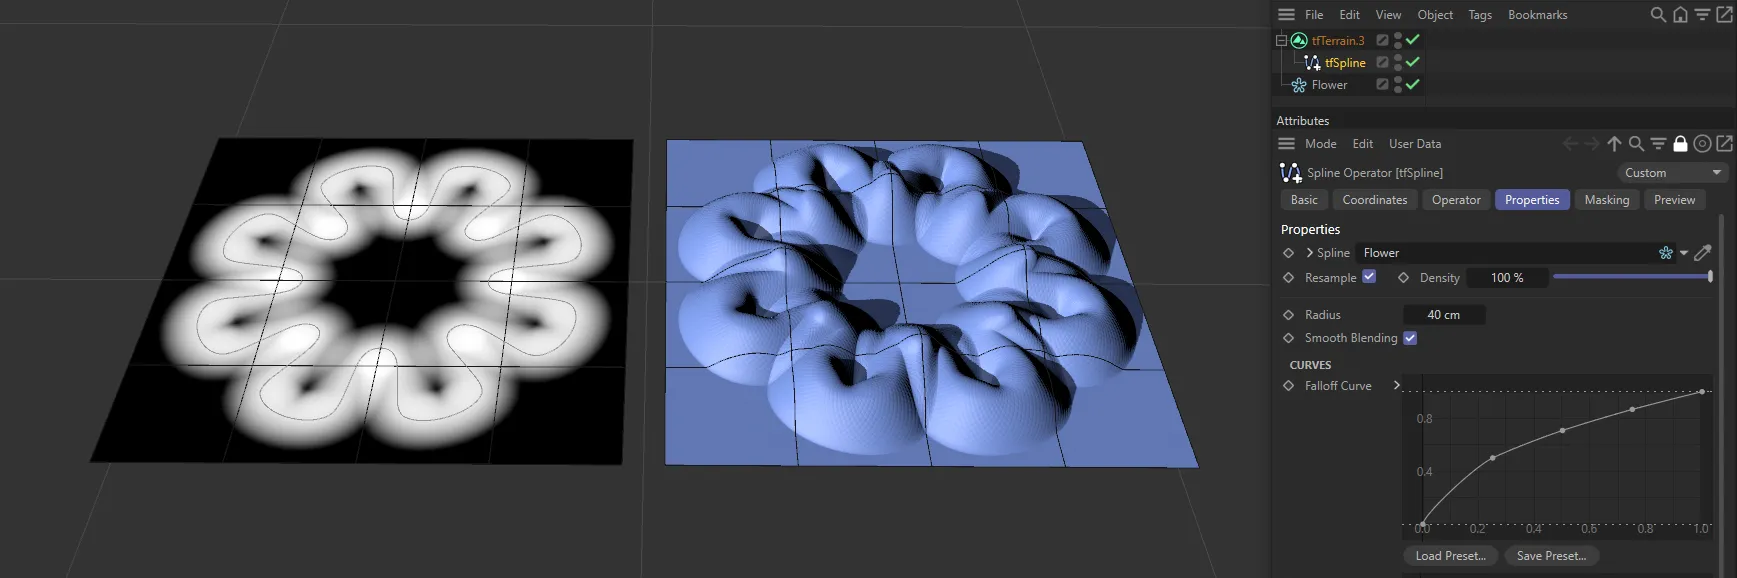
This Flower spline has been dropped into the Spline Link field.
Alternatively, you can use the Eyedrop tool to select the spline, directly from the Object Manager.
Resample
Section titled “Resample”Enabling this parameter re-samples the base spline, by uniformly distributing points along the spline.
If there is a low point count in the base spline and resample is turned off, there will be a stepped result.
Density
Section titled “Density”Raising this slider adds more points to the resampled spline making it smoother.
Set at Stroke, by default.
The alternative setting is Fill.
Stroke
Section titled “Stroke”This mode simply uses the spline to create the raised terrain.
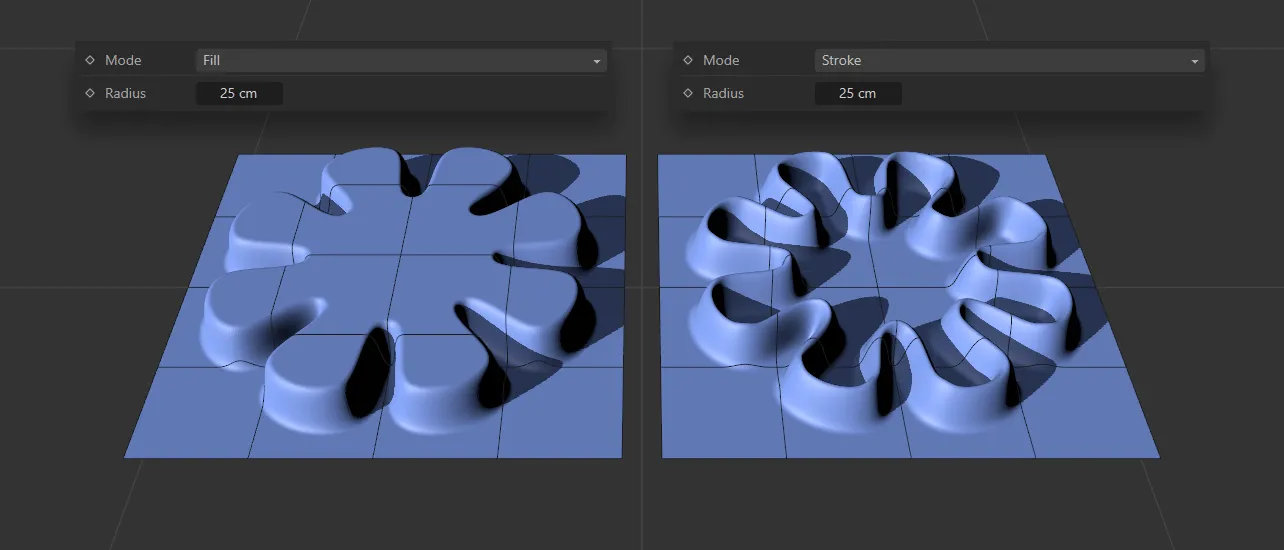
Mode set to Fill, on the left-hand image, with the center of the terrain at the same height as the spline edges. On the right, the Mode is set to Stroke, with the terrain raising to follow the n-Side spline.
The Fill mode fills in all the terrain inside the spline, raising it to the same level as the outer edges.
Radius
Section titled “Radius”Defines the radius around the spline, which is deforming the terrain.
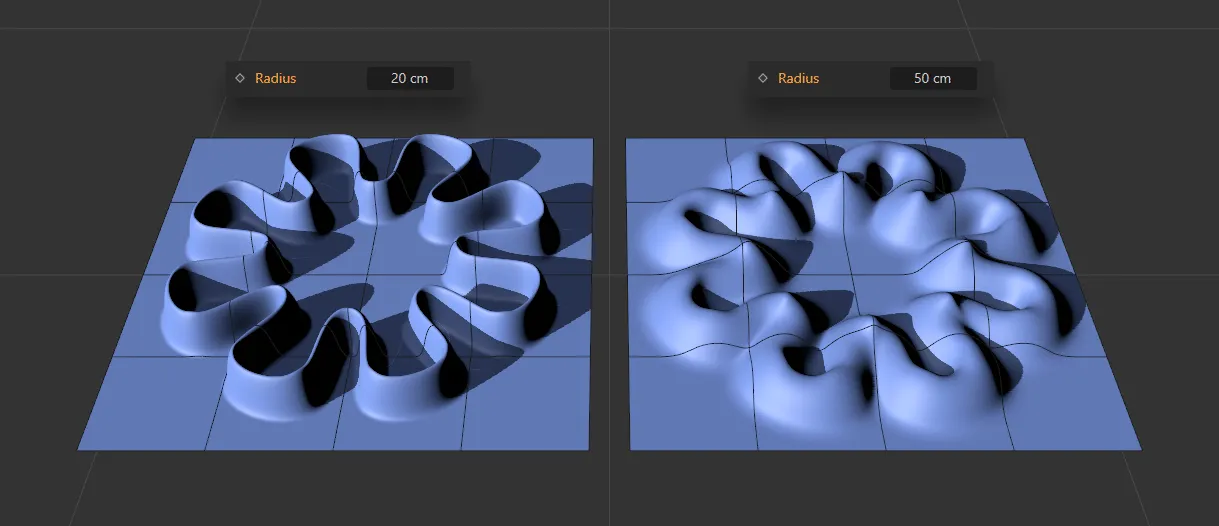
In this image, Radius is set at 20cm on the left and 50cm on the right.
Smooth Blending
Section titled “Smooth Blending”Activating this will smoothly blend the deformation of the spline sample.
The effect of the spline points will be added on top of each other and the end result averaged to avoid it becoming too high.
If this is not active, the spline points are placed using a calculation similar to the Highest blend mode; the points will then intersect each other instead of adding on top of each other.
Curves
Section titled “Curves”Falloff Curve
Section titled “Falloff Curve”This is a profile curve, which can be manipulated to alter the look.
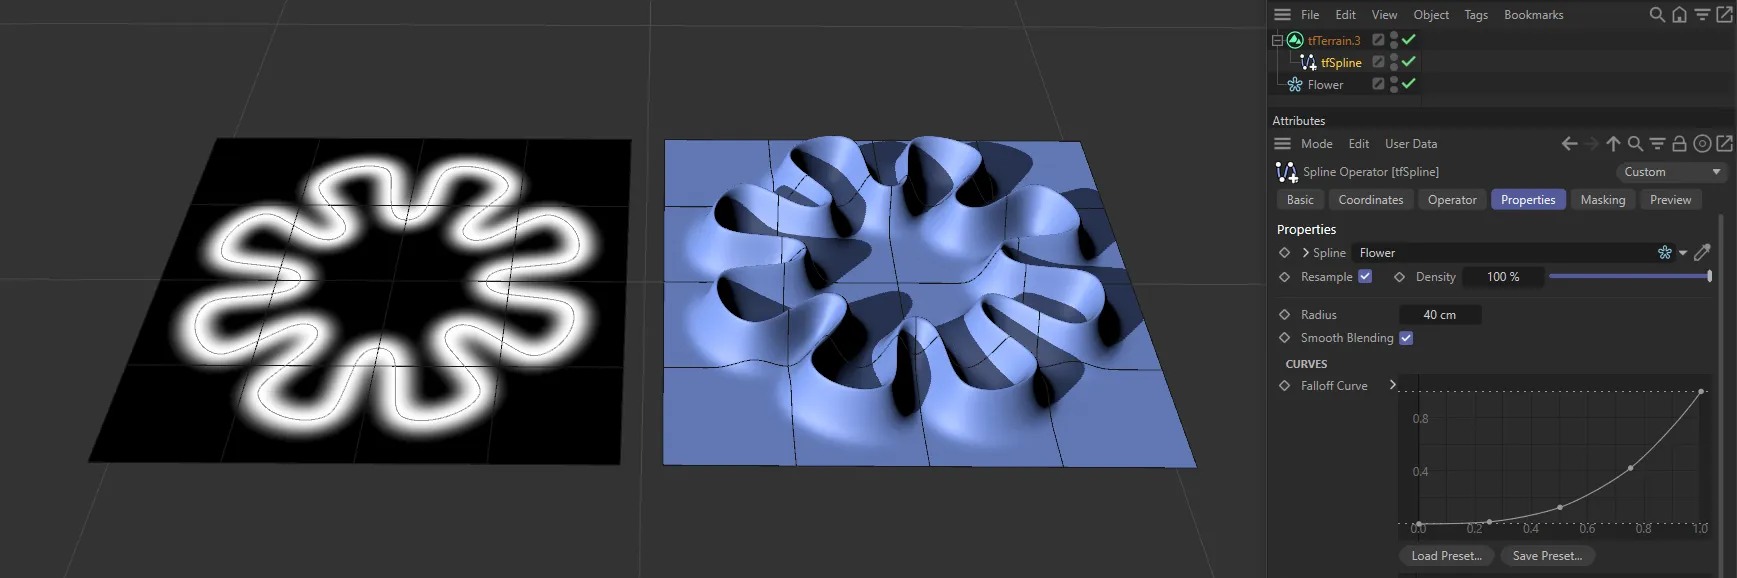
This Falloff Curve setting is generating a steep and sharp crest.

This Falloff Curve setting is generating an undulation in the hill.
This Falloff Curve setting is generating a rounded hill profile.
This curve controls the gain over the length of the spline, as below, where the beginning of the spline is at zero.
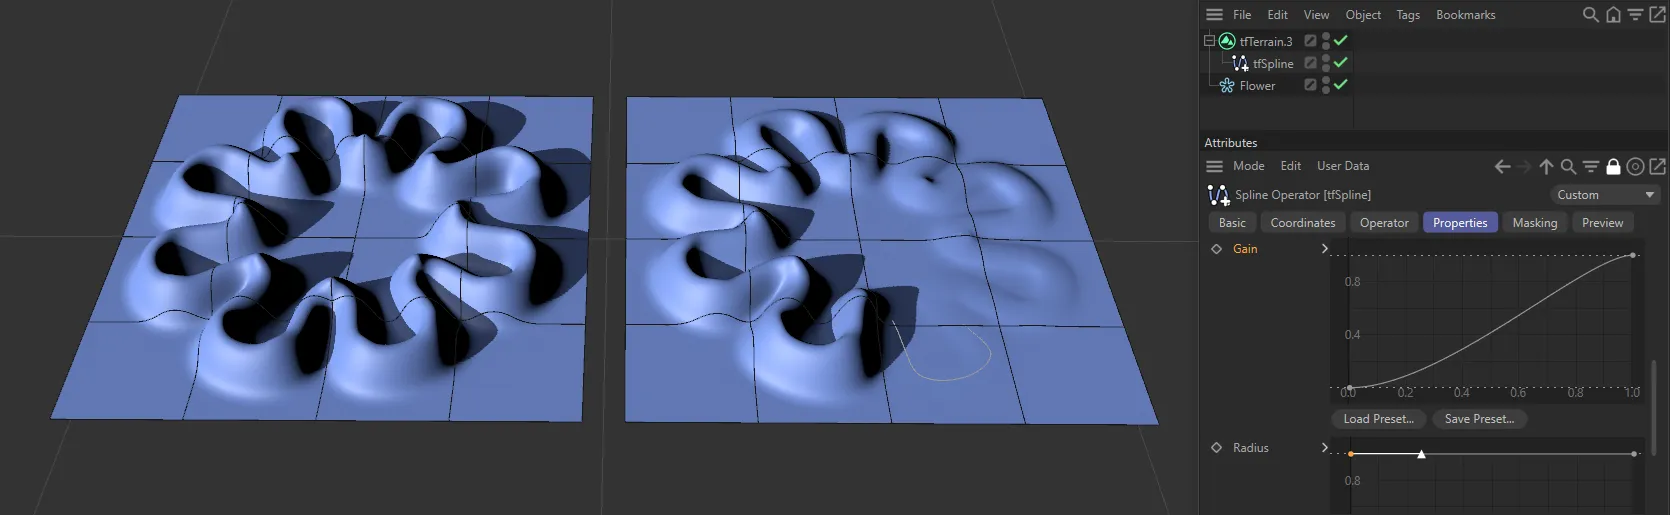
Gain being driven by the Gain curve setting.
Radius
Section titled “Radius”This curve controls the radius over the length of the spline.
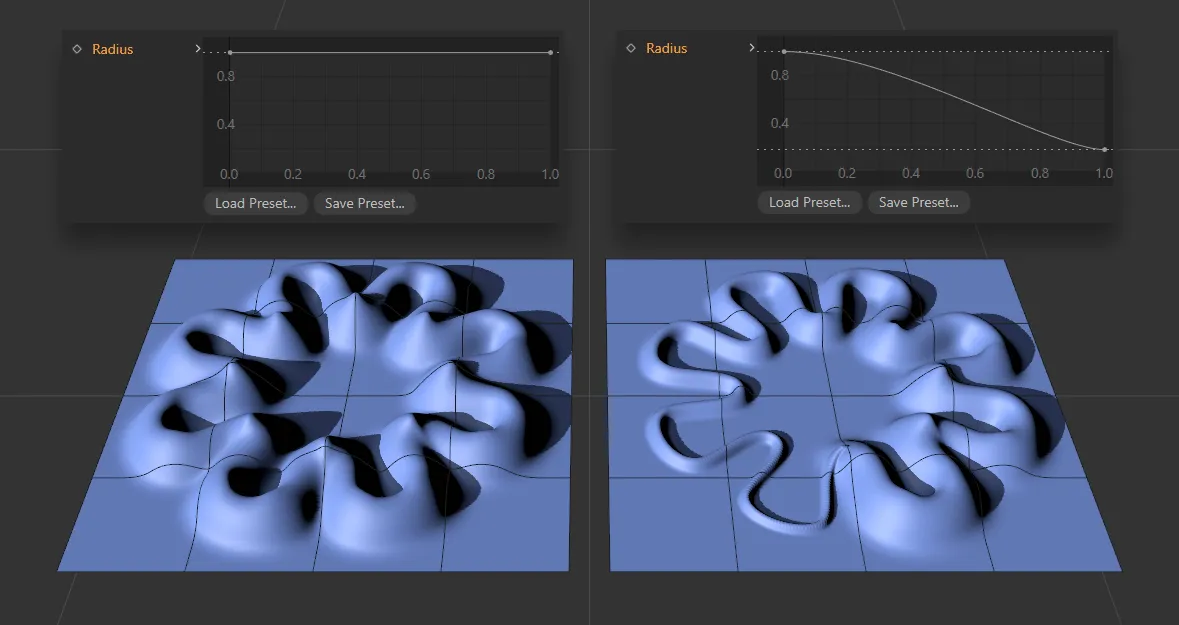
Here you can see that the radius at the start of the spline is much smaller than the radius at the end.
Copyright © 2026 INSYDIUM LTD. All rights reserved.