nxColor
nxColor allows particles to be colored in a controlled way based on the node tree layer options.
Object Properties
Section titled “Object Properties”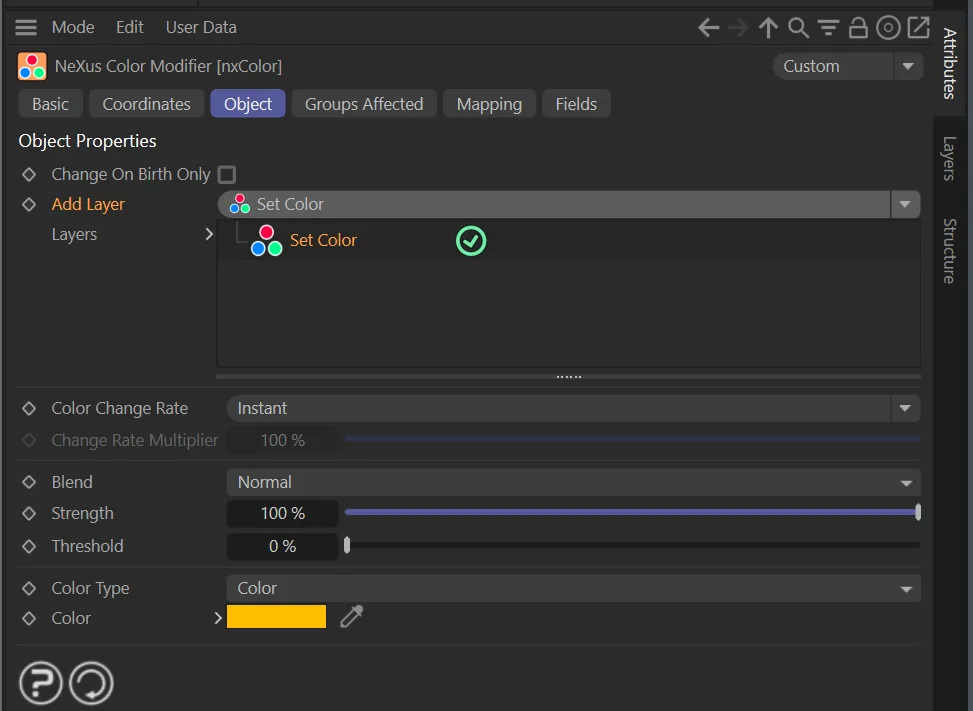
nxColor, Object tab menu settings.
Change on Birth Only
Section titled “Change on Birth Only”Check this box to change the color of the particles once, on birth.
When disabled, the coloring will affect the particles for the whole scene.
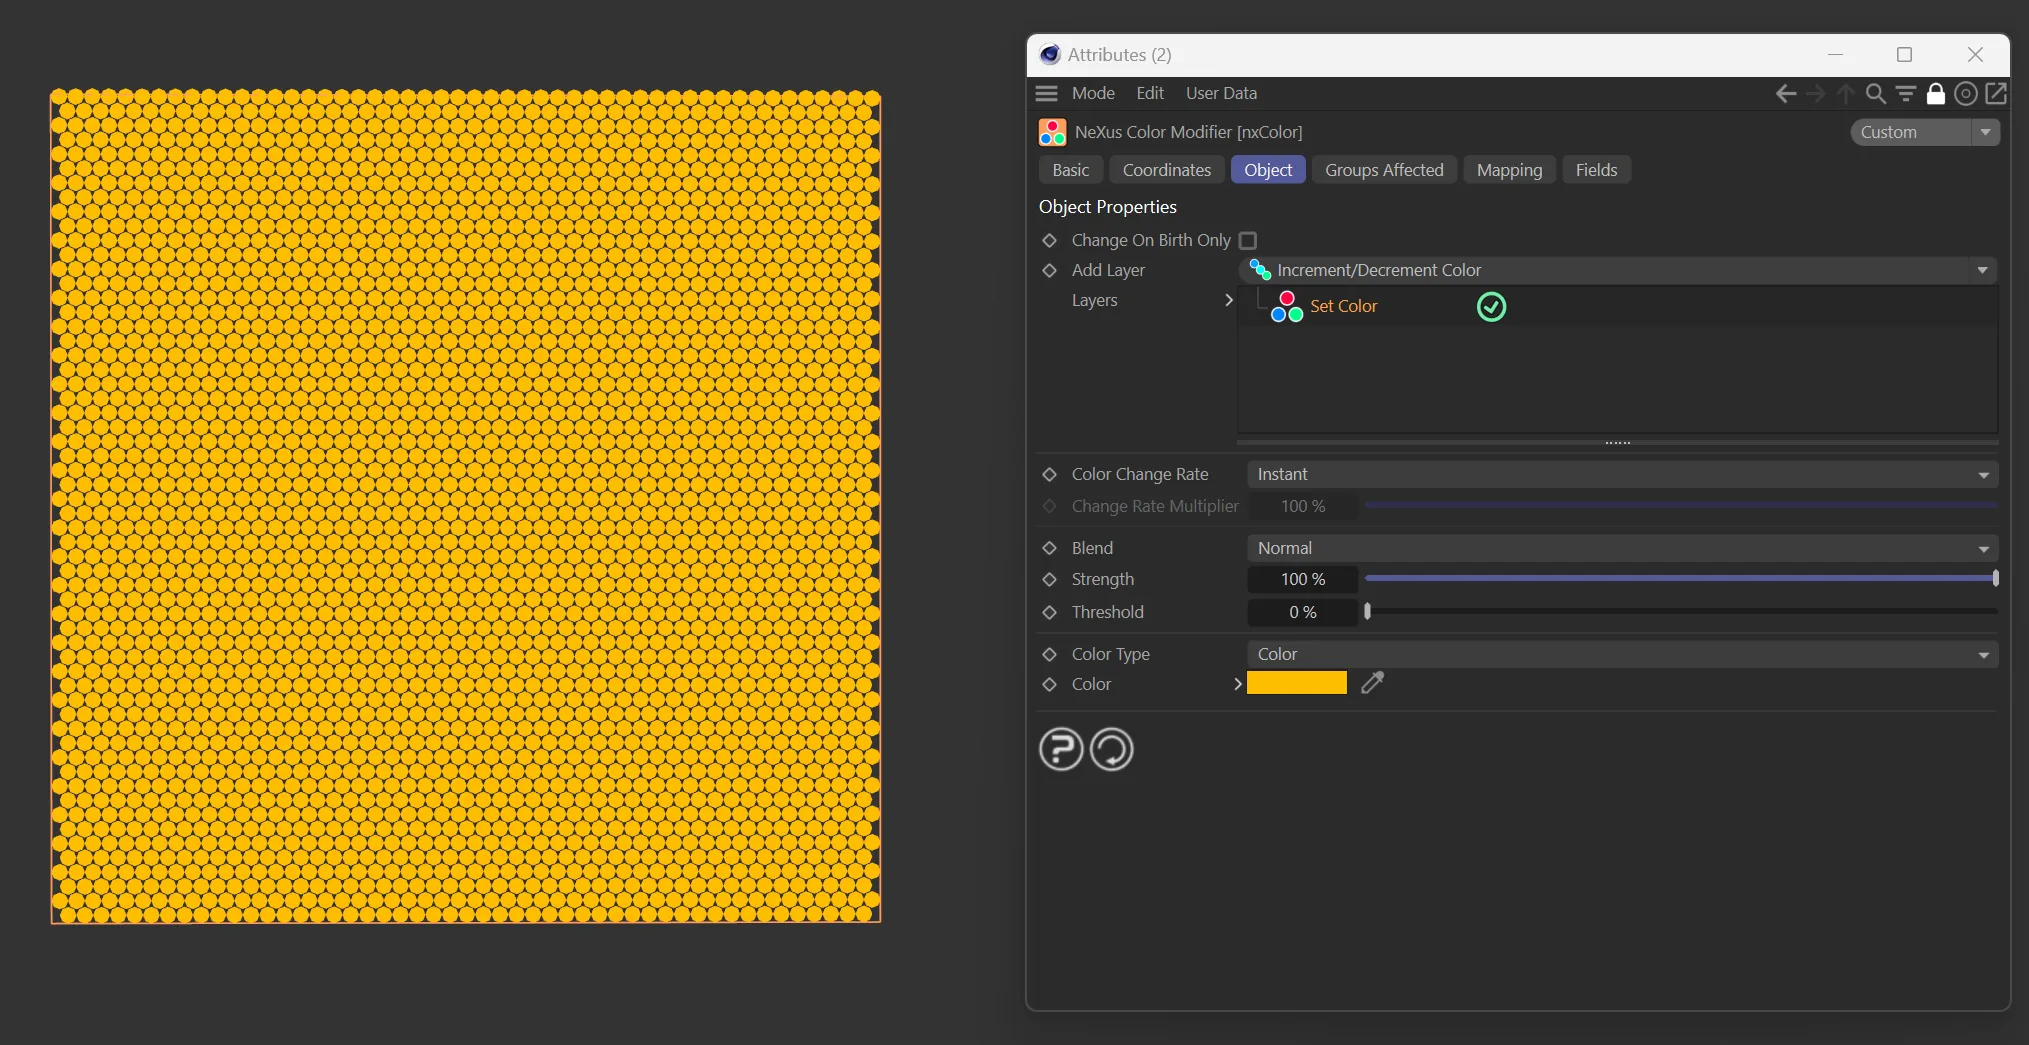
Add Layer
Section titled “Add Layer”Set Color, by default, these are the available layer types, which can be stacked in the Layers list.
The other options are: Increment/Decrement Color, Use Texture Tag, Use Vertex Color Tag, Gradient by Parameter, Time-Dependent, Distance from Object, Distance from Camera and Noise.
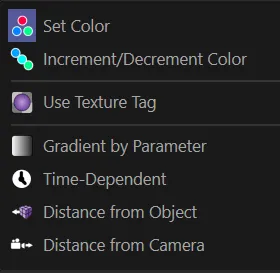
nxColor, Add Layer menu.
Layers
Section titled “Layers”The list of layers that the user is employing.
Clicking on and highlighting a layer will give the parameter options, explained below.
nxColor, selected layer parameters.
Each layer type has its own parameter options but there are two shared options, below.
Color Change Rate
Section titled “Color Change Rate”There are three options: Instant, Frame Time and Custom.
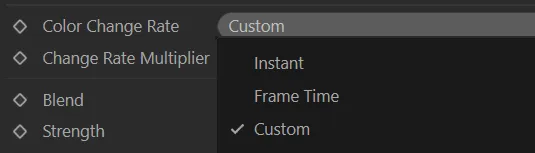
Color Change Rate options menu.
Instant
Section titled “Instant”Instantly set the color.
Color Change Rate set to Instant.
Frame Time
Section titled “Frame Time”Set the color based on the frame time (slow fade).
Color Change Rate set to Frame Time.
Custom
Section titled “Custom”Set the color based on the frame time (slow fade) with a multiplier, accessed with the Change Rate Multiplier parameter, below.
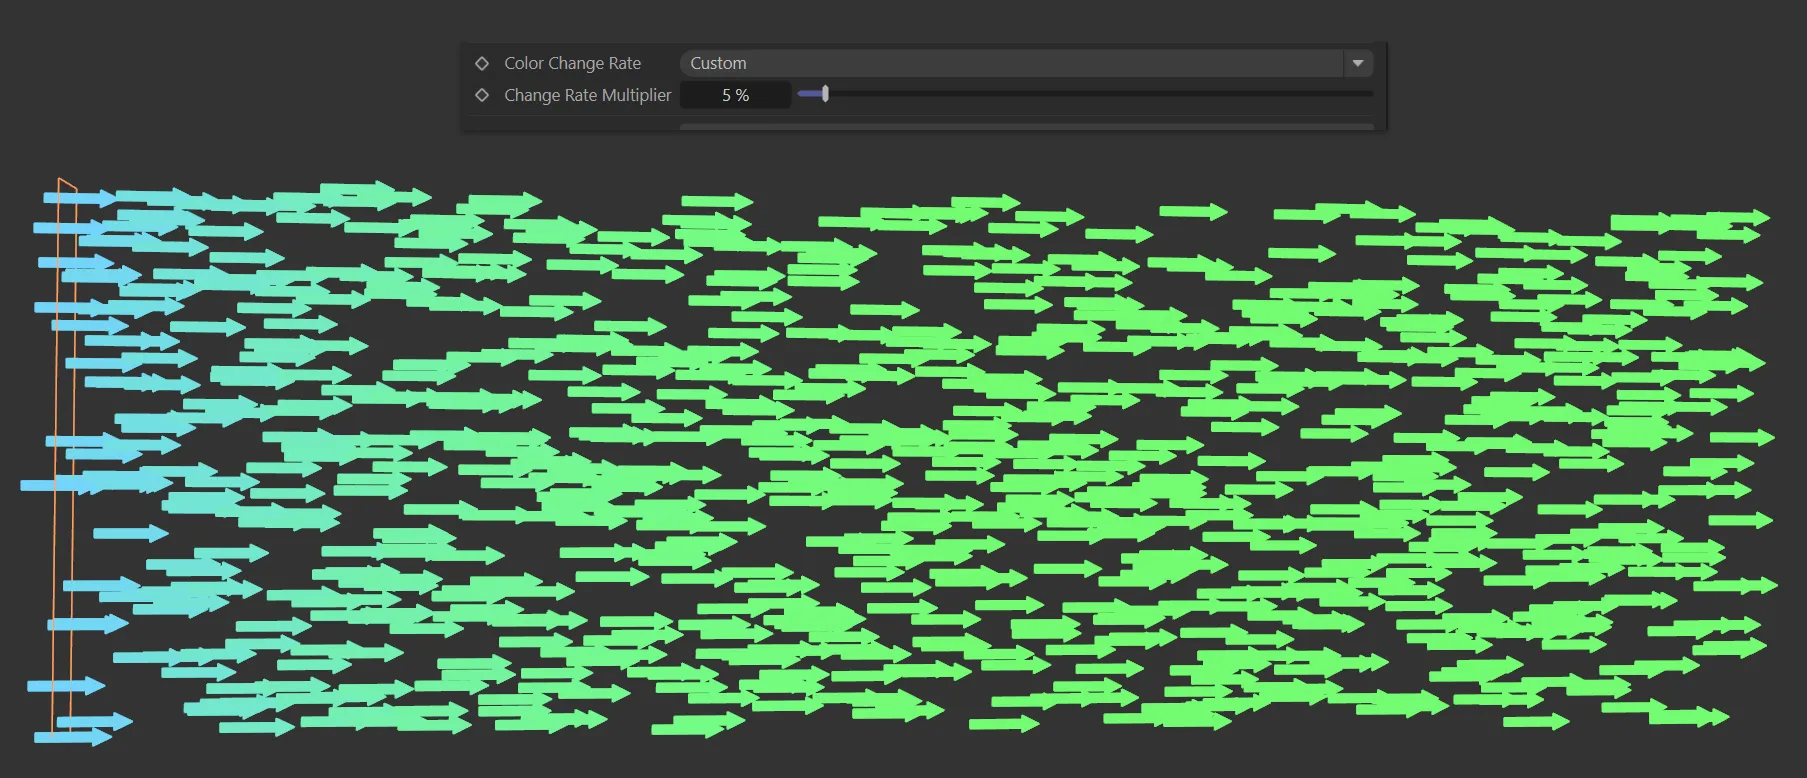
Color Change Rate set to Custom.
Change Rate Multiplier
Section titled “Change Rate Multiplier”For use when the Color Change Rate is set as Custom.
Per Layer Options
Section titled “Per Layer Options”Each layer contains the same options for Blend, Strength, Threshold, and a Falloff tab.
General tab
Section titled “General tab”Sets how this color layer is blended with the layers beneath it.
The available blend modes are Normal, Add, Subtract, Multiply, Difference, Screen, Overlay, Min and Max.
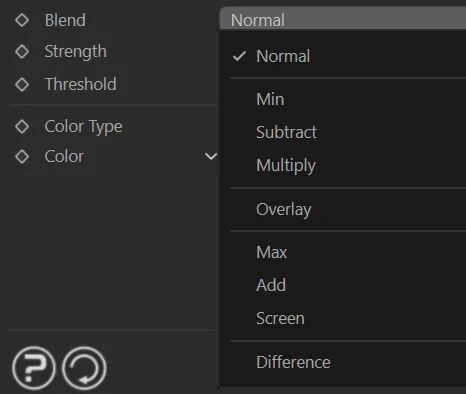
Blend options dropdown menu.
Strength
Section titled “Strength”The strength of the blend.
Strength value of 5% set, changing the color.
Threshold
Section titled “Threshold”This is a setting designed to introduce some random chance into the color change.
Each time the color is due to change for a particle, a random number is generated; if that number exceeds the threshold, the change will take place, but if it does not there will be no change.
A value of 0 (zero) % will always result in a change occurring; a value of 100% will mean that a change never occurs.
Threshold value of 5% set, changing the color.
Falloff tab
Section titled “Falloff tab”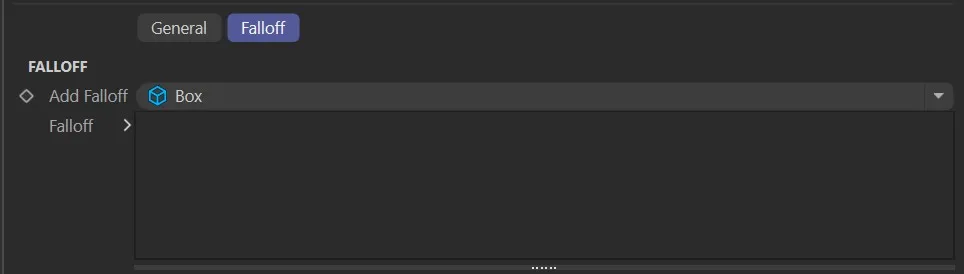
Color layer Falloff tab.
Each color layer has a Falloff tab that restricts which particles in space receive that layer’s effect.
Add Falloff
Section titled “Add Falloff”Adds a falloff to this layer.
A quick-select button allows choosing a built-in falloff shape (Box, Linear, Sphere, or Noise) directly on the layer, without needing a separate nxFalloff object.
For more complex or reusable falloffs, an nxFalloff object can be dragged from the scene into the layer’s falloff tree.
Falloff
Section titled “Falloff”The falloff stack for this layer.
Multiple falloffs can be added and combined.
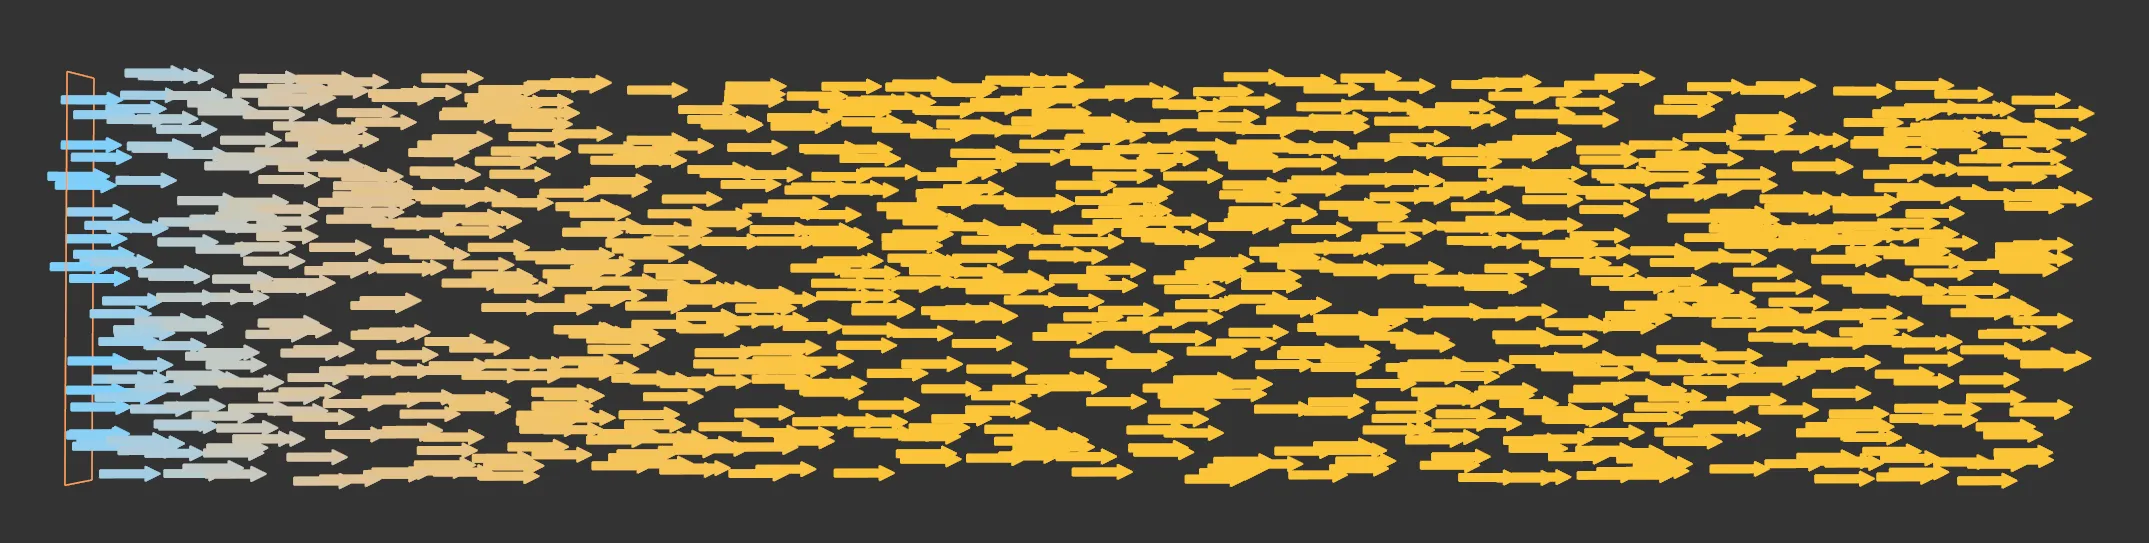
Set Color layer options
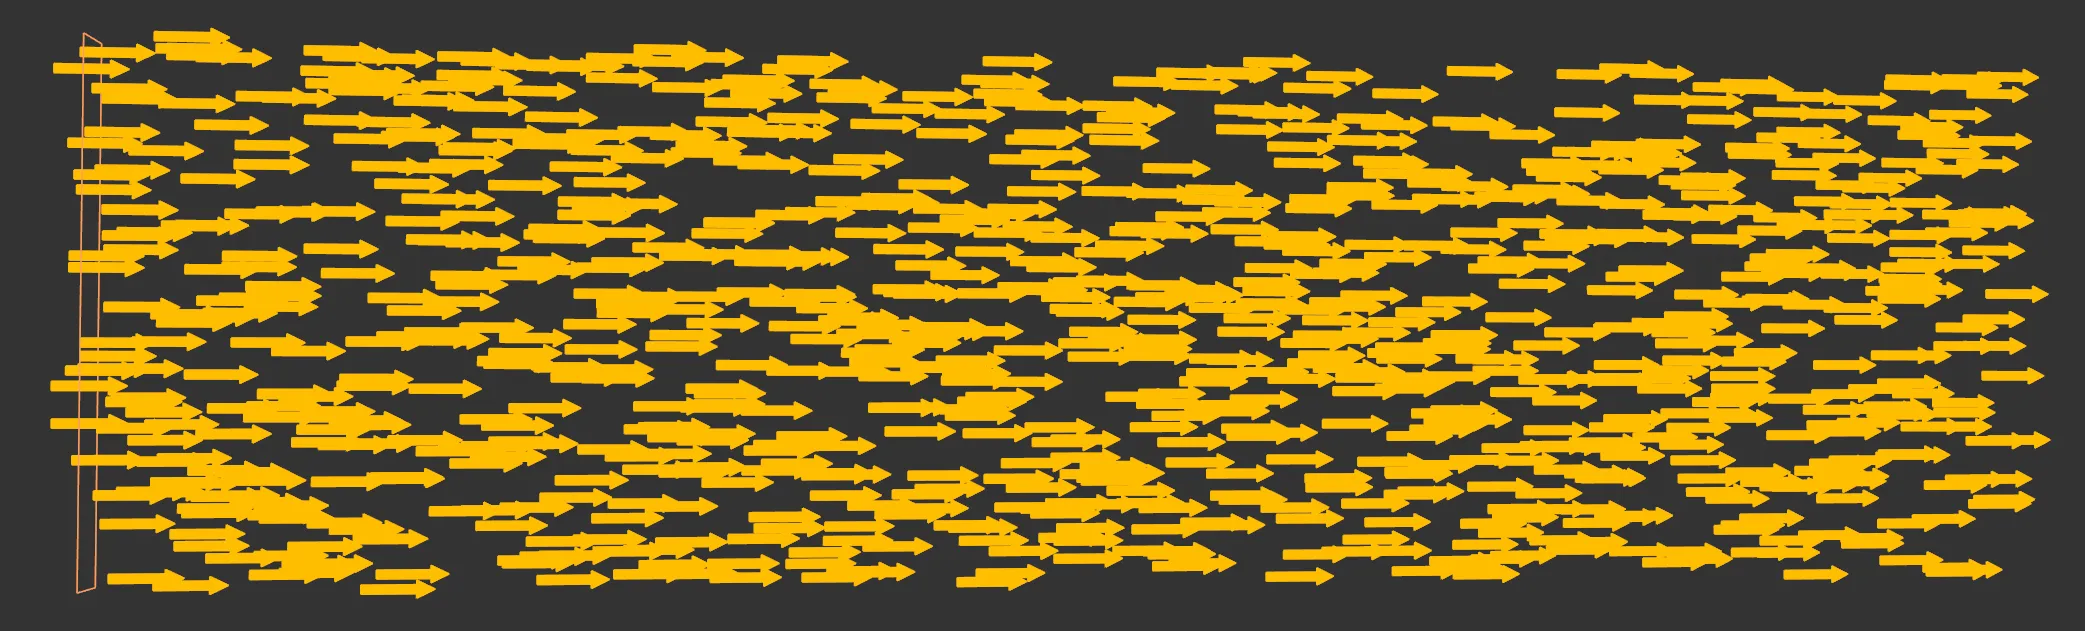
Section titled “Set Color layer options”This layer sets the color of the particles either using a single color or shader
In this image, the xpEmitter is set to Shot emission with a Shot Type of Hexagonal. The Set Color layer has a Color Type of Color, with the Color set to yellow.
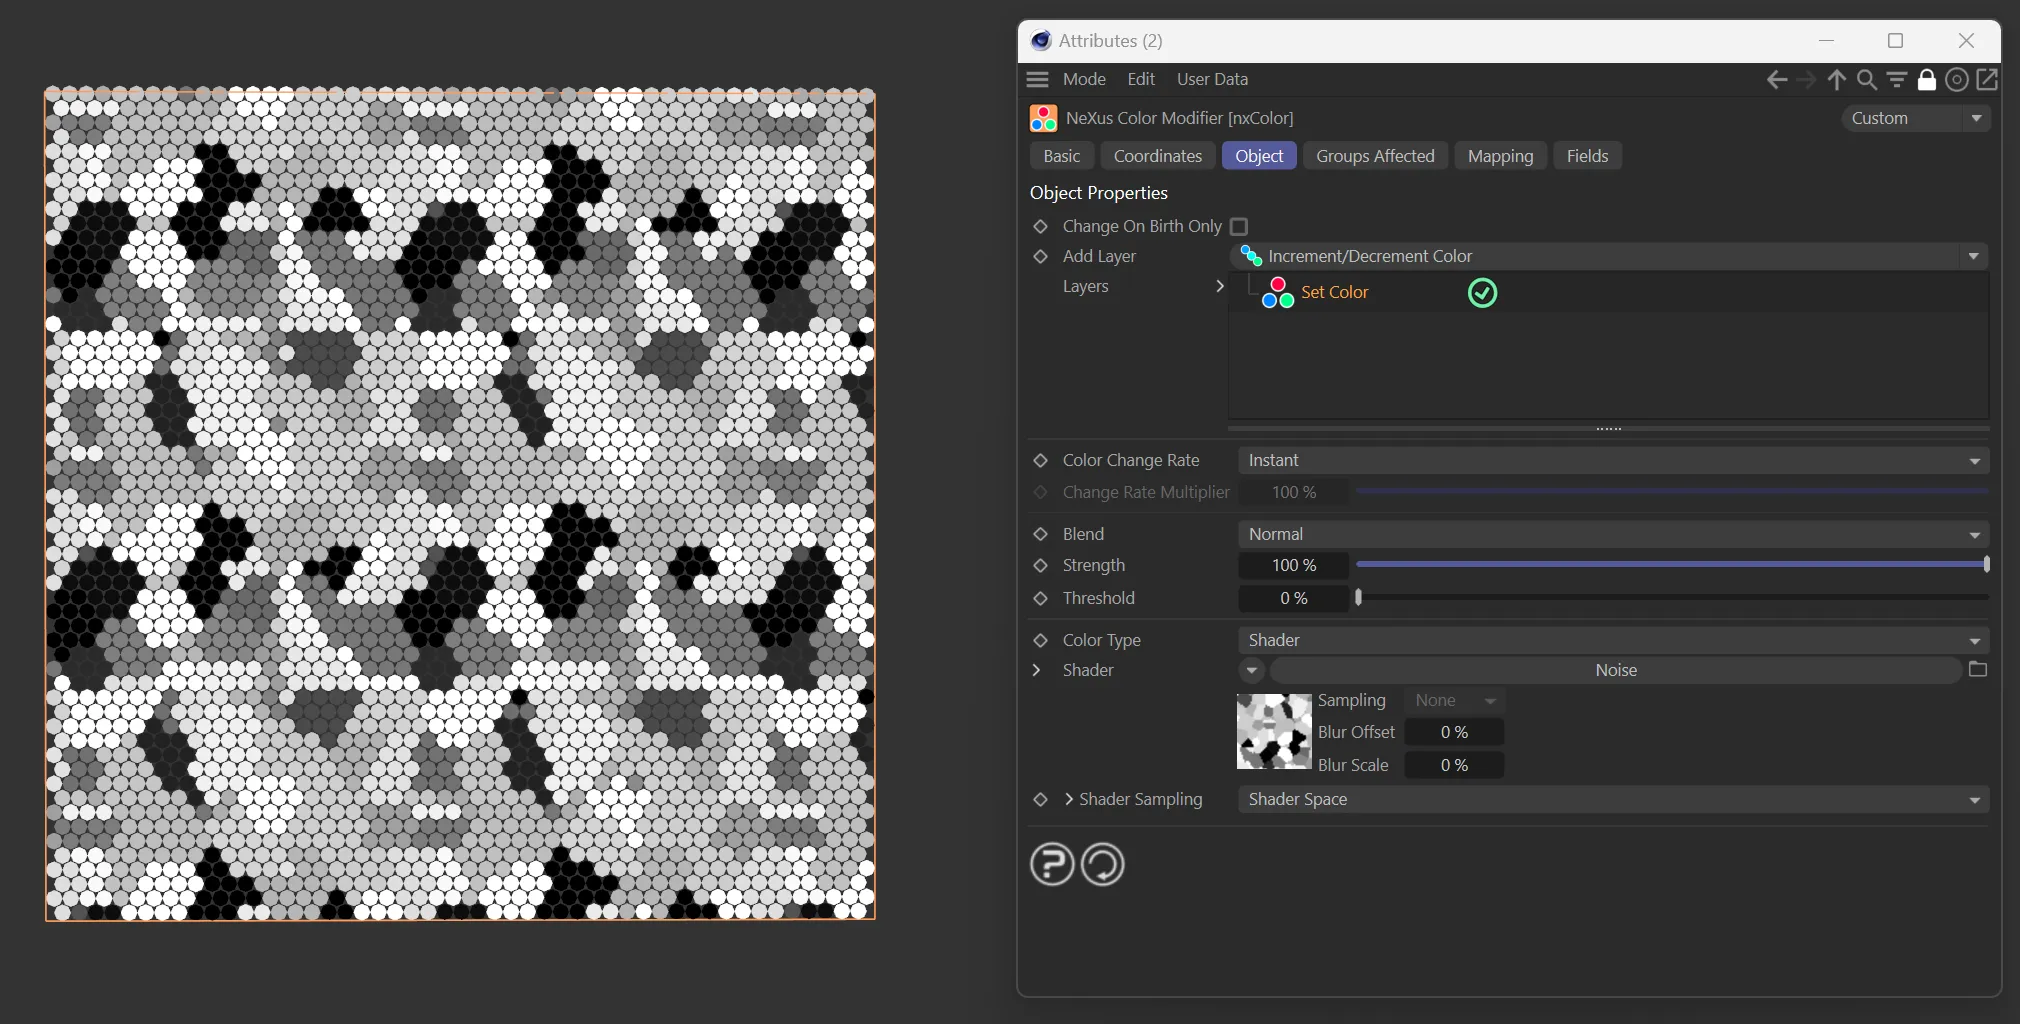
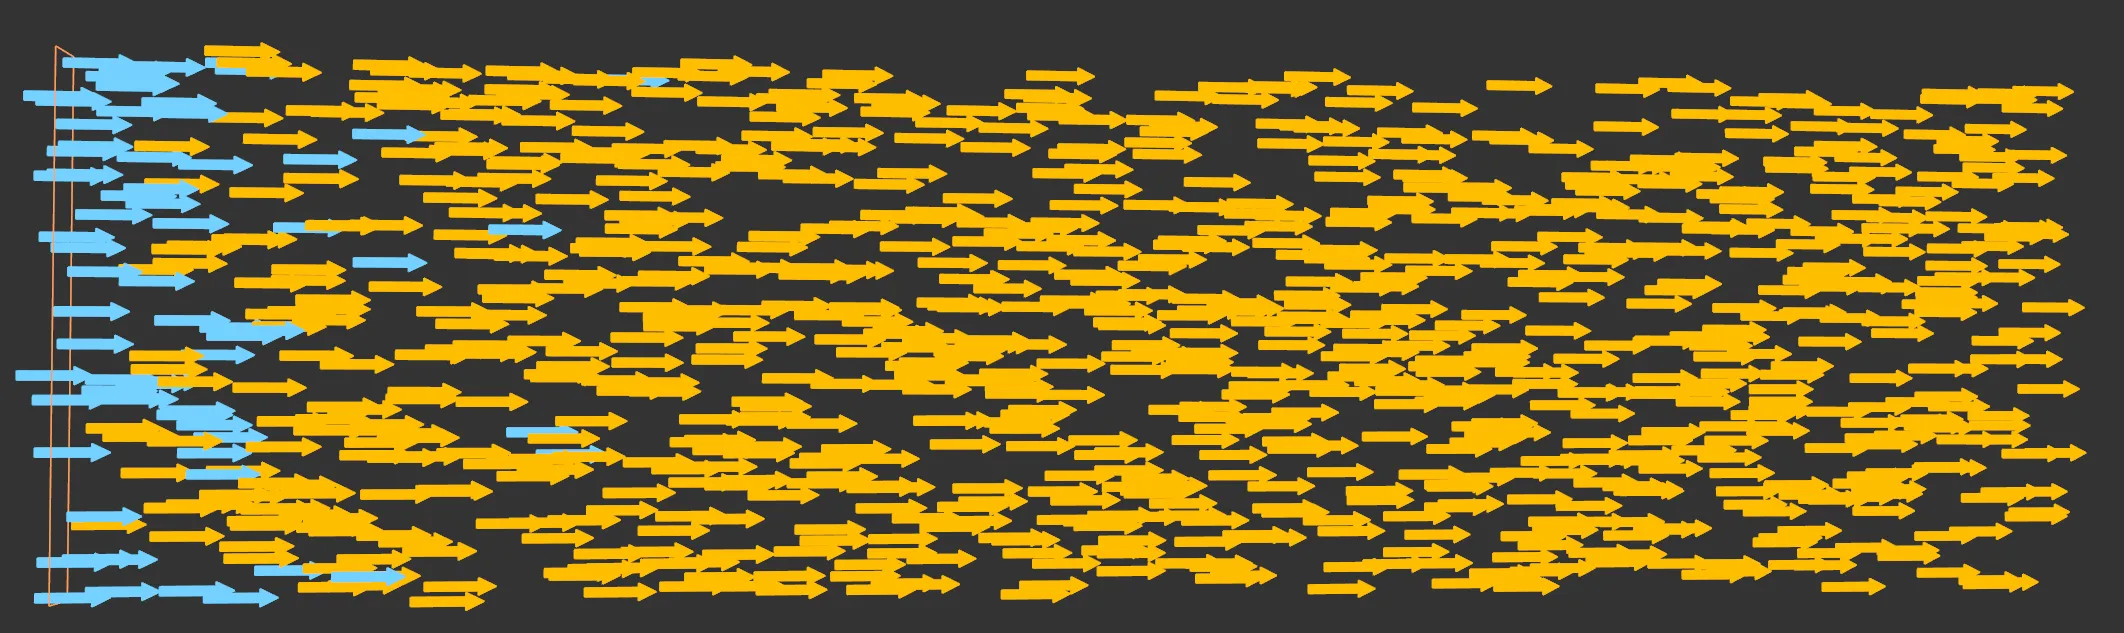
The xpEmitter has the same setting as above, in this second image, but the Set Color layer has a Color Type of Shader, using a Cinema4D noise shader.
Color Type
Section titled “Color Type”Dropdown option to use a fixed Color or a Shader.
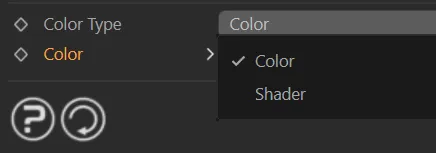
Color Type menu options.
A fixed color to change to.

Color Type and Color parameter settings.
Shader
Section titled “Shader”A shader to change color based on the position in the scene.

Shader menu parameter settings.
Increment/Decrement Color layer options
Section titled “Increment/Decrement Color layer options”In this mode, the modifier will change the color by a set amount using Red, Green and Blue Rate of Change (RGB) sliders
Red/Green/Blue Rate of Change
Section titled “Red/Green/Blue Rate of Change”The amount to change the red, green or blue value, each time.
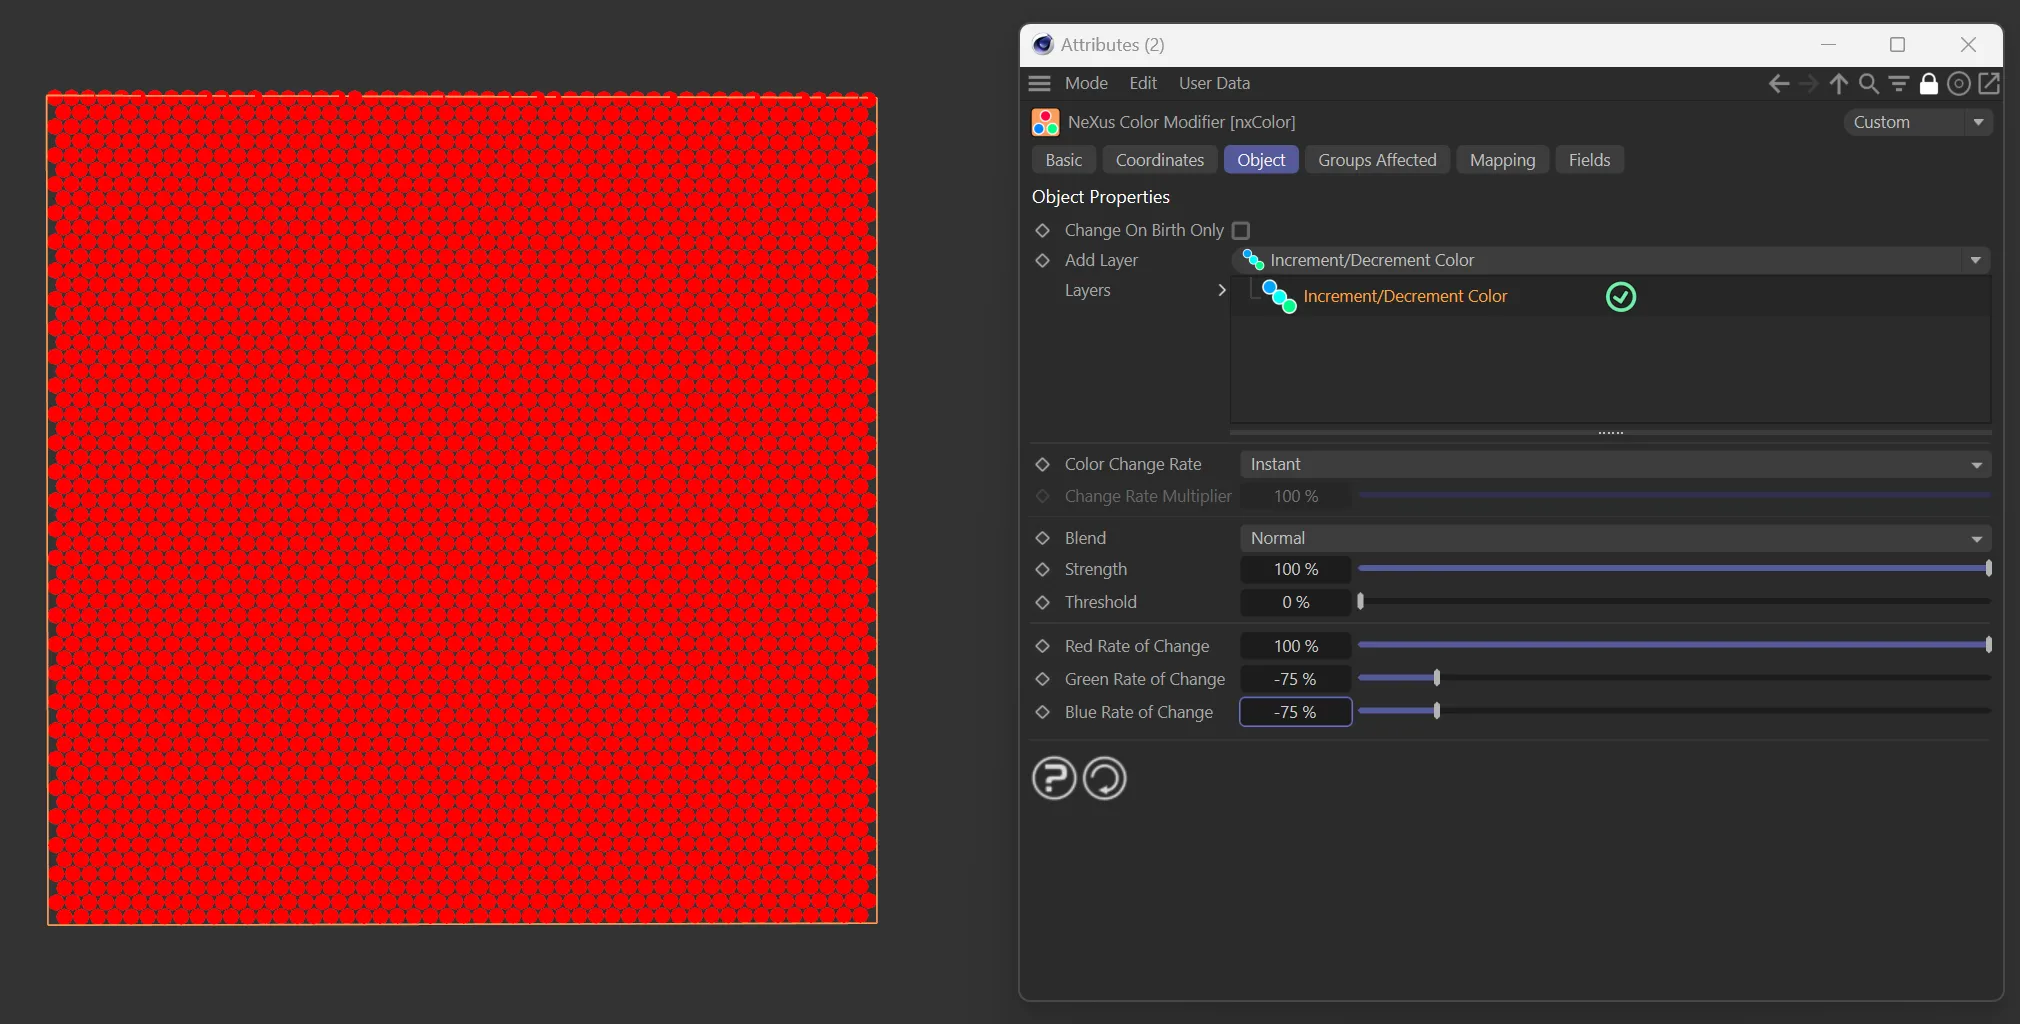
RGB values changed to change the particle color to red.
Use Texture Tag layer options
Section titled “Use Texture Tag layer options”This layer uses the data from a texture tag dragged into the link field.
There are two important steps required for this to work:
- First, the particles must be emitted from an object with UV data.
- Then, in the emitter’s Extended Data tab, the UV Emission Data checkbox must be enabled.
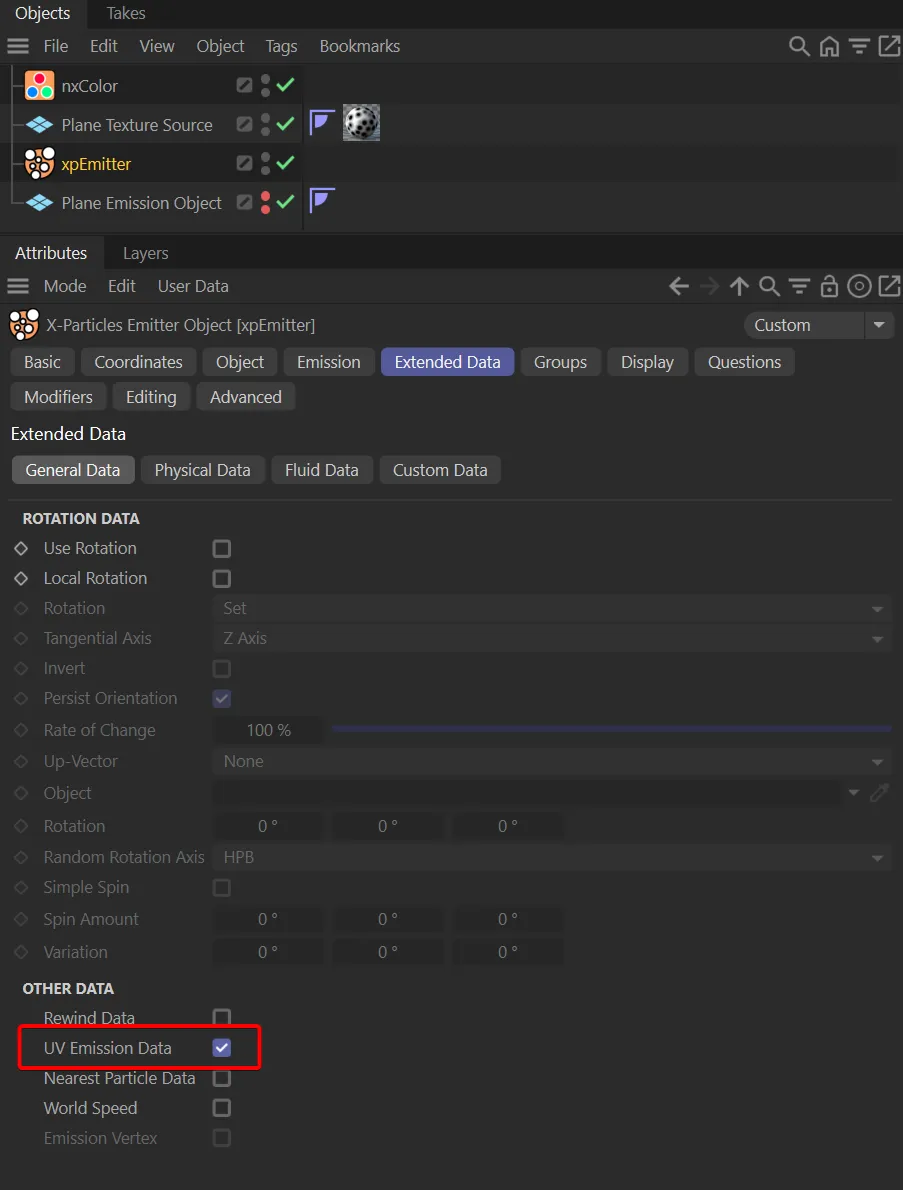
UV Emission Data enabled in the xpEmitter’s Extended Data tab.

Texture tag sampling from a Cinema4D noise texture, applied to a Plane.
Texture Tag
Section titled “Texture Tag”Link to a texture tag to use.
Channel
Section titled “Channel”Channel of the texture to use.
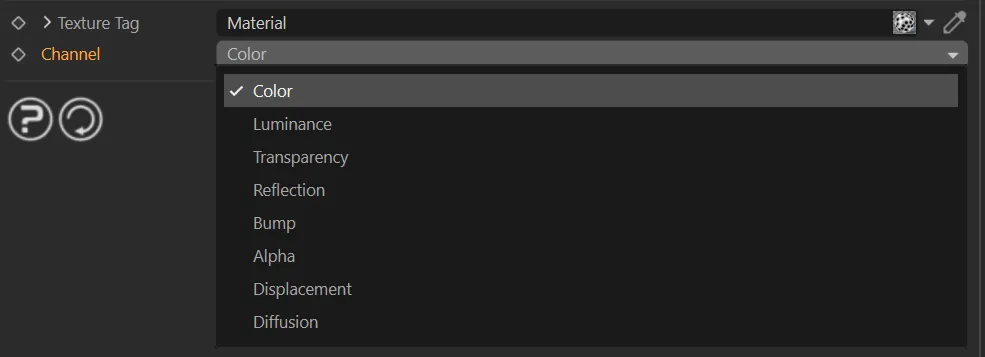
Channel drop-down menu options.
Resolution
Section titled “Resolution”Set as 128, by default, this dropdown box changes the resolution of the sampling of the texture/shader.
The available presets are: 64, 128, 256, 512, 1024 and 2048.

Resolution parameter options.
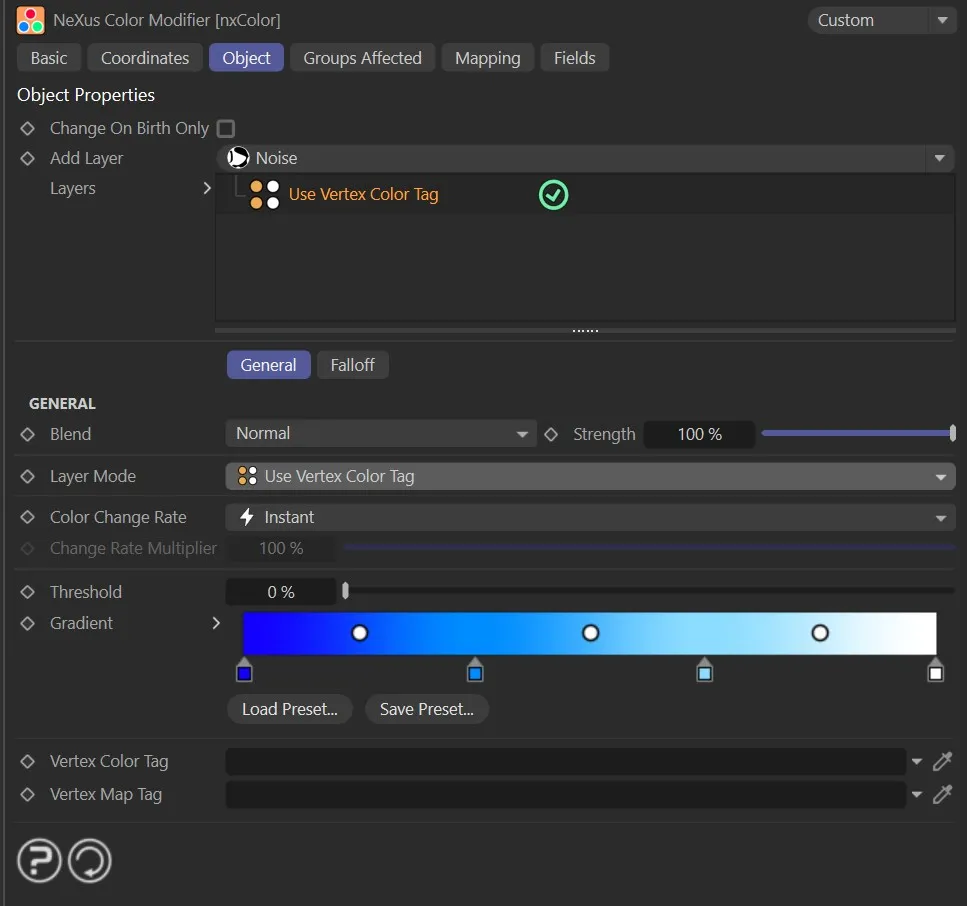
Use Vertex Color Tag layer options
Section titled “Use Vertex Color Tag layer options”This layer uses vertex color data from a vertex color tag to color particles, remapping the values through a gradient.
Use Vertex Color Tag layer, sampling a vertex color tag and remapping it to a gradient.
Vertex Color Tag
Section titled “Vertex Color Tag”Link to a vertex color tag to use.
Vertex Map Tag
Section titled “Vertex Map Tag”An optional vertex map tag to mask which particles receive the layer’s effect.
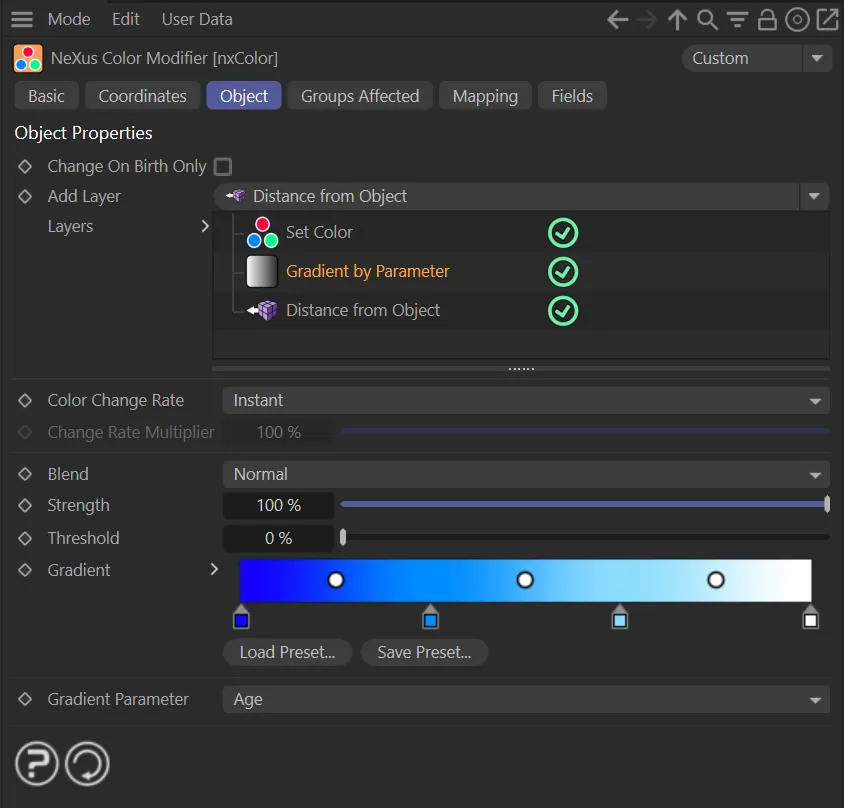
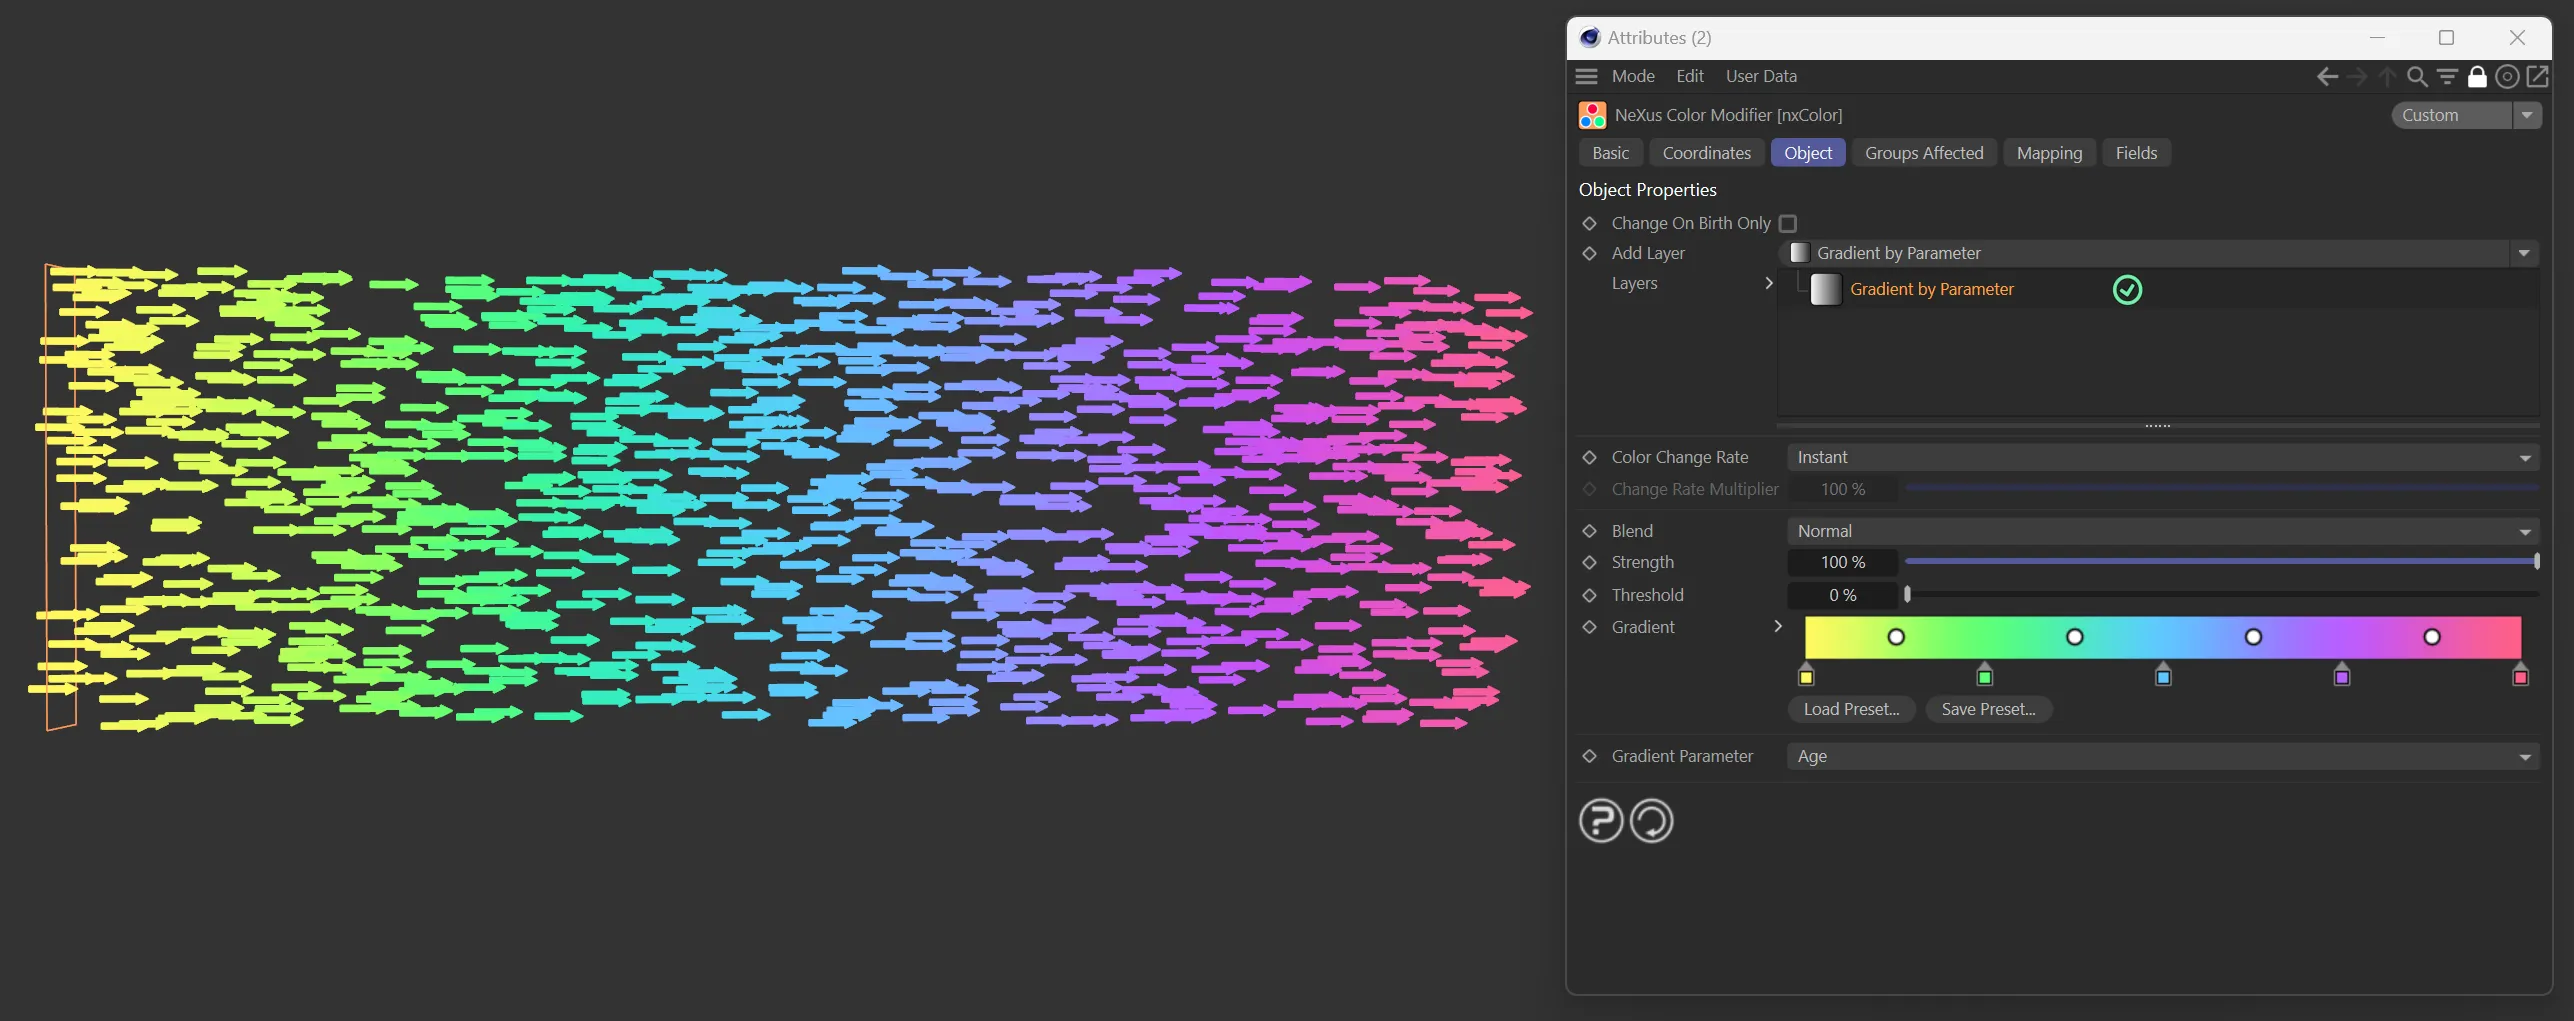
Gradient by Parameter layer options
Section titled “Gradient by Parameter layer options”This layer uses particle data to set the color based on certain paramaters.
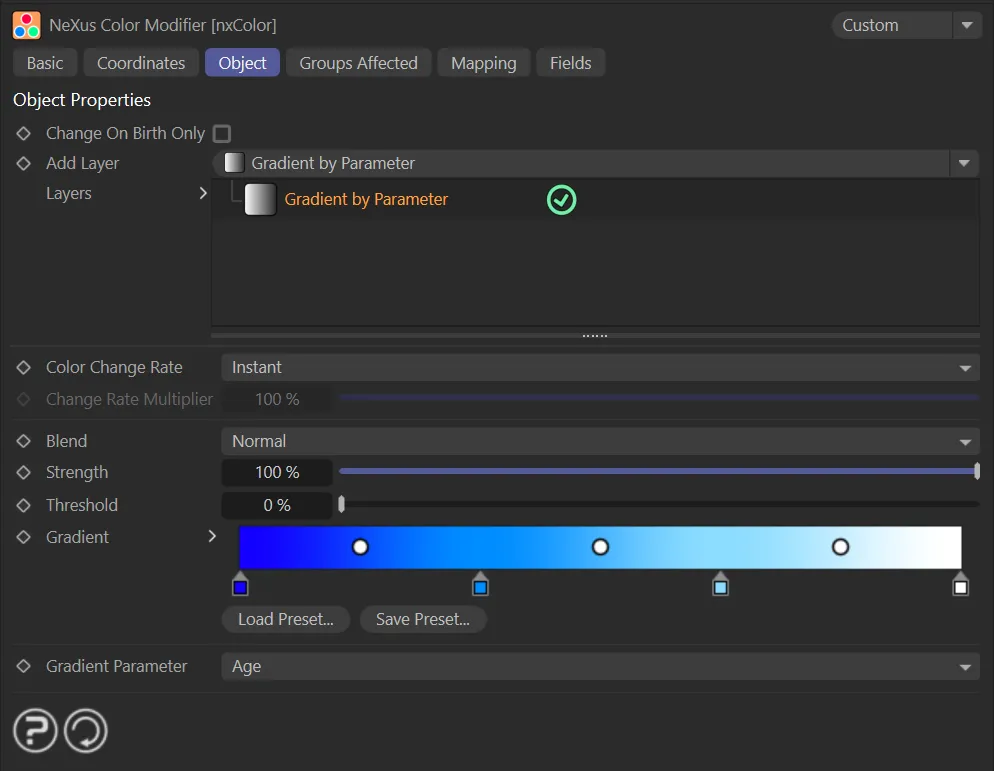
Default setting of particle Age in the Gradient Parameter.
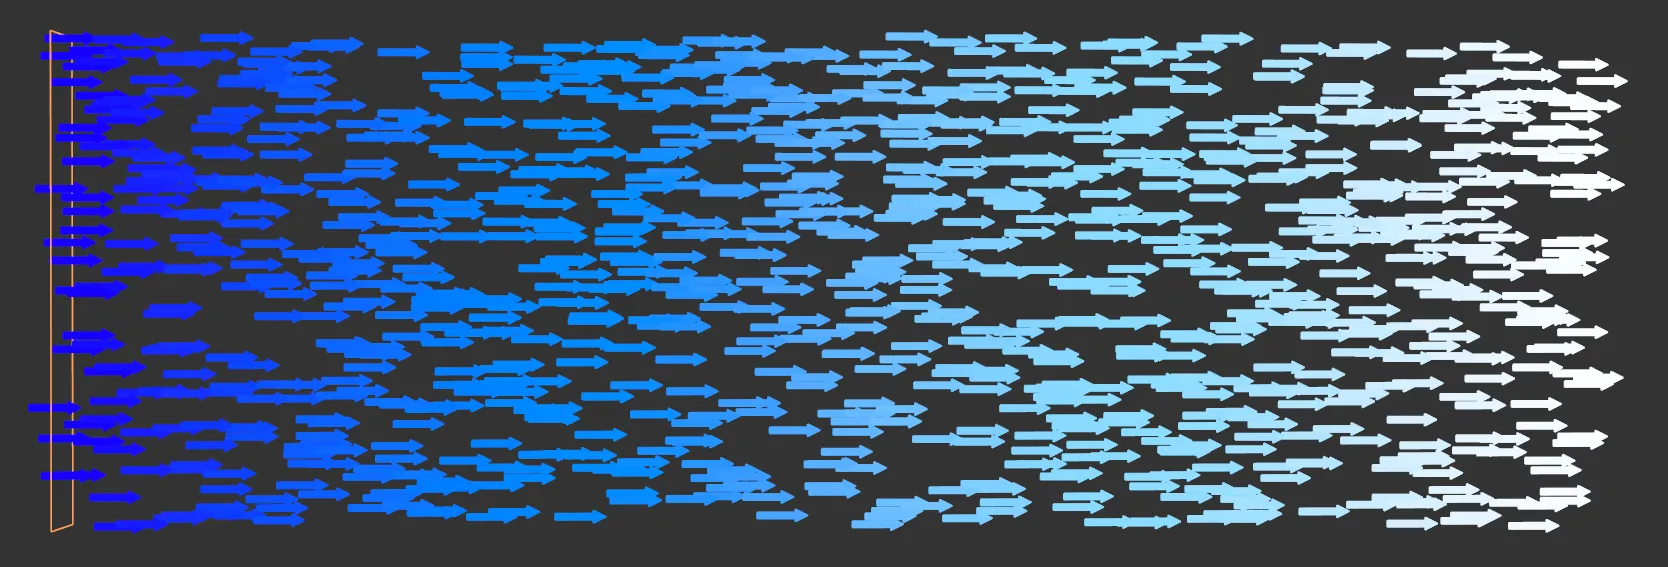
The results from the above settings.
Gradient
Section titled “Gradient”Color gradient to be used with each mode.
In this image, a different Gradient setting has been selected.
Gradient Parameter
Section titled “Gradient Parameter”The list of options to be used as the parameter for setting the color gradient: Age, Direction, Distance Traveled, Density, Life, Mass, Radius, Speed, Field, Random, P-P Distance and Neighbor.
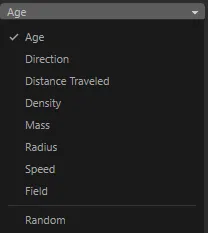
Gradient Parameter drop-down menu options.

Gradient Parameter set to Neighbor.
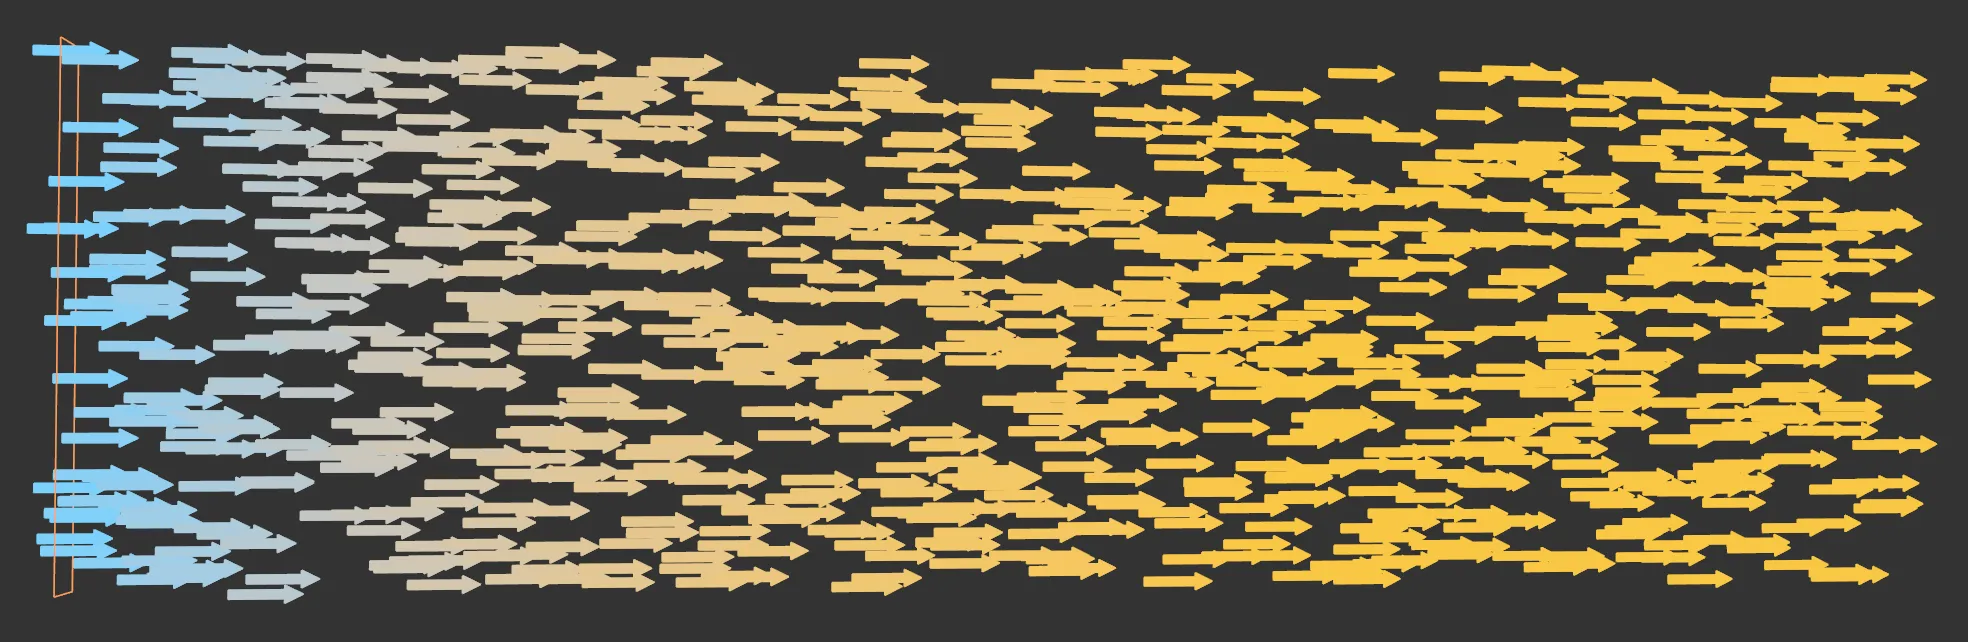
Time-Dependent layer options
Section titled “Time-Dependent layer options”This layer uses a gradient based on time to color the particles.
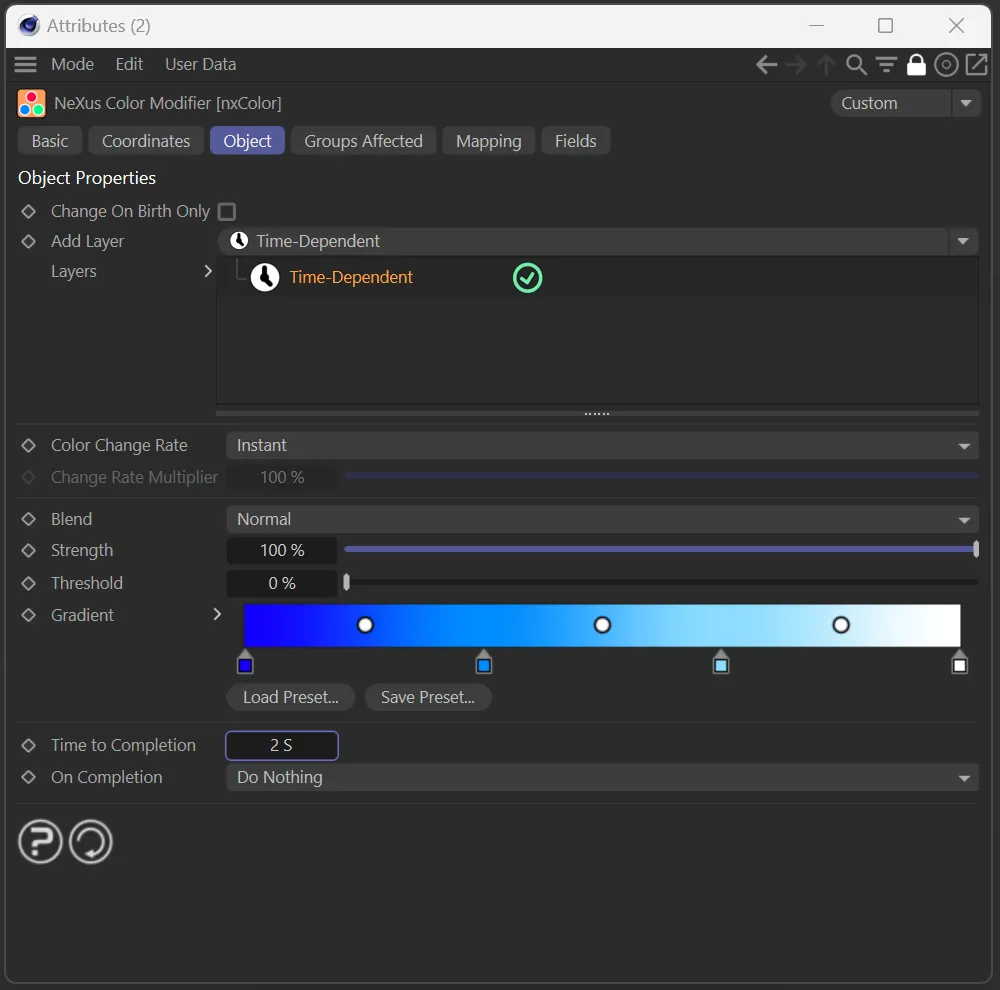
Time Dependent layer menu options.
Gradient
Section titled “Gradient”Color gradient to be used with each mode.

One of the preset Gradient color options available.
Time to Completion
Section titled “Time to Completion”A final time value acting as the end of the gradient.
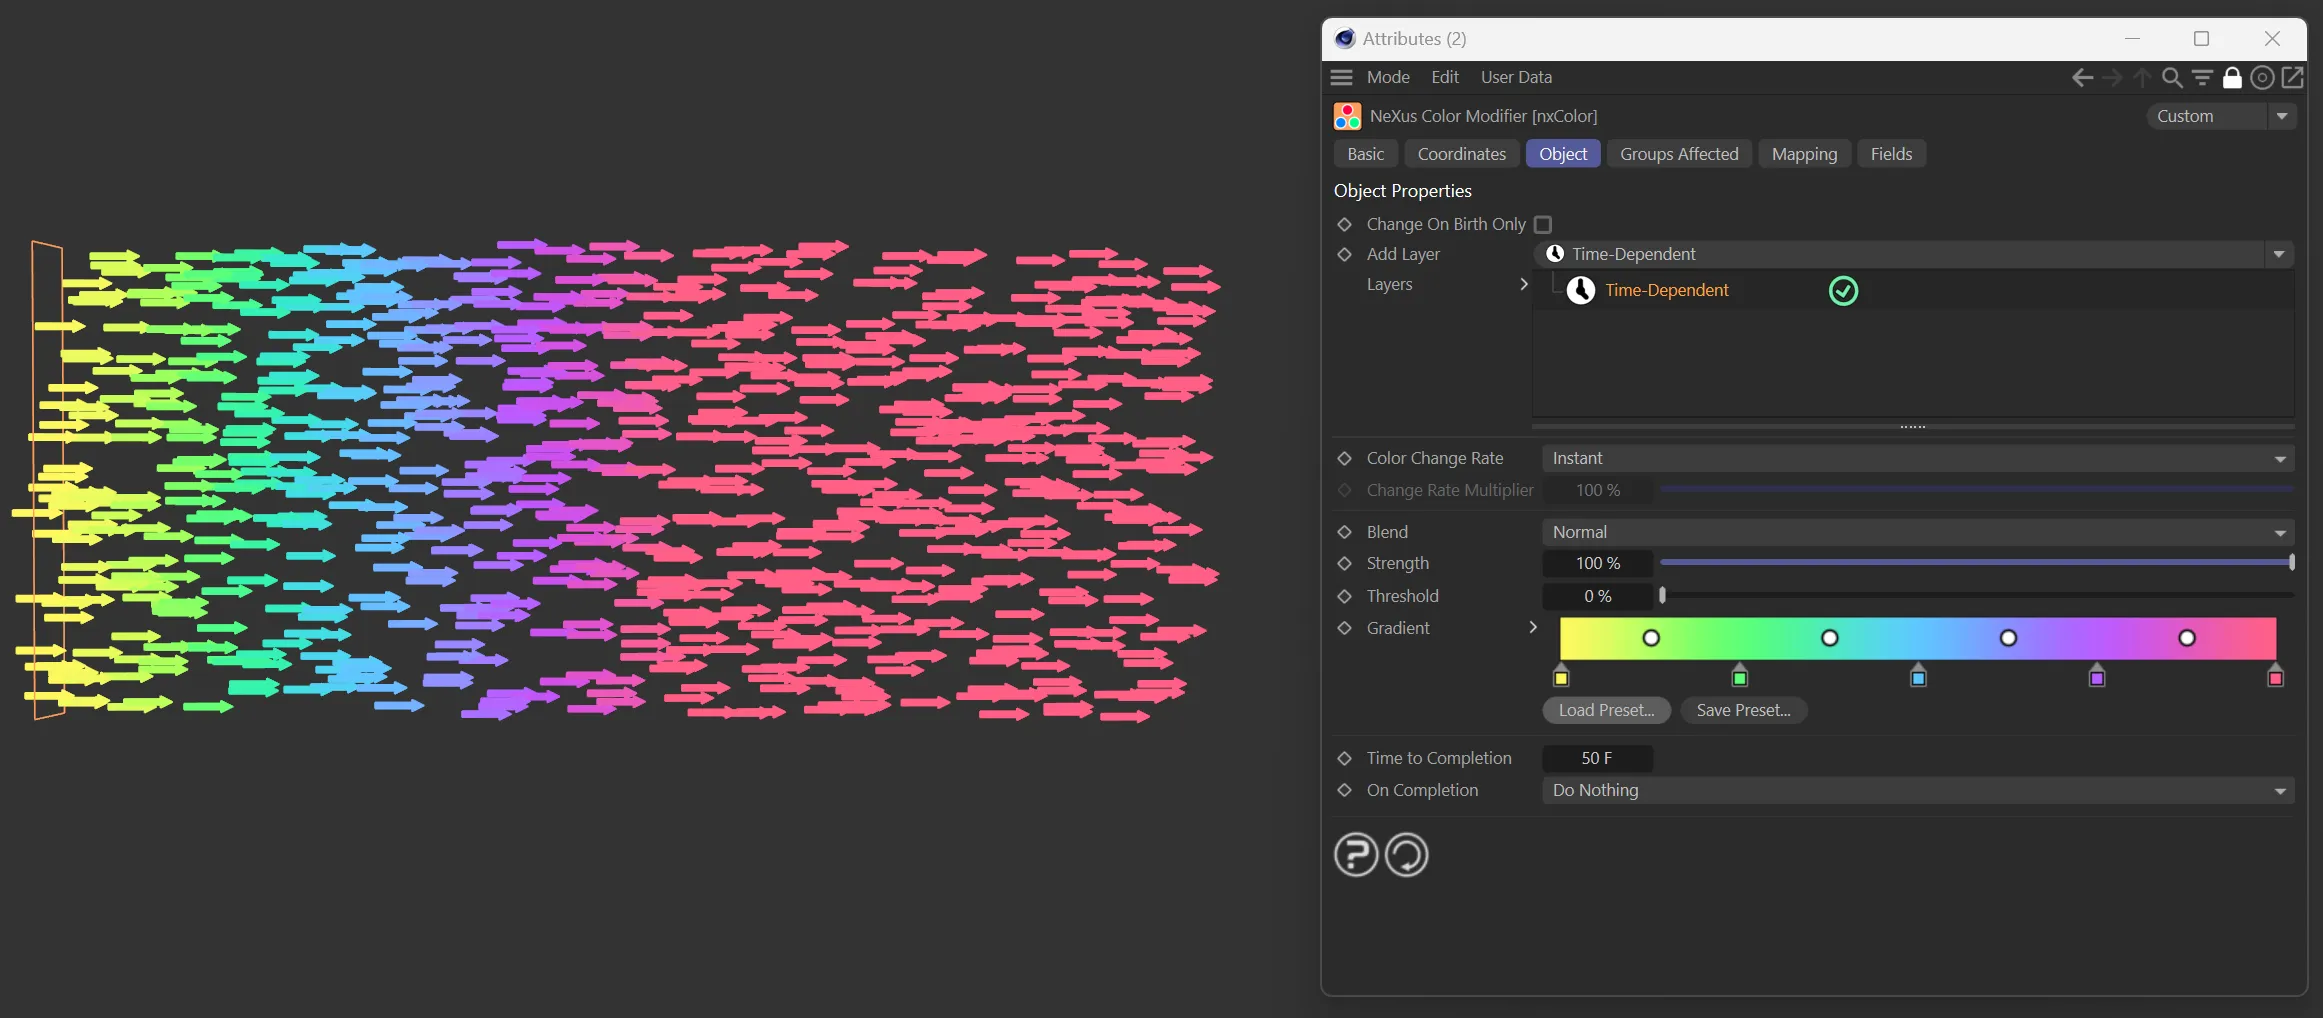
Time to Completion set to 50 frames.
On Completion
Section titled “On Completion”There are three options: Do Nothing, Wrap to Start and Reverse.
Do Nothing
Section titled “Do Nothing”After getting past the end of the gradient, nothing happens.
Wrap to Start
Section titled “Wrap to Start”After getting past the end of the gradient, start again from the beginning.
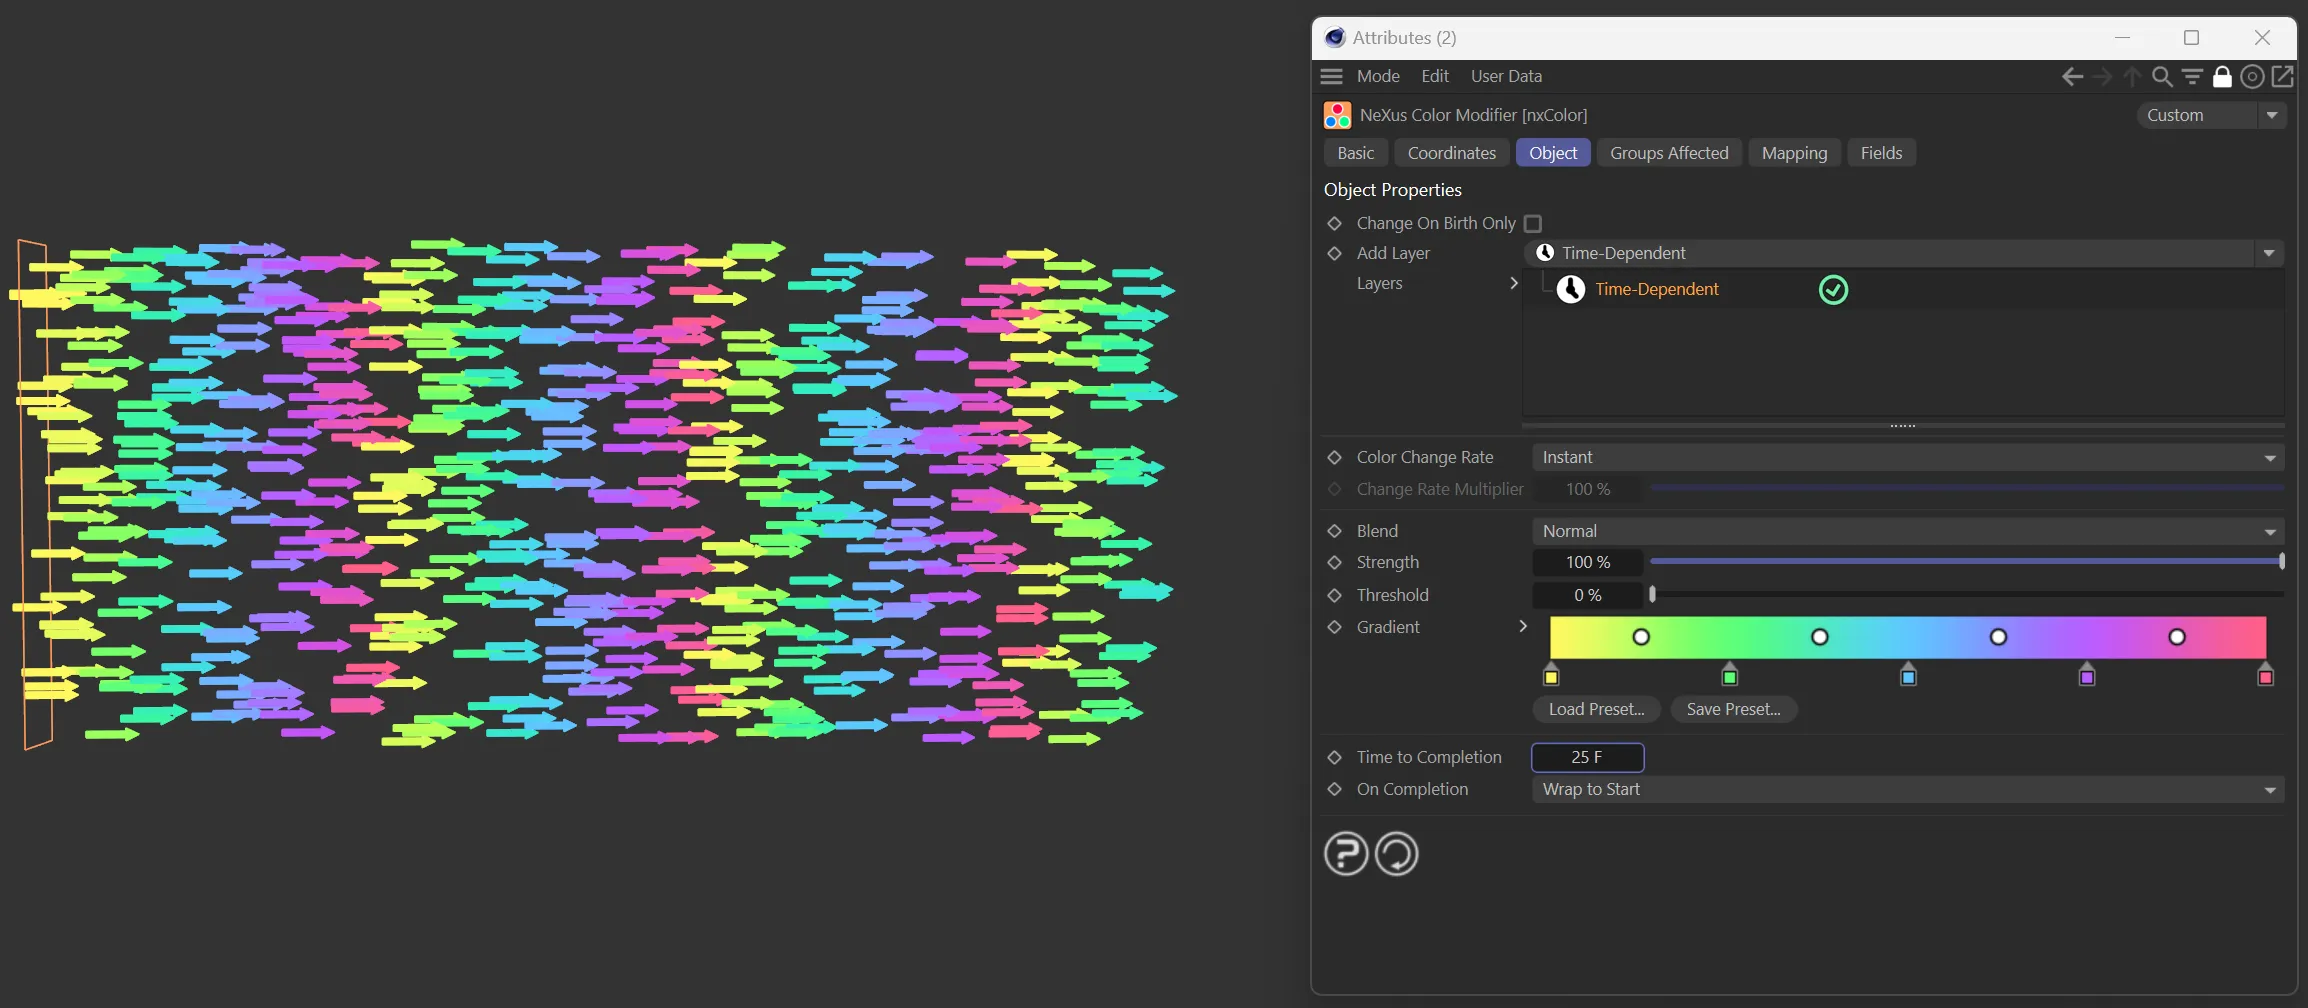
In this image, the On Completion parameter is set to Wrap to Start, with Time to Completion set to 25 frames.
Reverse
Section titled “Reverse”After getting past the end of the gradient, reverse back to the beginning.
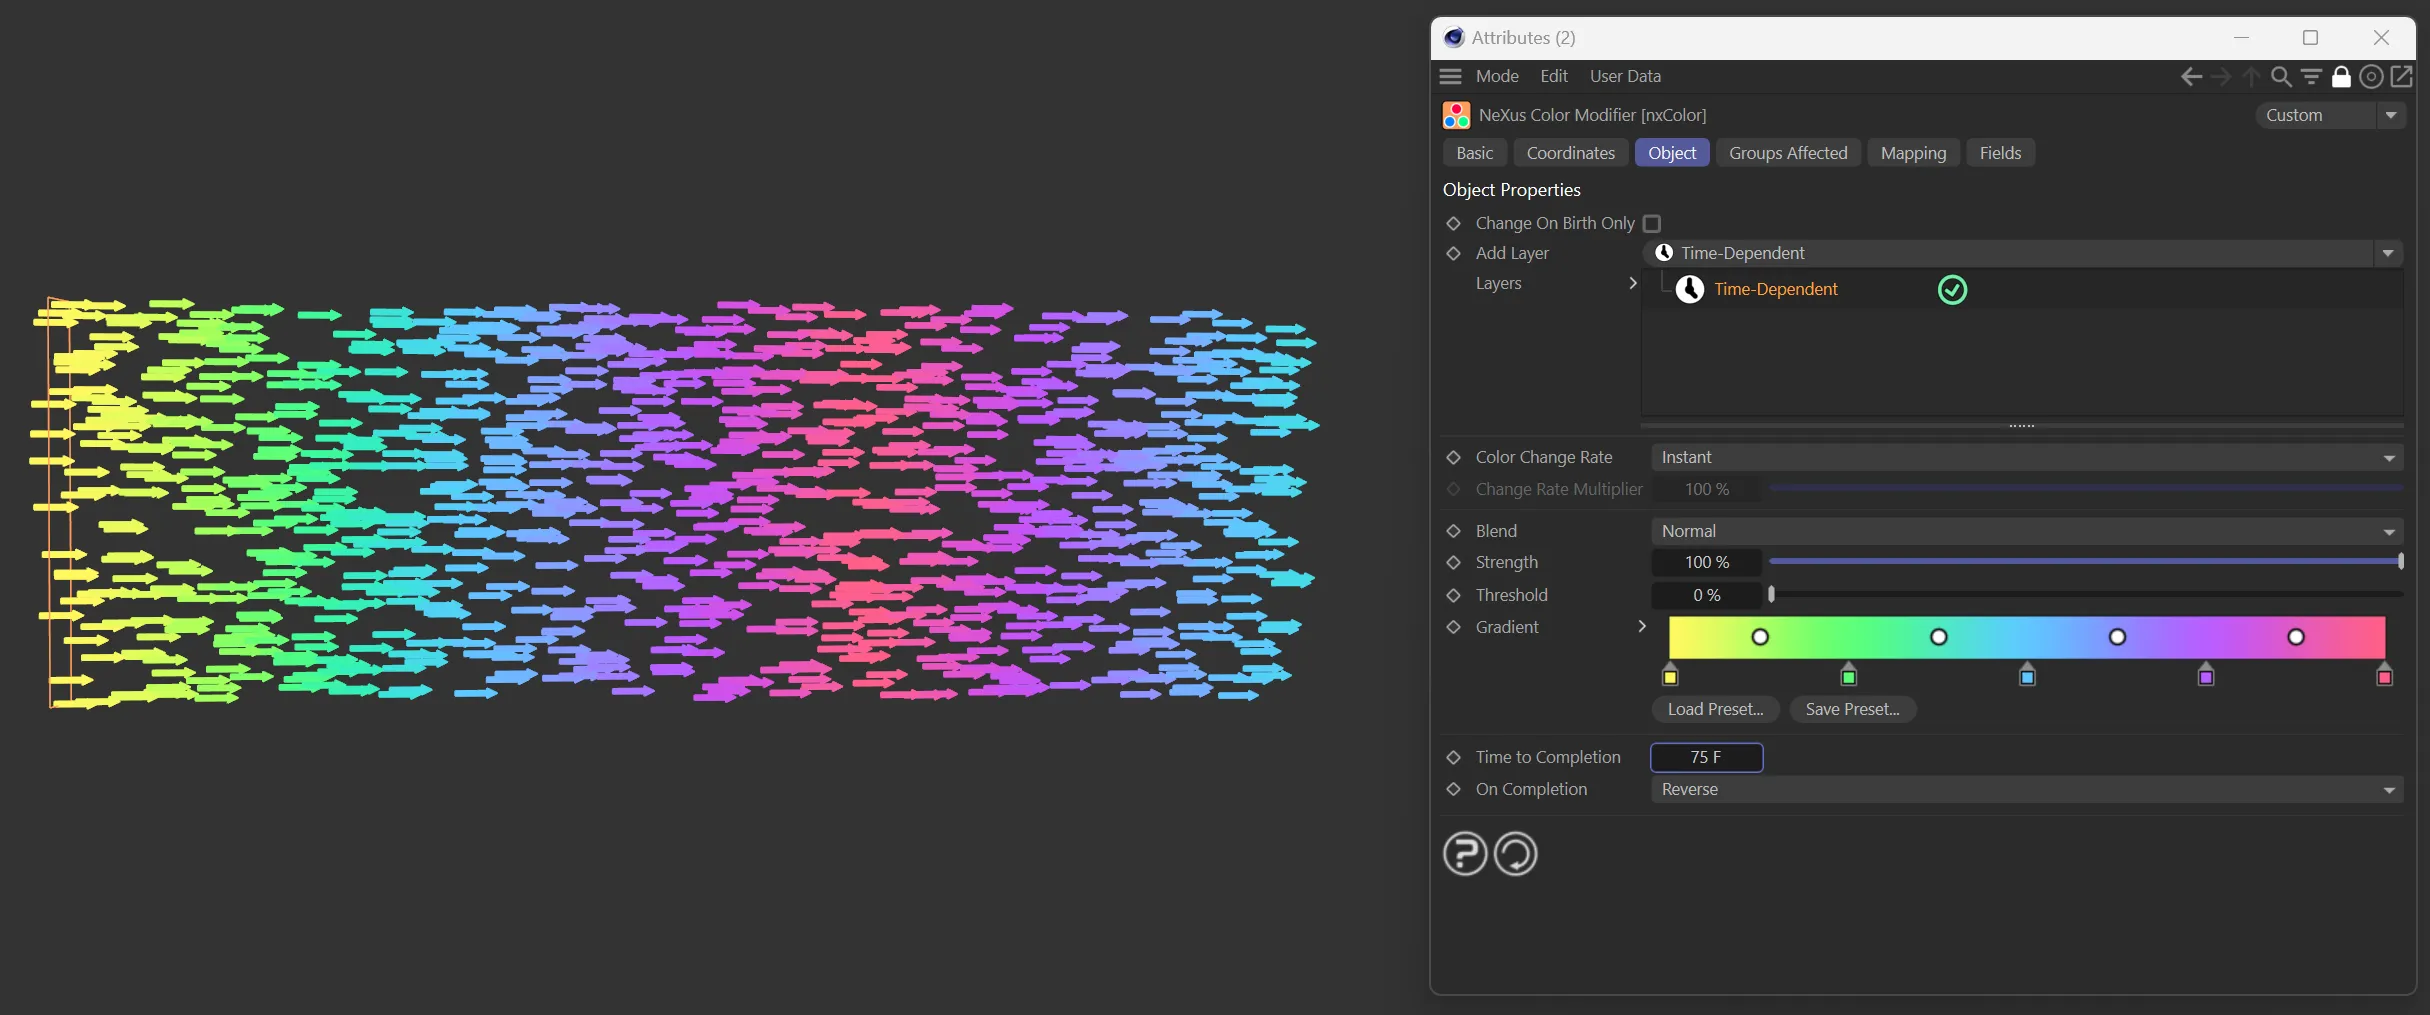
Here, On Completion is now changed to Reverse, once the Time to Completion of 75 frames is reached.
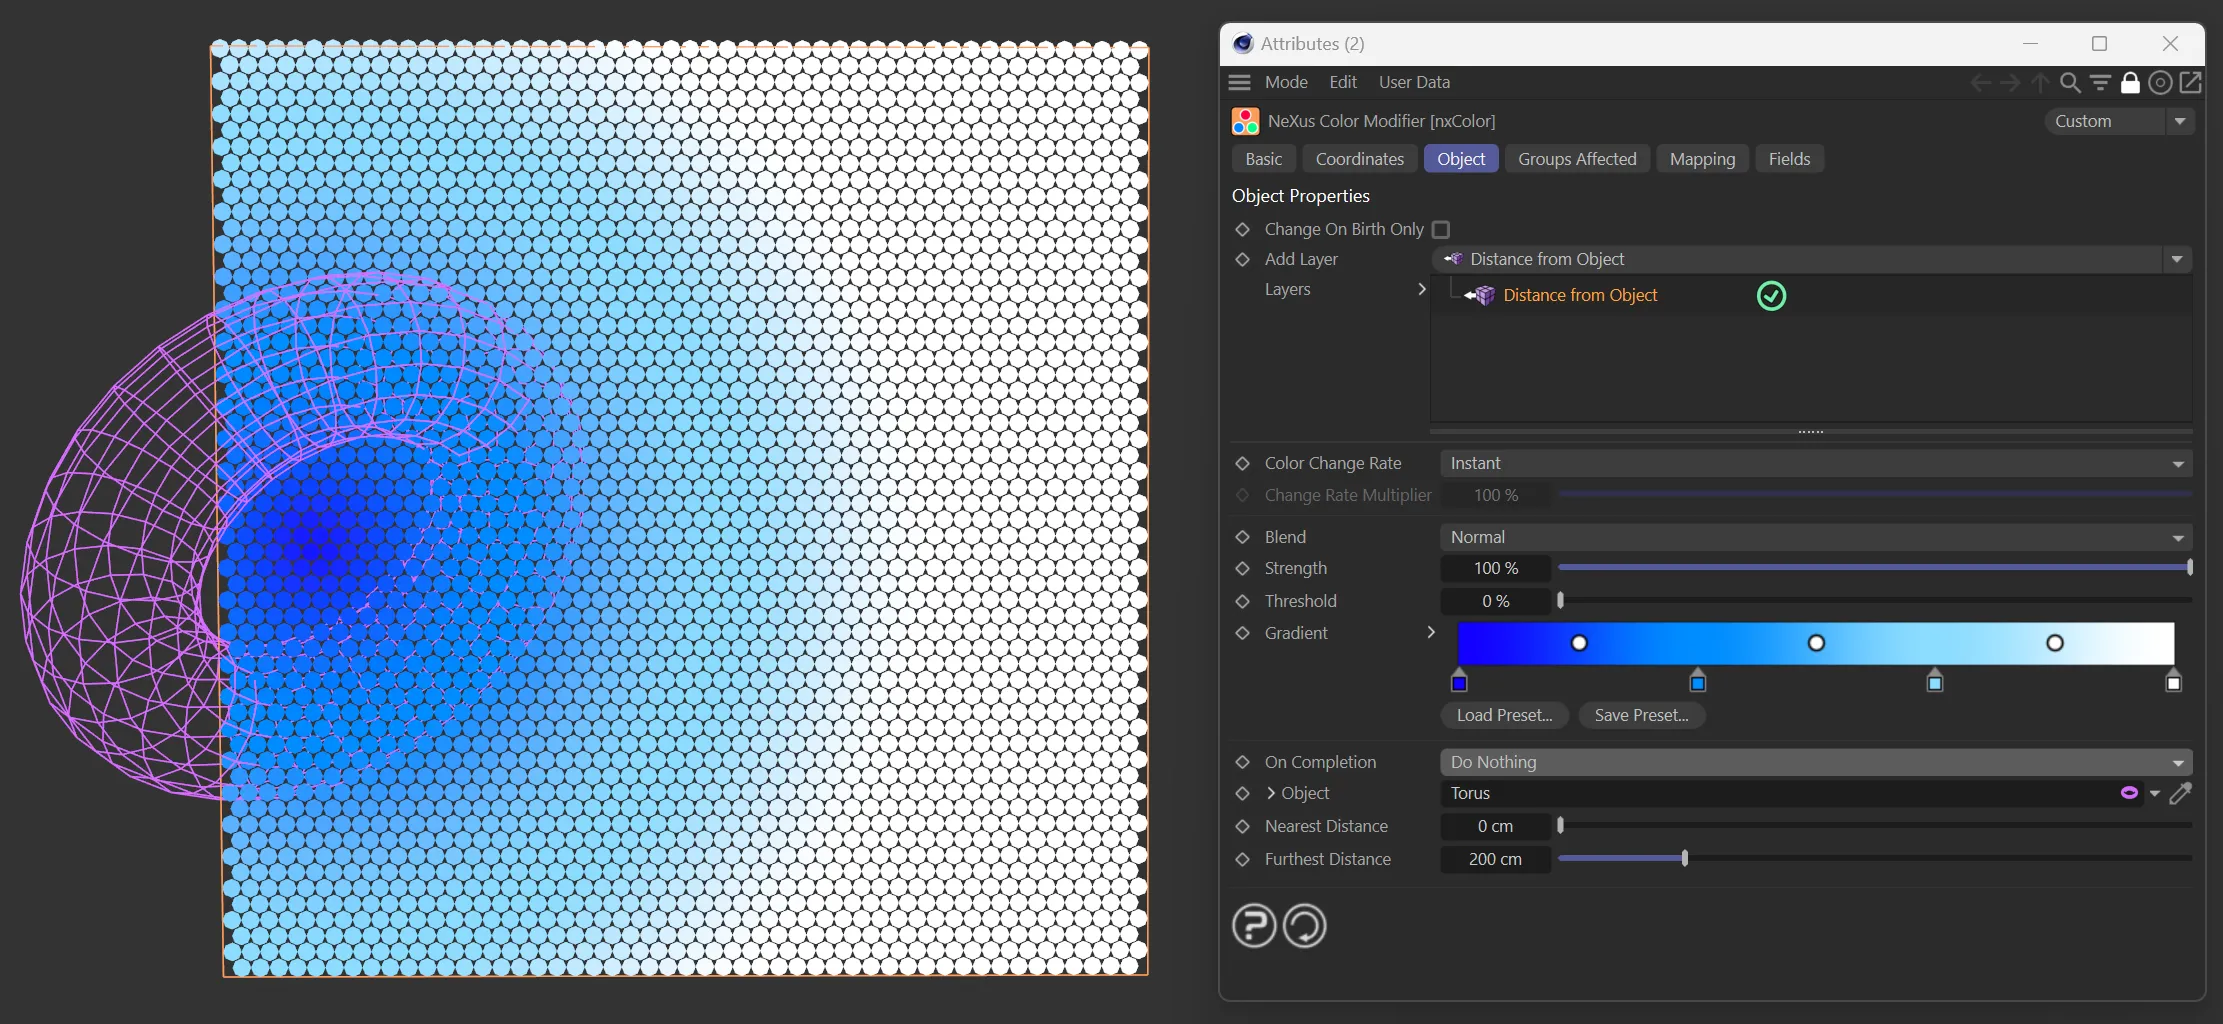
Distance from Object layer options
Section titled “Distance from Object layer options”This layer takes an input object and maps the gradient based on the distance from the object’s origin.
Distance from Object layer menu options.
Gradient
Section titled “Gradient”Color gradient to be used with each mode.
On Completion
Section titled “On Completion”There are three options: Do Nothing, Wrap to Start and Reverse.
Do Nothing
Section titled “Do Nothing”After getting past the end of the gradient, nothing happens.
Wrap to Start
Section titled “Wrap to Start”After getting past the end of the gradient, start again from the beginning.
Reverse
Section titled “Reverse”After getting past the end of the gradient, reverse back to the beginning.
Object
Section titled “Object”Object to be used as the distance measurement.
Nearest Distance
Section titled “Nearest Distance”Distance acts as the beginning of the gradient.
Furthest Distance
Section titled “Furthest Distance”Distance acts as the end of the gradient.
Distance from Camera layer options
Section titled “Distance from Camera layer options”This mode uses a camera to color the particles based on the gradient.

Distance from Camera layer menu options.
Gradient
Section titled “Gradient”Color gradient to be used with each mode.
On Completion
Section titled “On Completion”There are three options: Do Nothing, Wrap to Start and Reverse.
Do Nothing
Section titled “Do Nothing”After getting past the end of the gradient, nothing happens.
Wrap to Start
Section titled “Wrap to Start”After getting past the end of the gradient, start again from the beginning.
Reverse
Section titled “Reverse”After getting past the end of the gradient, reverse back to the beginning.
Nearest Distance
Section titled “Nearest Distance”Distance acts as the beginning of the gradient.
Furthest Distance
Section titled “Furthest Distance”Distance acts as the end of the gradient.
Noise layer options
Section titled “Noise layer options”This layer uses a procedural noise field to color the particles.
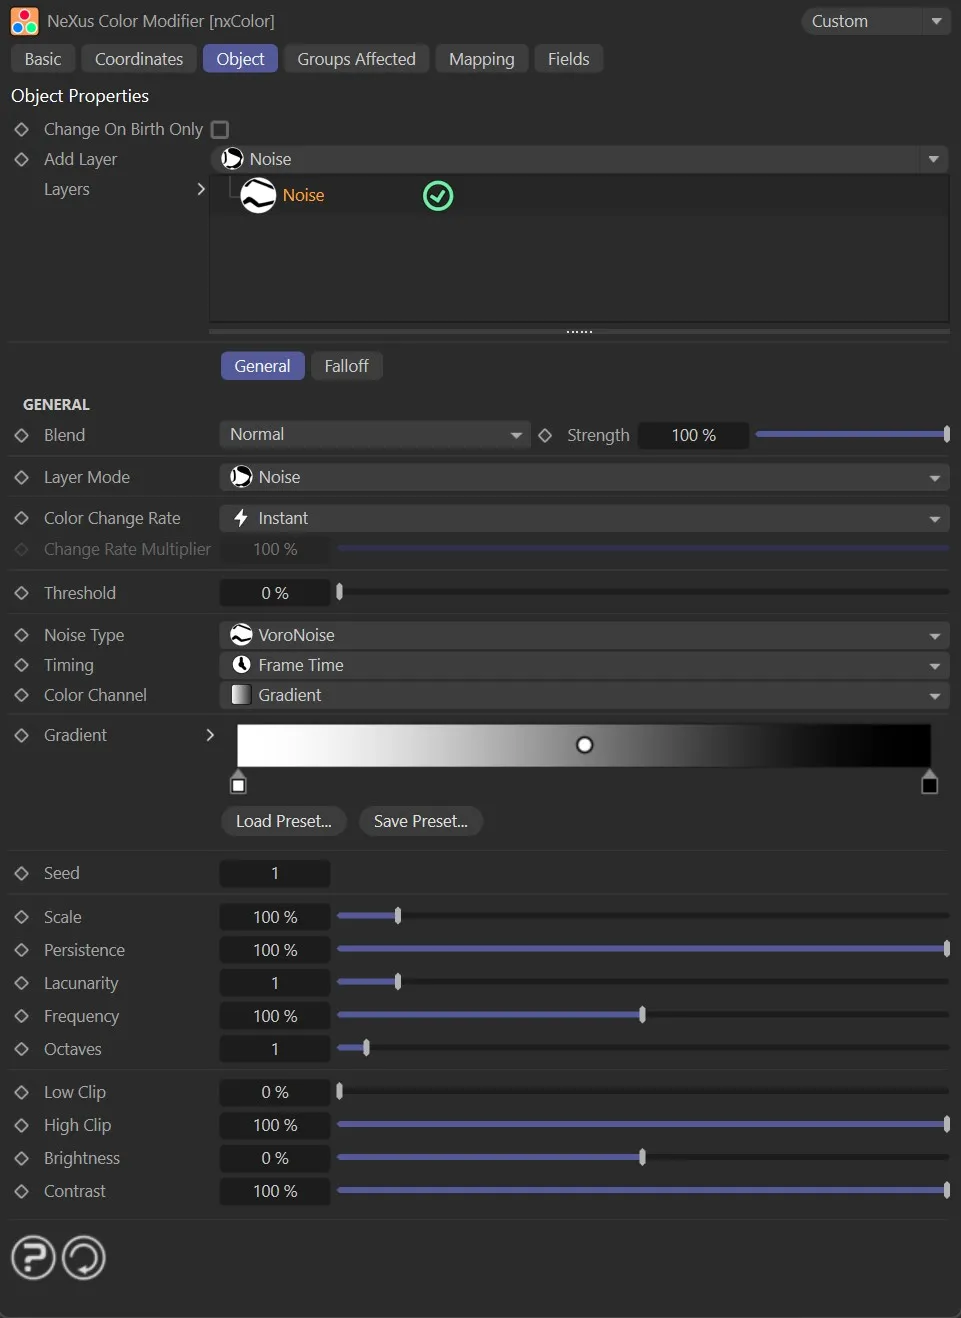
Noise layer options.
Noise Type
Section titled “Noise Type”The type of noise algorithm used.
The options are: Simplex, Curl, Turbulence, Wavy Turbulence, VoroNoise, FBM and Cubic.
Timing
Section titled “Timing”Controls when the noise field is sampled.
Set as Frame Time, by default.
The alternative is Particle Age.
- Frame Time: the noise value is sampled based on the current scene frame
- Particle Age: the noise value is sampled continuously based on particle age
Color Channel
Section titled “Color Channel”Controls how the noise values are mapped to color.
Set as Gradient, by default.
The alternative is Noise.
- Gradient: the noise value drives the position along the Gradient
- Noise: the noise field generates color directly from RGB noise
Gradient
Section titled “Gradient”Color gradient mapped across the noise field values.
Available when Color Channel is set to Gradient.
Randomises the noise pattern while keeping all other settings the same.
Changing the seed produces a different noise result without altering any other parameter.
The spatial scale of the noise field.
Persistence
Section titled “Persistence”Controls how much each successive octave contributes to the final noise value.
Lacunarity
Section titled “Lacunarity”Controls the frequency multiplier between successive octaves.
Frequency
Section titled “Frequency”The base frequency of the noise.
Octaves
Section titled “Octaves”The number of noise layers stacked together.
Low Clip
Section titled “Low Clip”Clips the noise output below this value.
High Clip
Section titled “High Clip”Clips the noise output above this value.
Brightness
Section titled “Brightness”Adjusts the brightness of the noise output.
Contrast
Section titled “Contrast”Adjusts the contrast of the noise output.
Groups Affected tab
Section titled “Groups Affected tab”Groups
Section titled “Groups”To specify the group, drag and drop the desired Group object into this field.
This setting is useful if you want to ensure that the spawned particles are, or are not, affected by nxColor.
Mapping tab
Section titled “Mapping tab”The modifier’s settings can be mapped to particle data.
Use the dedicated manual page, below, for instructions on how this works.
Fields tab
Section titled “Fields tab”You can use the Fields options to control where nxColor operates.
Copyright © 2026 INSYDIUM LTD. All Rights Reserved.