nxFluids - PBD solver parameters
Overview Video
Section titled “Overview Video”The PBD (Position Based Dynamics) particle fluid simulation solver can be used along with other modifiers and dynamics objects, if you need small-scale, fast simulation.
Solver settings
Section titled “Solver settings”Smoothing Radius
Section titled “Smoothing Radius”Blends each particle’s fluid properties with neighbouring particles.
At higher values, particles will influence more surrounding particles and animations will be smoother and less frenetic.
At lower values, particles will influence less of the surrounding particles, resulting in a much more choppy, fine-detailed fluid.
Animation to demonstrate increasing the Smoothing Radius from 100% to 200%, resulting in less clumping and a smoother liquid surface.
Substeps
Section titled “Substeps”The numbers of steps per frame being solved.
Set at 3, by default, increasing this will make the solve more accurate.
This may be necessary for scenes with very fast-moving particles.
This animation shows a comparison of Substeps strengths, with 1 on the left and 10 on the right.
Min Density
Section titled “Min Density”By default, this is set to 1, which is the number of iterations, per step, needed to work out the fluid density.
Comparison animation with Min Density of 1 on the left and Min Density of 20 on the right.
Max Density
Section titled “Max Density”By default, this is set to 10, again the number of iterations, per step, being used to work out the fluid density.
The more iterations, the more accurate, but the longer the calculation will take, with an effect on the simulation time.
In this animation, on the left Max Density is set at 1 and on the right it is 20.
Density Compression
Section titled “Density Compression”The amount that the fluid is allowed to compress by, without having to use a further iteration to make it more accurate.
At higher percentages the solver will use fewer iterations.
At lower percentages the solver will use up towards the Max Density amount of iterations, again with an effect on the simulation time.
This animation compares Density Compression settings, with 100% on the left and 0 (zero) % on the right.
Check Density
Section titled “Check Density”Fluids are normally incompressible so have a constant density.
If this parameter is turned on, the density will be checked to ensure consistency in the particle stream, therefore with far less ‘blasting’.
The value used in the density check is found in the Max Density setting.
When new particles are introduced into the scene, if they have a fluid density value of more than this setting, then they will be killed, thereby controlling the pressure in the particle stream.
If the Check Density parameter is turned off, no check will be applied (it is off by default).
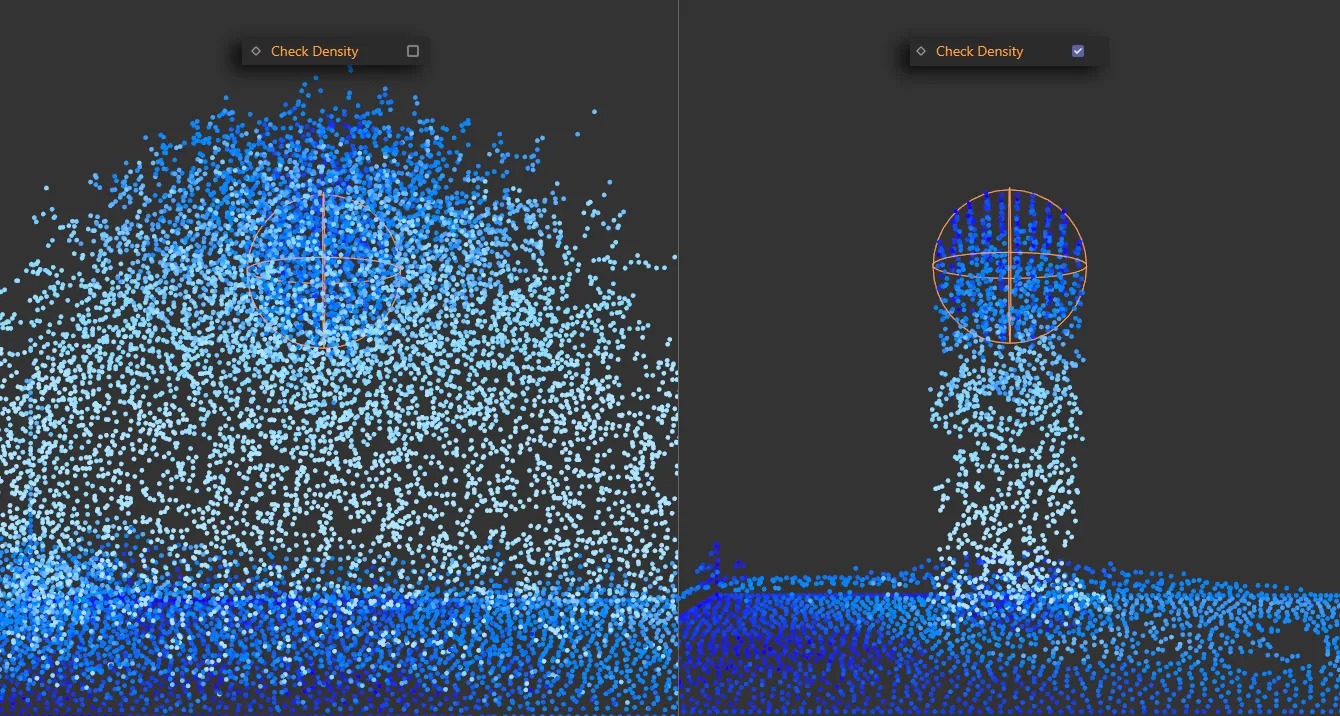
In this image, Check Density is disabled on the left and enabled on the right.
Max Density
Section titled “Max Density”The value to use when Check Density is on, to control the pressure in the particle stream.
Animation illustrating how increasing and decreasing the Max Density value controls the amount of generated particles.
Iterations
Section titled “Iterations”By default, this is set to 3.
This parameter helps to check the density values and can be increased to give greater accuracy but, again, this will have impact on the scene calculation speeds.
Comparison animation with Iterations of 1 on the left and 3 on the right.
Liquid settings
Section titled “Liquid settings”Viscosity
Section titled “Viscosity”Controls the levels of viscosity in the fluid.
There is an additional setting, which affects viscosity, to be found in the Cinema 4D Project settings, in the X-Particles tab.
Subframe Steps can be adjusted here to further fine-tune the scene.
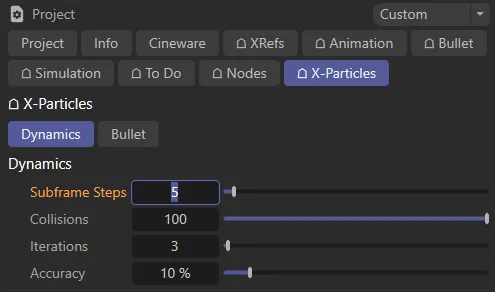
Subframe Steps setting in the X-Particles tab.
In this comparison animation, with Subframe Steps (in the Cinema 4D Project settings, above) set to 5, Viscosity is set at 0 (zero) % on the left and 100% on the right.
Vorticity
Section titled “Vorticity”This setting controls the swirling in the fluid.
Animation demonstrating raising the Vorticity value from 0 (zero) to 50%, to add more small scale motion to the water.
Attraction
Section titled “Attraction”Raising the Attraction level, from its default setting of 10%, will force particles together.
This can break up the liquid unless this is used alongside the Repulsion and Ext Pressure parameters, to keep a check on the separation of the fluids.
As a rule, it is prudent to keep the Repulsion value higher than the Attraction setting.
In addition, the external pressure acts as a binding agent, to keep the particles together as a fluid whole.
This animation shows the effect of raising the Attraction value from 0 (zero) to 89%, adding particle to particle attraction.
Repulsion
Section titled “Repulsion”Set at 20%, by default, this setting will force particles apart and should be used carefully alongside the Attraction and Ext Pressure parameters to ensure that the particles continue to behave as a fluid.
In this animation there is an increase of Repulsion from 0 (zero) to 30%.
Ext Pressure
Section titled “Ext Pressure”Ext Pressure is set at 10% by default and, as explained, acts as a binding agent to keep the fluid together, to keep the attraction and repulsion forces in check.
Animation demonstrating increasing and decreasing Ext Pressure by 10%.