Birth
Birth tab
Section titled “Birth tab”Overview Video
Section titled “Overview Video”For connections that are generated once, at particle birth.
Animation showing visible constraints connections (the yellow lines) in Custom mode.
Weight
Section titled “Weight”The Weight setting alters the influence each constraint type provides to the overall, global solution; here it relates to the birth constraints.
If you are only using one layer, this can be left at the default, 100%.
If you are combining different constraints in several layers, you could reduce this weight to lessen the effects of the connections and blend in other layers.
Only Born
Section titled “Only Born”If enabled, this only makes connections between particles born at the same time.
Demonstrating the enabling of the Only Born checkbox, during an animation.
Connection Limit
Section titled “Connection Limit”This is a limit on the number of connections each particle can make.
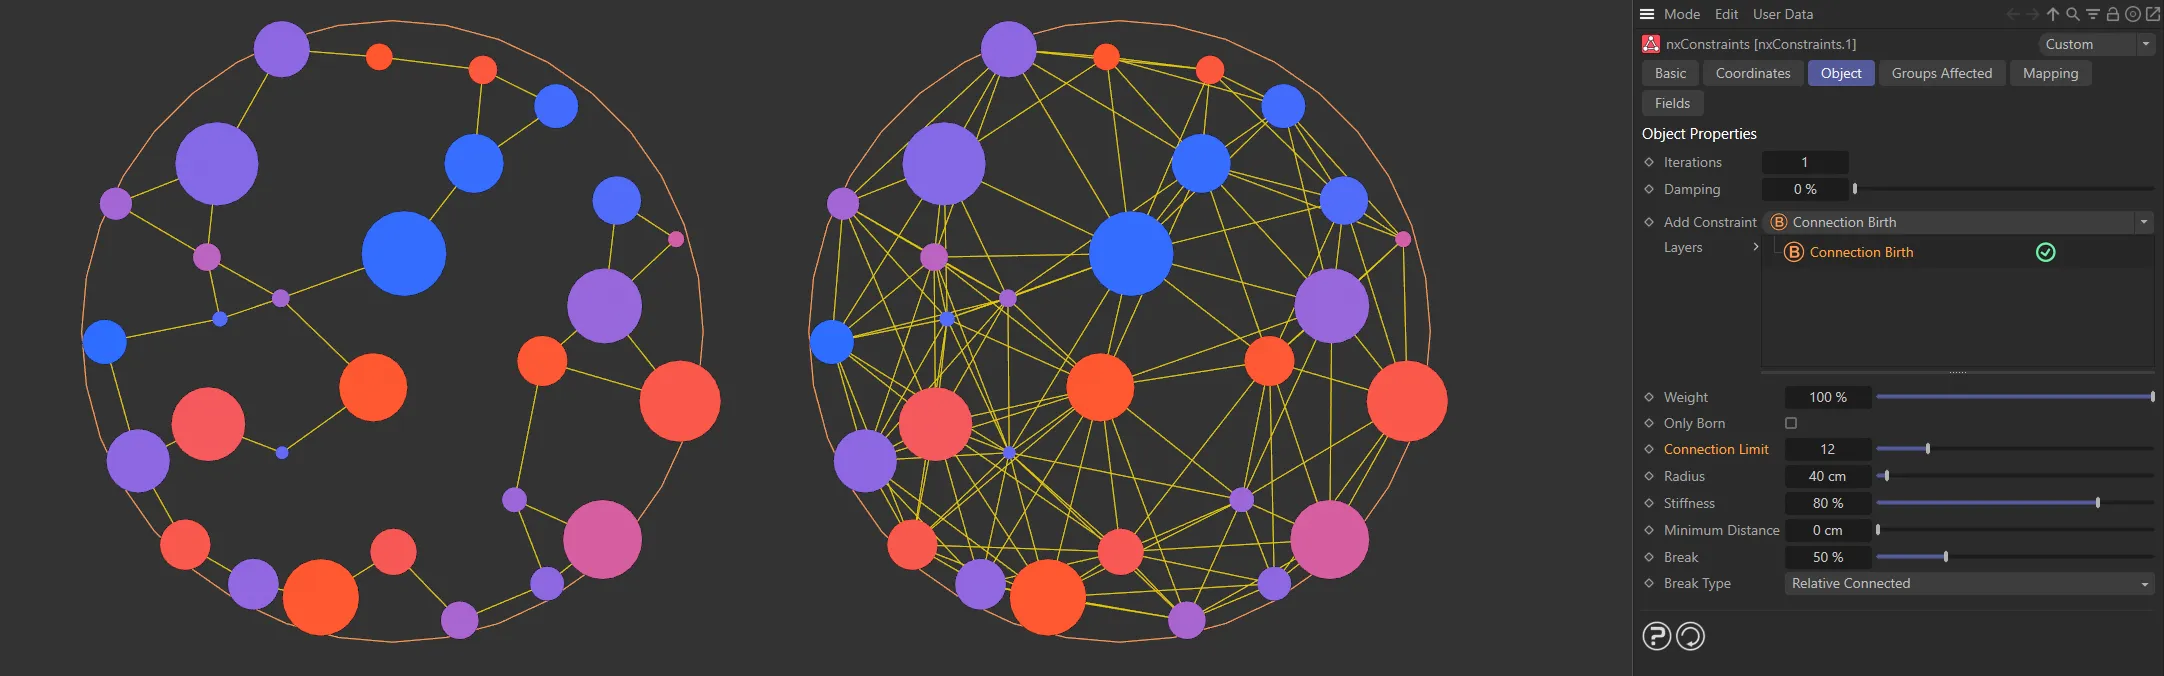
Connection Limit set to 2 on the left and 12 on the right.
Radius
Section titled “Radius”The distance between particles must be less than this value for a connection to be made.
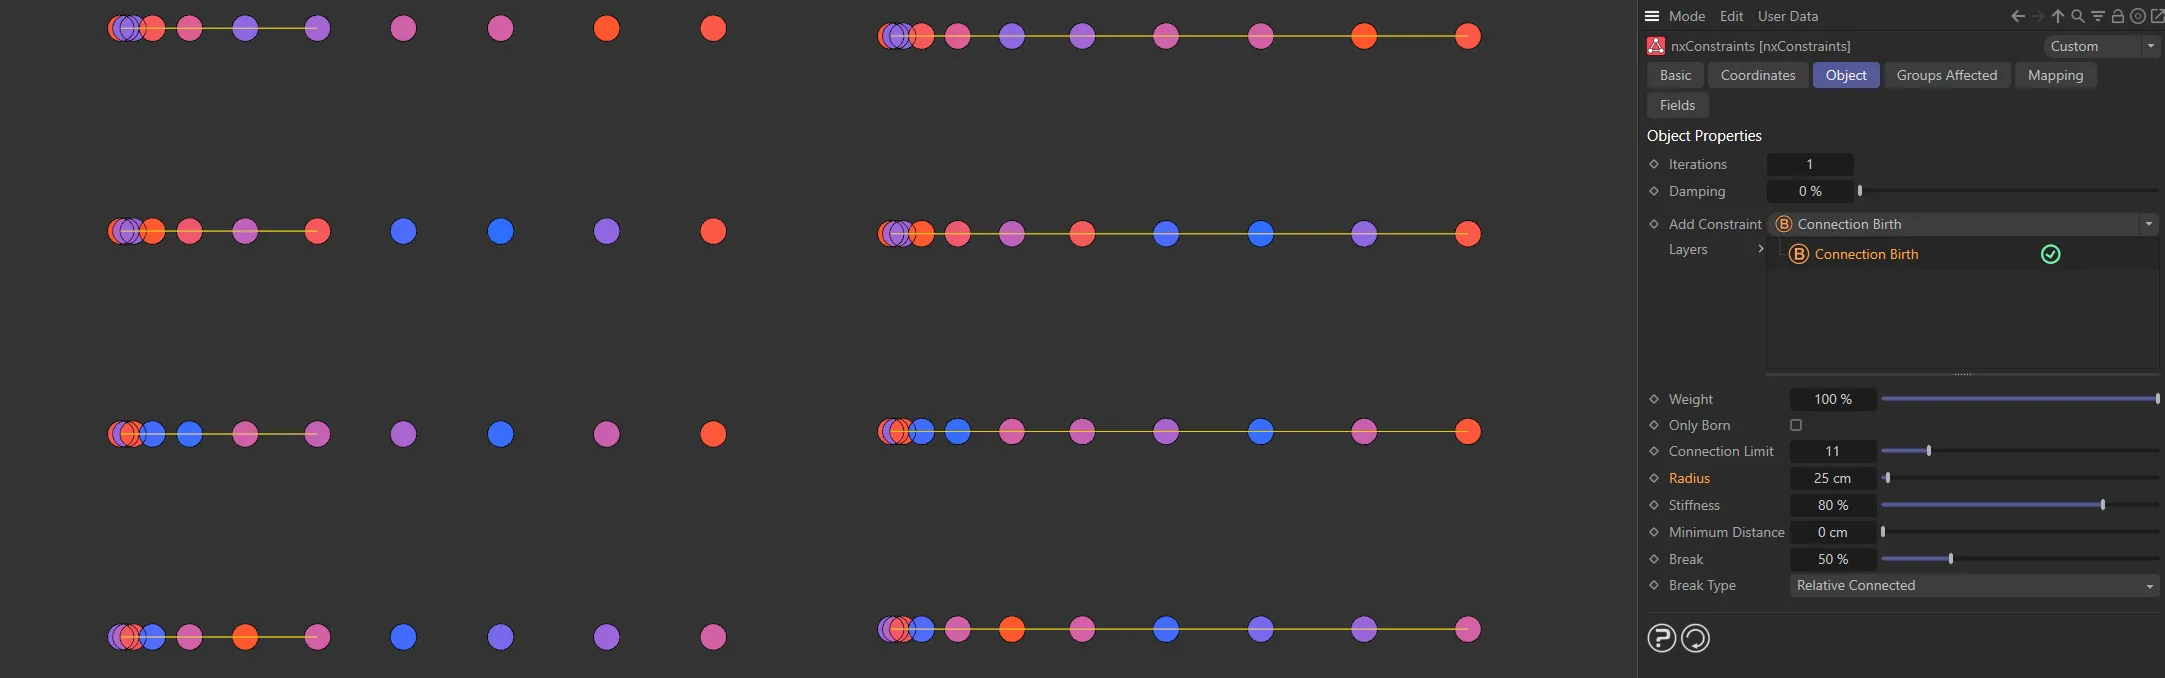
Radius value set to 10cm on the left and 25cm on the right. The left side particles are only connected in the first rows, stopping at 10cm maximum distance, while all particles are connected on the right, due to the higher Radius setting.
Stiffness
Section titled “Stiffness”This parameter is a measure of how strong the connection is.
Increase this to make the springs stiffer or reduce to make them looser.
This animation compares Stiffness values of 3% and 100%.
Minimum Distance
Section titled “Minimum Distance”This setting limits the connections made to particles which are further away than this distance.
This helps to control clumping so that particles don’t just connect to the very closest ones.

On the left, the Minimum Distance value is 20cm, raised to 80cm on the right.
This setting is dynamic and changes depending on what Brake Type is set below.
It determines at what point a spring connection should snap.
In both Relative Connected and Relative Radius modes this slider is a percentage of the spring’s original length.
In Absolute mode it is a distance value.
Break Type
Section titled “Break Type”Set at Relative Connected, by default.
The alternatives are: None, Relative Radius and Absolute.
This parameter controls how the link should break.
A broken link means there is no longer a connection between the particles.

Break Type menu.
Connections will not break if this option is selected.
Relative Connected
Section titled “Relative Connected”The value in Break is a percentage value of the distance when the particles were originally connected (at birth).
If the spring stretches beyond the value set here, it will snap.
Animation illustrating the effect of reducing the Break value, from 400 to 280, with a Break Type of Relative Connected, causing the connection with highest stretch to break.
Relative Radius
Section titled “Relative Radius”The value in Break is a percentage value of the distance in the Radius setting.
If the spring stretches beyond the value set here, it will snap.
In this animation, there is a reduction of the Break value, from 50% to 25%, with the Break Type in the Relative Radius mode.
Absolute
Section titled “Absolute”Break is an absolute distance setting and connections will break when they are longer than the Break Above value.
Here, there is a reduction in the Break Above distance, from 120cm to 100cm, with Break Type in Absolute mode.
Copyright © 2026 INSYDIUM LTD. All Rights Reserved.