tfRock
tfRock enables you to generate rocks and create custom rock-shaped objects.
Each time you create a new tfRock it will have a different Seed value, with different noise settings.
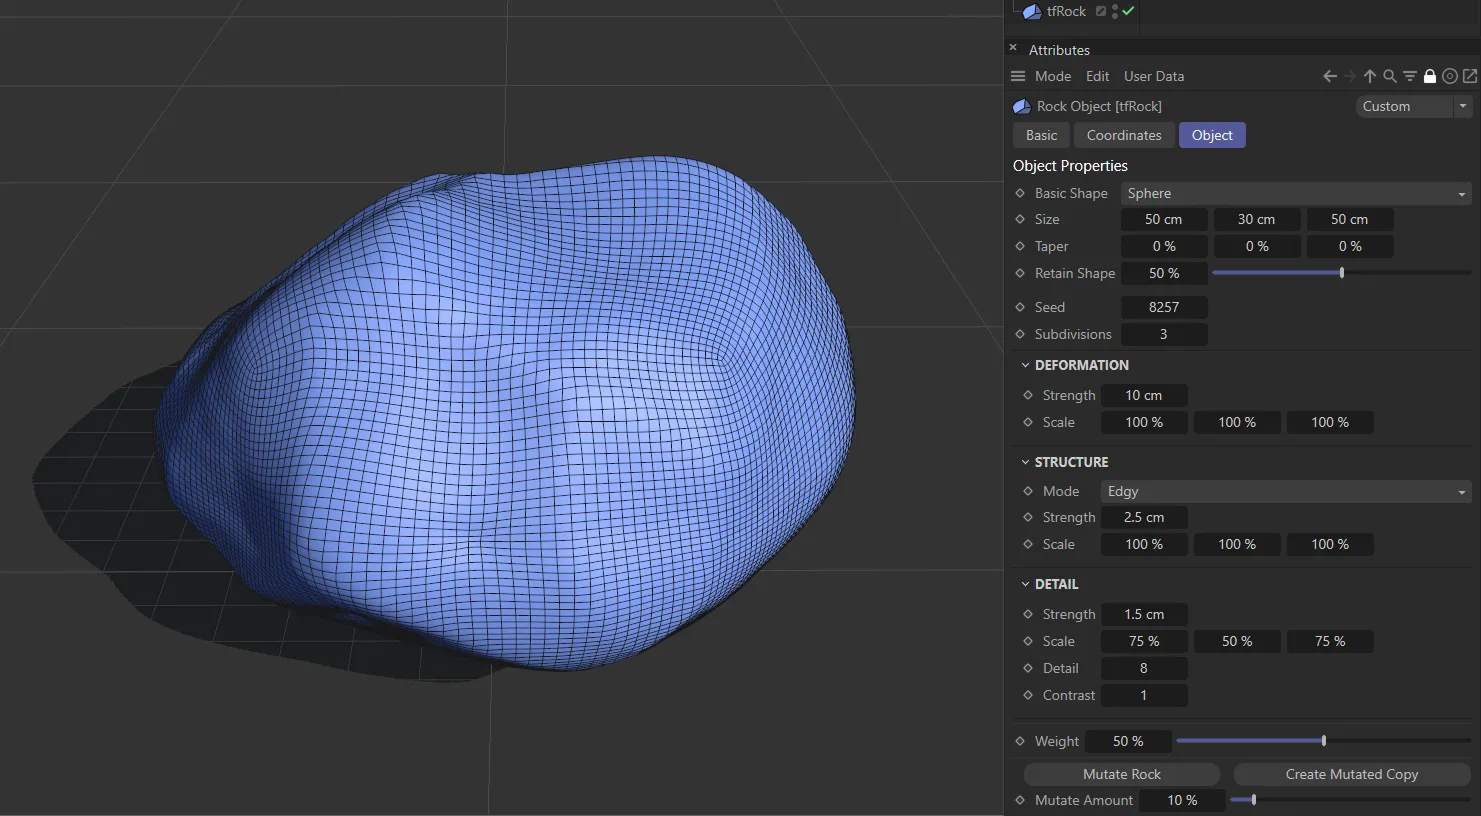
A default tfRock object.
Object tab
Section titled “Object tab”Basic Shape
Section titled “Basic Shape”The default setting is Sphere; other options are: Cuboid and Custom.
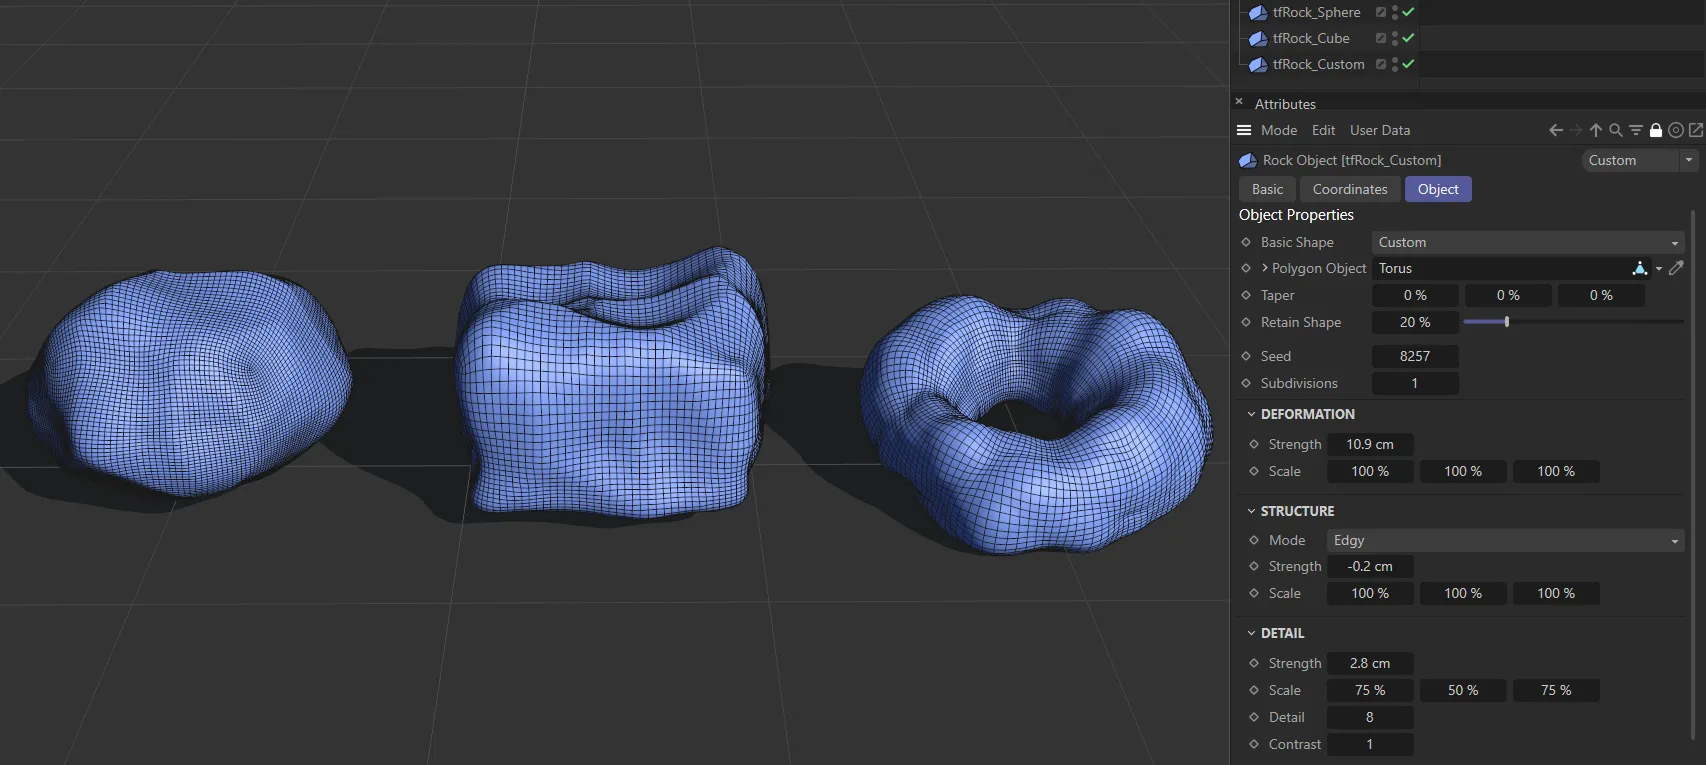
The three Basic Shape settings: Sphere, Cube and Custom, which is set as a Torus in the Polygon Object link field.
Custom shape
Section titled “Custom shape”In this mode, you will open up the Polygon Object parameter.
Polygon Object
Section titled “Polygon Object”Available in the Custom Shape setting, drop any polygon object into this link field to access the tfRock displacement parameters.
Increases and decreases the Size setting in the X, Y and Z-axes.
Tapers the shape in the X, Y and Z-axes.
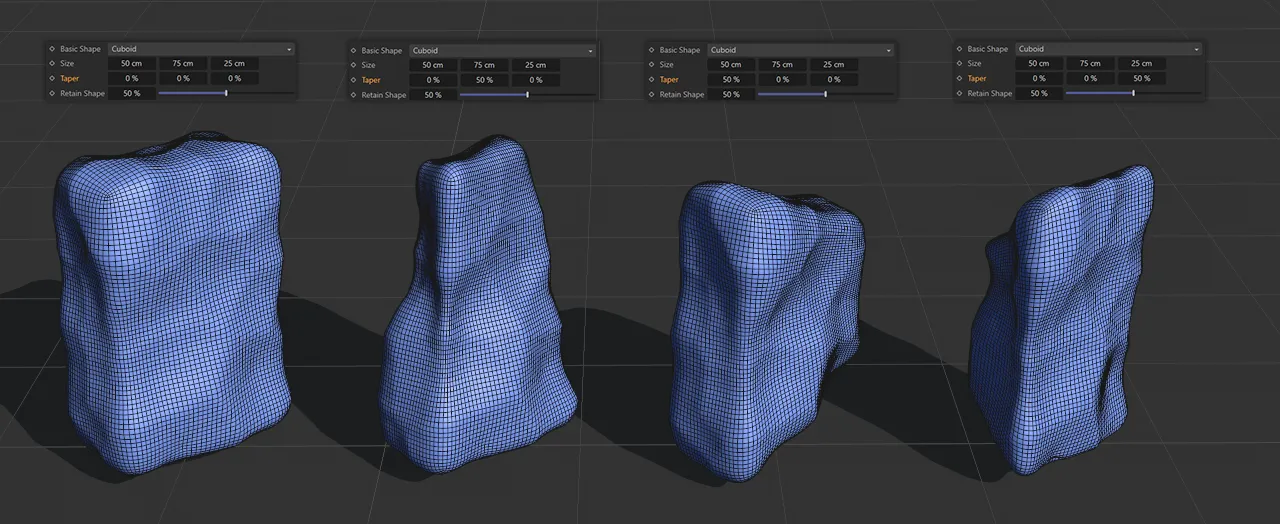
Here the Basic Shape is Cuboid, with different Taper settings.
The first rock has no taper. The second has 50% Taper value on the Y-axis, the third is 50% on the X-axis and the final rock has 50% on the Z-axis.
Retain Shape
Section titled “Retain Shape”Move the slider to add more polygons to your basic shape; this is more visible in different display settings.
Retain Shape is set at 50%, by default.
Increasing this amount adds detail to your tfRock, whilst retaining the base shape.
Use this in conjunction with Subdivisions settings to achieve your desired polygon density and rock profile.
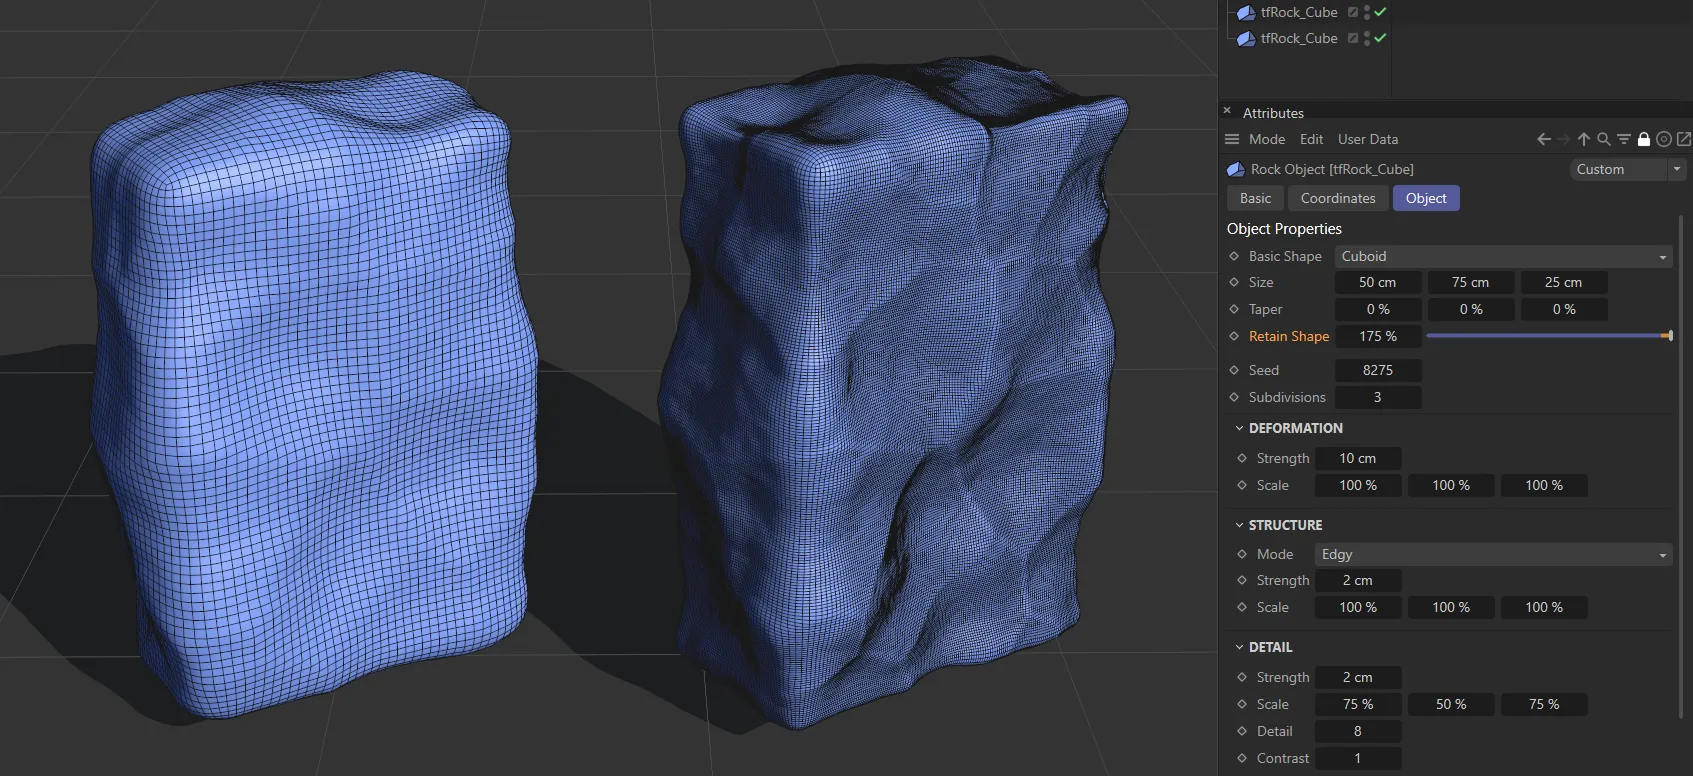
The left-hand rock has Retain Shape set at the 50% default setting. On the right-hand rock this has been increased to 175%.
Change the setting to get a different look, based on the noise displacement settings.
Subdivisions
Section titled “Subdivisions”Increase this to subdivide your shape.
The higher the setting, the more the polygon density will increase and the more the edges will be rounded.
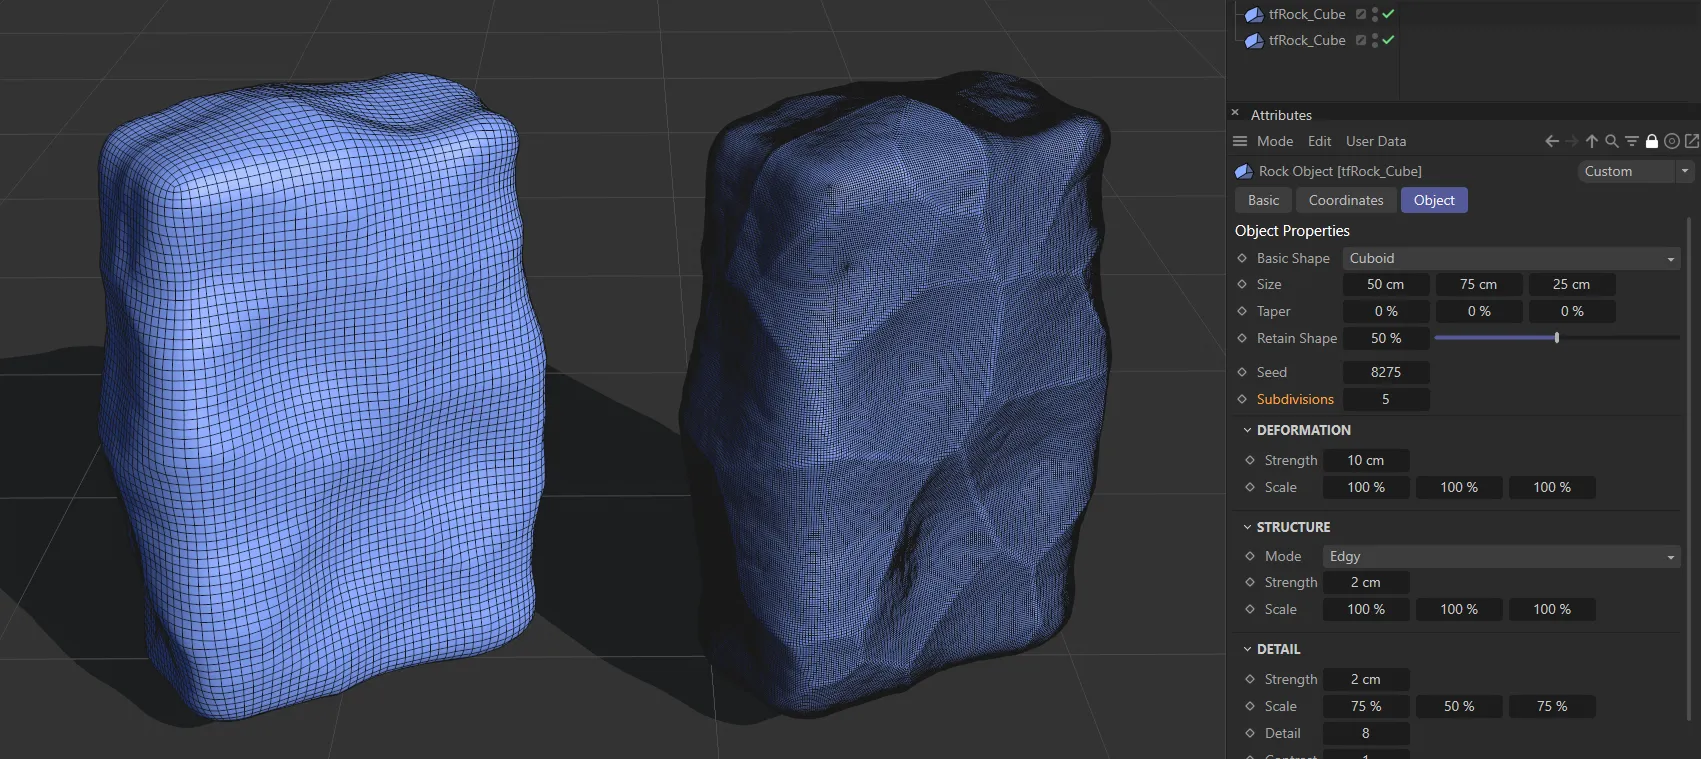
Retain Shape is at 50% on both rocks, with Subdivisions set at 3 on the left and 5 on the right, resulting in an increased polygon density.
Deformation
Section titled “Deformation”Strength
Section titled “Strength”Increases the strength of deformation.
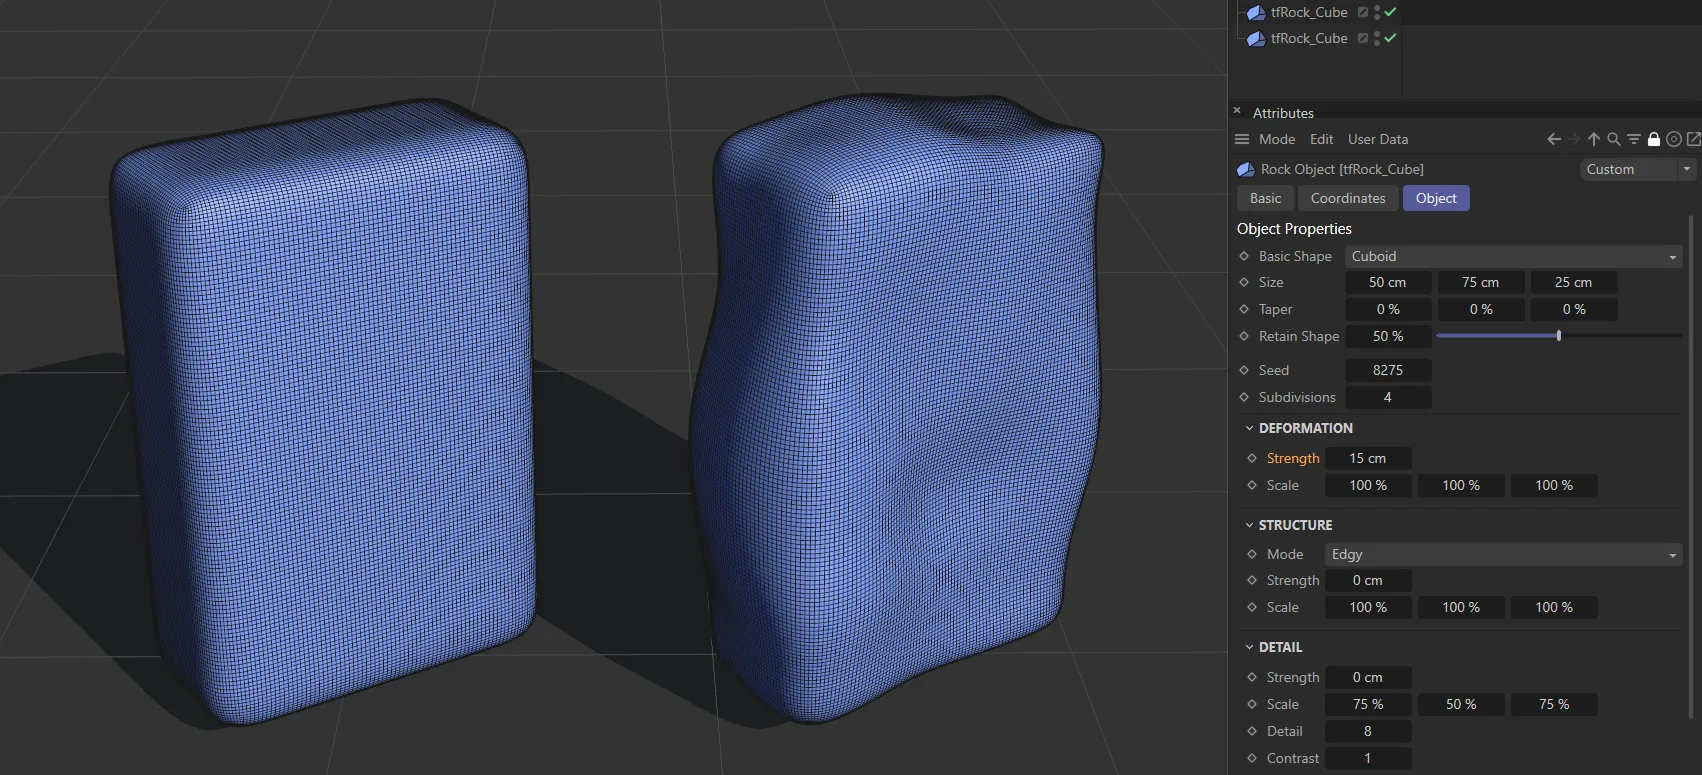
The rock on the left has 0 (zero) cm Strength in deformation, while the right-hand rock has a 15cm setting.
Increases or decreases the scale of the noise settings in the X, Y and Z-axes.
Structure
Section titled “Structure”The default setting is Edgy.
You can change this to: Standard, Blobby, or Knobby.
Each of these has its own distinct look, as you can see in the images below.
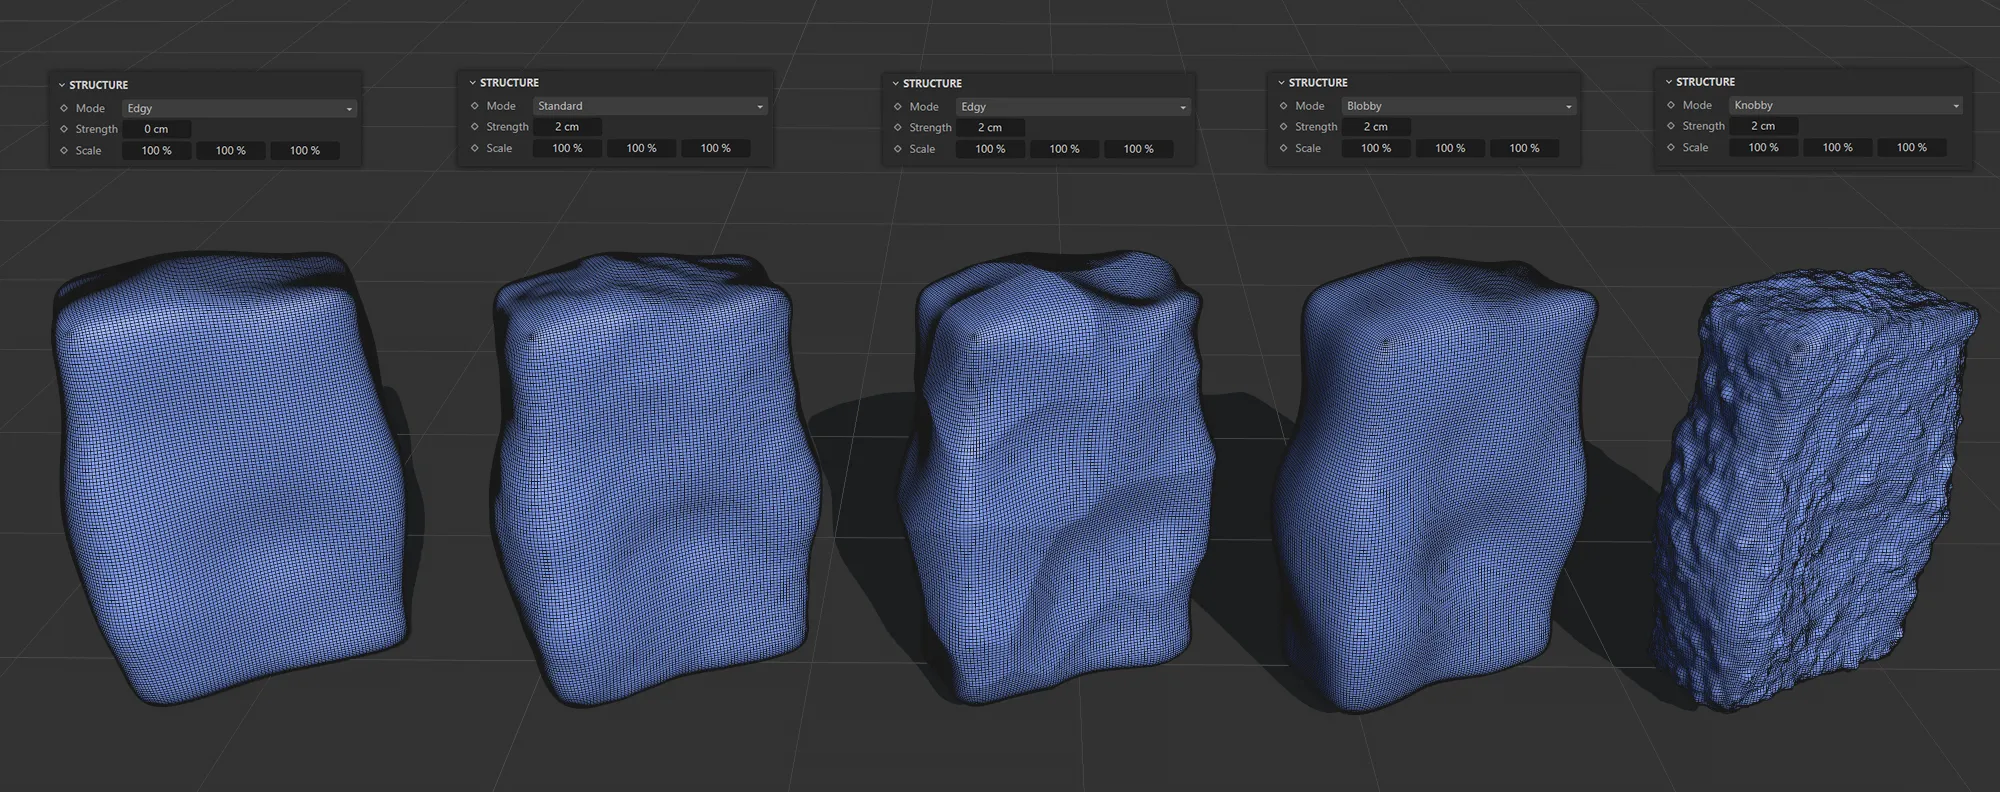
The left-hand rock has a 0 (zero) cm Strength value. The Strength is increased to 2cm for the four remaining rocks, which are in Mode settings, from left to right: Standard, Edgy, Blobby and Knobby.
Accentuates edges and crevices.
Standard
Section titled “Standard”This gives a more uniform look.
Blobby
Section titled “Blobby”Accentuates lumps.
Knobby
Section titled “Knobby”Gives an incredibly sharp, knobby displacement.
Strength
Section titled “Strength”Increases the strength of the Mode settings.
This can go into the negative value range to create a different effect.
Sets the scale of the Mode on the structure in the X, Y and Z-axes.
Detail
Section titled “Detail”Strength
Section titled “Strength”Increases the strength of the Detail setting.
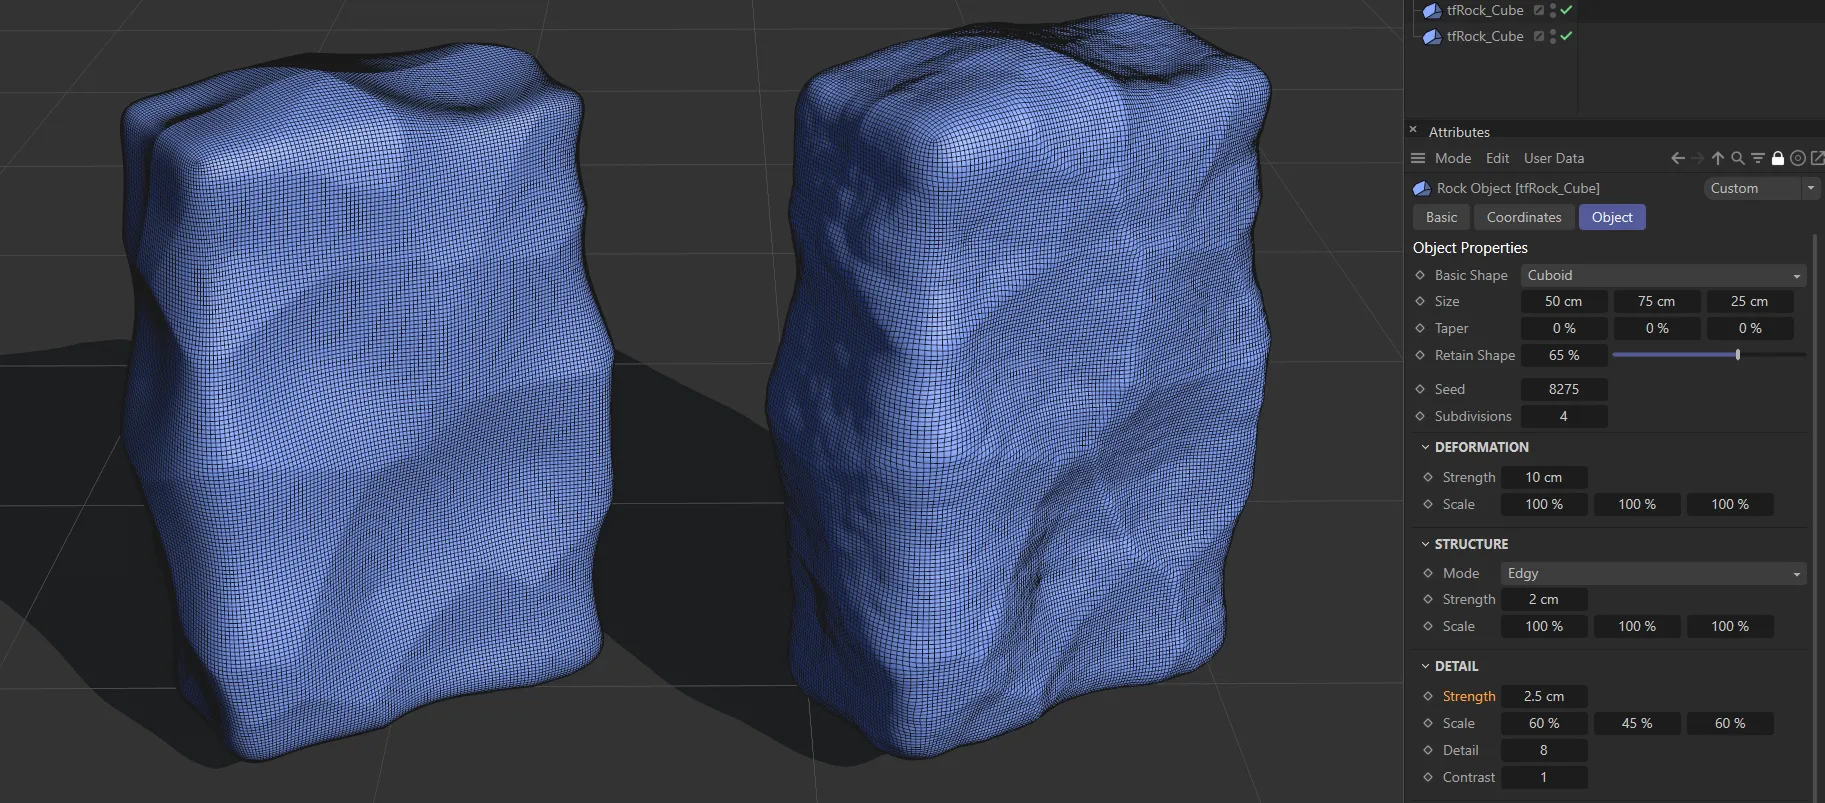
Here the Detail is subject to a Strength setting of 0 (zero) cm on the left and increased to 2.5cm on the right.
Increases or decreases the scale of detail in the X, Y and Z-axes.
Detail
Section titled “Detail”Adds more or less detail, to accentuate or smoothen the noise on the surface of your shape.
Contrast
Section titled “Contrast”With a low Contrast setting, you get less deformation.
Increasing the contrast gives more deformation, but then goes on to give a cracking look to the surface of the shape.
Weight
Section titled “Weight”Increasing the Weight setting pulls the noise deformations downwards, as the weight is simulated.
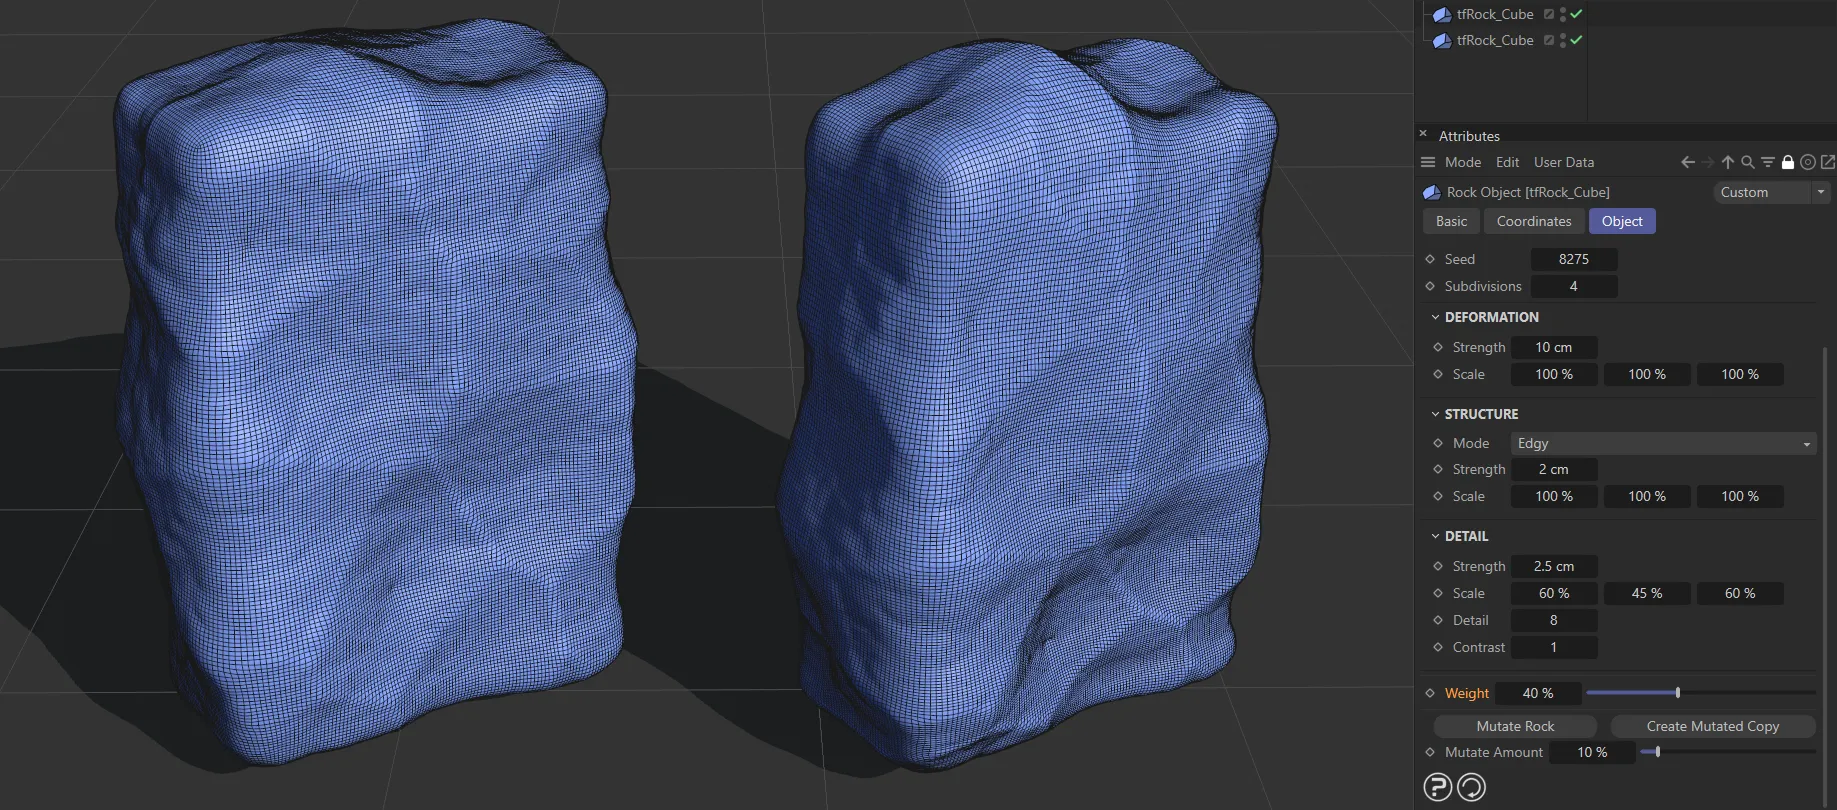
The Weight value is set at 0 (zero) % on the left and raised to 40% on the right.
Mutate Rock
Section titled “Mutate Rock”Creates a mutation of any shape that you have selected.
Create Mutated Copy
Section titled “Create Mutated Copy”Creates a mutated copy of the shape that you have selected, with settings reflected in the Mutate Amount value.
Mutate Amount
Section titled “Mutate Amount”This amount reflects the percentage of difference in the settings that any mutation will have.
Set at 0 (zero) %, you will mutate an exact copy.
Copyright © 2026 INSYDIUM LTD. All rights reserved.