X-Particles Project Settings
In addition to the general preferences, X-Particles has several settings which are used on a project-wide basis.
These can be found in Cinema’s Project attributes, which you can see by pressing Ctrl-D (or Cmd-D).
Dynamics tab
Section titled “Dynamics tab”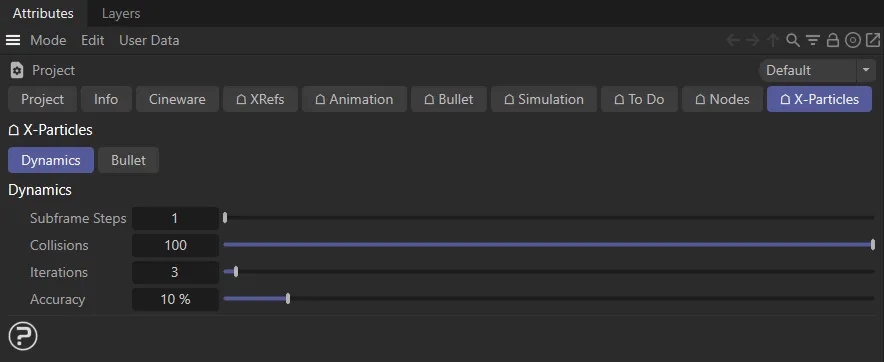
X-Particles project settings, Dynamics tab menu.
Subframe Steps
Section titled “Subframe Steps”This value affects the Collisions, Fluids and Constraints objects.
Increasing the Subframe Steps value divides each frame time into subframes, reducing the velocity per step that each particle is moved by.
Subframes are also used by most modifiers to reduce the banding effect which is sometimes seen.
If you have fast moving or complex particle motion, increasing the Subframe Steps parameter will increase the accuracy of the Fluids, Constraints and Collisions objects.
It is advised to only increase it by a small amount as it can greatly affect your particle simulation result and drastically slow down the speed of simulation.
Here, we have two animations. In the first one, the Subframe Steps is set at 1.
This second animation has Subframe Steps increased to 10, reducing the banding, seen in the first video.
If you experience leaks from collisions, especially from rotating/moving objects or when particles are pinched between multiple objects, then increasing Subframe Steps will help the collision engine resolve these cases more accurately.
The second use for this setting is to reduce the banding in the particle stream, caused by some modifiers.
Increasing this value can eliminate banding but will slow down playback, so you should keep this setting as low as possible to avoid too much speed reduction.
You can also increase this value to increase the accuracy/stiffness of dynamics/collisions and constraints.
Collisions
Section titled “Collisions”This is the maximum number of collisions per particle within one execution.
For example, fast moving particles may hit many polygons over their movement within one frame/subframe and this is the maximum number it is allowed to hit.
It is a safety limit to avoid very fast particles colliding repeatedly and slowing down execution.
Iterations
Section titled “Iterations”This setting is used for constraints and PBD Fluids.
Increase this value to make constraints and PBD more accurate/stiffer.
In this animation, with an Iterations value of 3, resulting in a less cohesive collision solve.
With Iterations raised to 30, there are stiffer collisions and a much-improved solve.
Accuracy
Section titled “Accuracy”This setting stops the constraints/dynamics solving early, if the execution of the constraints/dynamics doesn’t change the particle’s velocity or position very much (if the particles are already close to the constraints/dynamics final solution).
Increasing the value will improve the accuracy of the solution, but at the expense of slower playback.
Bullet tab
Section titled “Bullet tab”Max Steps
Section titled “Max Steps”This setting works in the same way as Subframe Steps described above.
Bullet simulation accuracy can be raised by increasing this value.
This may be necessary if your scene contains very fast-moving geometry and bullet collisions don’t seem to be accurate.
Gravity
Section titled “Gravity”This global gravity strength will affect all bullet objects.
This can be overridden in the xpBullet tag, using the Use Local Gravity setting found in the Forces tab.
World Density
Section titled “World Density”This density value will be applied to all bullet objects, unless overridden in the xpBullet tag.
Collision Algorithm
Section titled “Collision Algorithm”Set as GImpact by default, the other option is Triangle.
In most cases this can be left at the default.
If you are experiencing inconsistent collisions whilst using the Triangulated Mesh collision shape, try switching this setting to Triangle.
Random Seed
Section titled “Random Seed”Random seed used to generate variation settings and scatter effects.
Scene Size
Section titled “Scene Size”This should be set to match the size of your dynamic scene objects.
Display
Section titled “Display”Line Z Clip
Section titled “Line Z Clip”This setting incrementally clips the object display from front to back.
This enables the viewing of bullet collision shape lines, even if they are on the back face of an object.
Contact Points
Section titled “Contact Points”Displays the point at which contact has been made with other bullet objects.
Adjusts the color of the contact points display.
Adjusts the size of the contact points display.
Copyright © 2026 INSYDIUM LTD. All rights reserved.