xpCache
xpCache is used to cache, or bake, an X-Particles simulation.
Once cached, a simulation no longer needs to be calculated each time you run the scene; it will merely read the simulation data from disk.
Caching has several advantages:
- it enables you to scrub backwards and forwards in the timeline.
- you can run an animation once then play it back using the cache, which is much quicker for a complex animation.
- the cache is saved to disk with the scene file and reloaded when you load the scene file again.
- when rendering over a network, using the cache prevents discontinuity in the rendered frames from different machines, as all the machines will use the same cached data.
The Cache object icon in the Object Manager can have one of three colors to show you the state of the cache at any time.
These colors are:
- Green - the default color, indicating that the cache has not been built yet (or not loaded from a scene file with saved cache data).
- Amber - the cache is being built or it has been built, but is not being used (the Use Cache box is unchecked).
- Red - the cache has been built and is in use.
Object tab
Section titled “Object tab”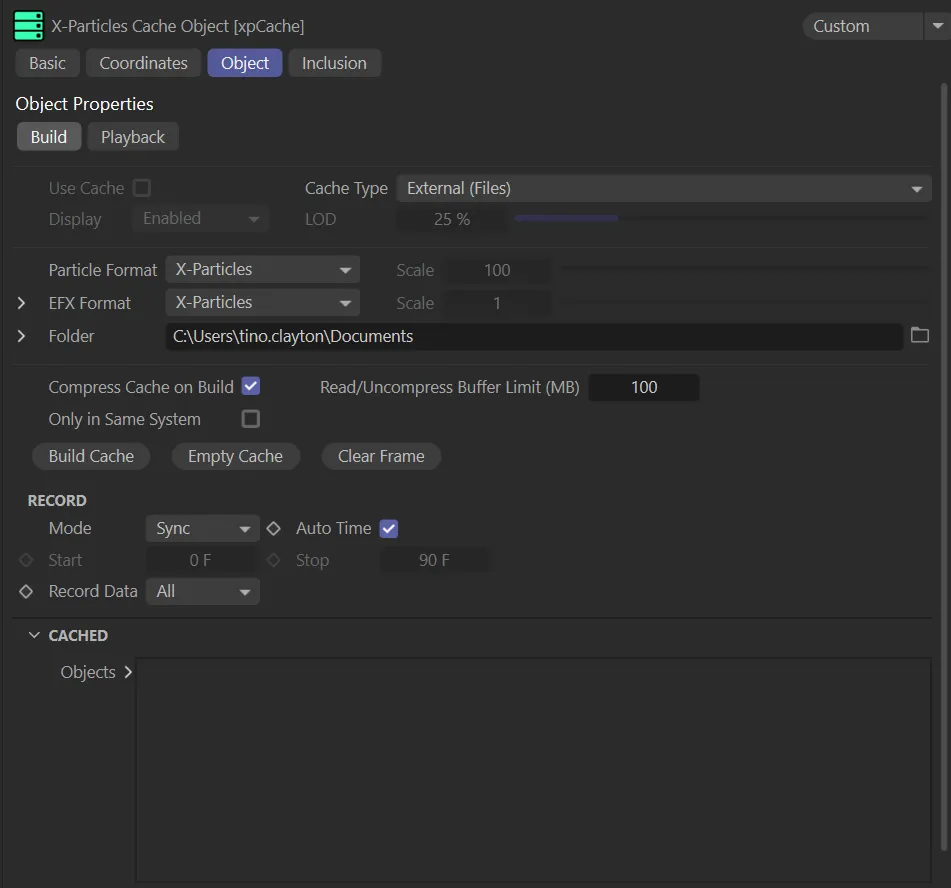
xpCache Build tab menu, within the Object tab.
Build tab
Section titled “Build tab”Use Cache
Section titled “Use Cache”If there is no cache built in this scene, this will be unavailable.
It is enabled automatically when a cache is built or a scene with a saved cache is loaded.
When enabled, objects in the scene will use cached particle data.
When disabled, the cache is not used, even if it is held in memory.
This animation demonstrates the ease of scrubbing backwards and forwards on the timeline once the cache has been built, using the Build Cache button.
Cache Type
Section titled “Cache Type”This setting affects the way the cached data is stored.
There are two options: External (Files) and Internal (Memory).
External (Files)
Section titled “External (Files)”The default setting, cached data is saved to a separate folder, as a series of files.
There will be one file per frame of animation.
The files are saved to the folder selected in the Folder link field.
Internal (Memory)
Section titled “Internal (Memory)”This setting will store cached data with the scene file.
When the scene file is saved, the cached data will save with it.
This is only recommended for short, test scenes to avoid the file being increased by hundreds (or thousands) of megabytes.
Display
Section titled “Display”Is not currently available with Cinema 4D, due to changes which prevent the screen being updated during caching.
As with the Display parameter, this is not currently available.
Particle Format
Section titled “Particle Format”If caching to external files, X-Particles can save the particle data, either in its own native format or in a variety of other formats.
This parameter is only available when saving to External (Files) setting.
It scales up or down the particle position and velocity data.
EFX Format
Section titled “EFX Format”If you are caching an xpExplosiaFX object, you can choose to save as an X-Particles file format or OpenVDB.
If OpenVDB is selected, the drop-down to the left of EFX Format will reveal additional options to further control which channels you wish to cache.
With these options, you can rename the channels.
This is so you can ensure that the channel names match those used by the 3rd party application or render engine in which you intend to use the VDB files.
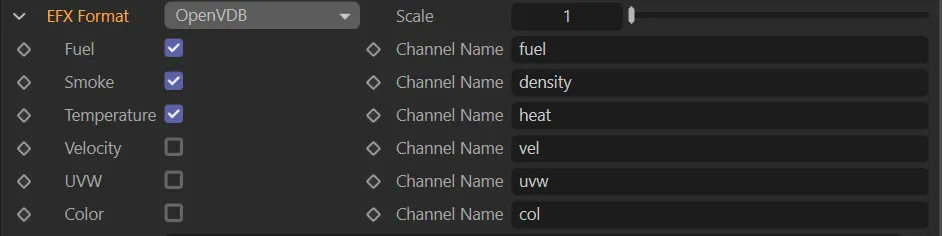
Open VDB channel options.
As above, this parameter is only available when saving to External (Files) setting.
It scales the particle position and velocity data up or down so that it can match the scale used in 3rd party software.
Folder
Section titled “Folder”By clicking on the file icon to the right of the Folder link field, you can select where you wish to save your cache files.
Clicking on the drop-down to the left of the Folder parameter gives you additional setting options.
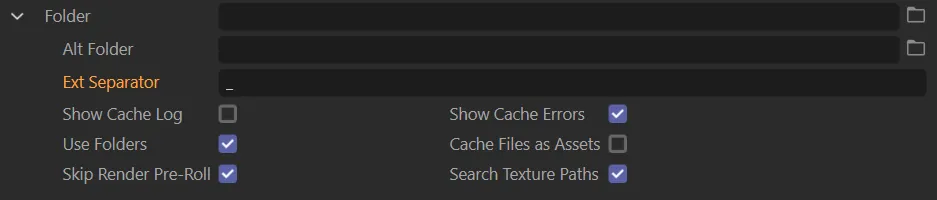
Additional Folder parameter options.
Alt Folder
Section titled “Alt Folder”This parameter enables you to enter an alternative folder for reading cache files.
Ext Separator
Section titled “Ext Separator”Here you can specify the separator to be used when building cached file names.
Show Cache Log
Section titled “Show Cache Log”Enabling this will give you output progress and details of the cache to the Cinema 4D viewport.
Show Cache Errors
Section titled “Show Cache Errors”If enabled, this will do the same as the Show Cache Log option, but only if an error occurs.
Use Folders
Section titled “Use Folders”If this is enabled, the cache files for each cached object within the scene will be within a separate sub-folder of the directory given in Folder.
If it is disabled all the cache files for all objects will be stored in the folder given in the Folder setting.
Cache Files as Assets
Section titled “Cache Files as Assets”If checked, any cache files will be saved as assets when using Save Project with Assets from the Cinema 4D File menu.
Skip Render Pre-Roll
Section titled “Skip Render Pre-Roll”If this is enabled, X-Particles does not read the cache for all frames before the starting render frame.
Search Texture Paths
Section titled “Search Texture Paths”If this is enabled, then, if the specified cache folder isn’t found, the cache folder name is searched for within the texture paths.
Compress Cache on Build
Section titled “Compress Cache on Build”The cached data is compressed during caching to save on memory/space.
With large numbers of particles, that can add a noticeable speed penalty, both on caching and playback.
Read/Uncompress Buffer Limit (MB)
Section titled “Read/Uncompress Buffer Limit (MB)”This value sets the maximum size (in megabytes) for the buffer used to hold cache data in its uncompressed state.
Only in Same System
Section titled “Only in Same System”If you have more than one xpSystem operating in your scene, but you only need to cache the objects in one system, then check this box.
If this is unchecked, the xpCache object will cache everything in the scene.
Build Cache
Section titled “Build Cache”Click this button to build the cache.
If a cache already exists (or if any object has a cache tag) then you will be given further options in order to proceed: Overwrite, Continue, New Cache and Cancel.
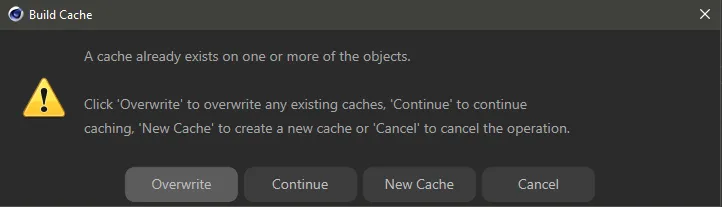
The response dialog box, should you attempt to build a cache, when one already exists.
Overwrite
Section titled “Overwrite”This will delete the existing cache and create a new one.
Continue
Section titled “Continue”This will continue to cache any frames not cached so far in the previous cache, rather than re-cache everything.
New Cache
Section titled “New Cache”This will keep the existing cache and create another one.
Cancel
Section titled “Cancel”This will cancel the caching operation.
Empty cache
Section titled “Empty cache”Clicking this button will delete the cache from memory and free up the memory used.
For external caches the cached data will also be deleted from disk.
You will be asked to confirm the deletion if the cache already exists.
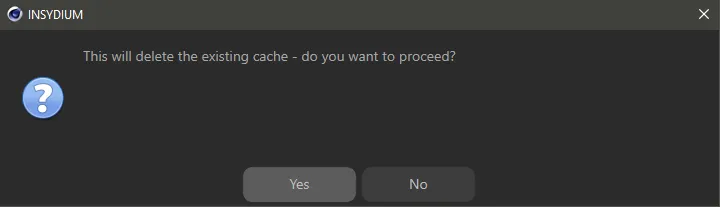
Dialog box response when deleting an external file.
Clear Frame
Section titled “Clear Frame”Once a cache is built you can clear the cached data for the current frame by clicking this button.
You will be asked to confirm that you want to do this.
Record
Section titled “Record”These settings control which data is recorded when the cache is built.
Set as Sync, by default, these options control when the cache is built.
The other option is: Playback.
The cache is built when the Build Cache button is clicked.
Playback
Section titled “Playback”The cache is built during playback.
You can halt playback at any time and switch back to Sync mode; the cache will not be deleted, but will only be filled up to the point where you halted playback.
Auto Time
Section titled “Auto Time”If enabled, the entire scene is cached.
Only available if the Auto Time parameter is unchecked.
Caching will start at the specified frame.
Only available if the Auto Time parameter is unchecked.
Caching will stop at the specified frame.
Record Data
Section titled “Record Data”Controls the data to be recorded.
The default setting is All, with two other options: Basic and Custom.
Only basic data is recorded (for particles, this is the particle velocity).
All particle data is recorded.
Custom
Section titled “Custom”Selecting this option will enable a new group of settings, headed PARTICLE DATA.
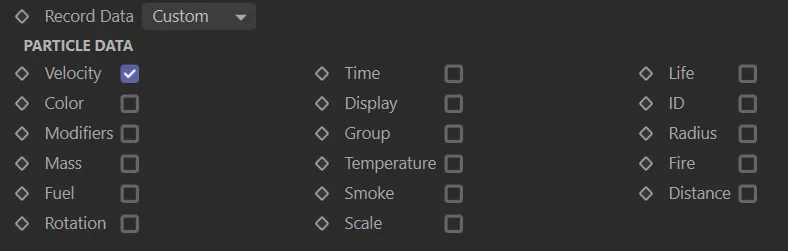
The PARTICLE DATA options, in the Custom setting for Record Data.
From the new settings, above, you can select precisely which data you want recorded.
Cached
Section titled “Cached”Objects
Section titled “Objects”This window displays the objects which have been cached.
Unchecking the boxes will turn the cache symbol amber, signifying the object is disabled in this cache.
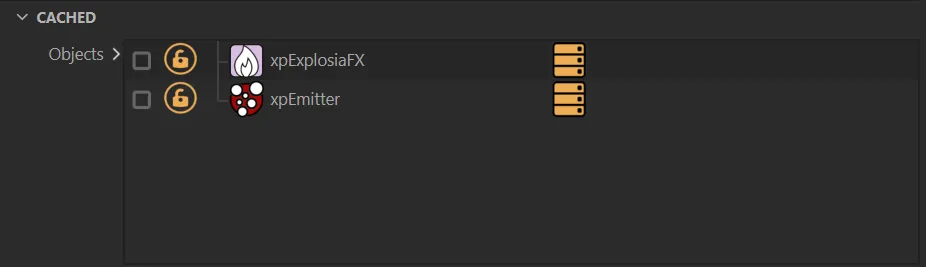
Objects window, with xpExplosiaFX and xpEmitter cached, but both disabled (unchecked).
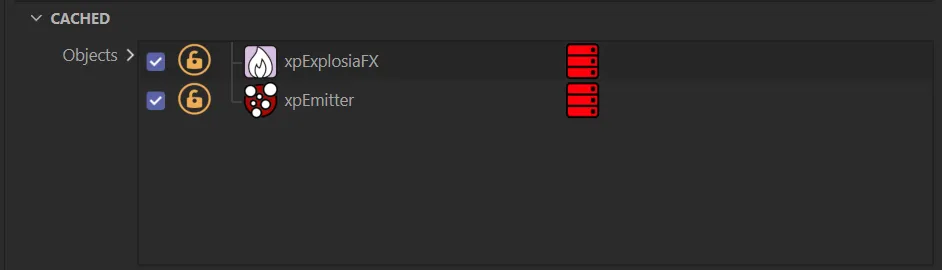
In this window, both objects are enabled.
The padlock icon locks the object, so it will not be recached if the cache is rebuilt and its contents will be preserved.
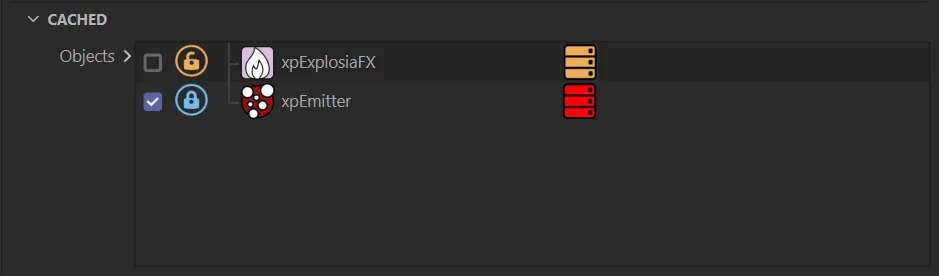
xpEmitter’s contents are locked and cannot be re-cached at present.
As mentioned at the start of this manual, the cache icon can have one of three colors:
Red - the object is cached and the cache will be used on payback.
Amber - the object is cached but the cache will not be used.
This is due to one of three reasons: the box has been unchecked; the Use Cache box has been unchecked; the Enable Cache box in the object’s cache tag has been unchecked.
Green - the object has a cache tag but does not have a cache.
At the bottom of the Attributes Manager, in the xpCache Build tab, information on the previous cache is displayed.
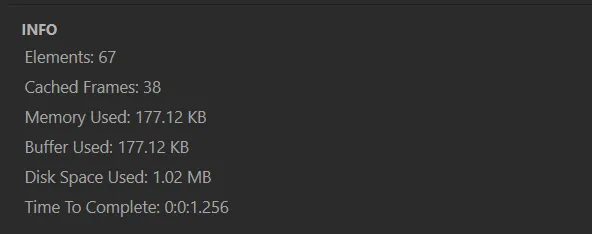
Information on the previous cache build.
Playback tab
Section titled “Playback tab”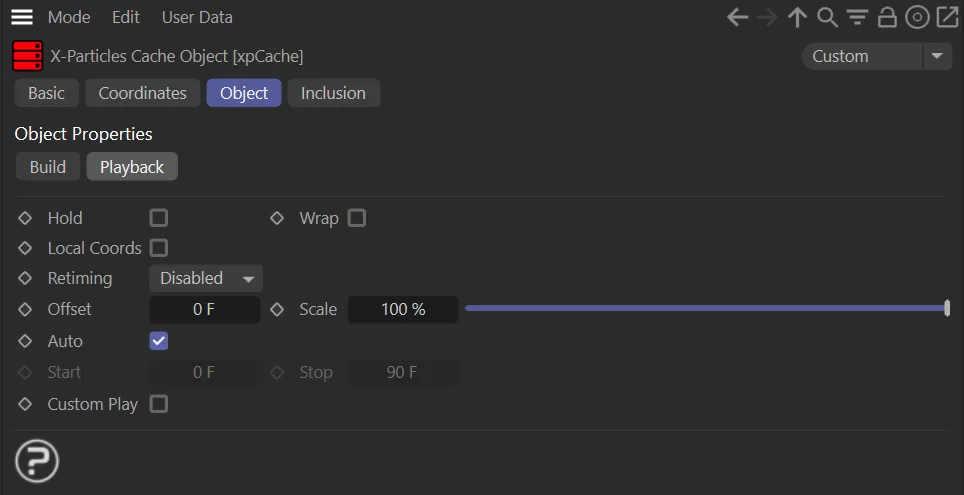
Playback tab menu.
If enabled, the last cached frame is kept (particles stop and freeze) at the end of the cached frames.
Otherwise (if unchecked) the particles will start to be evaluated, as if they were not cached.
If enabled, the cache frames repeat (wrap) around and start playing again once past the last cached frame.
Local Coords
Section titled “Local Coords”When this option is enabled, the cache data is transformed to be local to the object, eg cached particles follow an emitter’s position, if it is moved.
Retiming
Section titled “Retiming”This parameter is set as Disabled, by default.
Other options are: Frame, Time(s) and Custom.
Disabled
Section titled “Disabled”Retiming is not used.
Retiming is done by keyframing the Frame setting, which appears when you select this option.
In this animation, there is a demonstration of the effect of using keyframing with the Frame setting to retime the scene.
Time(s)
Section titled “Time(s)”Retiming is done by keyframing the Time setting, which appears when you select this option, in the same way as keyframing the Frame setting, above.
The Retiming is set to Time, in this animation, with keyframing being actioned on the Time parameter.
Custom
Section titled “Custom”With this option, a Timing spline curve becomes available.
The X-axis of the spline is the length of the scene.
The Y-axis represents the frames to play.
This animation has Retiming set as Custom video and begins with a linear Timing spline, which plays the simulation accurately. Next, it is reset to the default, which has easing at the beginning and end of the animation and, finally, there is a dramatic ease-out spline.
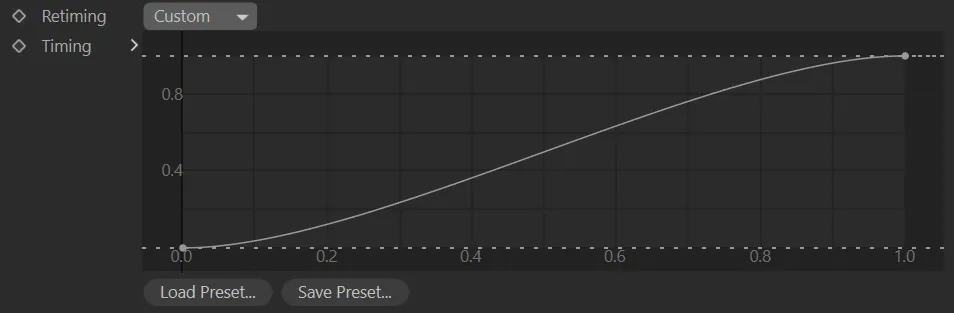
Custom spline curve options in Retiming.
Offset
Section titled “Offset”This option is only available with Retiming set to Disabled.
It offsets the cache time (a negative Frame setting will start the cache playing further into the frames).
This option is only available with Retiming set to Disabled.
It can be used to scale the cache time (eg. 200% will make the cache play twice as fast).
If enabled, the cache takes the playback time from the document’s time (minimum to maximum).
Start, Stop
Section titled “Start, Stop”These settings are only available if Auto is unchecked.
They are used to set when to start/stop using the cache.
Custom Play
Section titled “Custom Play”Disabled by default and all data recorded in the cache is used on playback.
If checked, a Particle Data options menu becomes available.
Particle Data
Section titled “Particle Data”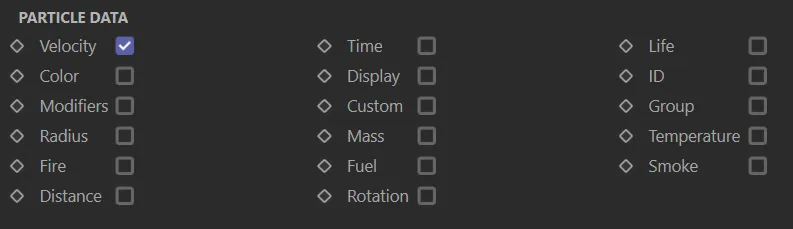
Particle Data options menu.
You can decide which data is used on playback by checking the required boxes.
Inclusion tab
Section titled “Inclusion tab”Within this tab, you can select the types of data to cache and define what you choose to include/exclude.
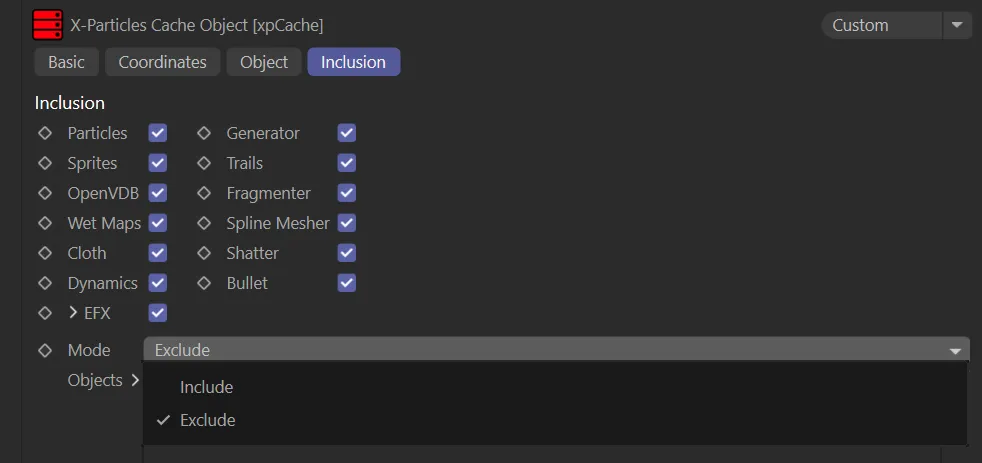
Inclusion tab menu with Mode drop-down box options open.
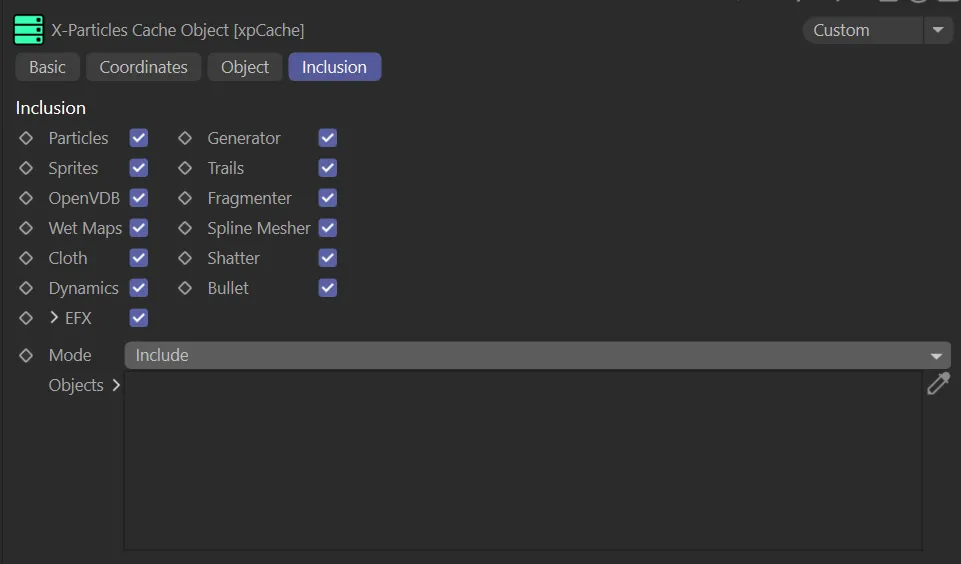
The same menu with the Mode set to Include, displaying the Objects link field.
Particles, Sprites, Wet Maps, Spline Mesher, Dynamics, Generators, Trails, Fragmenter, OpenVDB, Cloth and Scatter
Section titled “Particles, Sprites, Wet Maps, Spline Mesher, Dynamics, Generators, Trails, Fragmenter, OpenVDB, Cloth and Scatter”Check or uncheck these boxes to determine which X-Particles objects are cached.
This gives you additional options, when caching an Explosia FX object.
Clicking the drop-down arrow will reveal these further options.

EFX options menu.
Your options are: Include, or Exclude.
Include mode
Section titled “Include mode”Any objects you want to include in the cache should be dragged and dropped into this window.
Exclude mode
Section titled “Exclude mode”Any objects you want to exclude in the cache should be dragged and dropped into this window.
Objects
Section titled “Objects”Drag the objects to be excluded or included into this list, having first set the Mode menu accordingly.
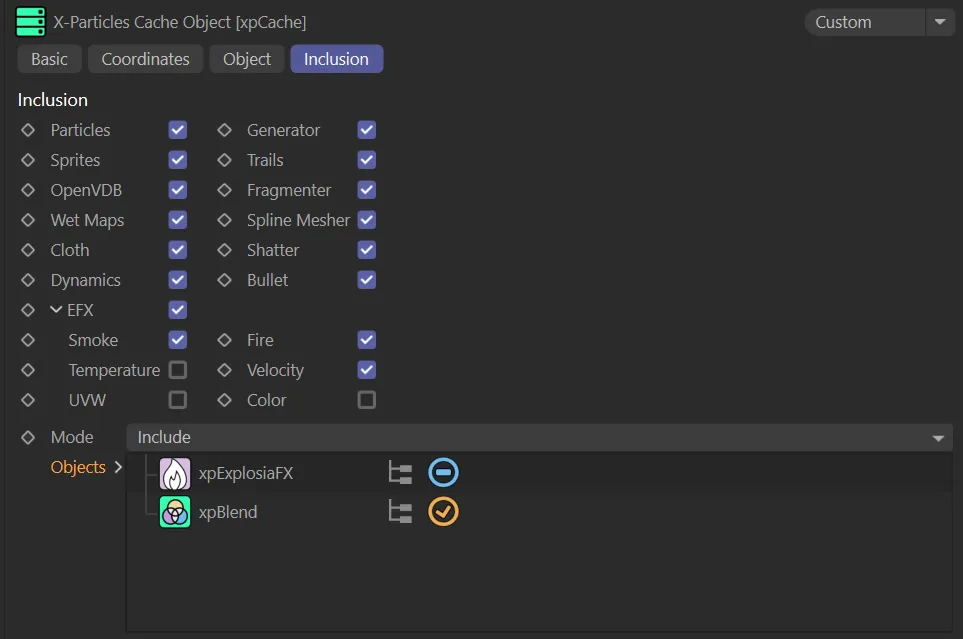
With the Mode set to Include, xpBlend will be included in the cache, but xpExplosia will not, as the icon in the window is not enabled (it does not have the yellow tick).
Copyright © 2026 INSYDIUM LTD. All rights reserved.