xpCustomData
xpCustomData can be used to change any custom data items you may have added in the emitter.
Each X-Particles particle carries with it quite a large amount of data specific to itself (color, speed, age, etc.).
More data is added by some modifiers or, if you add it, by turning on features such as particle rotations in the emitter.
However, there may be times when you want to add some specific data to each particle which is not already available.
You can do that by adding Custom Data in the emitter; the various parameters shown for each item of custom data are explained in the Extended Data tab of the xpEmitter:
The xpCustomData modifier is used to manipulate this custom data for various effects.
Object properties
Section titled “Object properties”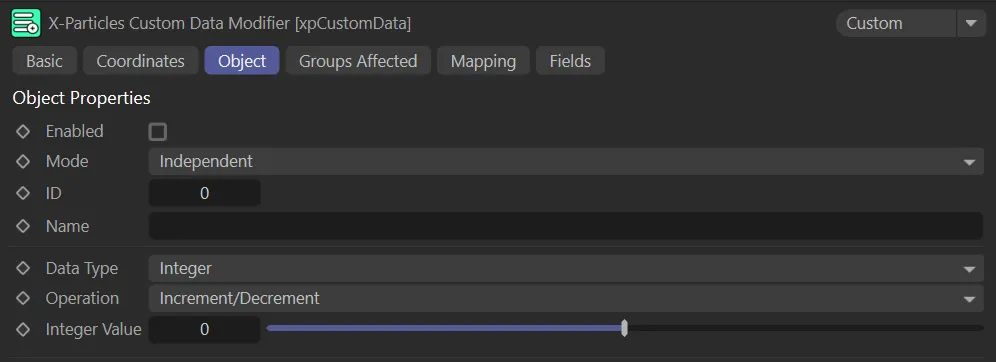
Object tab for xpCustomData.
Enabled
Section titled “Enabled”Check this box to enable the xpCustomData modifier.
Set at Independent, by default.
You can change this to Action-Controlled.
Independent Mode
Section titled “Independent Mode”In this mode, particles will be affected if they come into the field of effect of the modifier.
Action-Controlled Mode
Section titled “Action-Controlled Mode”When in the Action-Controlled setting, the modifier will only act on a particle when told to do so by an action.
ID, Name
Section titled “ID, Name”These two fields are used to identify which custom data item to query.
You should enter either ID value of the data item you want to test, or its name, or both.
Data Type
Section titled “Data Type”Set as Integer, by default.
The other types of data that can be selected are: Float, Matrix, String, Time and Vector.
The data type must match the data type in the custom data item, as specified in the xpEmitter Extended Data tab; if the two are different, nothing will happen and the custom data will not be changed.
xpCustomData enables you to map custom data items to particle data, as you can in most other modifiers.
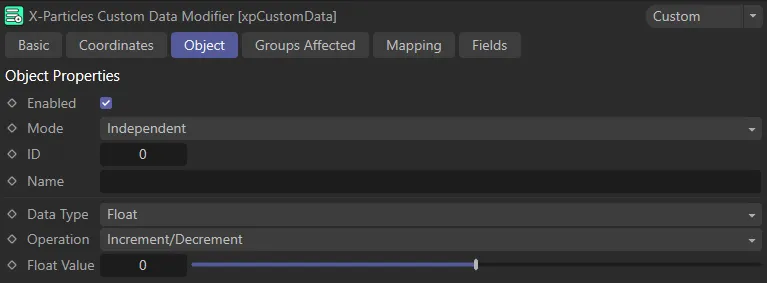
User Interface (UI) for the Data Type setting of Float.
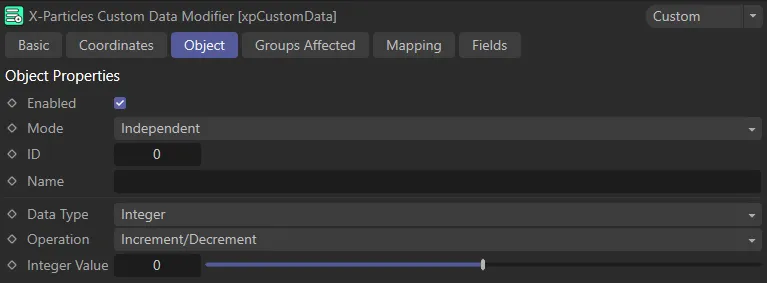
UI for the Integer setting.
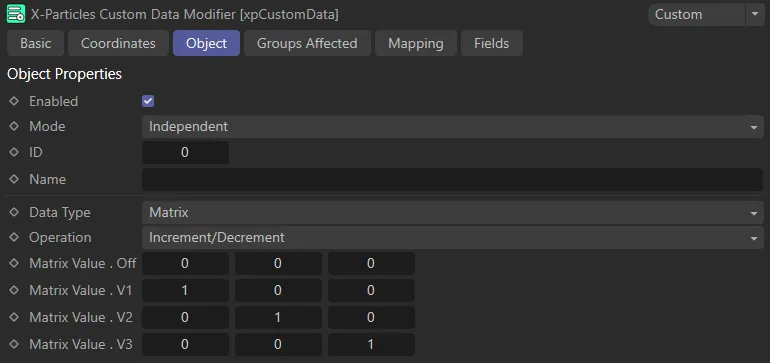
The UI for the Matrix setting.
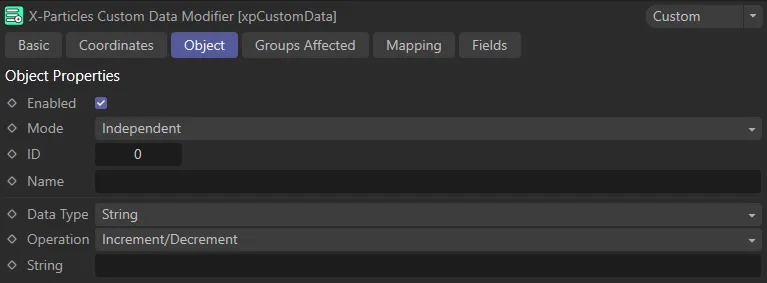
UI for the Data Type of String.
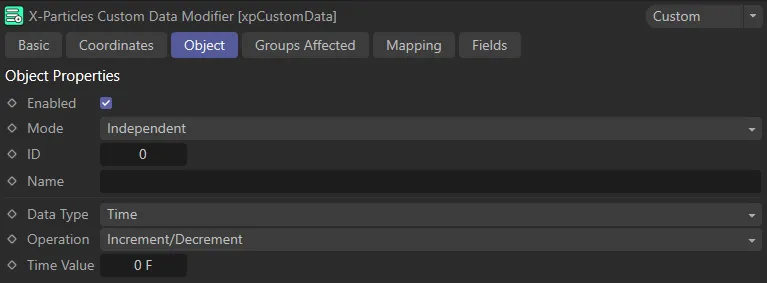
The UI for the Time setting.
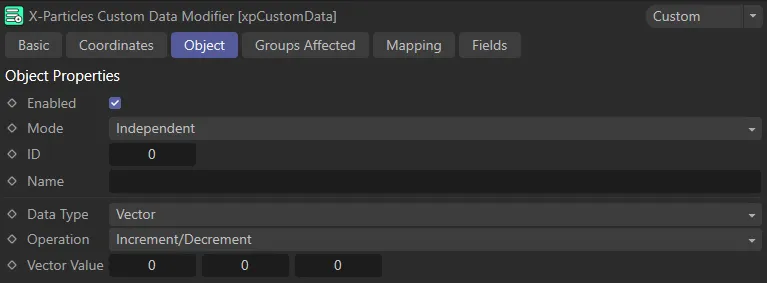
Finally, here is the UI for the Vector setting.
Operation
Section titled “Operation”Set at Increment/Decrement, by default.
The alternative is Set Value.
Increment/Decrement
Section titled “Increment/Decrement”This option will change the custom data each frame.
It does so by adding the value from the Value field to the existing custom data value.
For numeric data items (all except the String type), the value in the Value field can be positive or negative, so adding a negative value will decrement the value in the custom data item.
For the String data type, the string from the String field is joined to the end of the existing string in the custom data item.
Set Value
Section titled “Set Value”This option simply sets the custom data item to the value in the Value field (or String or Time fields, depending on the chosen data type).
For Float, Integer, Matrix and Vector this is the value to use.
String
Section titled “String”If Data Type is set to String, the Value field is not shown and this field appears instead.
If Data Type is set to Time, the Value field is not shown and this field appears instead.
Time values can be added to, or subtracted from, the time value in the custom data item, as with any other numeric data.
Groups Affected tab
Section titled “Groups Affected tab”Groups
Section titled “Groups”To specify the group, drag and drop the desired Group object into this field.
This setting is useful if you want to ensure that the spawned particles are, or are not, affected by xpCustomData.
Mapping tab
Section titled “Mapping tab”The modifier’s settings can be mapped to particle data.
Use the dedicated manual page, below, for instructions on how this works.
Fields tab
Section titled “Fields tab”You can use the Fields options to control where xpCustomData operates.
Copyright © 2026 INSYDIUM LTD. All rights reserved.