tfRoad
tfRoad generates a procedural road based on the path, with built-in cloning for adding roadside structures such as street lamps, traffic lights, steel barricades or trees, to make the road more realistic.
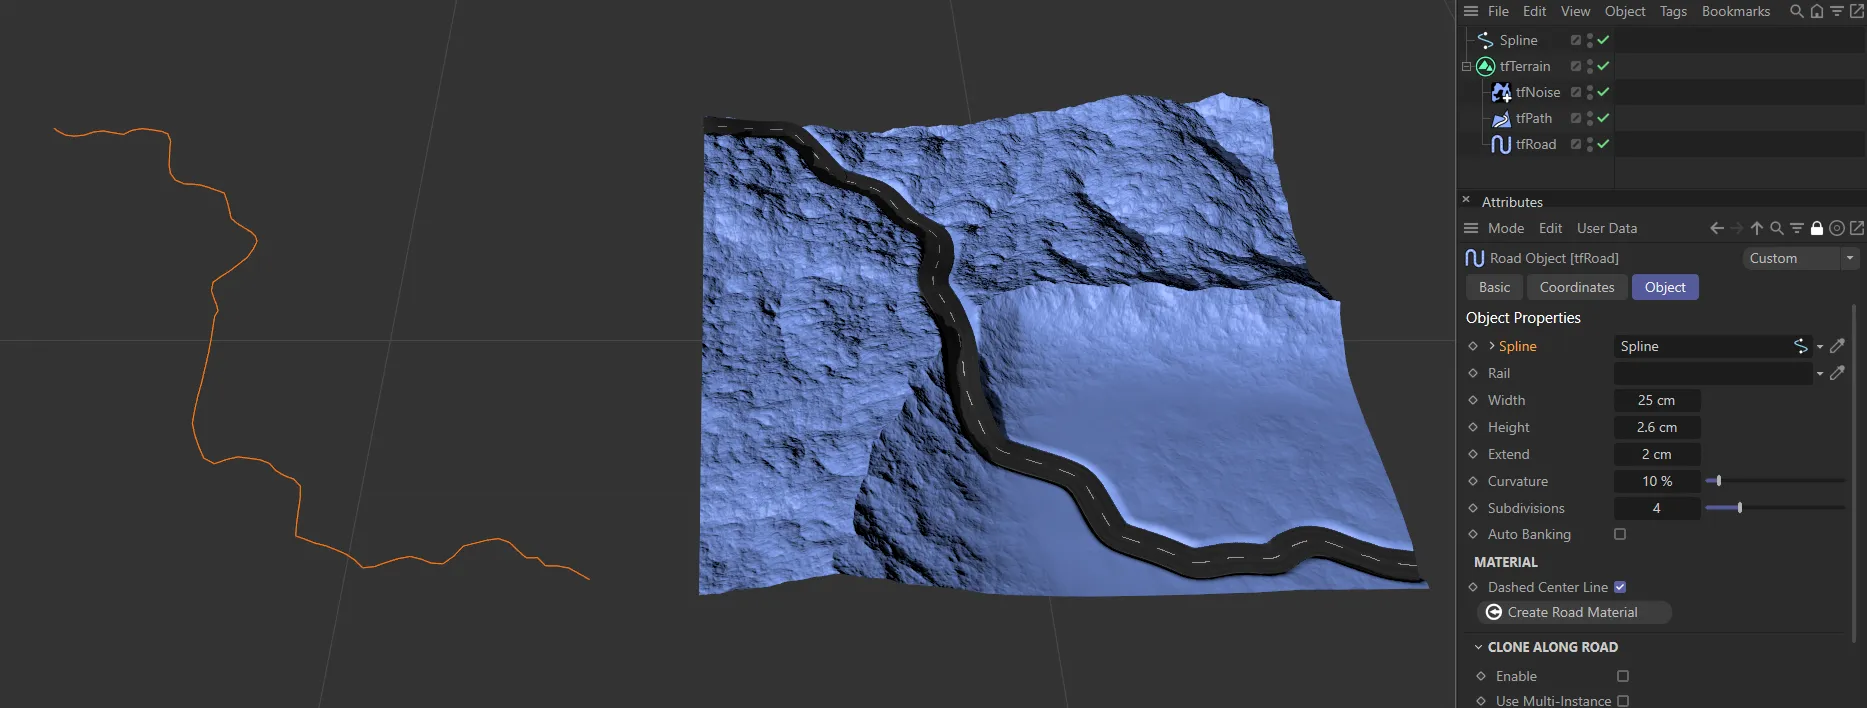
tfRoad uses the spline path to create the road geometry.
Object tab
Section titled “Object tab”Spline
Section titled “Spline”Drag the spline into the Spline link field to create your road geometry.
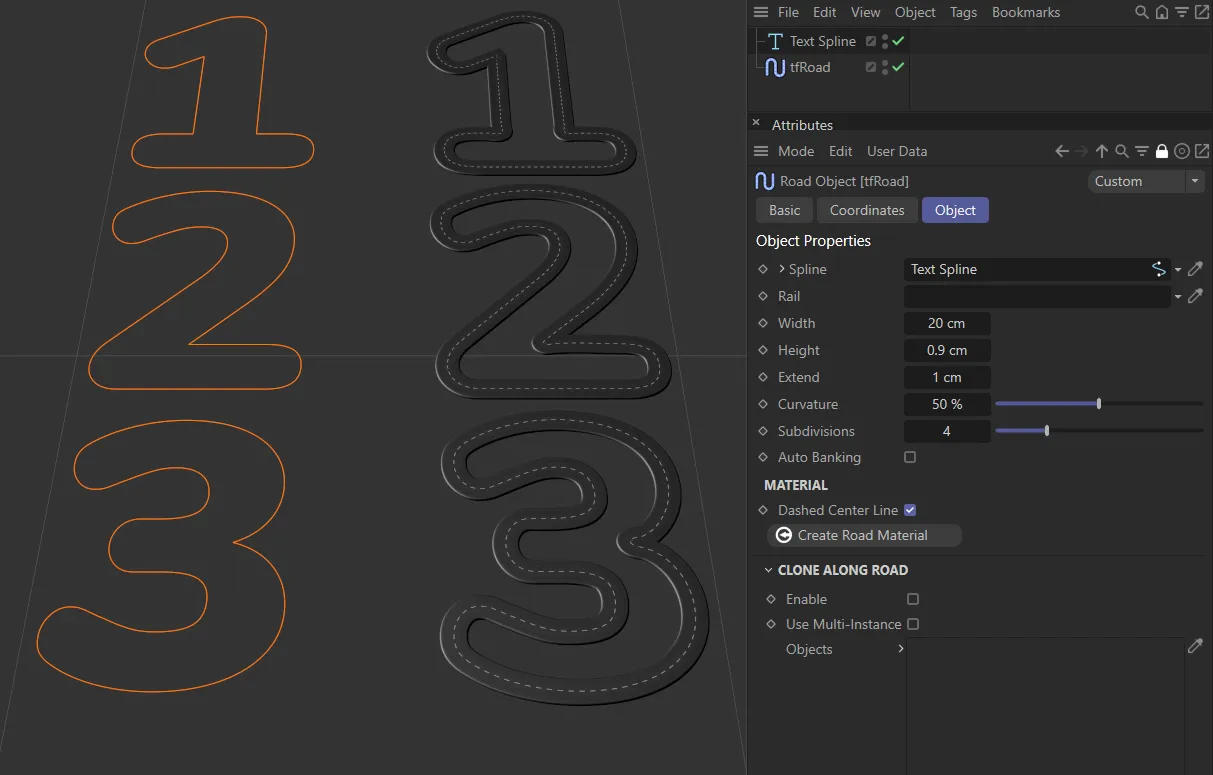
Here a Text Spline has been dropped into the Spline link field.
You can also use an xpTrail generator to create road geometry in an interesting way, as part of an xpSystem.
Drop a spline into this link field to precisely control the banking of the road, which is essential for realistic-looking curves.
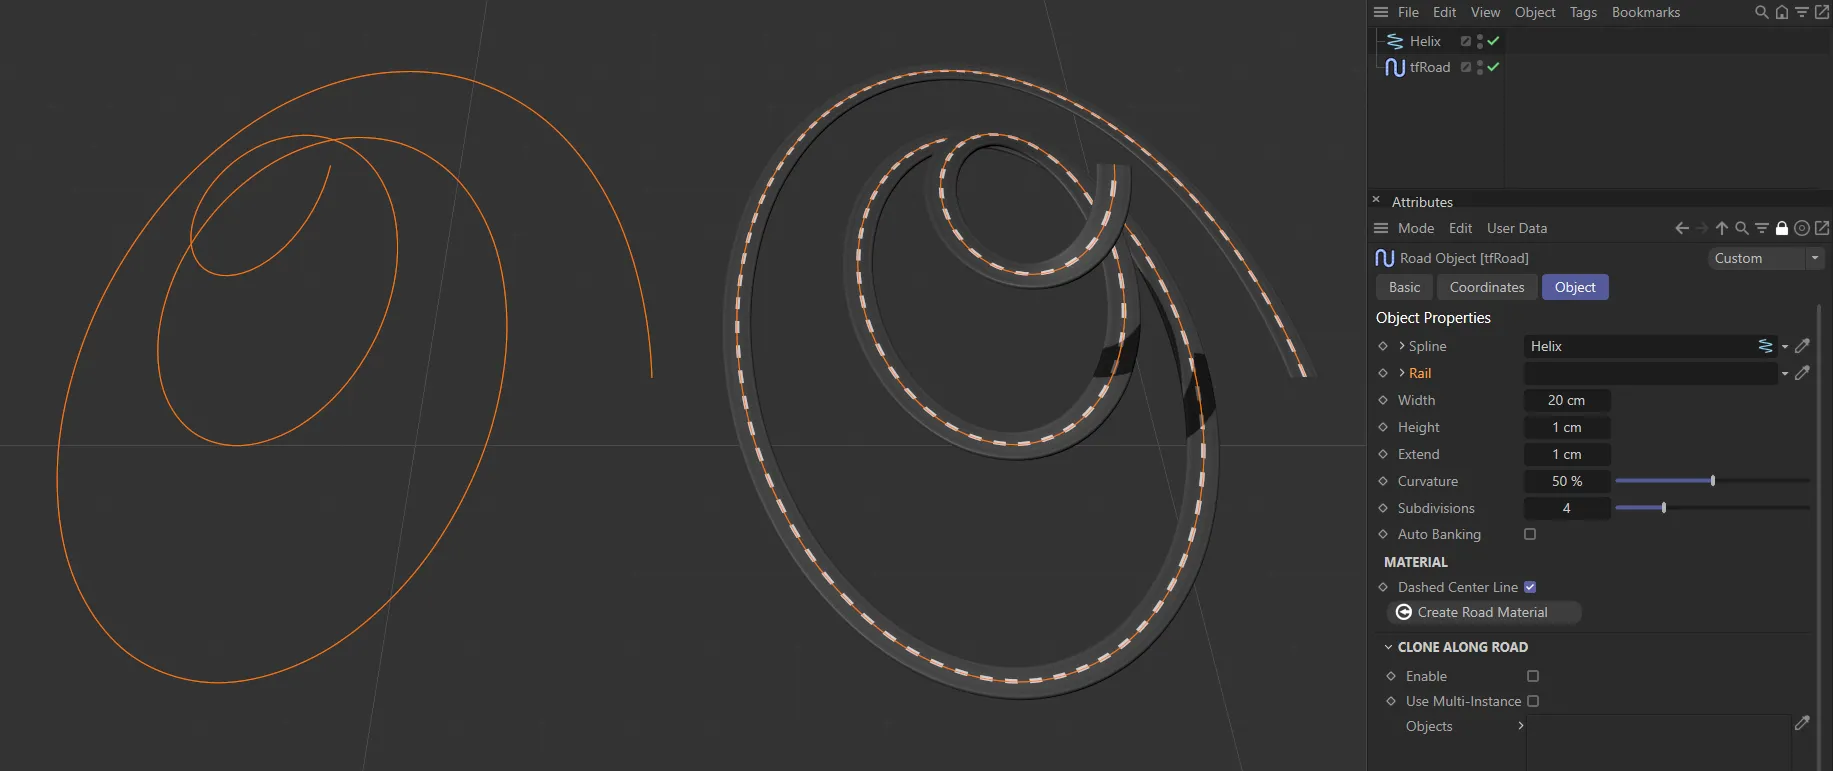
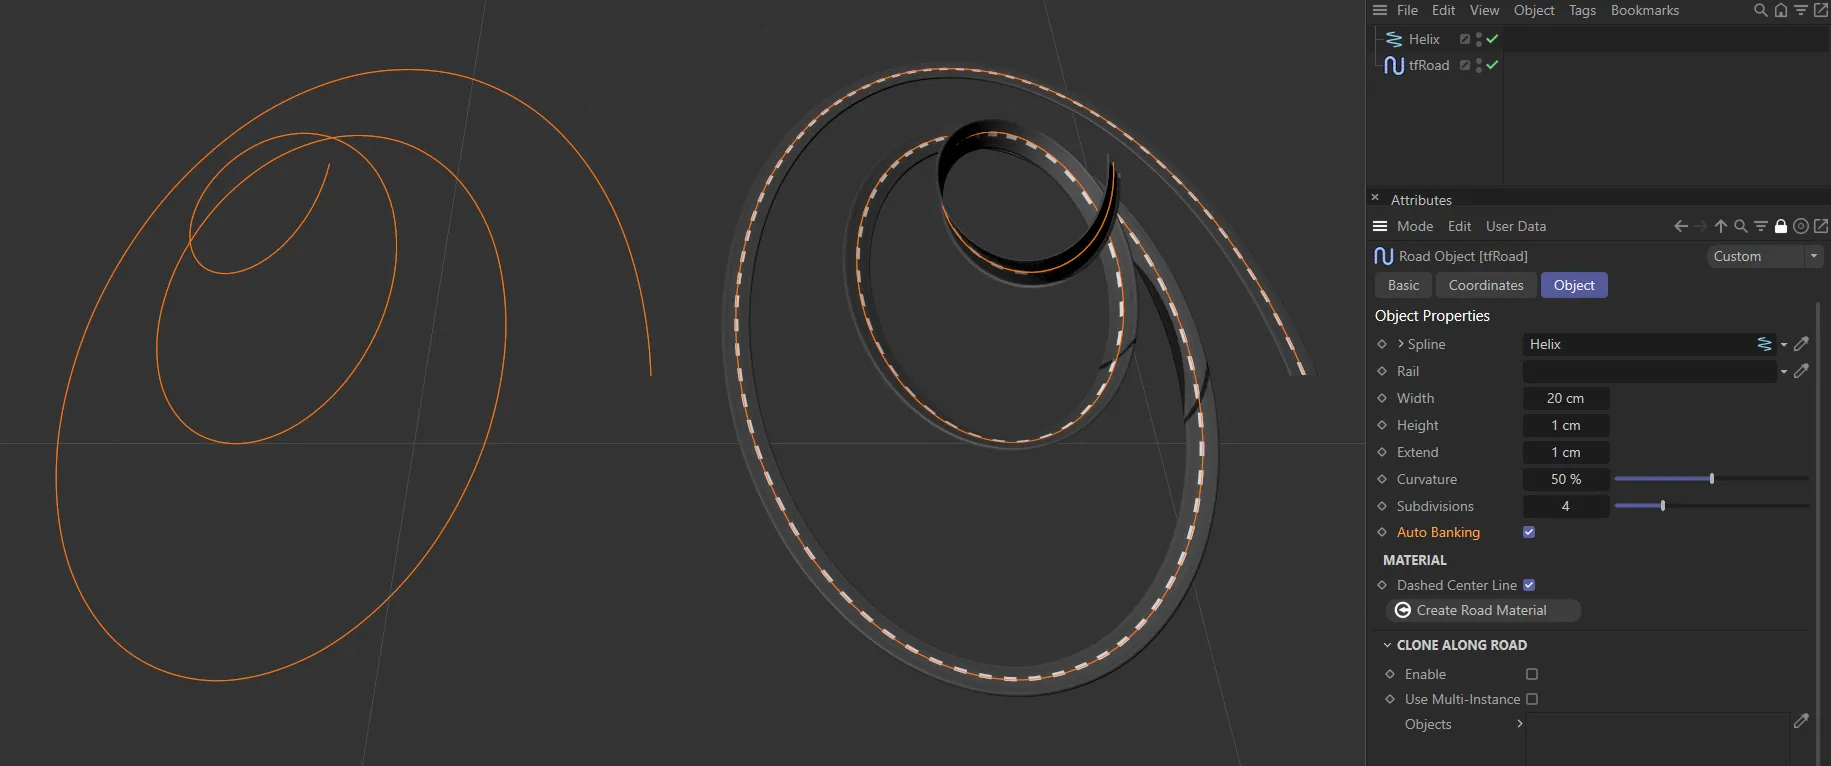
Here a Helix spline (on the left) is driving the generation of road, on the right, without Autobanking or a rail spline.
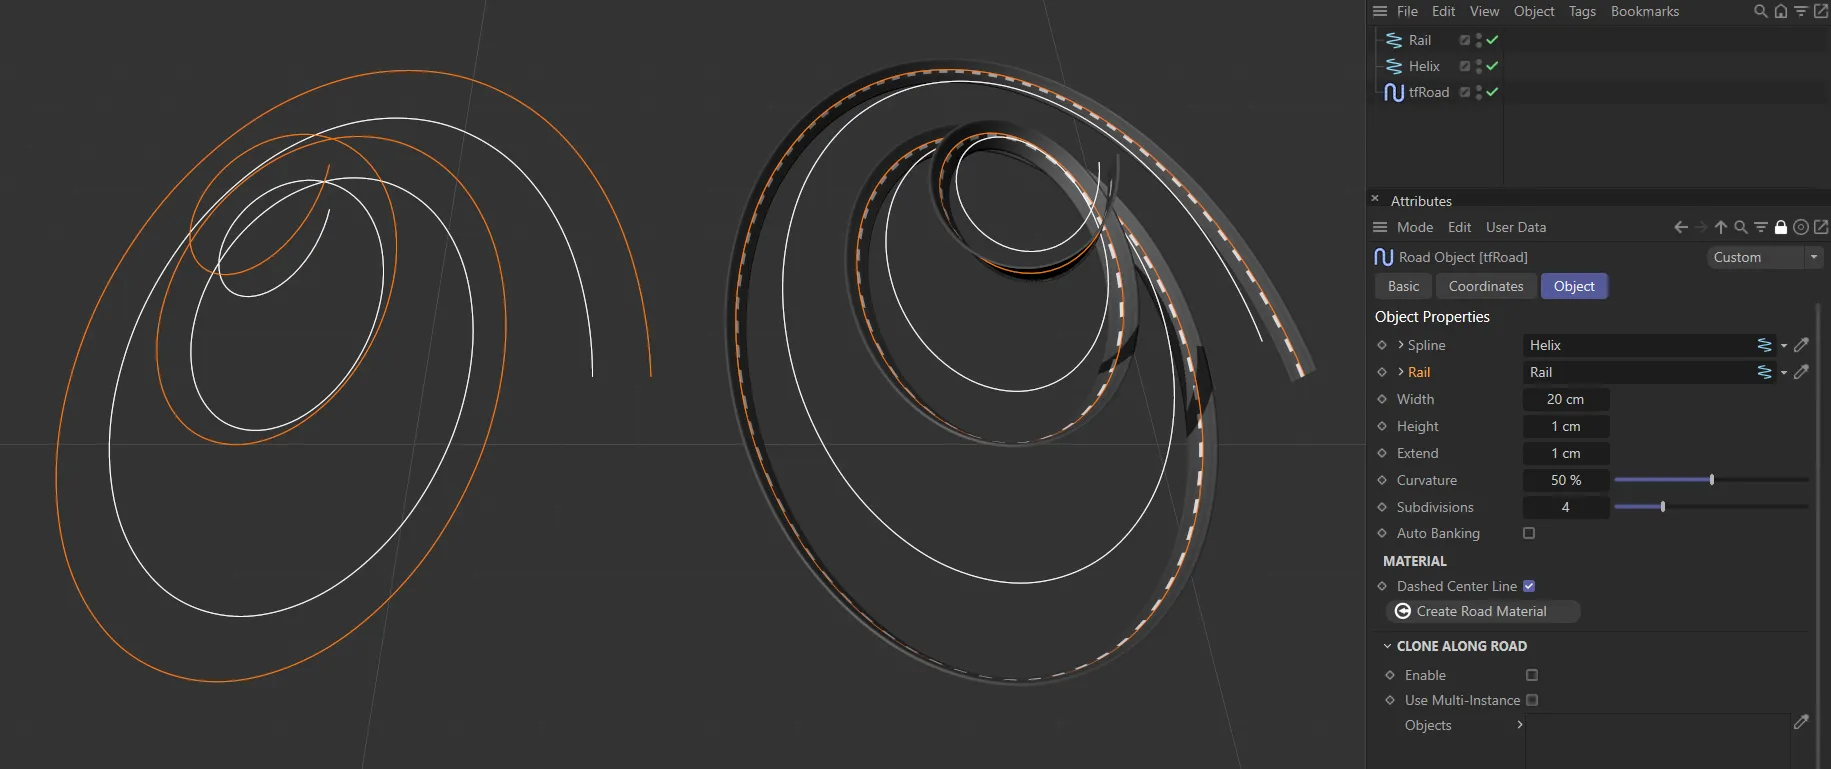
In this second image, the Rail in the Rail link field is creating a rail spline, resulting in a road that banks towards the center of the helix.
Increases and decreases the width of the road.
Height
Section titled “Height”The height levels of the road are set by the spline that has been used.
You can adjust the height levels here.
Extend
Section titled “Extend”This setting extends your road downwards on the Y-axis.
Curvature
Section titled “Curvature”Increasing the Curvature setting rounds off your road and road edges.
Subdivisions
Section titled “Subdivisions”Generates more polygons, allowing for more detail in the road.
Auto Banking
Section titled “Auto Banking”Enabling this will favor the bends in your road and the road will lean into the corners.
A Helix spline is used here, with Auto Banking enabled.
Material
Section titled “Material”Center Line
Section titled “Center Line”Set as Dashed, by default, this setting puts a dashed white line down the center of your road material.
The alternatives are: None (no white line) or Solid (an unbroken white line).
Skidmarks
Section titled “Skidmarks”Set as Two-way, by default, this option can put tire marks on your road surface.
The other options are: None (no tire-marks) or One-way (one set of tire-marks in each lane, as opposed to two).
Create Road Material
Section titled “Create Road Material”You can create a road material for your road objects.
Clone Along Road
Section titled “Clone Along Road”You can drag and drop objects (eg streetlamps - available in the Asset Browser) into the link field to clone them along your road.
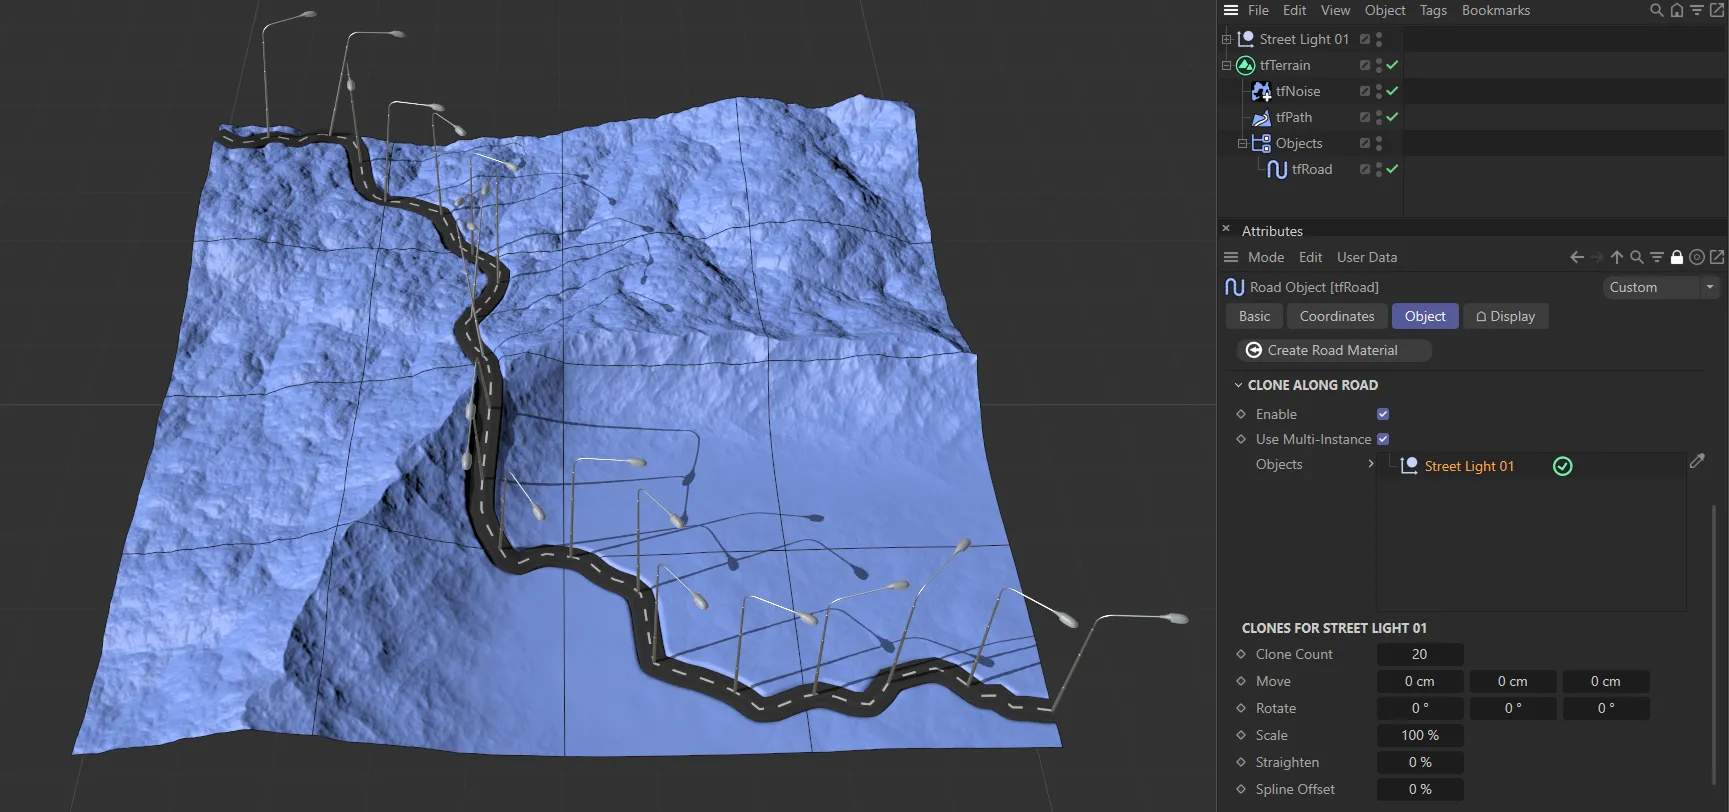
Street Light 01 has been added to the Objects link field, with Clone Along Road enabled on this terrain and a Clone Count of 20.
Enable
Section titled “Enable”Click this to enable the Clone Along Road option and open up a further menu for options for the clones.
Use Multi-Instance
Section titled “Use Multi-Instance”This option will further optimize the scene, creating one instance for all of the clones.
Objects
Section titled “Objects”Drag and drop objects into this link field.
If you have more than one object in the link field, simply highlight the one you wish to alter to get the options below.
Clone Count
Section titled “Clone Count”Adjust this to increase, or decrease, the number of clones.
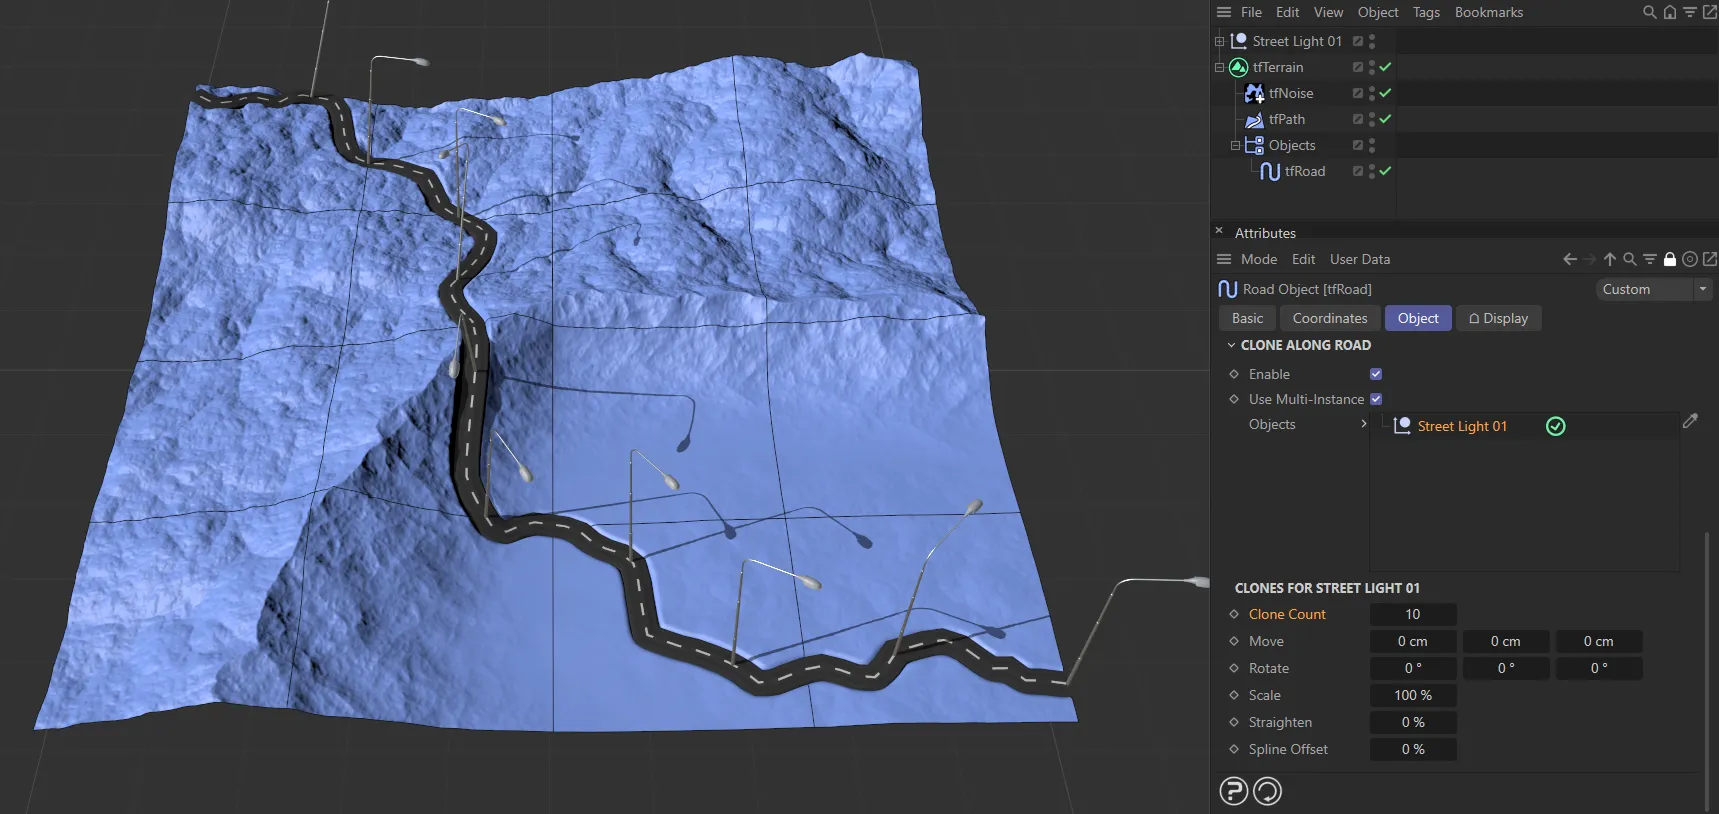
Clone Count reduced to 10, producing 10 street lights.
You can move the clones around on the X, Y, or Z-axes.
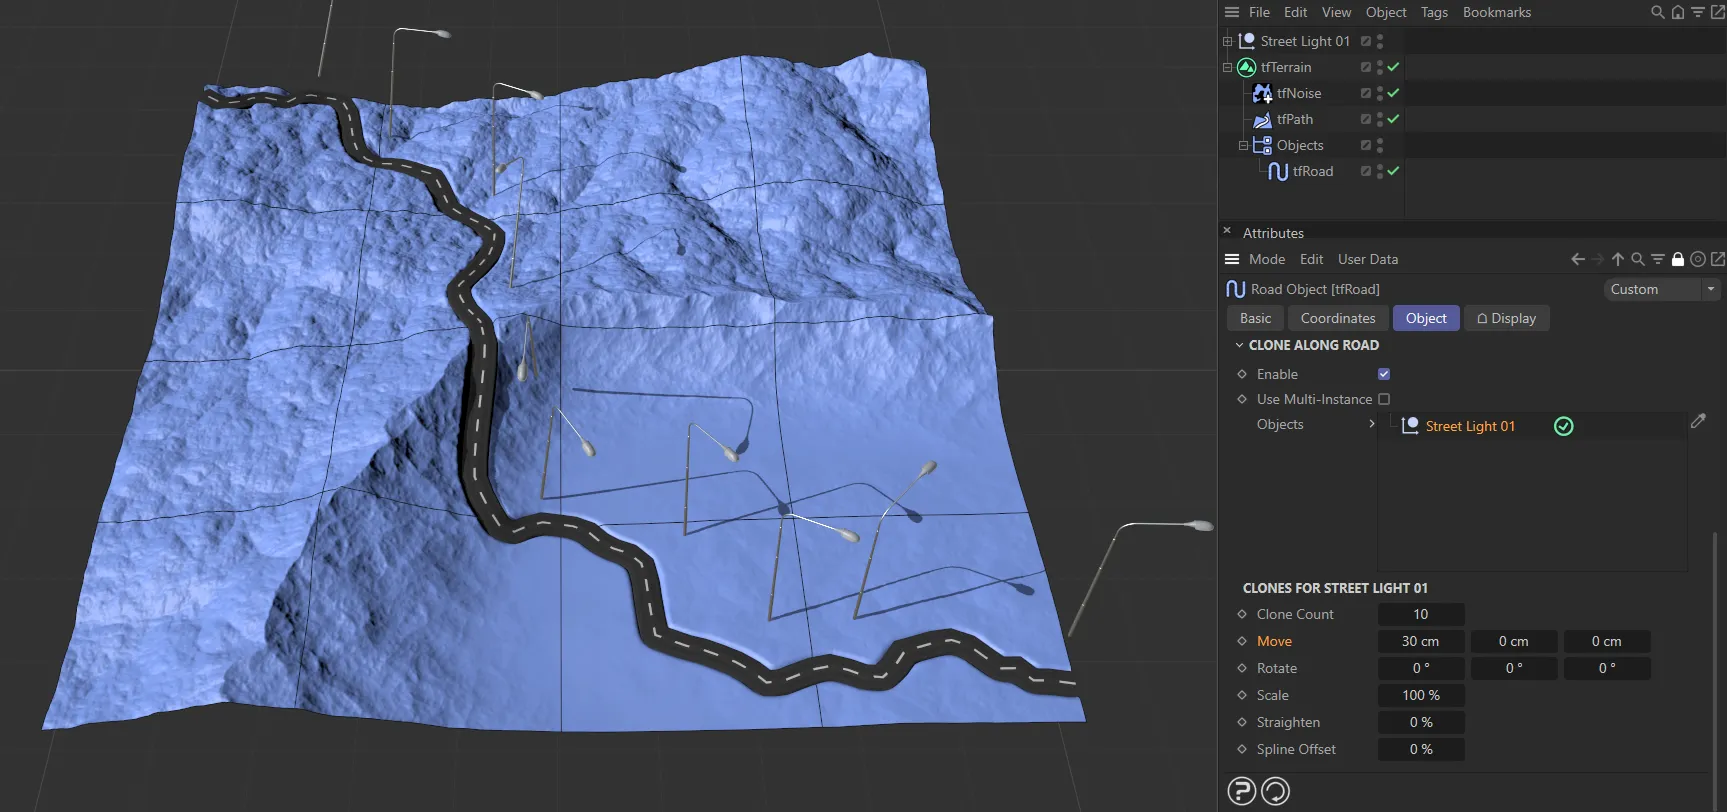
Here, the Move parameter has been used to push the street lights 30cm on the X-axis.
Rotate
Section titled “Rotate”The clones can be rotated in the heading, the pitch and the bank.
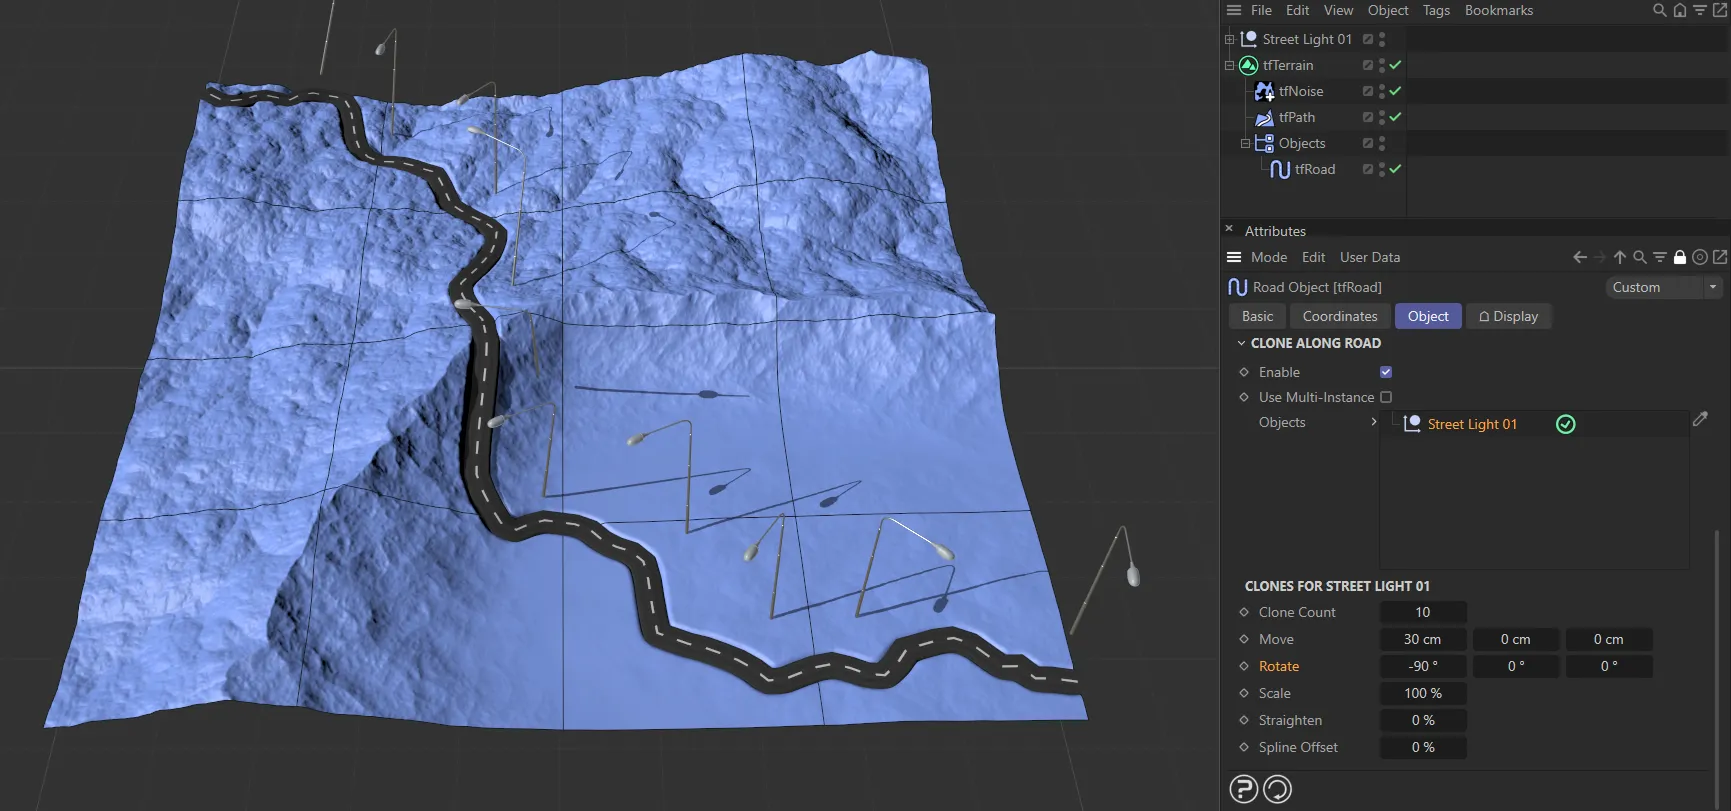
Further to the above, in this image, the Rotate value is -90 degrees, positioning the street lights over the road.
You can scale your scene objects up or down, to fit your scene.
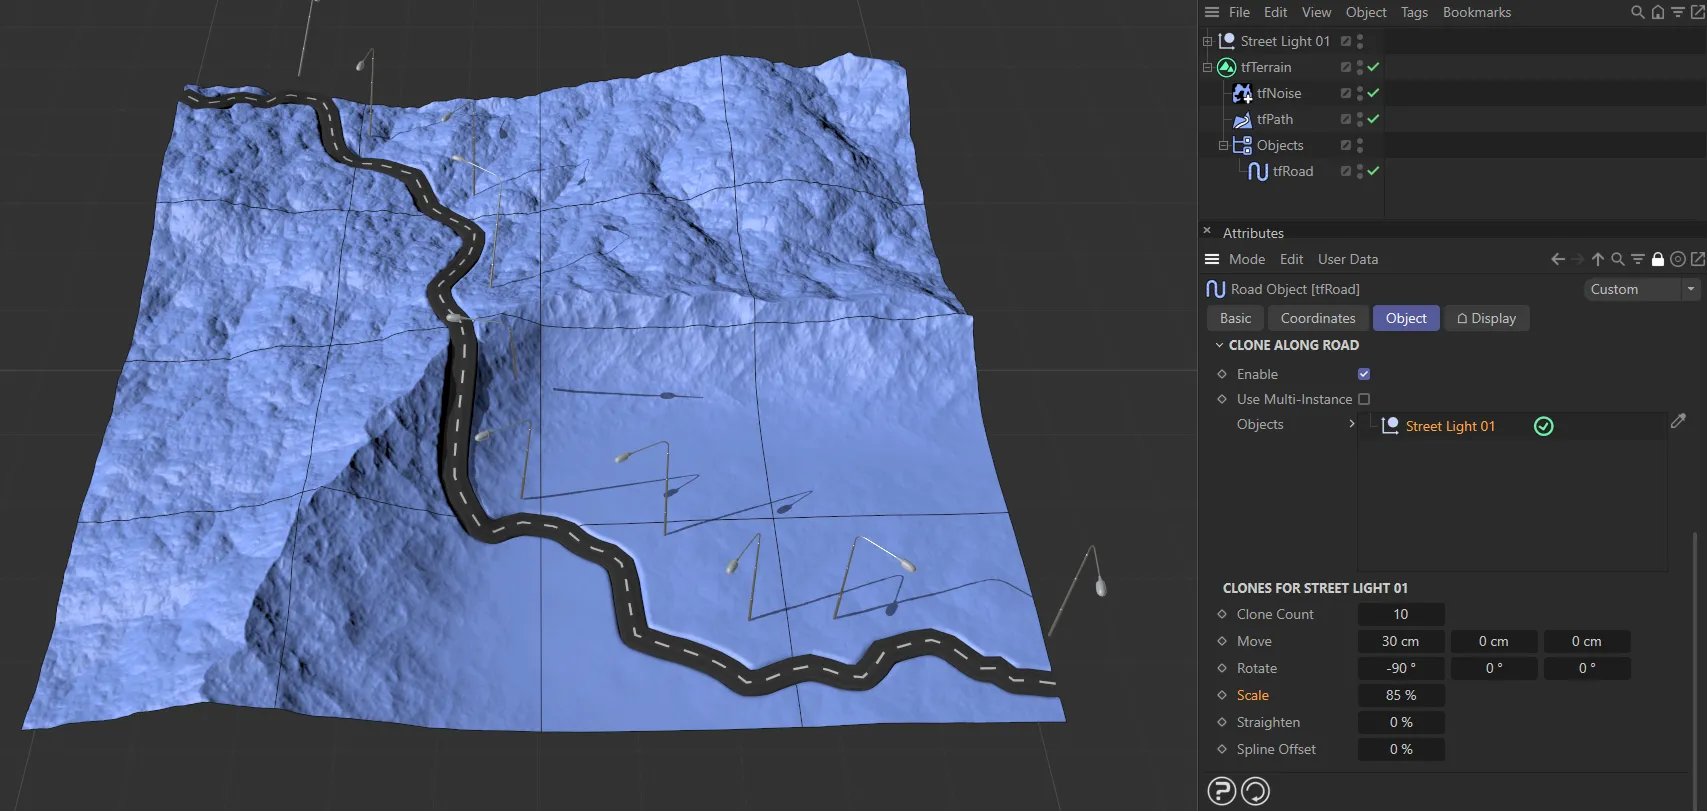
With the Scale setting at 85%, reducing the size of the street lights.
Straighten
Section titled “Straighten”This option will alter the angle of the object related to the Y-axis.
Spline Offset
Section titled “Spline Offset”Use this setting to offset your objects along the spline length, moving their position.
Clicking on the drop-down arrow will reveal two further parameters.

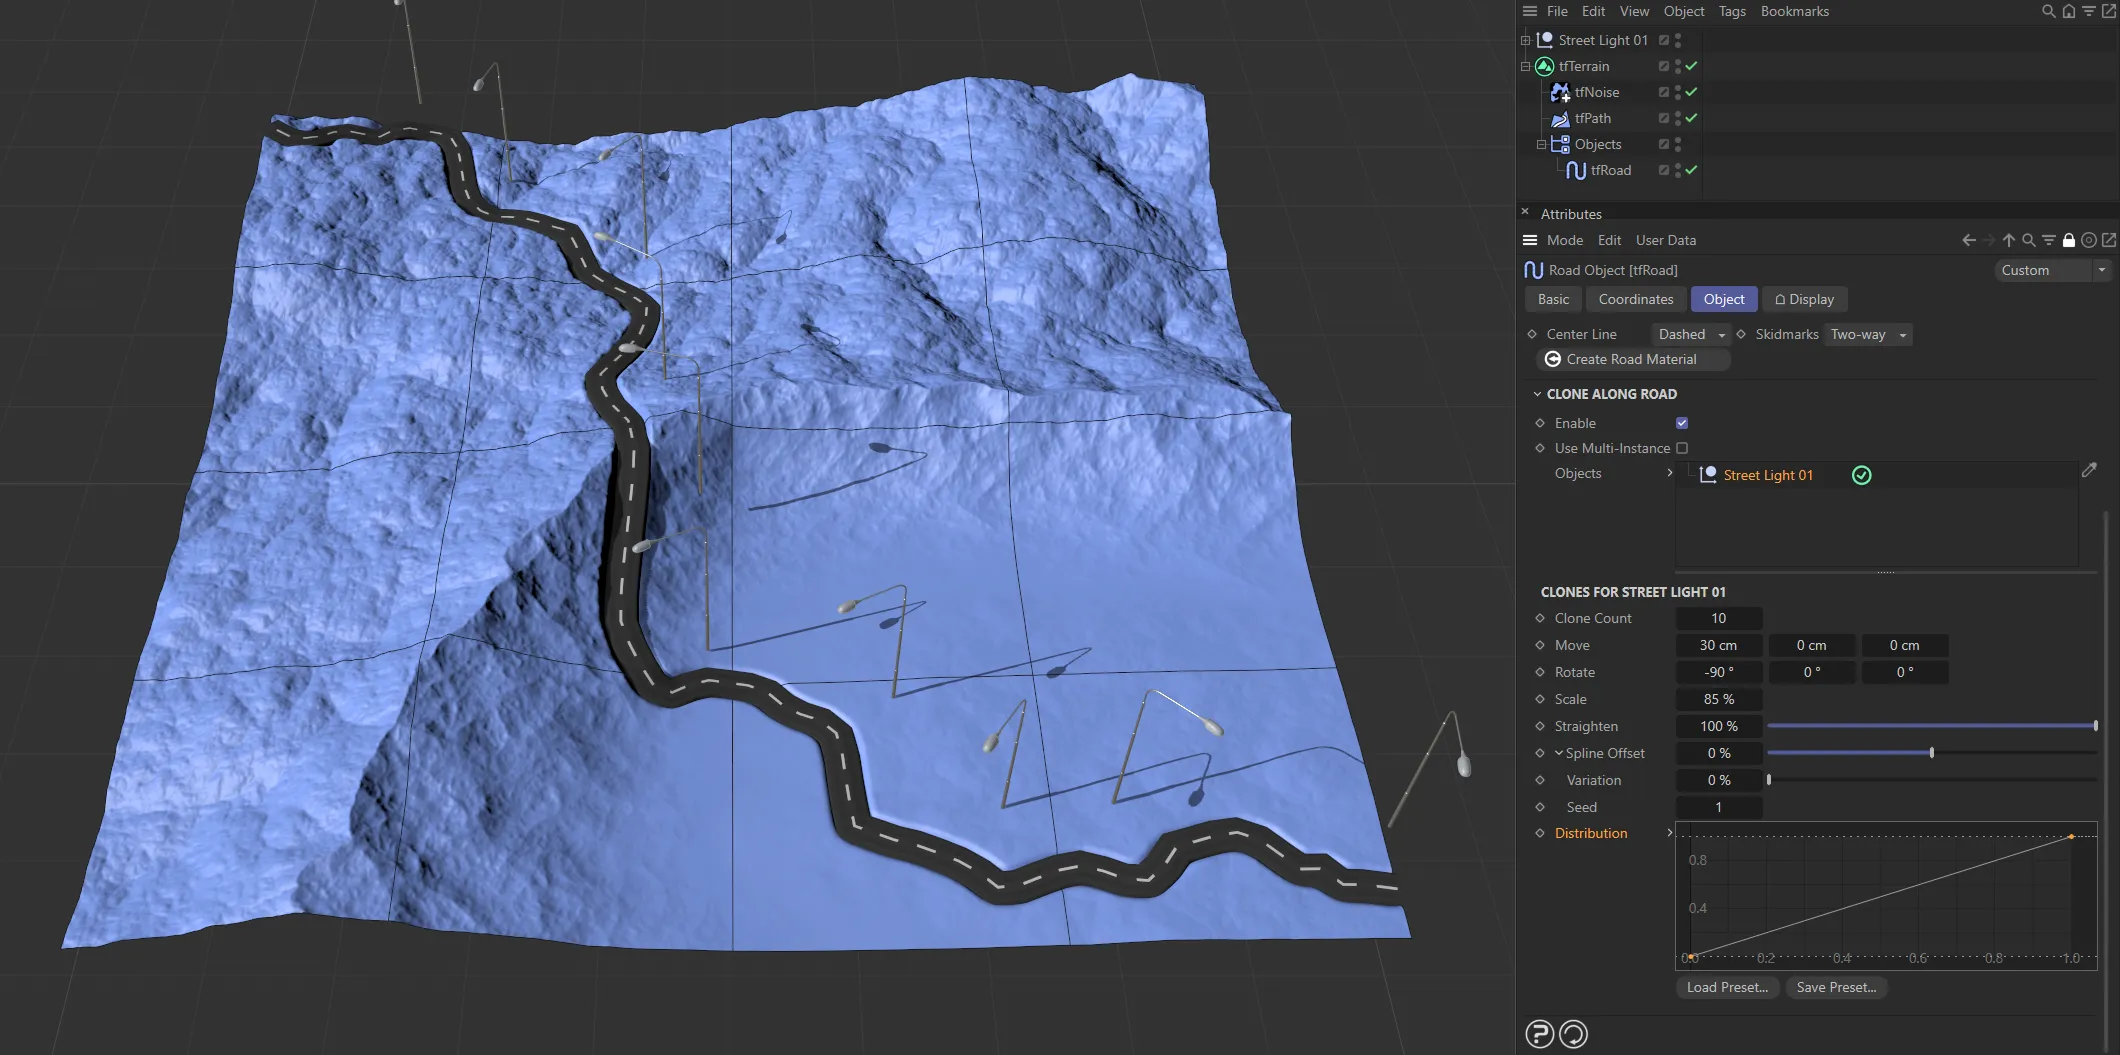
In this image, the Straighten value is at 100%, to straighten out the street lights, and the Spline Offset is at 4%, resulting in street lights offsetting from the road.
Variation
Section titled “Variation”Adding variation will give a more random, natural-looking clone distribution.
Changing the Seed will give an alternative, random ‘look’, based on your settings.
Distribution
Section titled “Distribution”Gives you more control over the placing of your clone objects, creating a custom clone distribution along the road spline.
The linear Distribution curve setting gives a linear distribution of clones here.

In this second image, the dense collection of clones is created by the steep incline in the Distribution curve setting.
Copyright © 2026 INSYDIUM LTD. All rights reserved.