xpSampleShader
The xpSampleShader can be used in any material channel which has a shader link.
For every point to be shaded on an object surface, the shader looks at a chosen parameter of all particles which are within a specified distance.
The parameter might be the particle speed, age, temperature, etc.
In its default mode, from those particles, the shader calculates an average value used as an index into a gradient; the color returned from the gradient is then used to shade the surface point.
Shader Properties
Section titled “Shader Properties”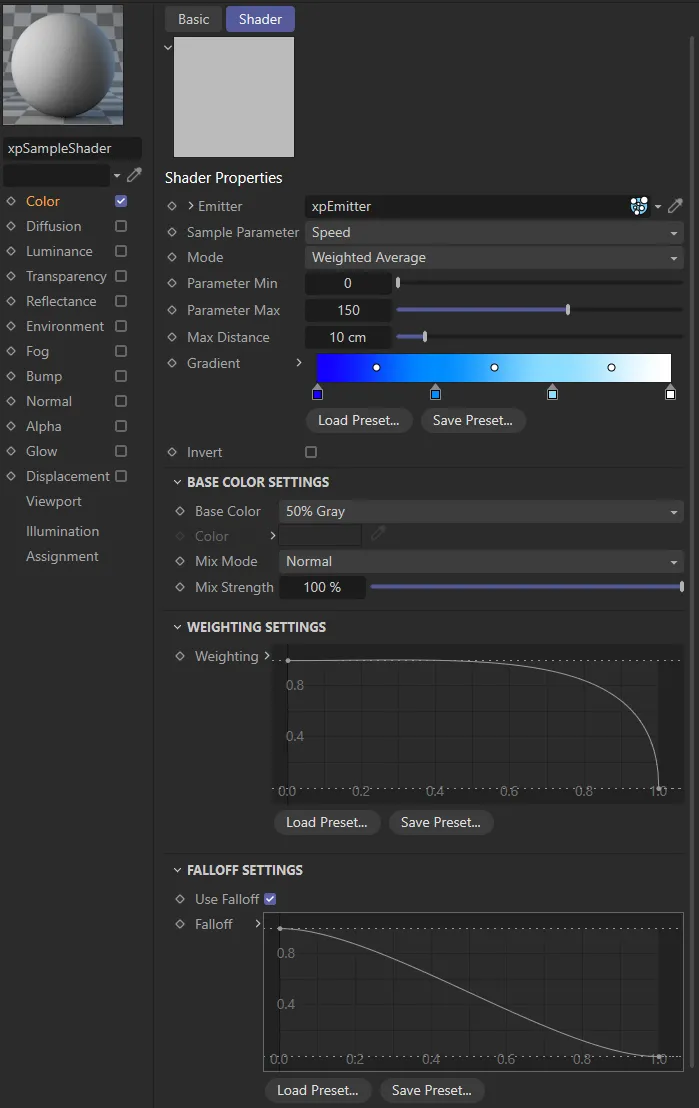
xpSampleShader menu settings.
Emitter
Section titled “Emitter”A link field for the emitter to be sampled.
Sample Parameter
Section titled “Sample Parameter”Set as Speed, by default, this is the particle data that will be sampled.
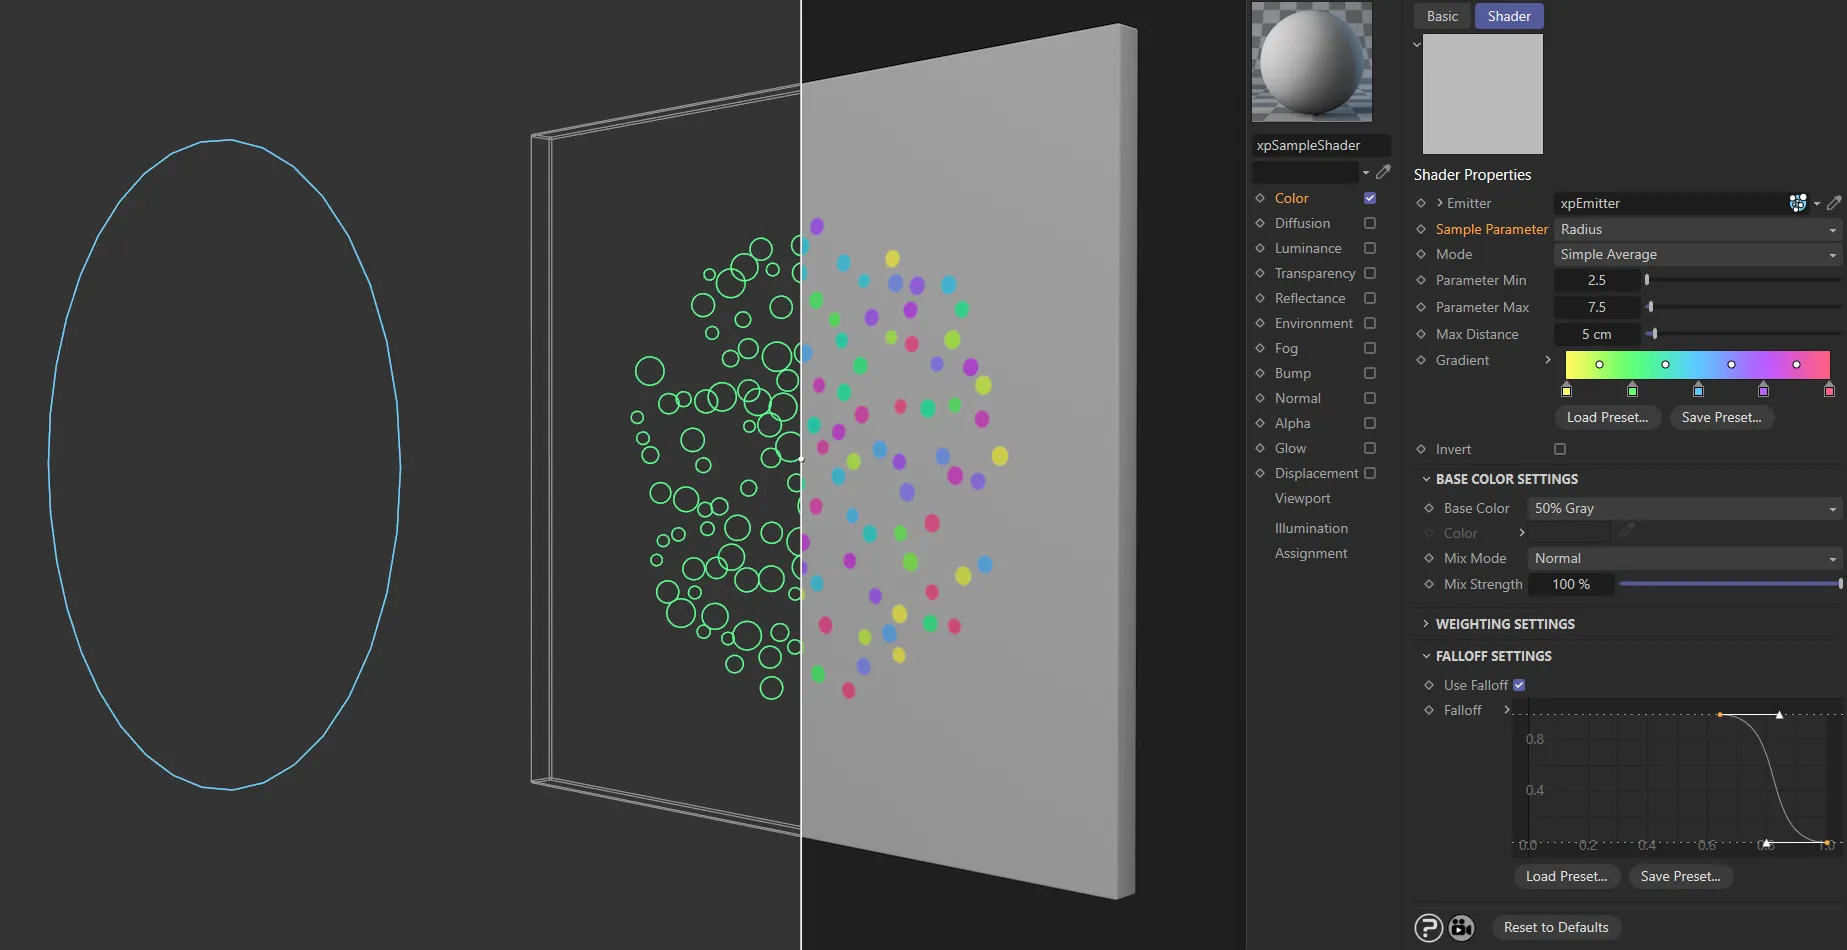
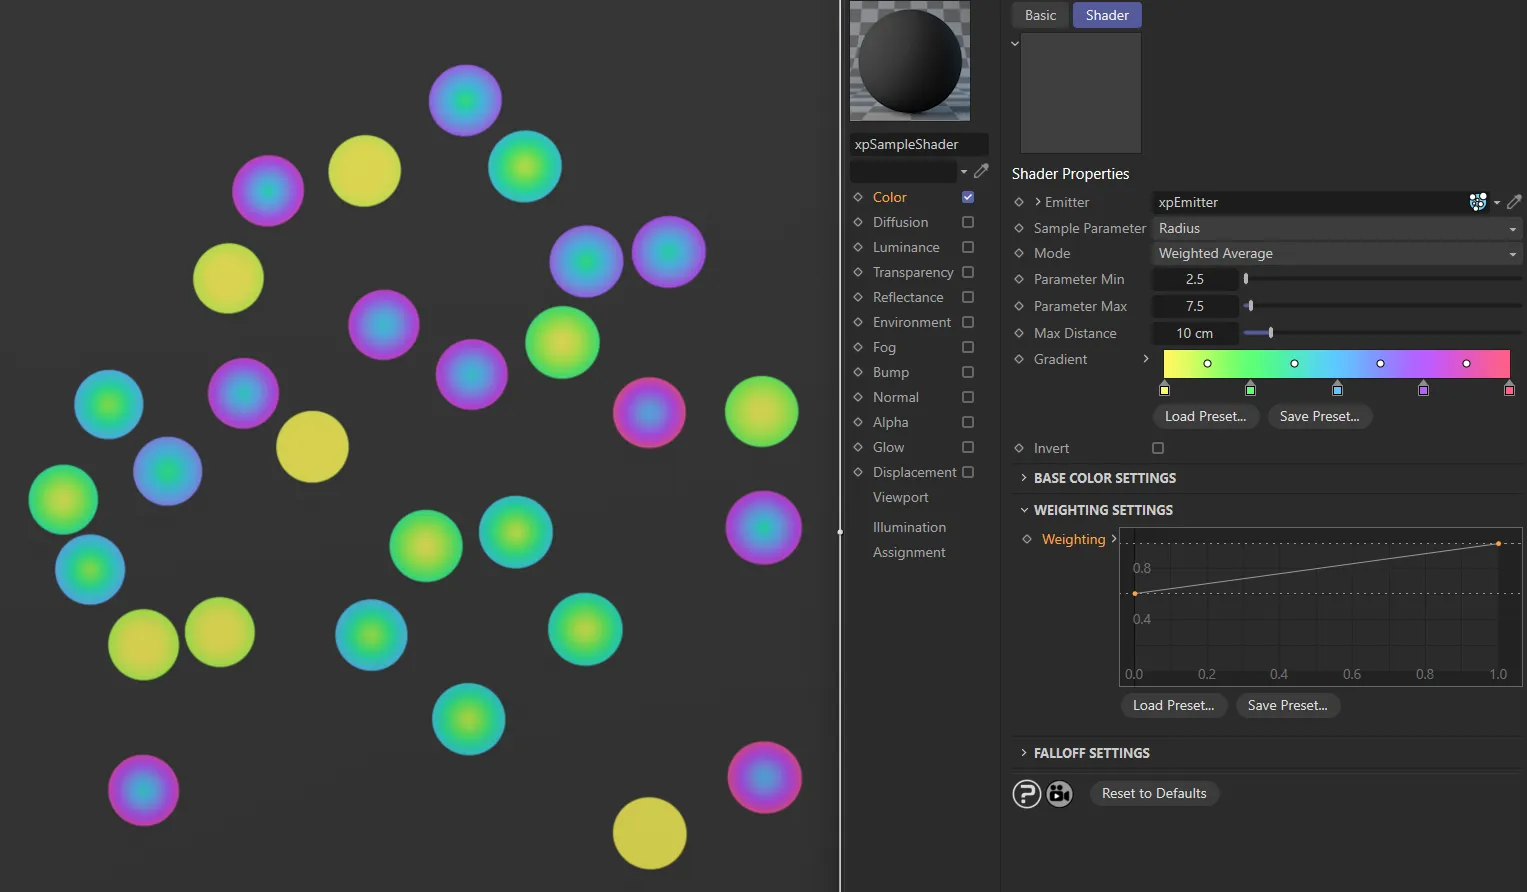
In this scene, the Sample Parameter being sampled is Radius, dictating where, in the color Gradient, the shading occurs from.
You can choose from a variety of parameters, including Custom Data, if required.
If you choose Custom Data, you will see the following three additional settings.
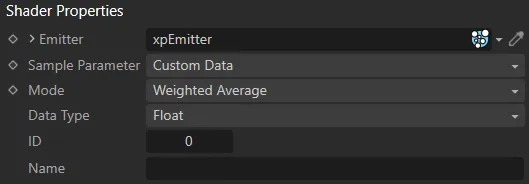
Sample Parameter set to Custom Data.
Data Type
Section titled “Data Type”Only custom data which are integers, floating point numbers or time values can be used here.
Other types are not supported.
ID, Name
Section titled “ID, Name”The ID and name of the custom data, used to identify the custom data item.
Set as Simple Average, by default, this drop-down menu determines how the index into the gradient is calculated.
What difference you see between these options depends, to a great extent, on how many particles affect the point to be shaded (which in turn is affected by the Max Distance setting).
In some cases you may see little or no difference between these options.
The other options available are: Weighted Average and Nearest Particle.
Simple Average
Section titled “Simple Average”A simple mean value of the parameter from all the particles within range is used.
Weighted Average
Section titled “Weighted Average”With this option, more weight is given to particles nearer the shaded point.
The weighting is controlled by the Weighting spline control (see below).
Nearest Particle
Section titled “Nearest Particle”The parameter of the nearest particle to the shaded point is used.
No other particles are taken into consideration.
Parameter Min, Parameter Max
Section titled “Parameter Min, Parameter Max”These are the minimum and maximum settings for the selected sample parameter.
If the parameter value is less than the minimum value, the color at the left-hand edge of the gradient is returned; if it is greater than the maximum value the color at the right-hand edge of the gradient is returned.
Max Distance
Section titled “Max Distance”Any particle further away than this distance from the shaded point will not be included in calculation of the color for that point.
Gradient
Section titled “Gradient”The color is chosen from this gradient, as described above.
Invert
Section titled “Invert”if checked, the returned color is inverted (i.e. black becomes white and vice-versa).
Base Color Settings
Section titled “Base Color Settings”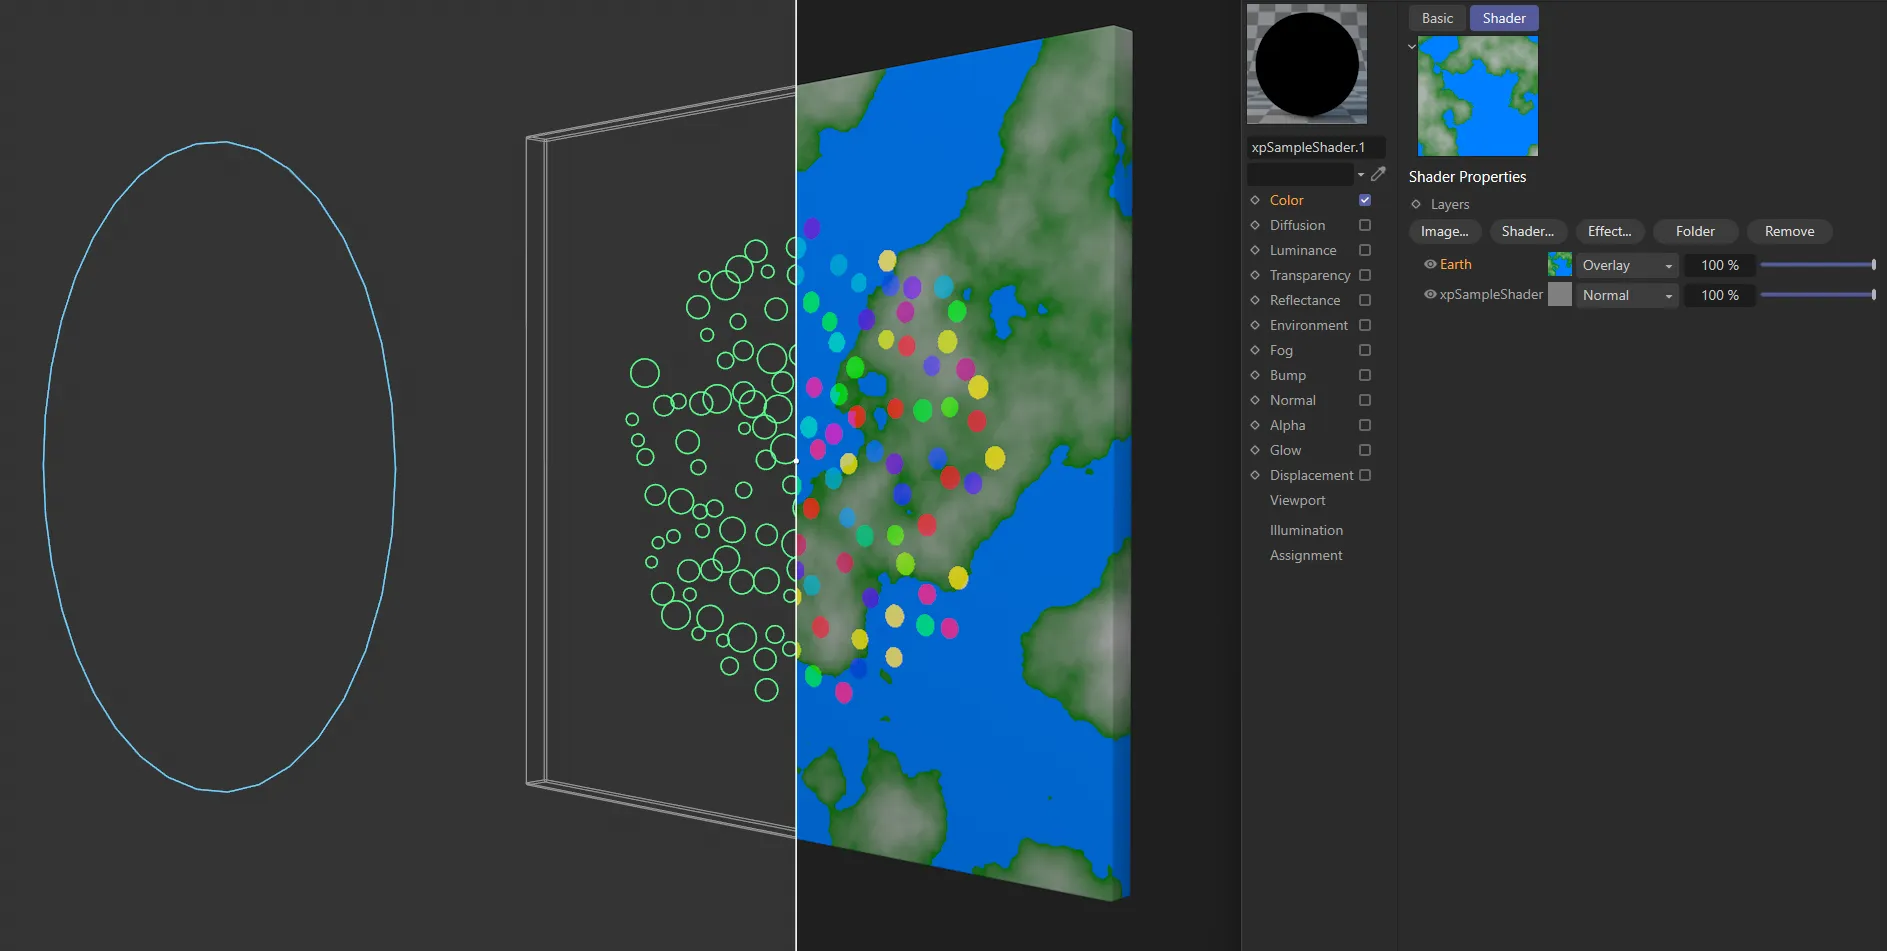
Here, there is an Earth shader with the sample shader beneath it. Note: The Earth shader is set to Overlay. In the sample shader, Base Color is set to 50% Gray. With these settings, the colour from the sample shader is overlaid on the Earth shader without any of the base color (gray) being visible.
Base Color
Section titled “Base Color”Set as 50% Gray, by default, this is the color the shader will return if no particles are within range of the shaded point.
The other options are: Black, White and Custom.
A color field which is only available if Base Color is set to Custom.
Mix Mode
Section titled “Mix Mode”Set as Normal, by default, this controls how the color from the gradient is blended with the base color.
The usual choices are available, such as Add, Difference, Multiply, etc.
Mix Strength
Section titled “Mix Strength”This controls the ratio in which the gradient and base colors are mixed.
Weighting Settings
Section titled “Weighting Settings”Weighting
Section titled “Weighting”This spline controls the weight given to particles at different distances from the shaded point.
It is only available if Mode is set to Weighted Average.

The default Weighting spline is controlling the weight given to particles here.
In this second image, a custom Weighting spline is adding control over where colors start and end.
Falloff Settings
Section titled “Falloff Settings”Use Falloff
Section titled “Use Falloff”If this box is checked, the Falloff spline becomes available.
This lets you produce soft edges to the rendered circle rather than hard edges.
Falloff
Section titled “Falloff”This spline controls the falloff of the rendered circle.

With no falloff set, the shading is hard, around the edges.
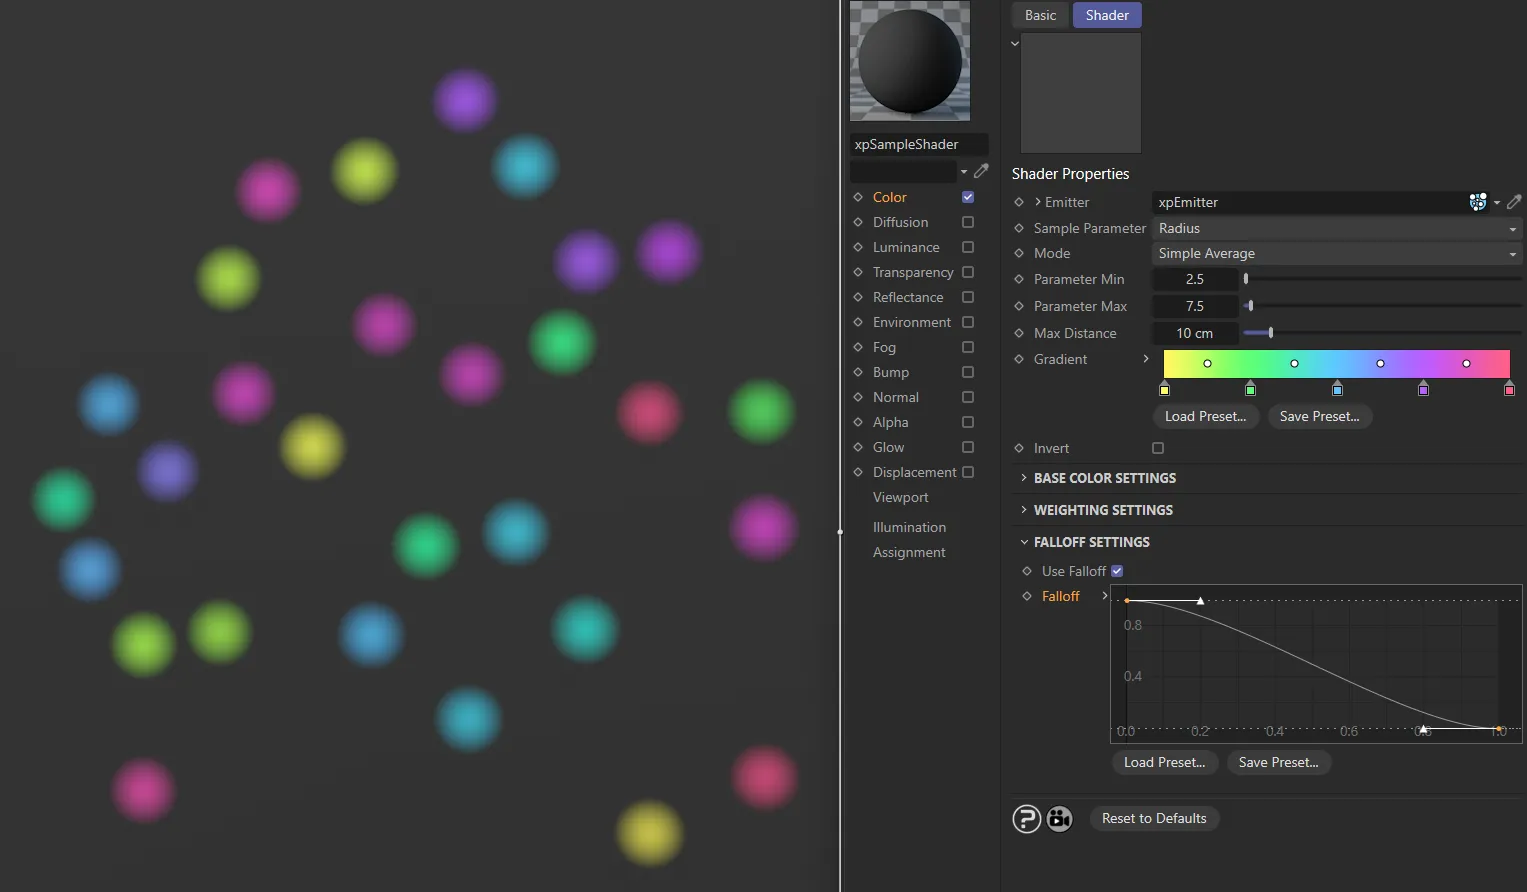
This gentle downwards Falloff setting gives a gradual fade towards the edges.
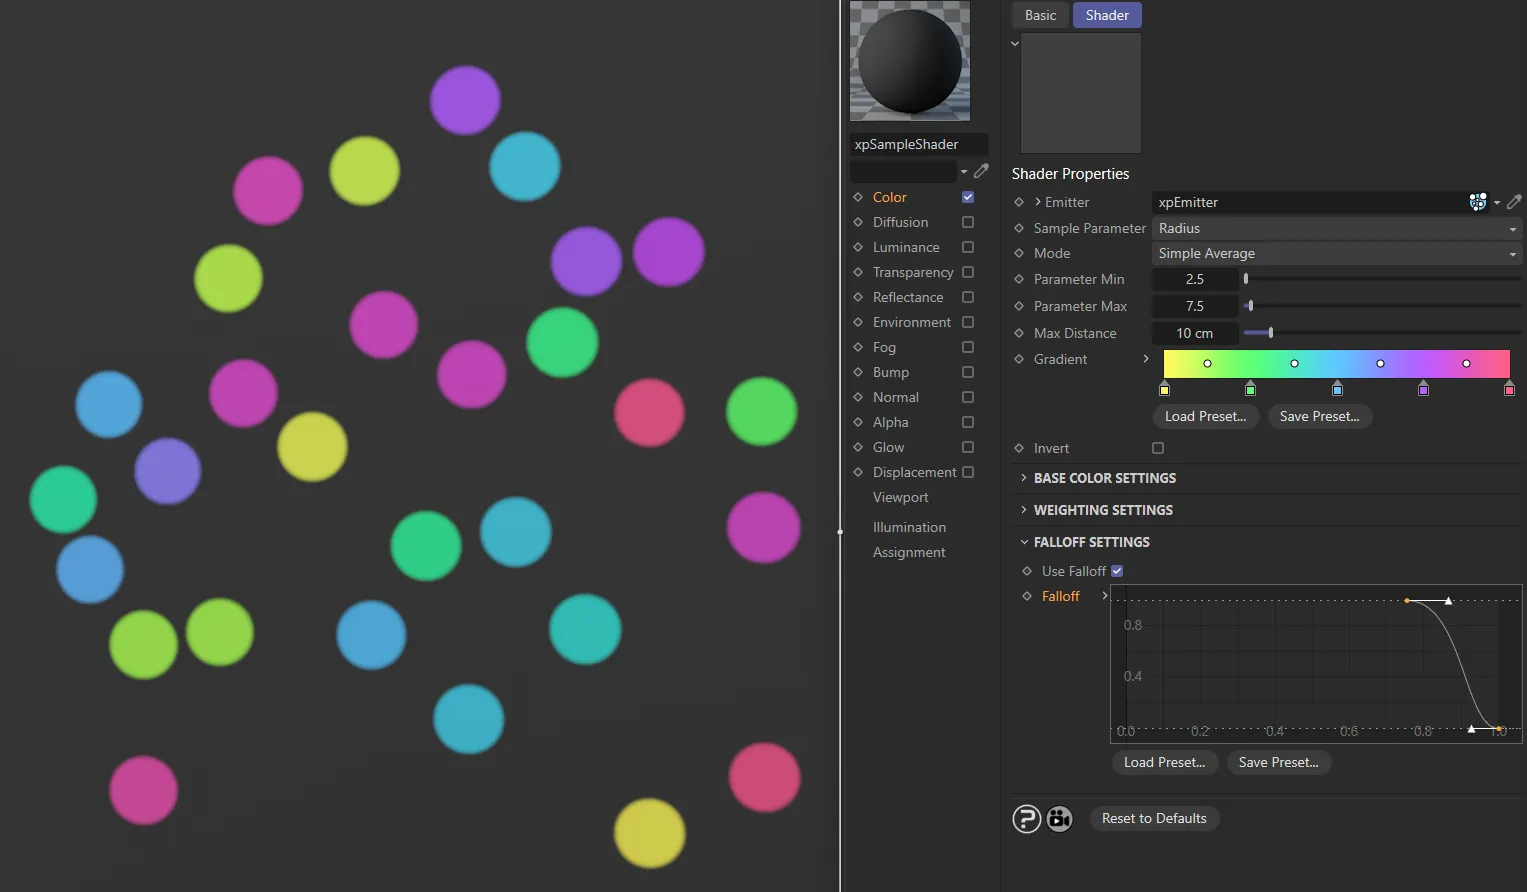
In this image, the Falloff has been pushed further towards the edges.
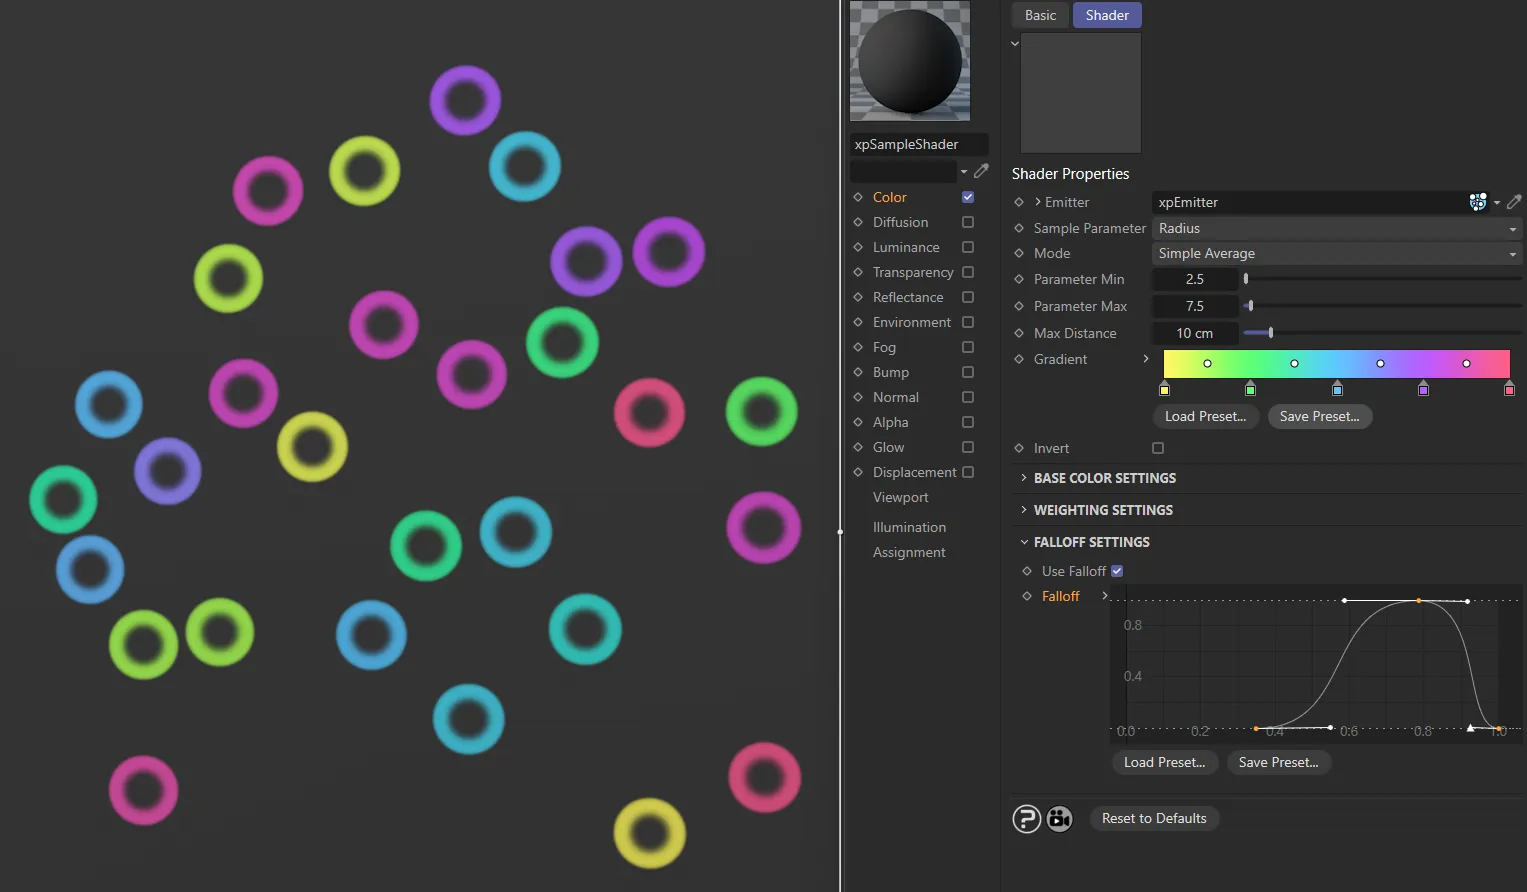
This final custom Falloff setting is creating rings, with softened edges.
Copyright © 2026 INSYDIUM LTD. All rights reserved.