xpExplosaFX Source
This tag must be added to any object intended to be used as a source for an ExplosiaFX solver.
It controls the initial parameters for the burn model.
You can attach this tag to a variety of objects.
The source object can be:
- a polygon object or a primitive object which, when made editable, would be a polygon object.
- a spline, either a primitive or editable; the spline vertices are the source, so you may need to add more vertices for a uniform appearance along the spline.
- an xpEmitter.
You cannot use a MoGraph cloner directly as a source object.
Instead, make the cloner a child of an X-Particles Join object and add the source tag to that.
All the clones will then be used as a source.
If you use an xpEmitter, there are certain other things you must do:
- in the emitter’s Extended Data tab, increase the initial Temperature setting from zero (in the Physical Data tab), essential to ignite the fuel; it is recommended that you try a value of 1 in the first instance.
- in the same tab, give the particles some fuel; a value of 1 may be enough; if you add too much the fire will never go out.
- adjust the particle radius to suit the effect you want; start with the same as the voxel size in the solver and increase or decrease it as required.
What this means is that a texture is only sampled at the points where there are vertices in the object.
If you have an object with only a small number of vertices the texture may appear to have no effect or you may see no burning at all, depending on the texture sample at each vertex.
Therefore, to use textures effectively, make sure your objects have plenty of vertices to ensure the texture is sampled adequately.
Tag Properties
Section titled “Tag Properties”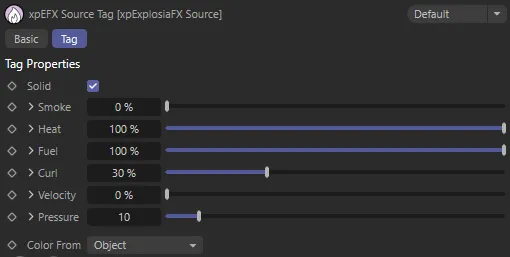
xpExplosiaFx Source tag menu settings.
If the source is an object other than X-Particles emitter, a little arrow is seen next to the various parameters.
If you click the arrow, additional parameters are made available.
These additional parameters are: Custom and Tag or Texture (depending on the Custom setting).
Custom
Section titled “Custom”This drop-down menu enables you to specify what area on the object is used by the solver as the source of the smoke or heat etc.
Normally this is the entire object, but you can set this menu to Tag or Texture.
If Tag is selected, you can drag a selection tag, vertex map tag or texture tag into the Tag field and then only that part of the object is used as the source.
If Texture is selected, you can add a shader or bitmap to a Texture field to specify the area to use as the source.
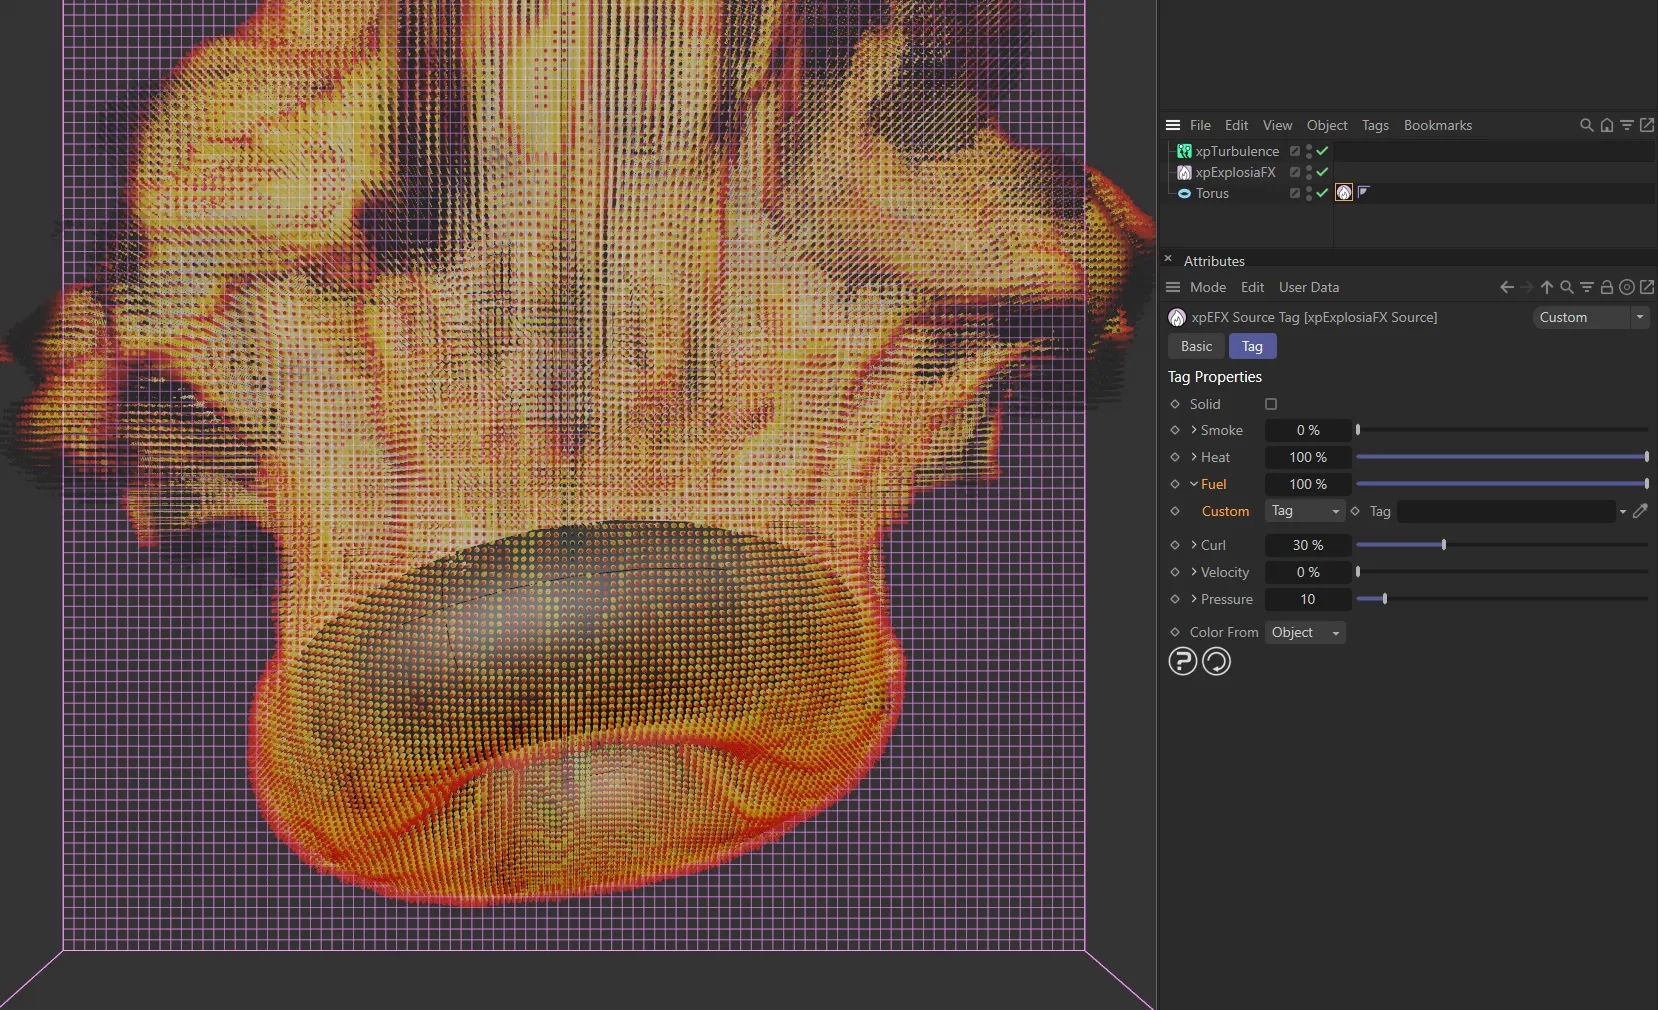
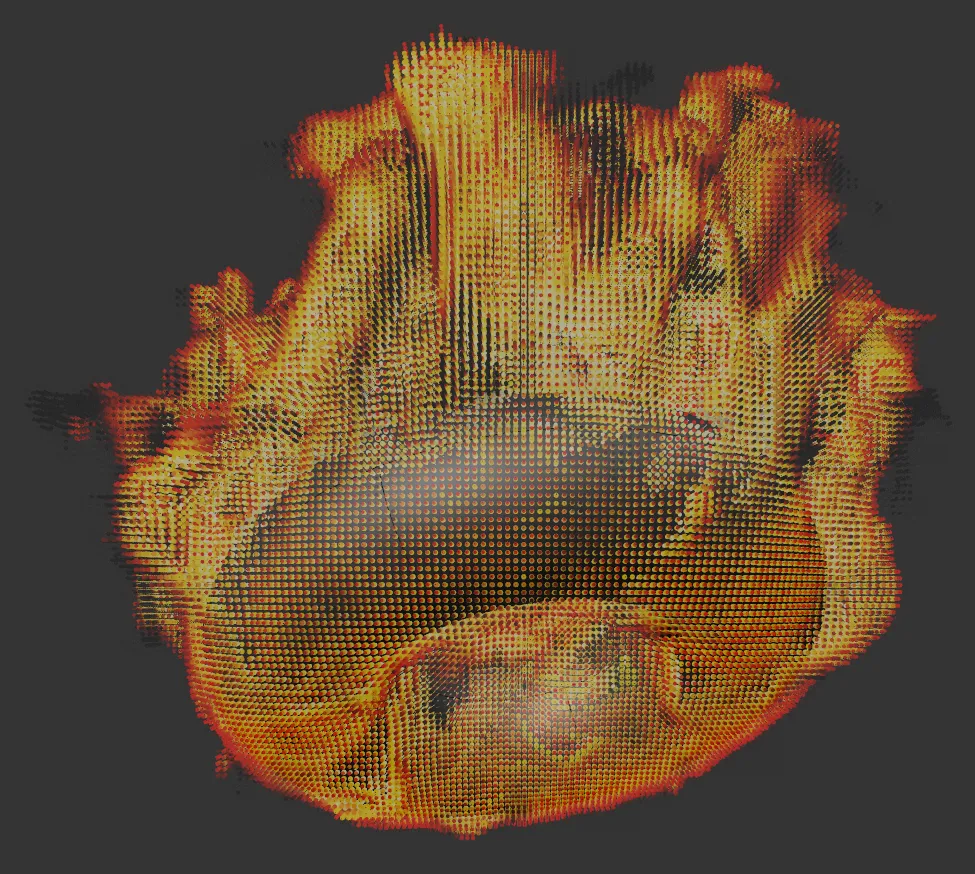
In this image, with Custom set as Tag, there is no tag (or texture) set, resulting in the full source mesh emission.
A link field for a selection tag, vertex map tag, or texture tag if Custom is set to Tag.
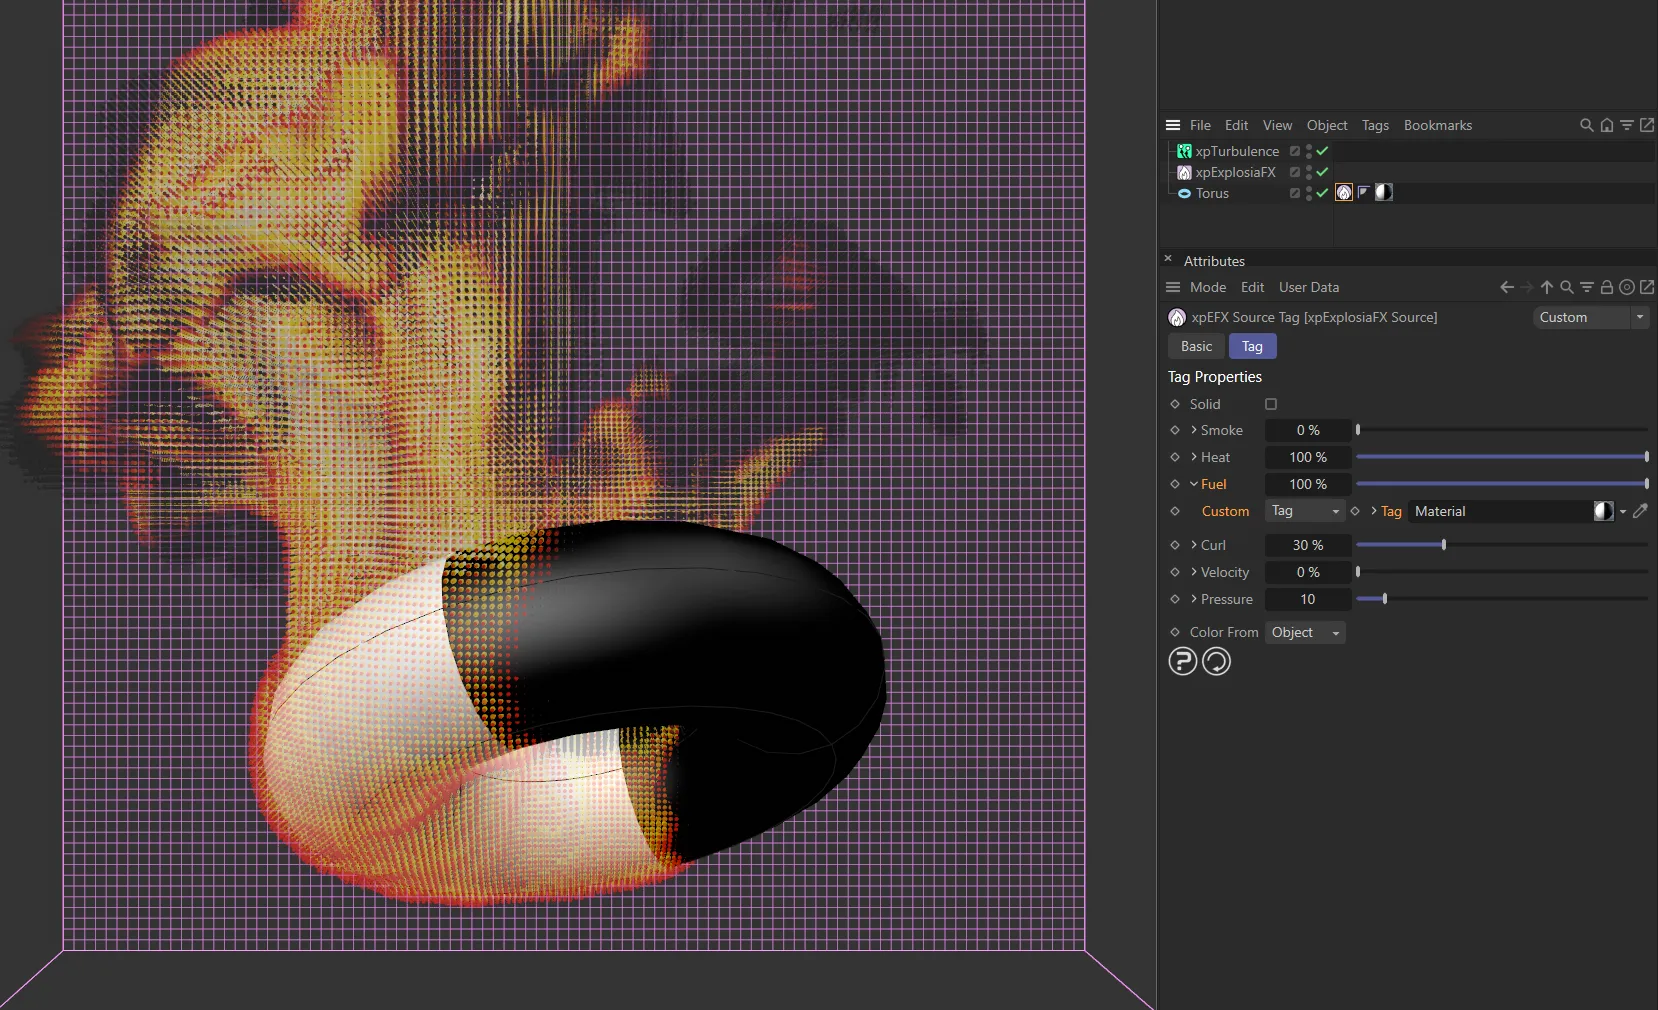
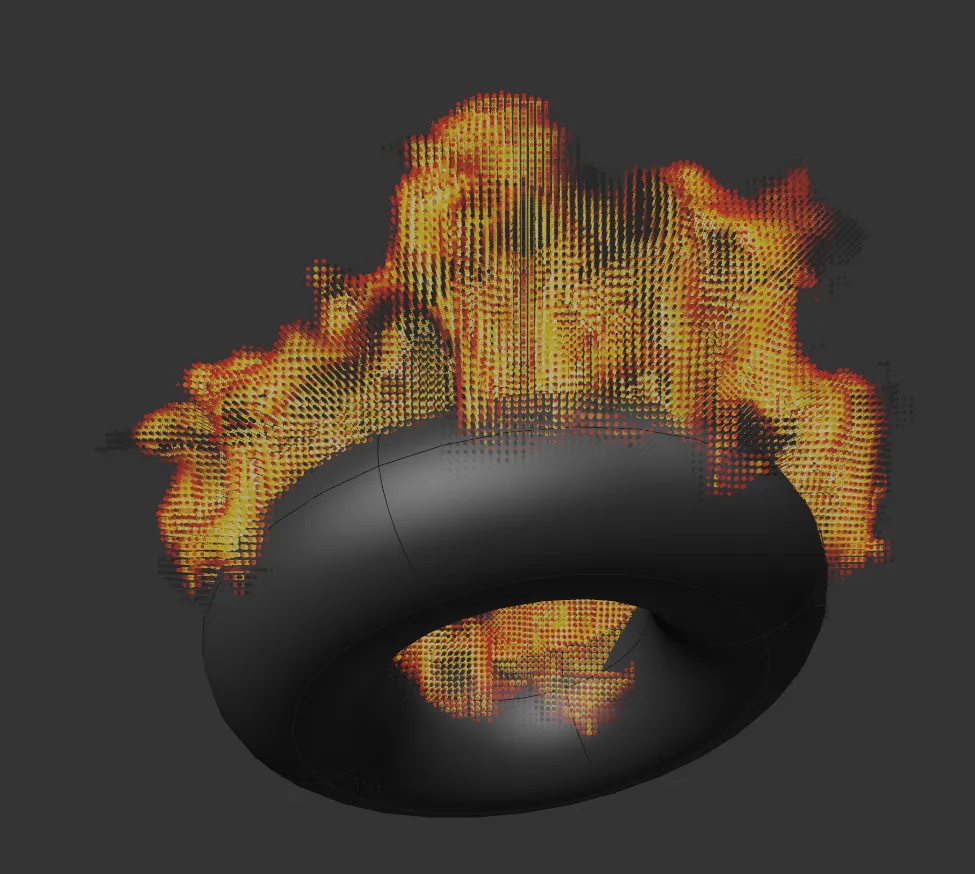
Here, a Cinema 4D material has been dropped into the Tag field and applied to the Torus. This checkerboard texture is set in such a way that half is white and half is black. The white is creating the emission, as it’s this area that has the fuel.
Texture
Section titled “Texture”A field for a shader or bitmap if Custom is set to Texture.
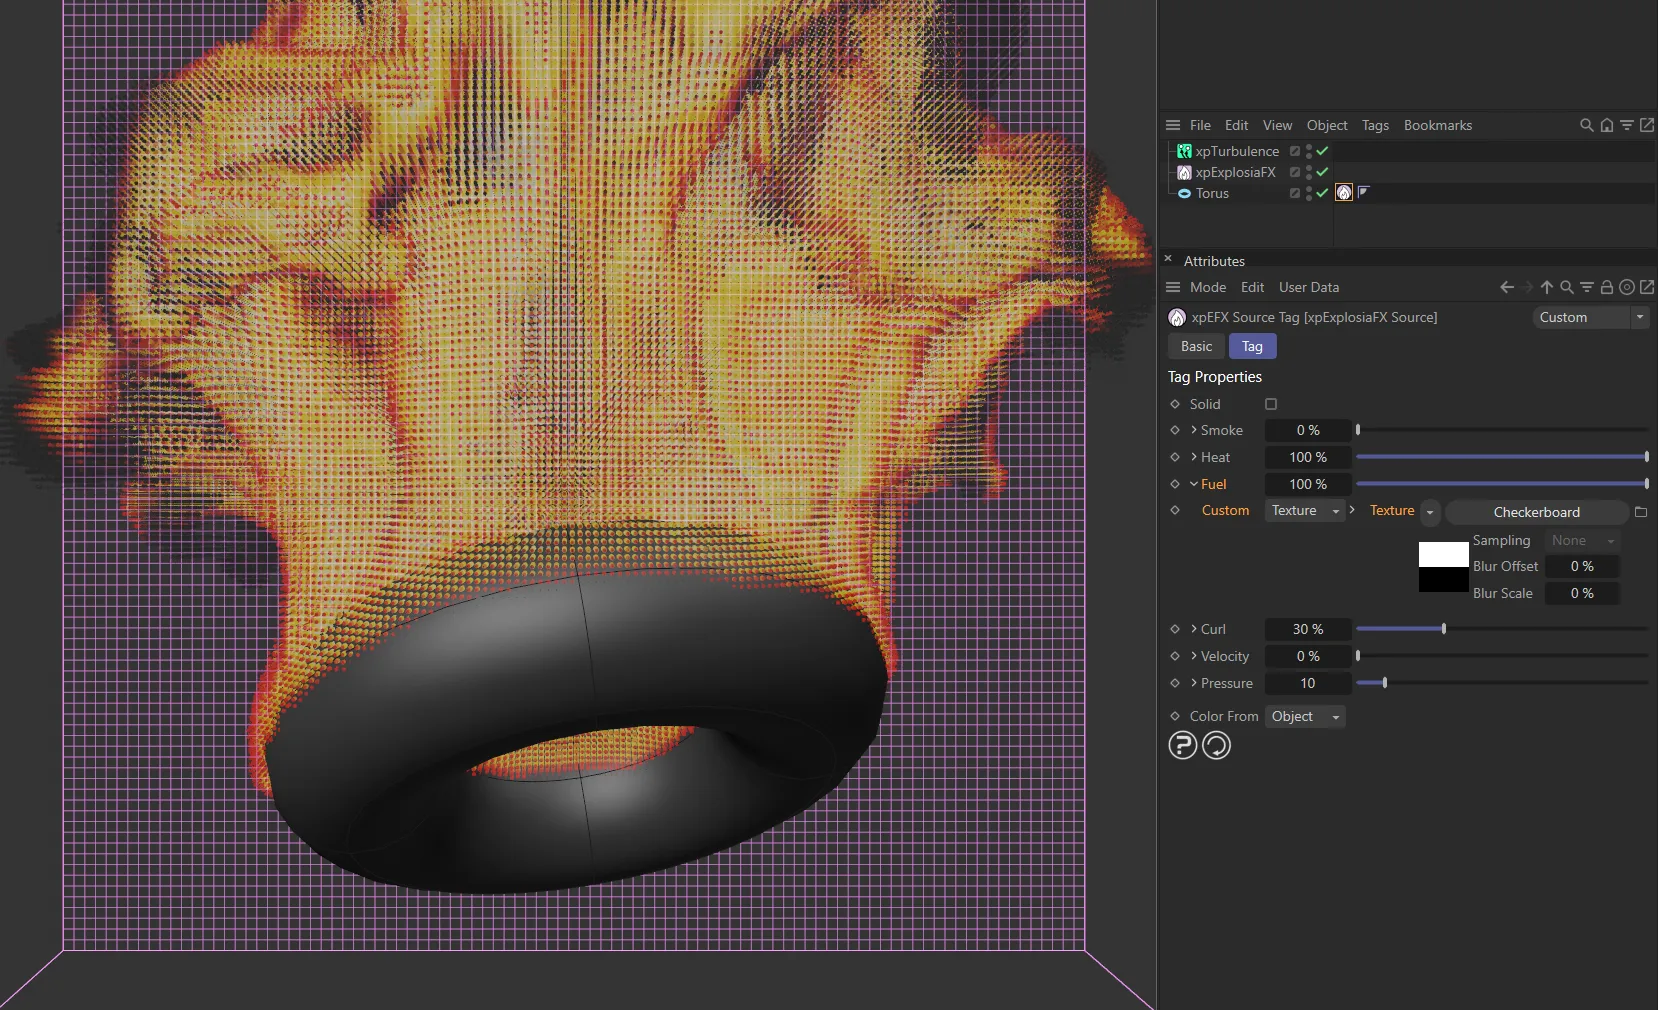
With Custom now set as Texture, Checkerboard has been selected from the Texture dropdown. The checkerboard shader can not be seen but it’s effects are visible, with the top half of the Torus having fuel, which is then able to be burned.
When textures are rendered in Cinema 4D, this is normally a multi-threaded process.
But sampling a texture tag without a full render can only be single-threaded - there is a risk of random crashes if multi-threaded sampling is done outside an actual render.
This does not apply if shaders are sampled directly.
The result of this is that if you set Custom to Tag and drop a texture tag in the link field, sampling is single-threaded.
This is therefore much slower than if you set Custom to Texture and add a shader or bitmap directly to the Texture link field.
If this is checked, the object is treated as a solid and its volume is used as the source.
If it is unchecked, the object’s surface is used as the source.
Solid is disabled here.
Solid enabled.
Smoke is normally generated from fuel, but this parameter lets you generate it independently.
The value is zero by default, but if you set Fuel to be very low and you still want plenty of smoke, you can increase this value as desired.
The amount of heat to generate.
The fuel used in the simulation.
If it is set to zero, there will be no burning.
The amount of curl in the simulation.
Velocity
Section titled “Velocity”If the object to which the tag is linked is animated and this value is greater than zero, the object’s velocity will be transferred to the ExplosiaFX velocity field.
Pressure
Section titled “Pressure”The pressure applied to the gas on ignition.
The higher this is the more violent the ignition.
Color From
Section titled “Color From”Set as Object, by default, this setting is only used if Color has been checked in the Explosia solver’s Solver tab and Color is selected as the display channel.
The other options are: Shader and Custom.
Object
Section titled “Object”The color to use is obtained from the source object, that is, the Display Color color in the object’s Basic tab.
Shader
Section titled “Shader”With this option a shader link field is available.
You can add a shader or bitmap to use as the color to this shader link.
Custom
Section titled “Custom”Selecting this option displays a color field from which you can select a color to use.
Copyright © 2026 INSYDIUM LTD. All rights reserved.