xpOcean
xpOcean generates an animated mesh which simulates an ocean.
Object Properties
Section titled “Object Properties”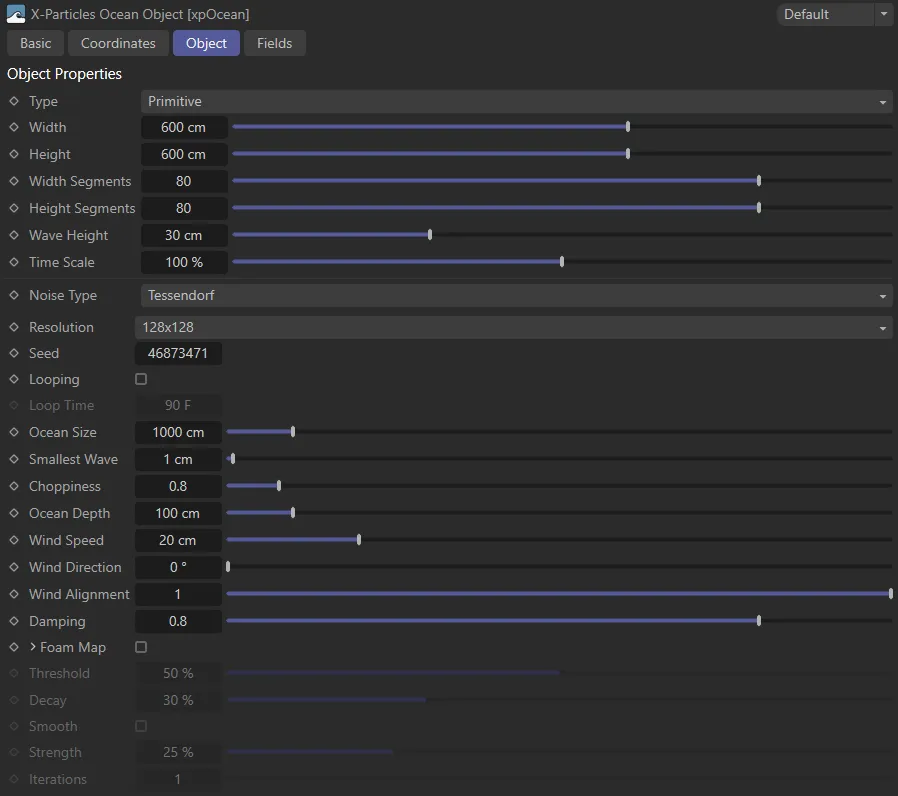
xpOcean Object tab settings.
In this animation, xpOcean is combined with an xpEmitter which is creating particles from areas with the most vertex weighting, produced by the foam map. These particles create an ocean spray effect when some modifiers are introduced.
This animation demonstrates how additional xpOcean generators can be stacked. Here a base xpOcean is in Primitive mode. There are three extra xpOcean generators, each in Deformer mode, all deforming the Primitive xpOcean, each with different variations of the settings. This gives the ability to add larger or finer detail to the base xpOcean, especially if the Seed, Time Scale and various size parameters of the additional xpOcean deformers are changed.
Set as Primitive, by default, xpOcean can act either as a primitive object in its own right, or as a deformer.
If it is set as Deformer it does not generate a mesh itself and, like other deformers, must be made the child of another object.
Type set to Primitive.
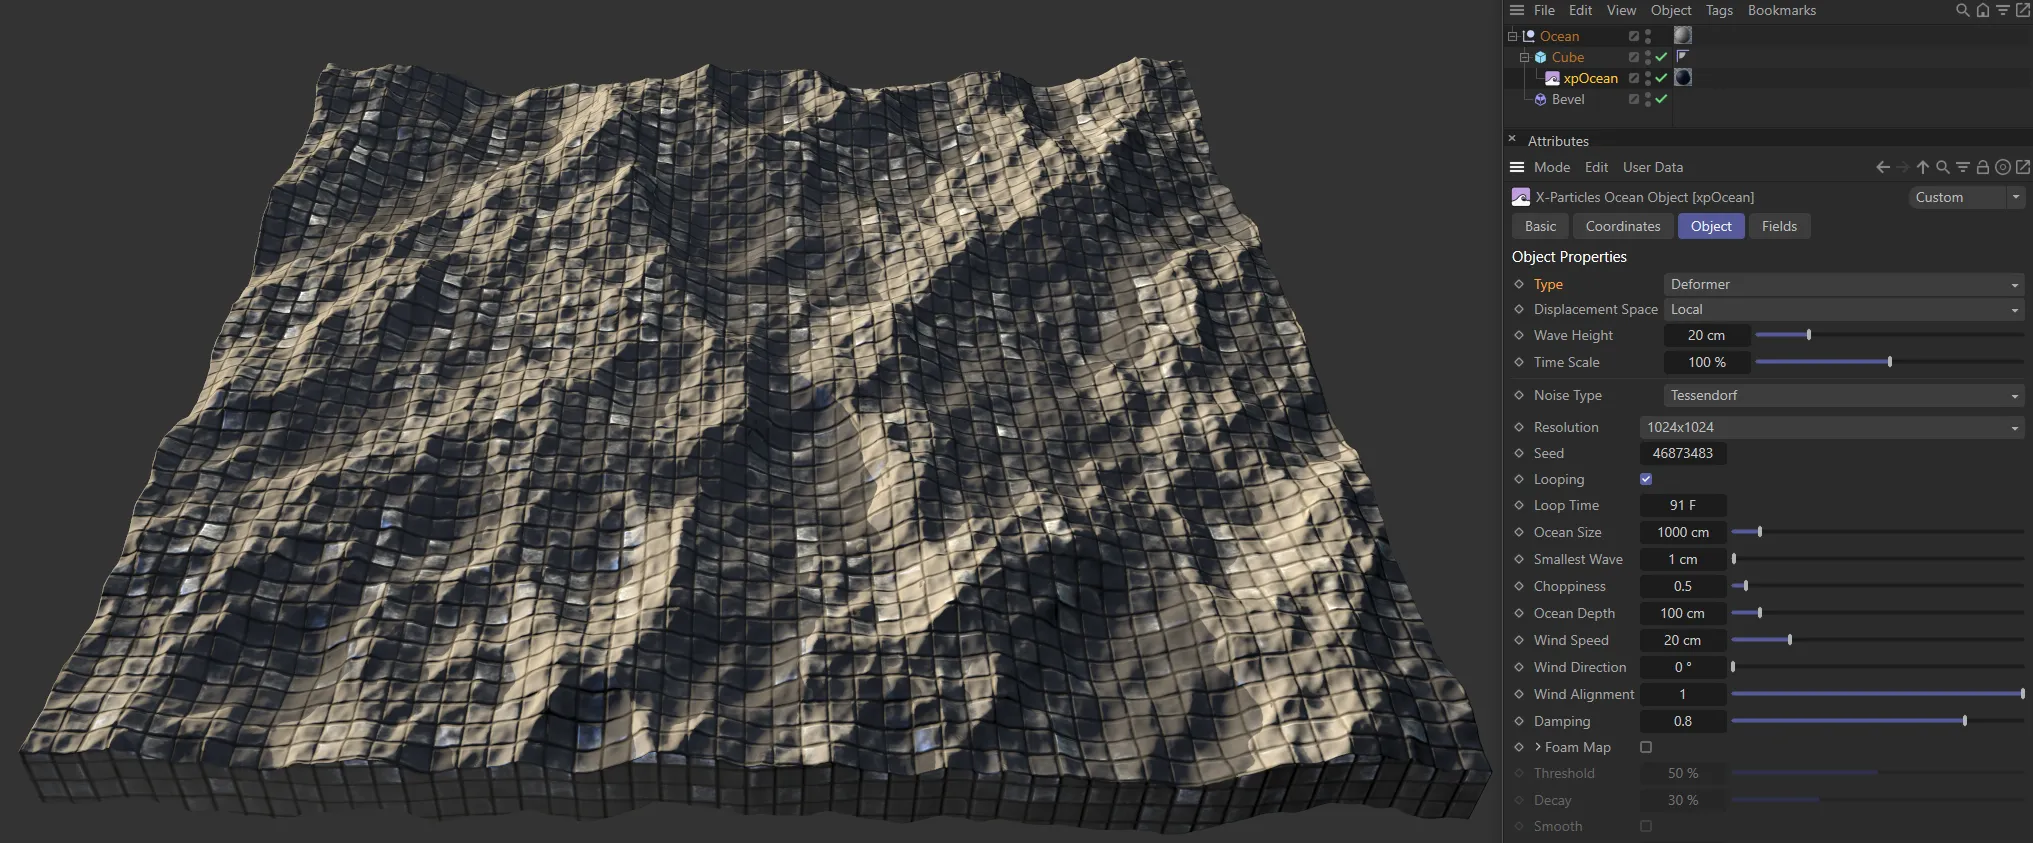
Type set to Deformer.
Width, Height
Section titled “Width, Height”The width and height of the object in scene units.
Only available when Type is set to Primitive.
Width Segments, Height Segments
Section titled “Width Segments, Height Segments”Only available when Type is set to Primitive.
The ocean object is divided into a number of segments.
Reducing this value gives a smoother, rolling surface, while increasing it gives a choppier, more detailed surface.
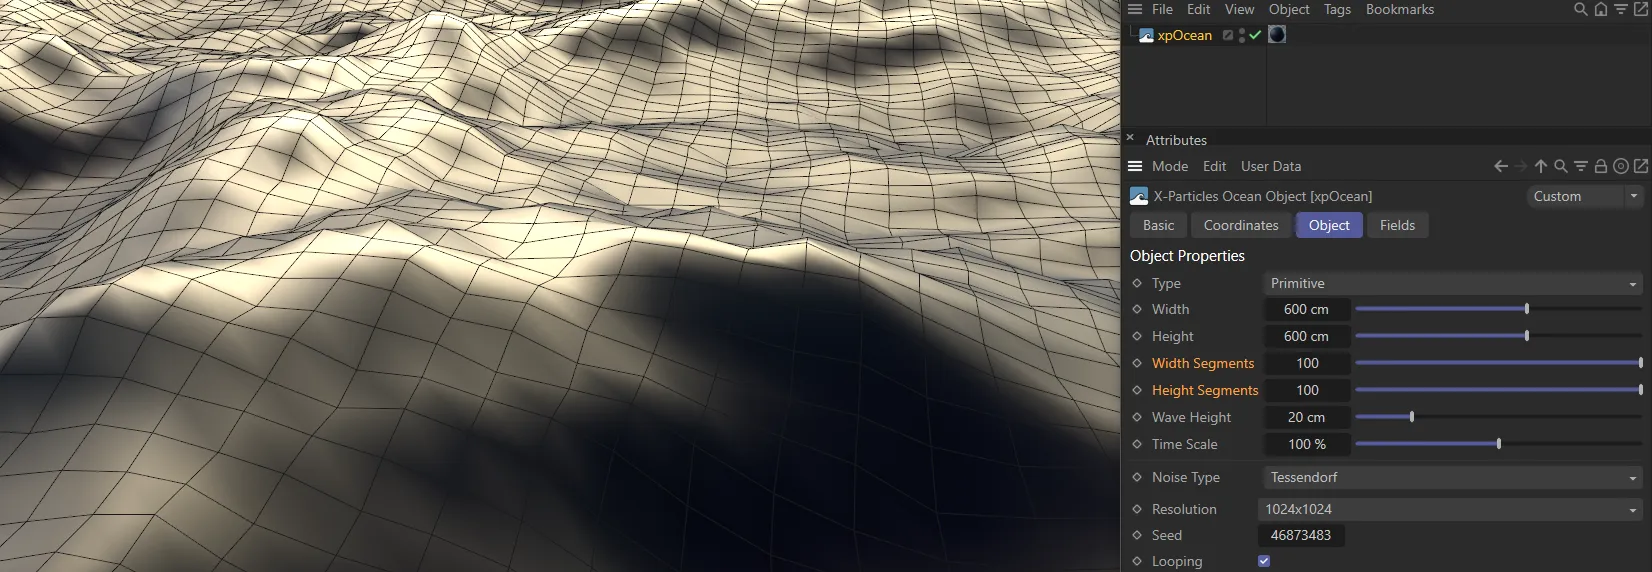
In this first image, both the Width Segments and Height Segments are set at 100.
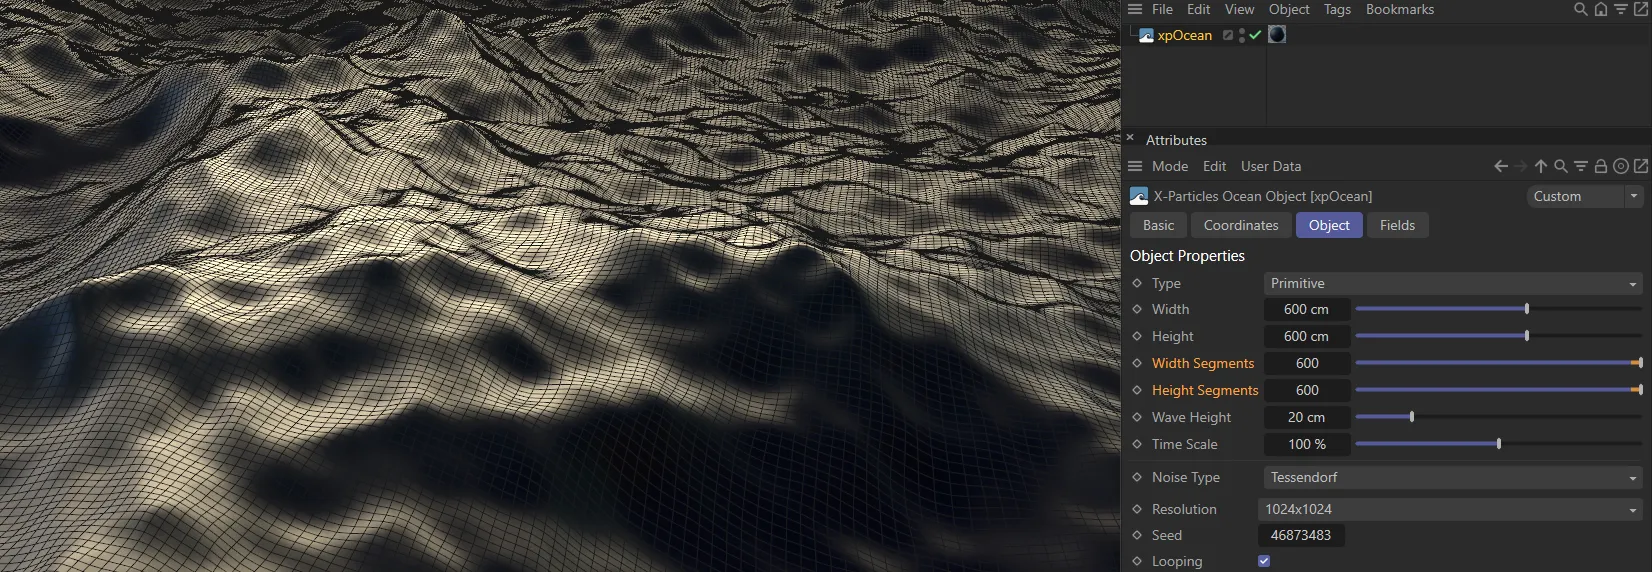
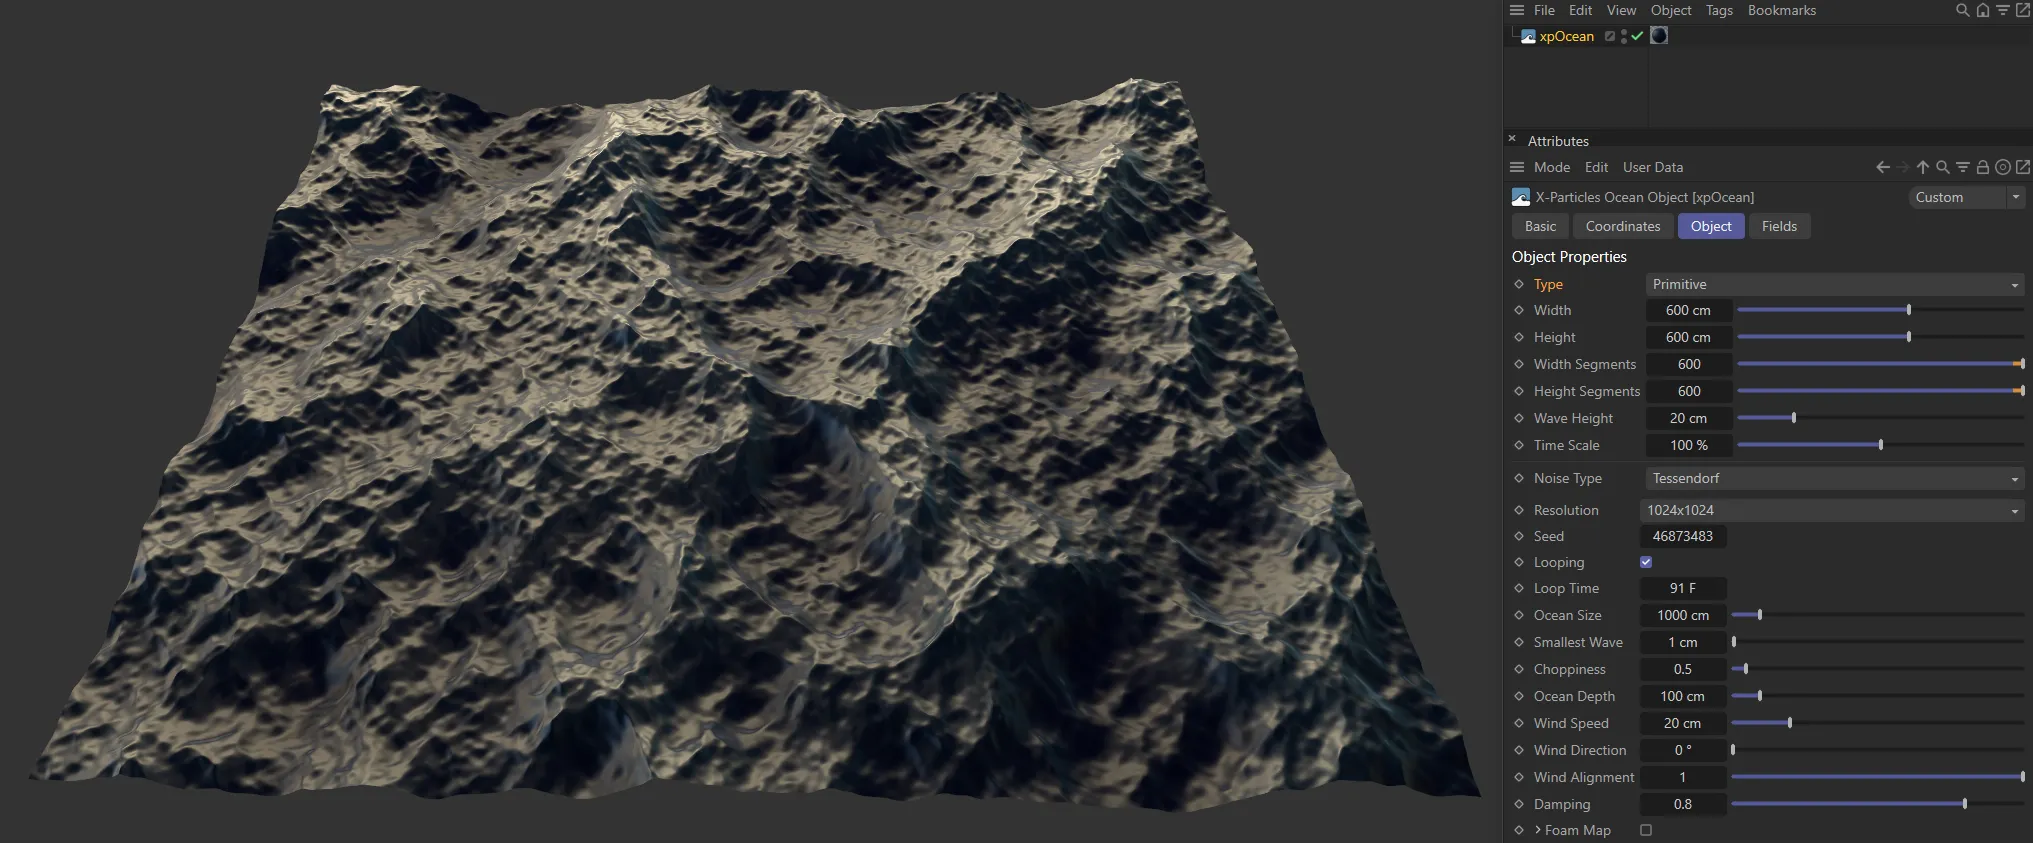
In this second image, both the Width Segments and Height Segments are increased to 600, producing far more segments.
Displacement Space
Section titled “Displacement Space”Set as Local, by default, this is the space in which the deformer operates.
Only available when Type is set to Deformer.
The alternative settings are: World, Object and Surface.
The deformer works in space local to the object and moving/rotating the deformer or the object has no effect on the deformed mesh.
The deformer works in 3D world space.
Moving/rotating the deformer has no effect but moving/rotating the object will alter the deformed mesh.
Object
Section titled “Object”The deformer works in its own space.
Moving/rotating the object has no effect but moving/rotating the deformer will alter the deformed mesh.
Surface
Section titled “Surface”With this option, the deformer works in the UV space across the surface.
Wave Height
Section titled “Wave Height”The height of the waves in scene units.
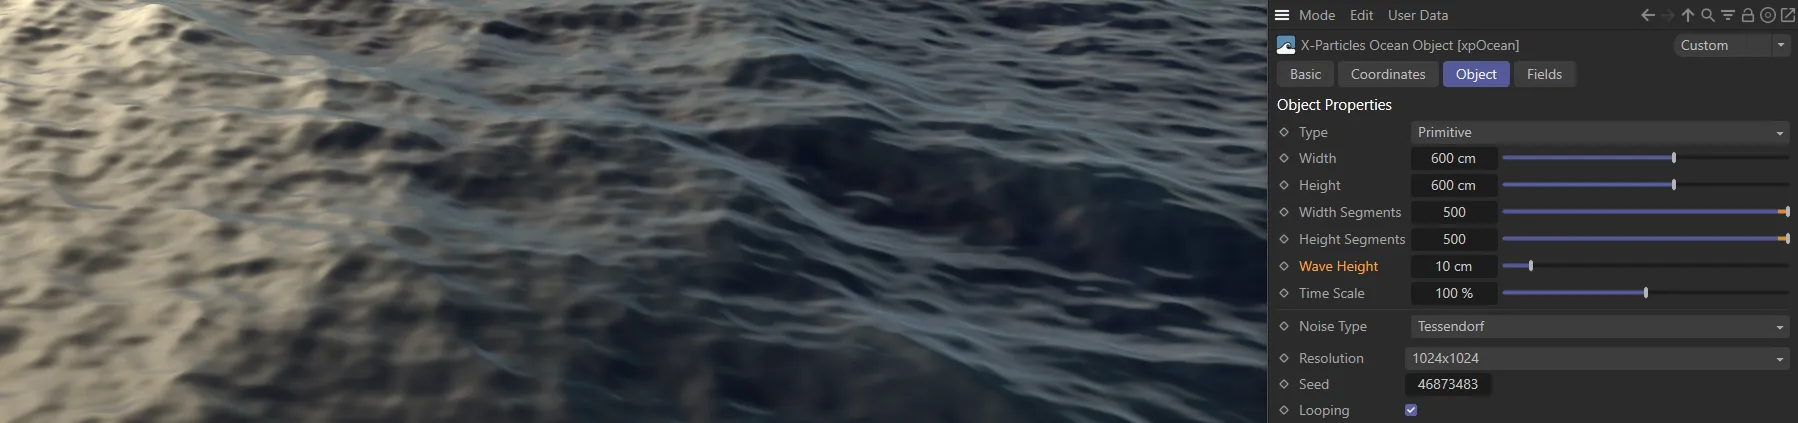
Here the Wave Height is set at 10cm.
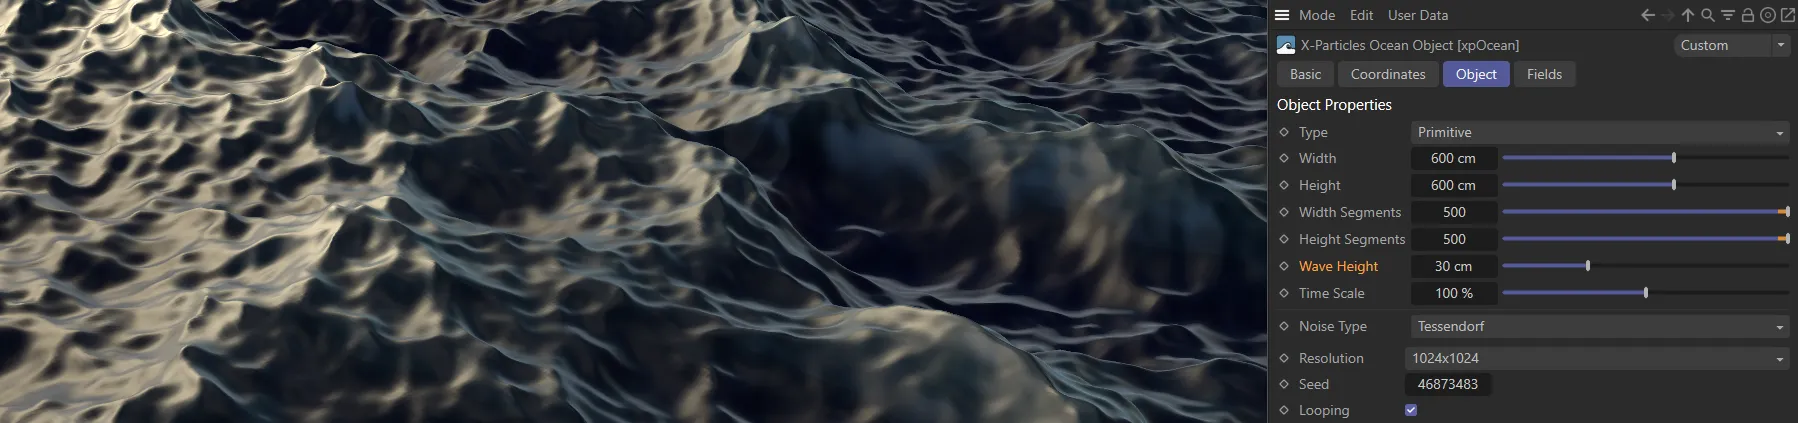
Wave Height increased to 30cm.
Time Scale
Section titled “Time Scale”The animation can be slowed down by reducing this value and speeded up by increasing it.
In this animation, Time Scale is keyframed, starting at 50%, before being increased to 200%.
Noise Type
Section titled “Noise Type”Set as Tessendorf, by default, this is the type of noise used to generate the surface.
The Tessendorf algorithm is used to generate the waves and the following settings are used only for when Noise Type is set to Tessendorf.
All the usual Cinema 4D noise types are available as alternatives; these come with different parameter options (below).
Resolution
Section titled “Resolution”Set as 128 x 128, by default, this is the resolution used in Tessendorf’s algorithm.
Changing the selected resolution will alter the complexity of the surface, but the number of generated points and polygons does not change.
The higher the value, the longer it takes to process the algorithm each frame, so playback will be slower.
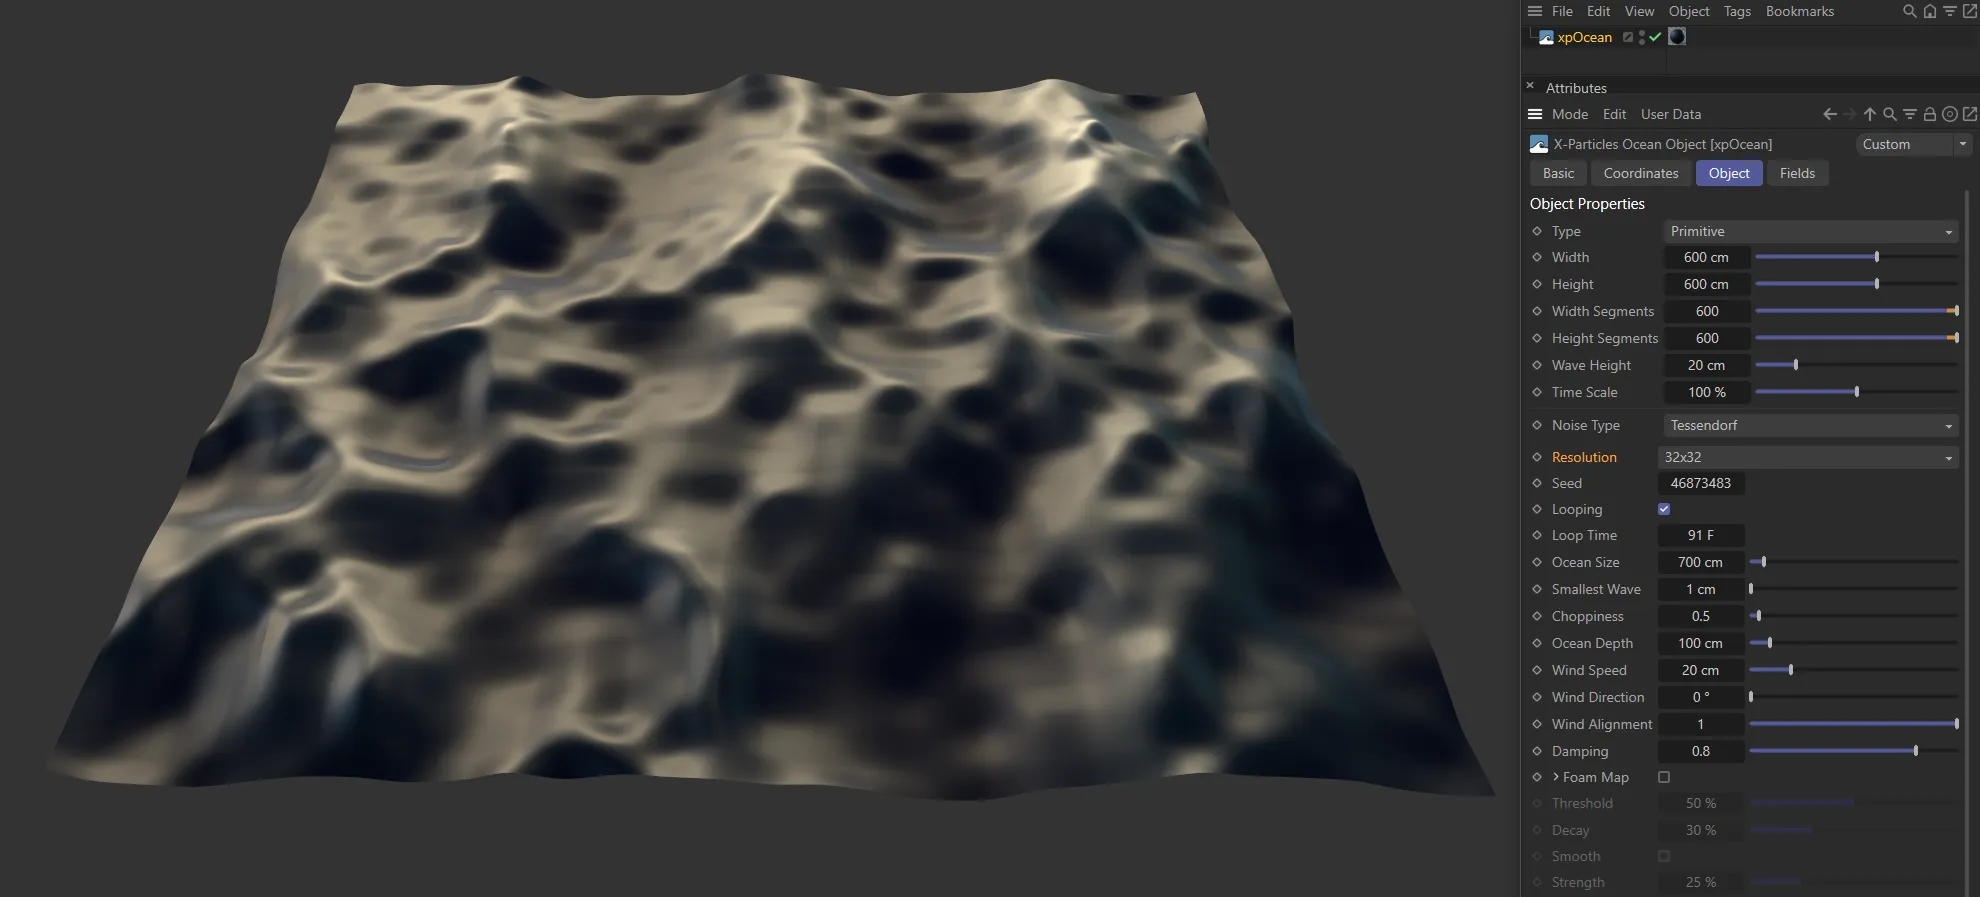
Resolution set at 32x32.
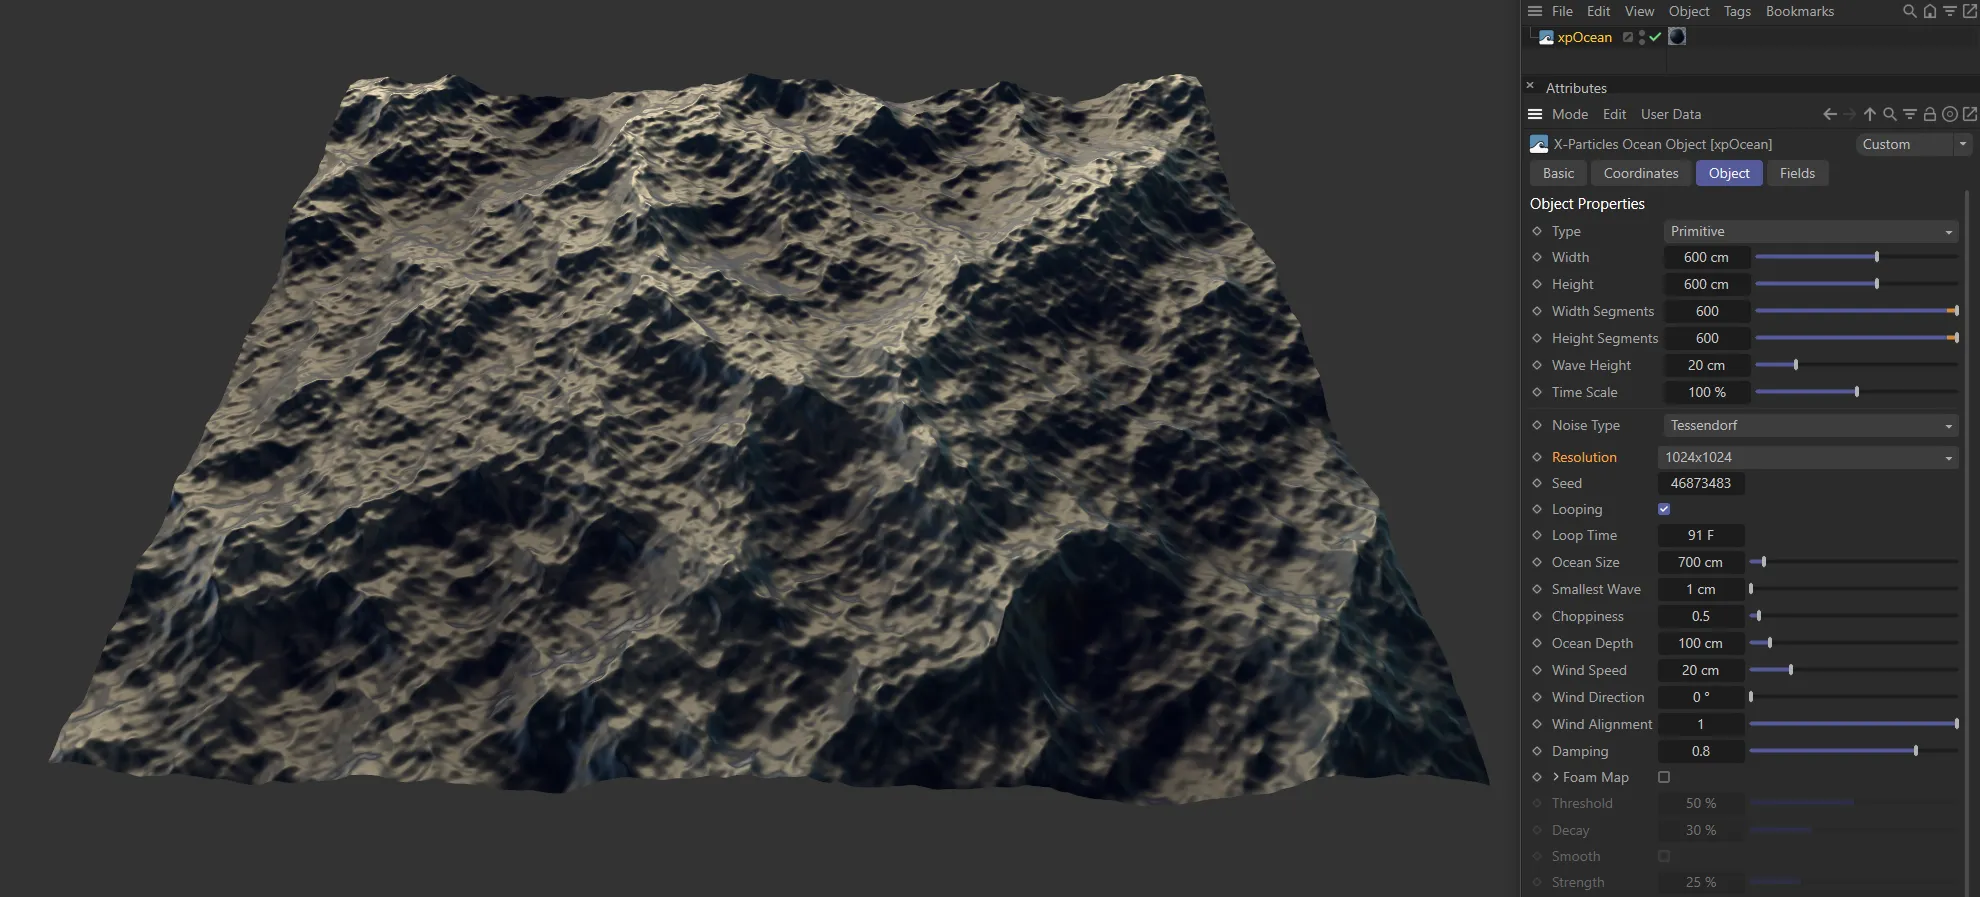
With Resolution raised to 1024x1024, the detail is far clearer.
The random seed used in Tessendorf’s algorithm.
Looping
Section titled “Looping”If enabled, the animation will loop so as to provide a seamless repeating pattern.
It will loop over the time given in the Loop Time setting.
Loop Time
Section titled “Loop Time”Only available if Looping is checked.
It is the length of time over which the animation will loop.
Ocean Size
Section titled “Ocean Size”The deformed mesh is tiled over an area of the size determined by this setting.
If you don’t want to see any tiling of the ocean, ensure that this value is greater than the Width and Height settings (or larger than the object being deformed if Type is set to Deformer).
This setting actually controls the size of the area deformed by the algorithm.
If the object size remains the same and, if you increase this value, the ocean will appear smoother and less detailed because you are seeing the same effect spread over a larger area.
Smallest Wave
Section titled “Smallest Wave”As this value increases the waves become fewer but larger; surface detail is reduced.
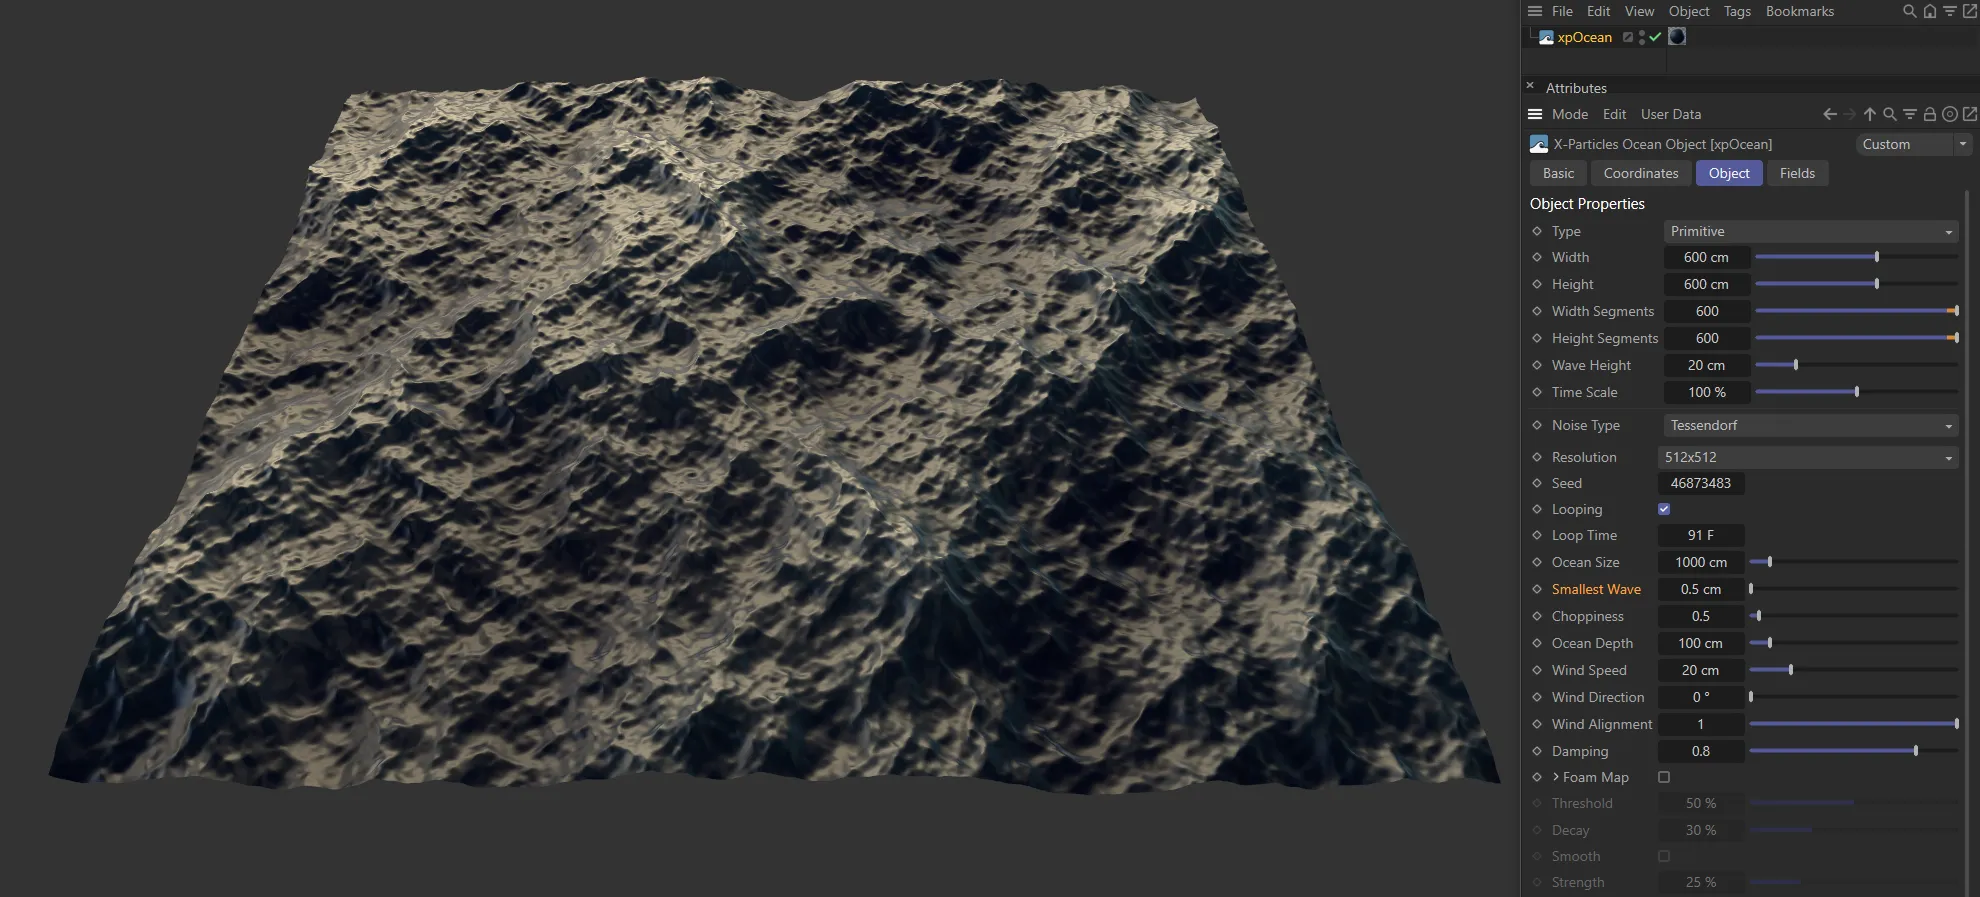
In this image, Smallest Wave is set at 0.5cm.
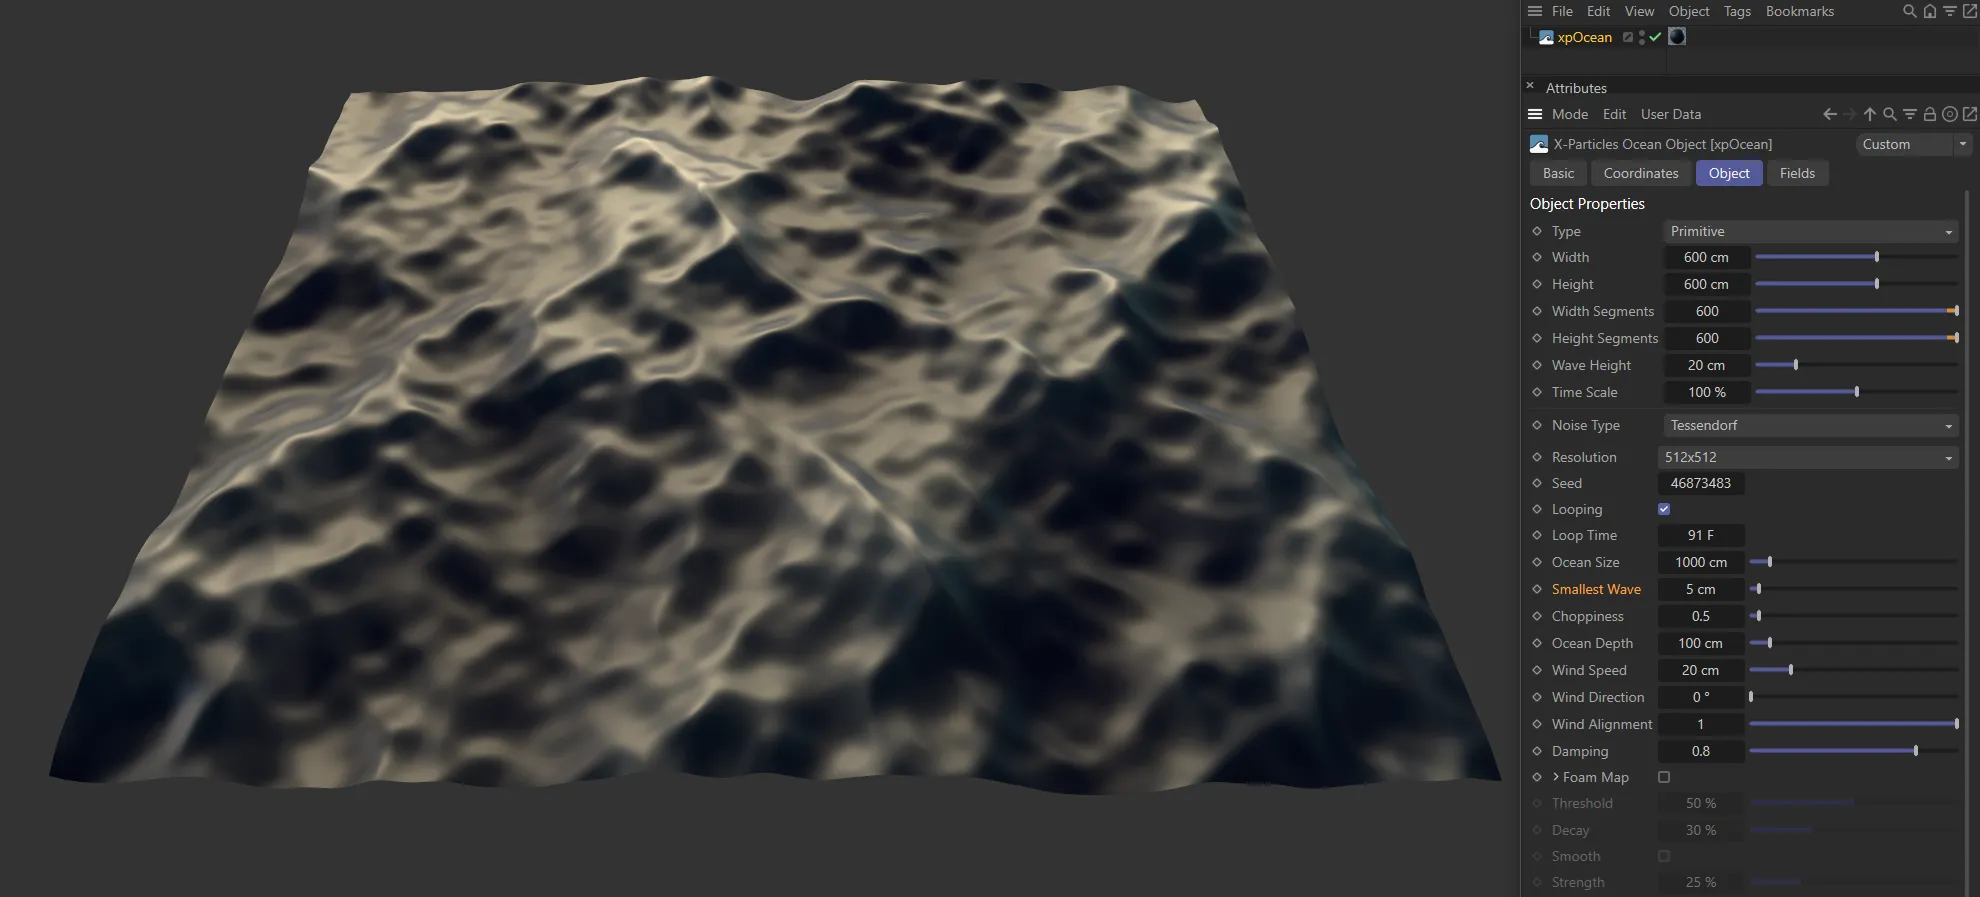
Smallest Wave increased to 5cm.
Choppiness
Section titled “Choppiness”Increasing this value will increase the appearance of choppiness by sharpening the wave crests.
Animation to demonstrate the Choppiness parameter, starting at 0.5, then being raised to 1.8.
Ocean Depth
Section titled “Ocean Depth”Waves behave differently in deep water compared to shallow water.
Experiment with this setting to fine-tune the wave appearance.
The effect of two differing Ocean Depth settings are displayed here, with 15cm on the left and 2000cm on the right.
Wind Speed
Section titled “Wind Speed”Increasing wind speed will tend to drive the generation of wide, flat waves while at low speeds short choppy waves are produced.
In this scene, the Wind Speed parameter is keyframed, starting at 12cm, before increasing up to 80cm.
Wind Direction
Section titled “Wind Direction”The direction of the wind.
This will change the direction in which the waves run.
At zero, the waves move along the positive Z-axis; at 90 degrees along the positive X-axis, and so on.
Wind Alignment
Section titled “Wind Alignment”This is the degree to which the wave movement is aligned with the wind direction.
At 1 (the default setting) the waves move in the wind direction; at zero, they don’t seem to move at all and you have a body of choppy water with no overall direction.
Damping
Section titled “Damping”Damping reduces the tendency of the water to move chaotically and if set to 1 gives a strong directional flow.
At zero there is no apparent flow at all and the water appears to behave chaotically.
Foam Map
Section titled “Foam Map”If enabled, a vertex map tag is added to the object and a vertex map will be generated with the highest values (white areas) on the wave crests.
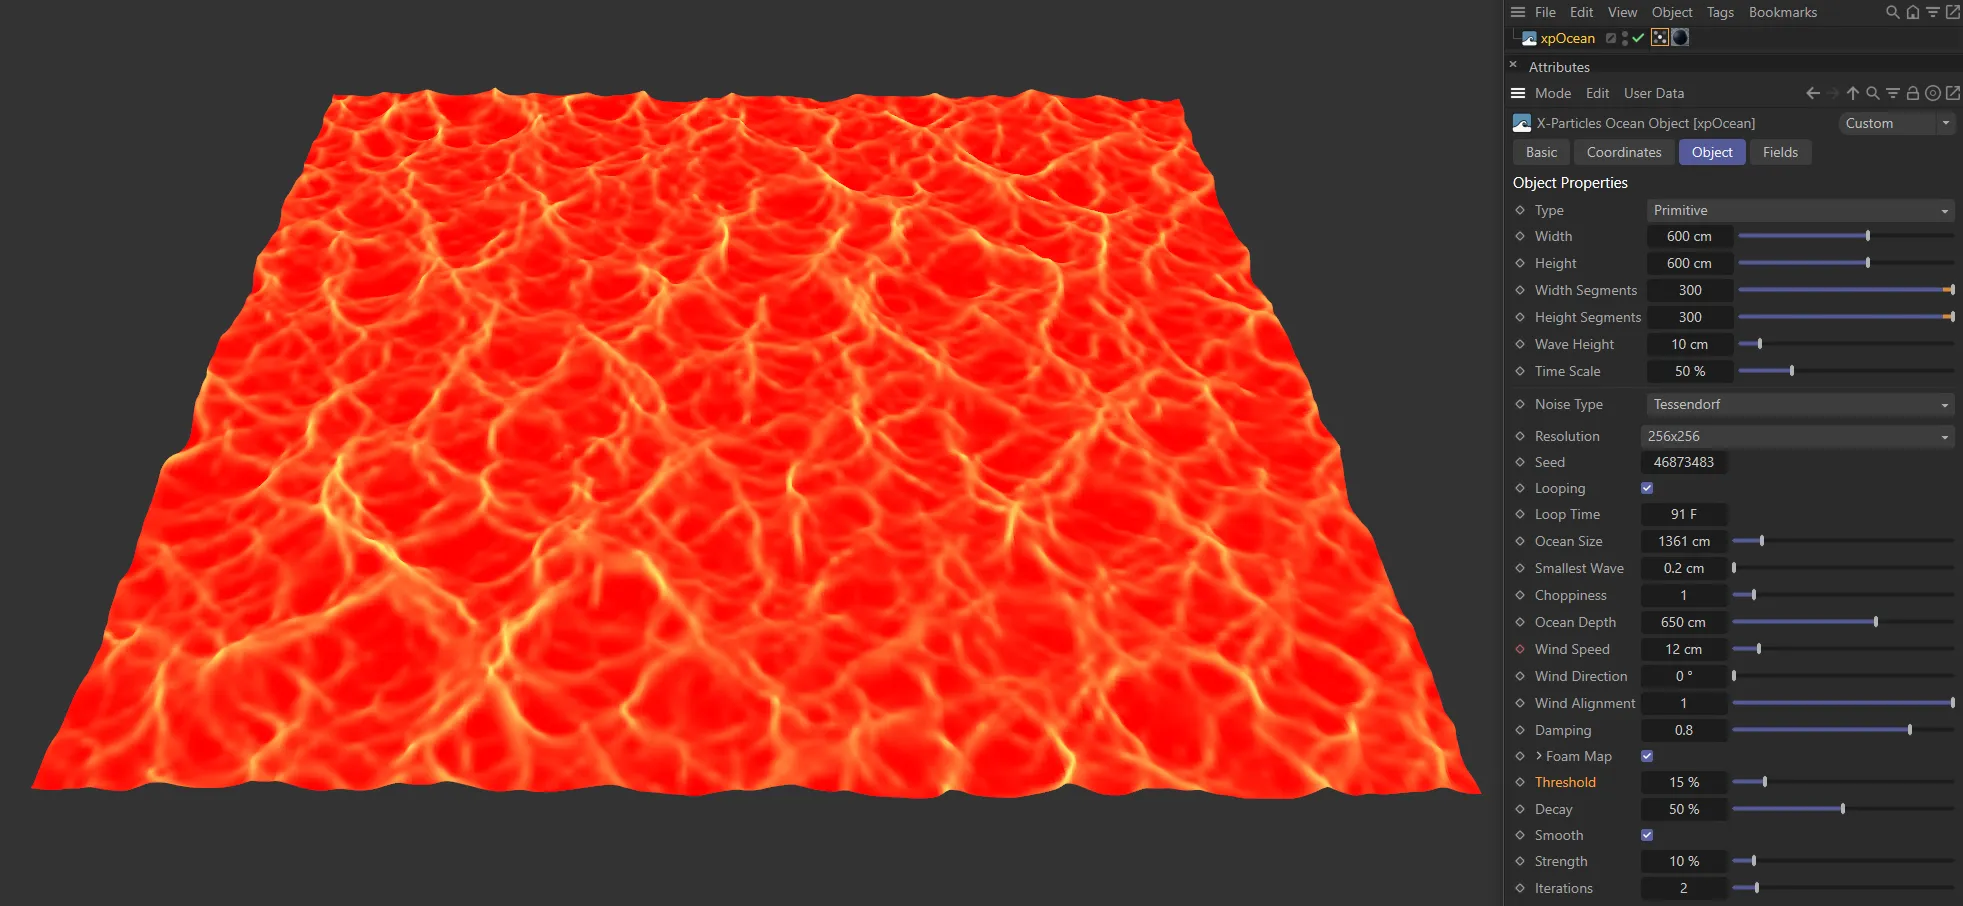
With Foam Map enabled, a vertex map has been generated, based on the settings and a vertex map tag added to xpOcean.
Map Name
Section titled “Map Name”The name of the vertex map tag that is generated.
You can change this if desired.
Threshold
Section titled “Threshold”As this value increases the white areas of the map become more and more restricted to the wave crests.
This is the amount of falloff from the highest values to zero.
As this is increased, the falloff is increased and the white areas of the map are reduced.
Smooth
Section titled “Smooth”Tick this box to enable smoothing of the vertex map.
Strength
Section titled “Strength”The strength of the smoothing effect.
Iterations
Section titled “Iterations”This is the number of times the smoothing algorithm is applied so, if it is set to 2, the vertex map is smoothed then the smoothed map is smoothed again.
The result is that by increasing this setting the highest values of the vertex map tend to spread over the rest of the surface.
Shader and Noise settings
Section titled “Shader and Noise settings”Shader
Section titled “Shader”A link field for a shader if Noise Type is set to Shader.
The animation speed of the shader, measured as the distance the shader displacement moves across the surface in one second.
Scale Width, Scale Height
Section titled “Scale Width, Scale Height”These settings scale the shader across the two axes of the object.
Octave Number
Section titled “Octave Number”This parameter influences the frequency of any noise set. Higher numbers will generate finer details.
It is not available for the Standard turbulence mode.
Low Clip, High Clip
Section titled “Low Clip, High Clip”These controls clip the maximum (peaks) and minimum (troughs) wave heights.
You may see flat plateaus on the top and/or bottom of the wave pattern if these are changed from their defaults.
Brightness
Section titled “Brightness”This setting alters the brightness of the sampled noise, which will alter the strength of the effect.
Contrast
Section titled “Contrast”Reducing the contrast will reduce the difference between peaks and troughs in the wave.
If set to zero, there will be no waves at all.
If it is reduced below zero, the wave pattern will be inverted.
Fields tab
Section titled “Fields tab”You can use the Fields options to control where xpOcean operates.
Copyright © 2026 INSYDIUM LTD. All rights reserved.