xpFluidFX
xpFluidFX is an SPH fluid solver. It takes control over particles so that they interact in a fluid like way.
It creates very realistic fluid motion and is a good choice when simulating medium to large-scale fluid scenes.
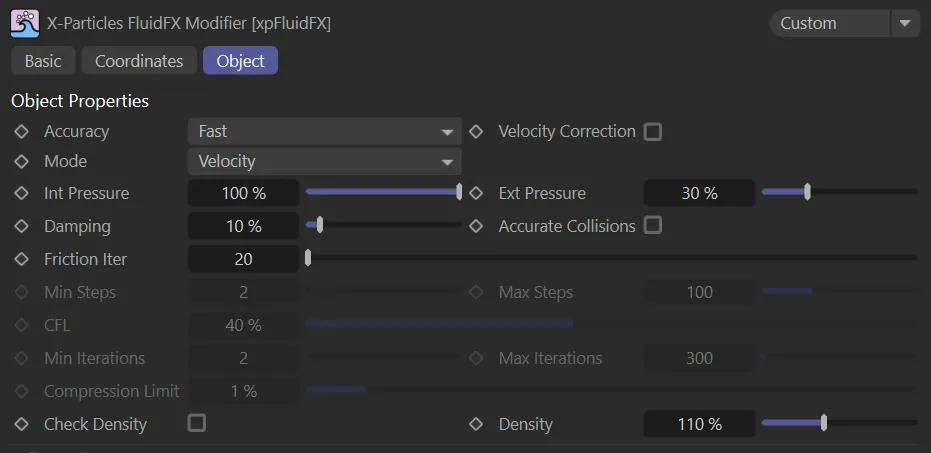
Object tab menu for xpFluid FX.
Accuracy
Section titled “Accuracy”Set at Fast, by default.
The alternatives are: Medium, High, Accurate and Custom.
If you select Custom, you can set your own values for Min Steps, Max Steps, CFL, Min Iterations, Max Iterations and Compression Limit.
With all other options, these settings are not available.
Animation to demonstrate the Accuracy modes of Fast (on the left) and High (on the right).
Velocity Correction
Section titled “Velocity Correction”Enabling this parameter causes xpFluidFX to correct the ‘divergence’ when the fluid starts to compress or expand.
Velocity Correction does an extra solve to change the velocity so the fluid flows around and does not compress/expand (divergence free).
Set to Velocity, by default.
The alternative setting is Position.
Due to the solver used in xpFluidFX (by default a velocity solver), it takes over particle movement and does not interact with other X-Particles objects that move the particles.
This makes it difficult to use with the X-Particles dynamics engine.
This menu enables you to change the solver to a position-based solver which enables full interaction with other X-Particles objects.
Int Pressure
Section titled “Int Pressure”Internal pressure forces the particles apart, ensuring the fluid does not compress.
It acts together with Ext Pressure to produce a surface tension-like effect.
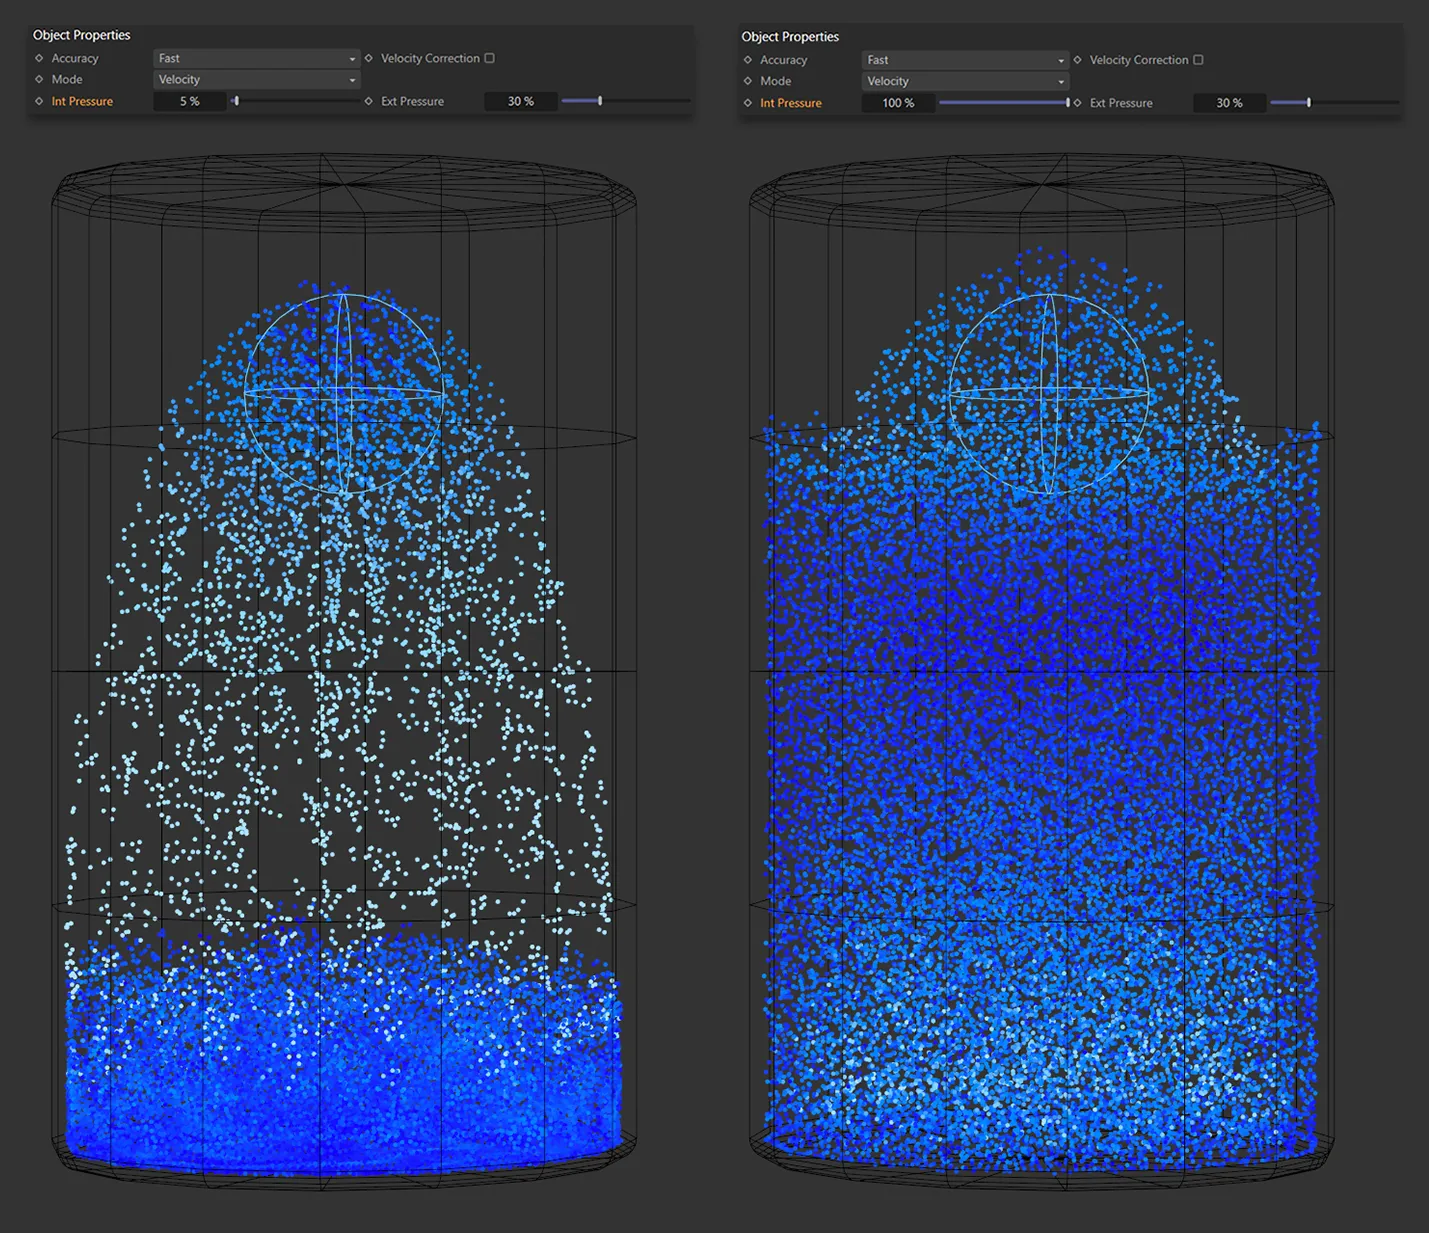
On the left, the Int Pressure setting is 5%, while it is 100% on the right.
Ext Pressure
Section titled “Ext Pressure”External pressure pushes the particles together, ensuring the fluid does not expand.
It acts together with Int Pressure to produce a surface tension-like effect.
Damping
Section titled “Damping”Damping helps to reduce explosive forces.
Increasing this setting damps the forces but also reduces motion from the fluid.
Accurate Collisions
Section titled “Accurate Collisions”Enabling this will improve the accuracy of collisions between the particles and a collider object.
Friction Iter
Section titled “Friction Iter”Friction (between fluid particles) is only used for granular simulations.
Therefore this setting has no effect unless, in the emitter’s Fluid Data section, you have set the Fluid Type to Granular.
You can then use it to alter the friction between granular particles.
Min Steps
Section titled “Min Steps”xpFluidFX uses subframes; this parameter is the minimum number of time steps per frame.
Max Steps
Section titled “Max Steps”xpFluidFX uses subframes; this parameter is the maximum number of time steps per frame.
On the left, in this animation, the Min Steps value is 1 and the Max Steps is 2. By comparison, on the right, the Min Steps is increased to 10 and Max Steps is much higher, at 100. Increased steps is creating a more balanced and stable simulation. Note the smooth color shimmering (indicating fluid density) towards the end in the simulation on the right, in comparison to the more erratic density changes on the left.
In each subframe, a particle must never move farther than its own diameter; this means that the particle radius will have a significant effect on the simulation.
The CFL (Courant-Friedrichs-Lewy) parameter controls how aggressively the solver increases subframes to ensure this condition is met.
Technically, a value of 40% is safest (you can lower it but the usual result is a slower simulation).
Practically, in some simulations, you can increase this value to 90%, but collision accuracy, and also stability, may suffer.
It is a matter of testing and experience.
Min Iterations
Section titled “Min Iterations”This is the minimum number of solver iterations.
If you reduce it, the simulation can be faster but at the cost of reduced accuracy.
Max Iterations
Section titled “Max Iterations”This is the maximum number of solver iterations.
If you reduce it, the simulation can be faster but at the cost of reduced accuracy.
Compression Limit
Section titled “Compression Limit”This is the maximum loss of fluid volume, which can occur during the simulation, expressed as a percentage value.
If you increase it, fewer iterations are required but the amount of bouncing and elasticity increases.
Smaller values require more iterations (so the simulation is slower), but reduces the bouncing/elasticity effect.
Check Density
Section titled “Check Density”Fluids are normally incompressible so have a constant density.
If this parameter is turned on, the density will be checked to ensure consistency in the particle stream.
If it is turned off, no check will be applied.
The value used in the density check is found in the Density setting.
This setting is off by default.
Occasionally (for example, with slow-moving particles on emission) you may still need to turn this on, but there is much better control and you can alter the Density value to obtain a stable simulation.
Check Density is enabled in this animation. The Density level begins at 110%, before being raised to 2250% to demonstrate the effect, then returned to 110%.
Density
Section titled “Density”The value to use when Check Density is on.
Copyright © 2026 INSYDIUM LTD. All rights reserved.