ClothFX
The Cloth FX system connects particles to the vertices of scene objects.
When the cloth particles are affected by modifiers, such as xpGravity or xpTurbulence, the object vertices follow along.
This can make objects fold, ripple, and even tear, like cloth.
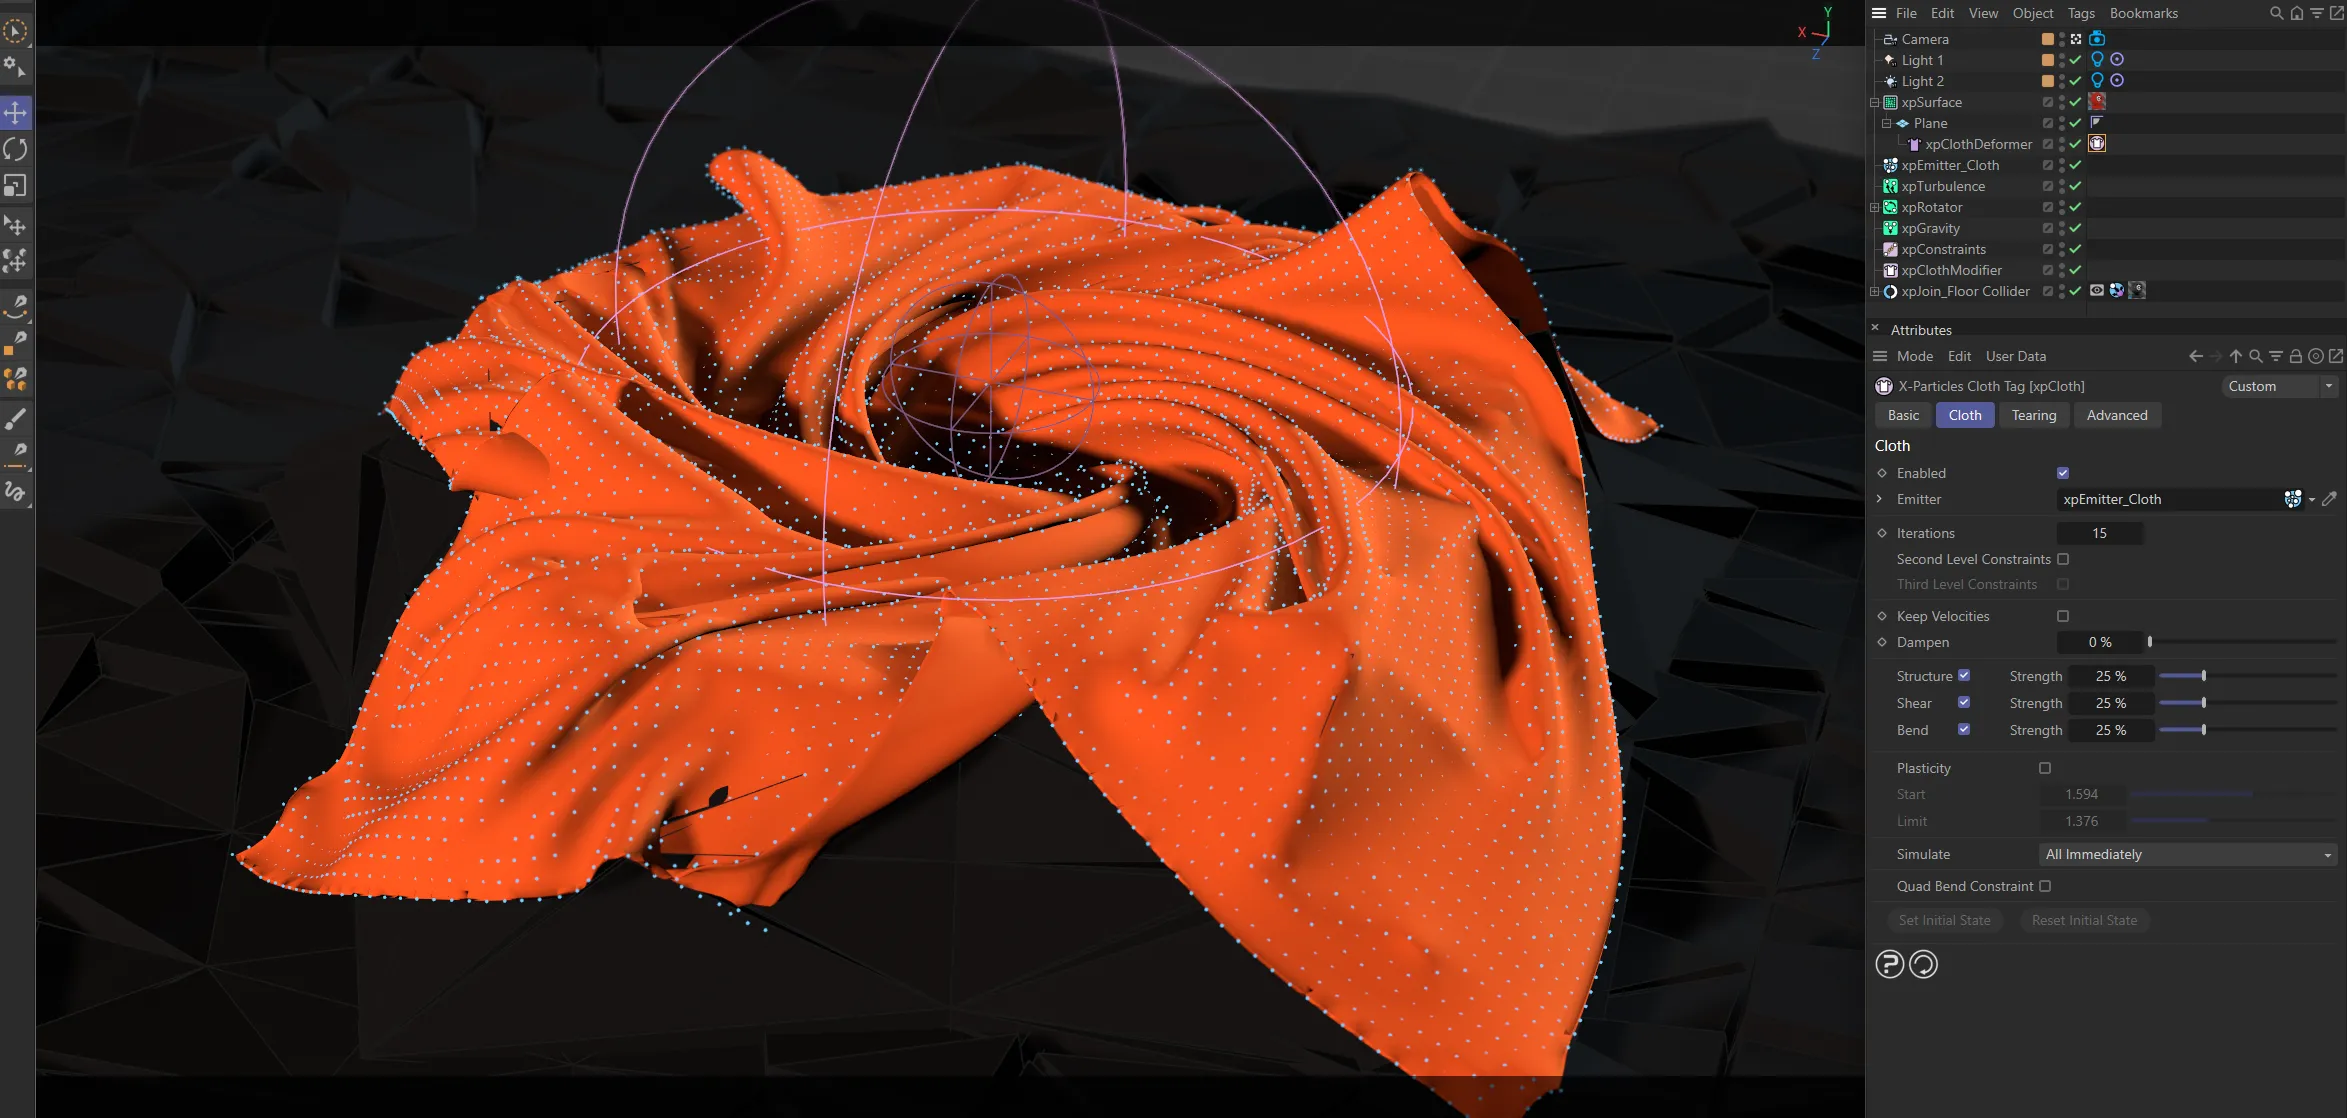
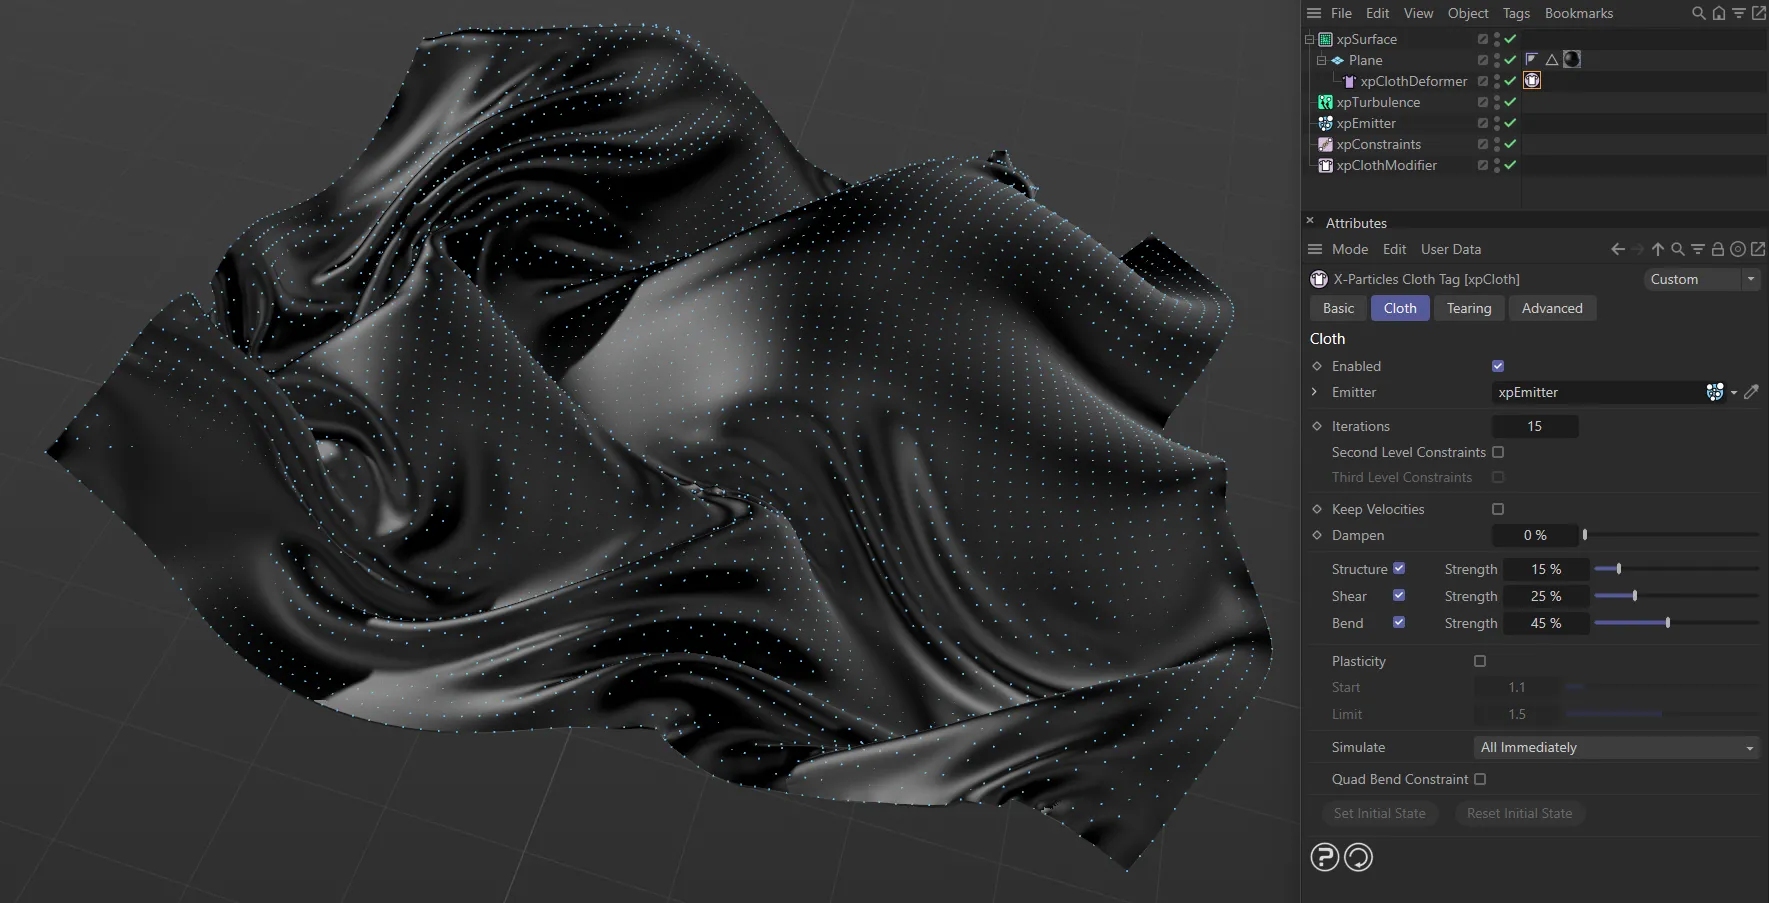
Image to demonstrate the power of xpClothFX, here being used in conjunction with a selection of modifiers and dynamic objects.
There are several elements required for a cloth simulation to work.
There are also optional elements that can be used for additional functionality and control.
The easiest way to ensure you have all of the correct elements to begin a simulation is to use the Create Cloth command.
This brings all of the necessary components into the Objects Manager and automatically sets them up ready for simulation.
However, to properly understand the system, the elements are individually explained below.
Create Cloth having being accessed, the ClothFX elements are all now visible in the Objects Manager.
Cloth FX Setup
Section titled “Cloth FX Setup”1: Cloth Object
Section titled “1: Cloth Object”First, you need an object that you wish to become cloth.
This can be a Cinema 4D primitive (a Plane, for example) or a polygon object.
The advantage of using primitive objects is that you can adjust the polygon count at any time and they remain procedural.
Polygon objects offer more functionality within the cloth system, such as sticky controls and pinning.
A good general rule is to use low-poly primitives for fast-calculating draft scenes and use higher-poly objects for scenes requiring greater detail and complexity.
2: xpEmitter
Section titled “2: xpEmitter”An emitter is required to generate particles on the vertices of your cloth object.
This needs to be setup as follows:
The Emitter Shape is set to Object, with your desired cloth object dropped into the Object field.
Emit From is set to Points, with the emission coming from the object’s points.
One Particle Per Source Element is enabled.
Emission is set to Shot.
The particle Speed value is set to zero.
This setup ensures that every vertex of the cloth object has a particle stuck to it.
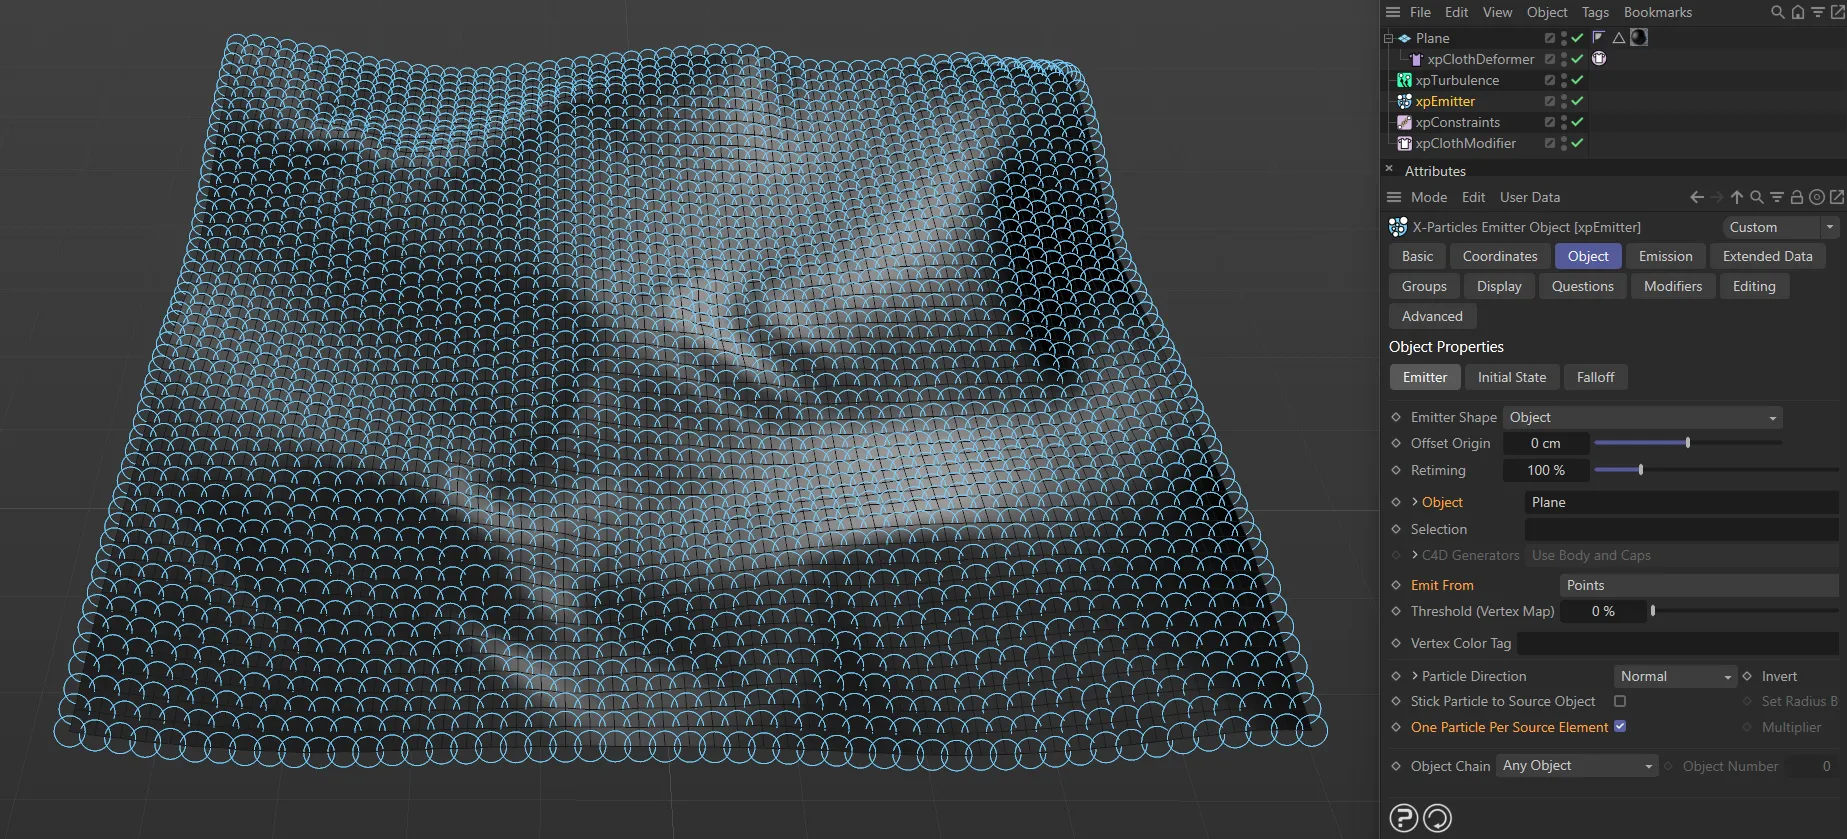
The xpEmitter is highlighted here in the Objects Manager, with One Particle Per Source Element enabled and particles visible, in the viewport, at each vertex.
3: xpClothDeformer
Section titled “3: xpClothDeformer”This object should be made a child of the scene object you wish to be cloth.
Primitive objects can only simulate cloth when used with a cloth deformer.
Polygon objects can simulate cloth without the use of a cloth deformer, however, you can choose to use one, which will enable the use of fields to drive the cloth effect.
The cloth deformer doesn’t have any adjustable settings.
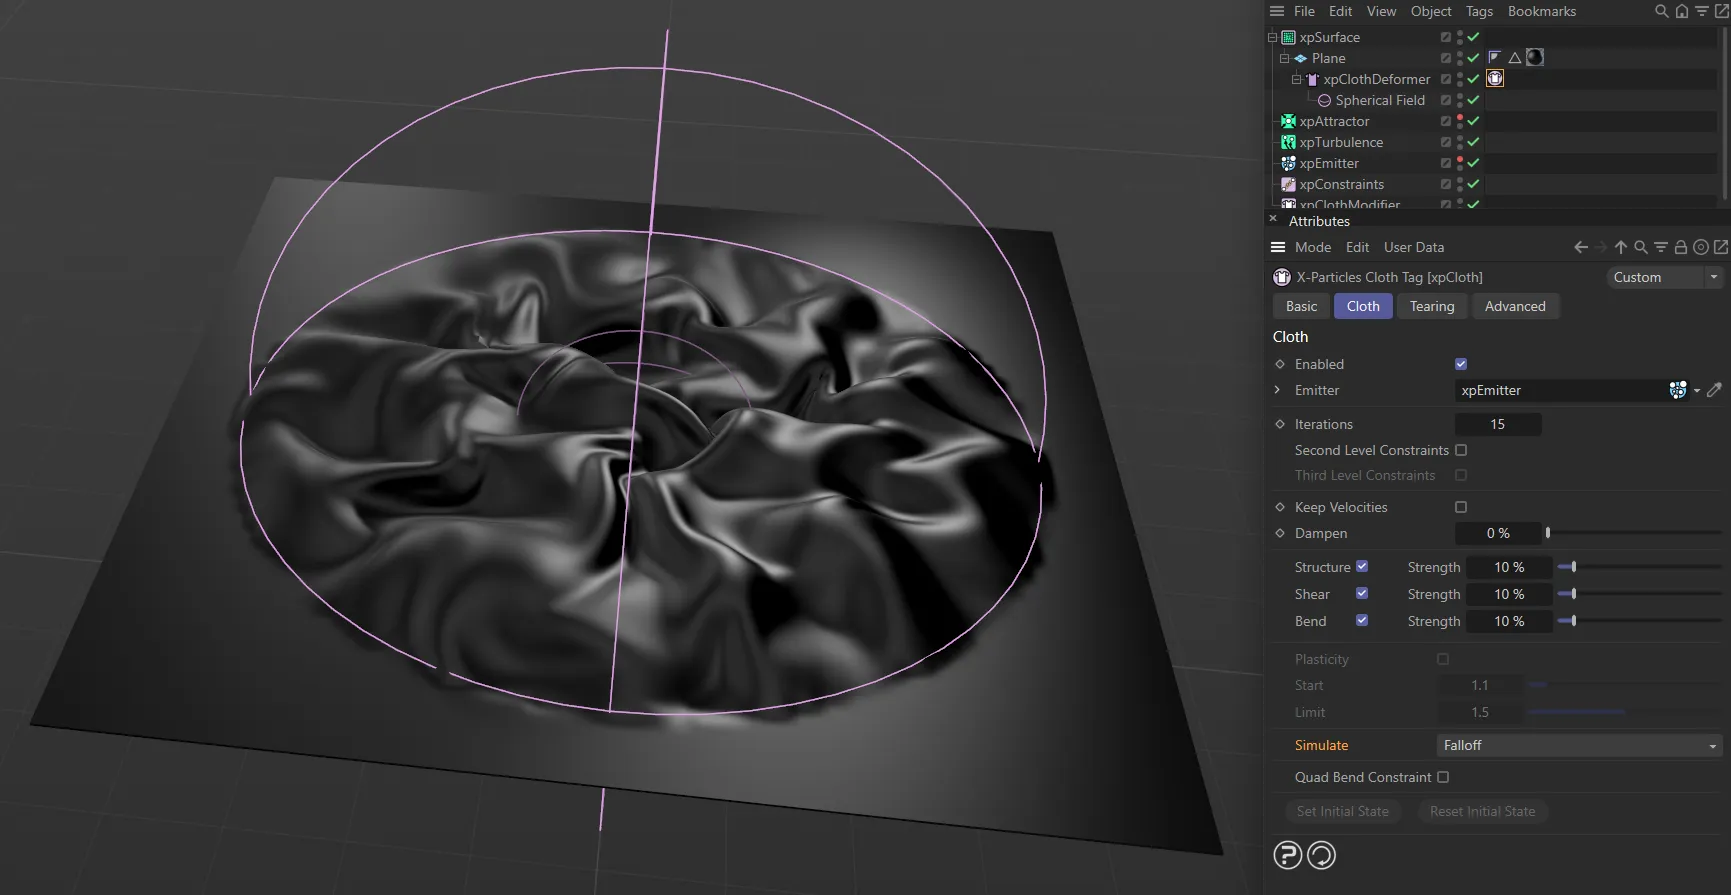
As the cloth object is a primitive, an xpClothDeformer is required. This enables the use of fields, as demonstrated here with a Spherical field.
4: xpCloth Tag
Section titled “4: xpCloth Tag”All of the user settings for adjusting the cloth properties and behaviors can be found in the xpCloth tag.
The tag should always be assigned to a cloth deformer, if in use.
If your cloth is a polygon object and you are not using a cloth deformer, the tag should be assigned directly to the object.
Here, the xpCloth Tag is assigned to the xpClothDeformer, which is a child of a primitive Plane. The tag settings are visible, in the Attributes Manager, where the cloth characteristics can be adjusted.
5: xpClothModifier
Section titled “5: xpClothModifier”The cloth modifier has no user settings, but must be active in the Objects Manager, for the cloth simulation to take place.
6: xpConstraints
Section titled “6: xpConstraints”You can choose to use an xpConstraints solver in your cloth simulation to include particle to particle collisions.
This can prevent the cloth from intersecting itself.
This makes the simulation characteristics more accurate, but increases processing time.
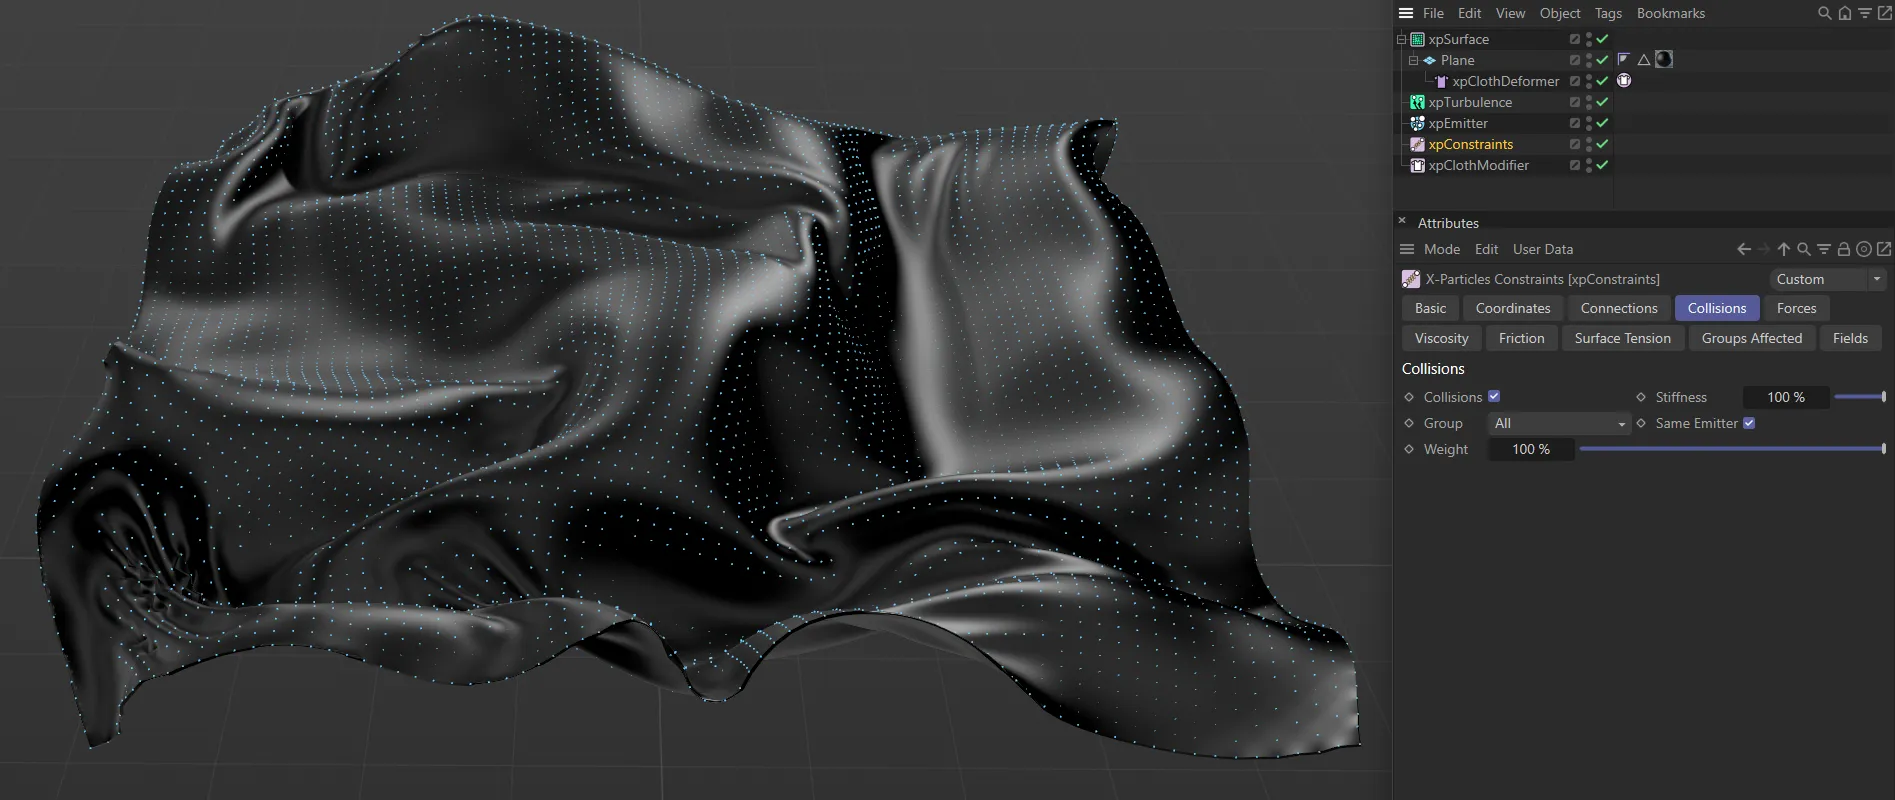
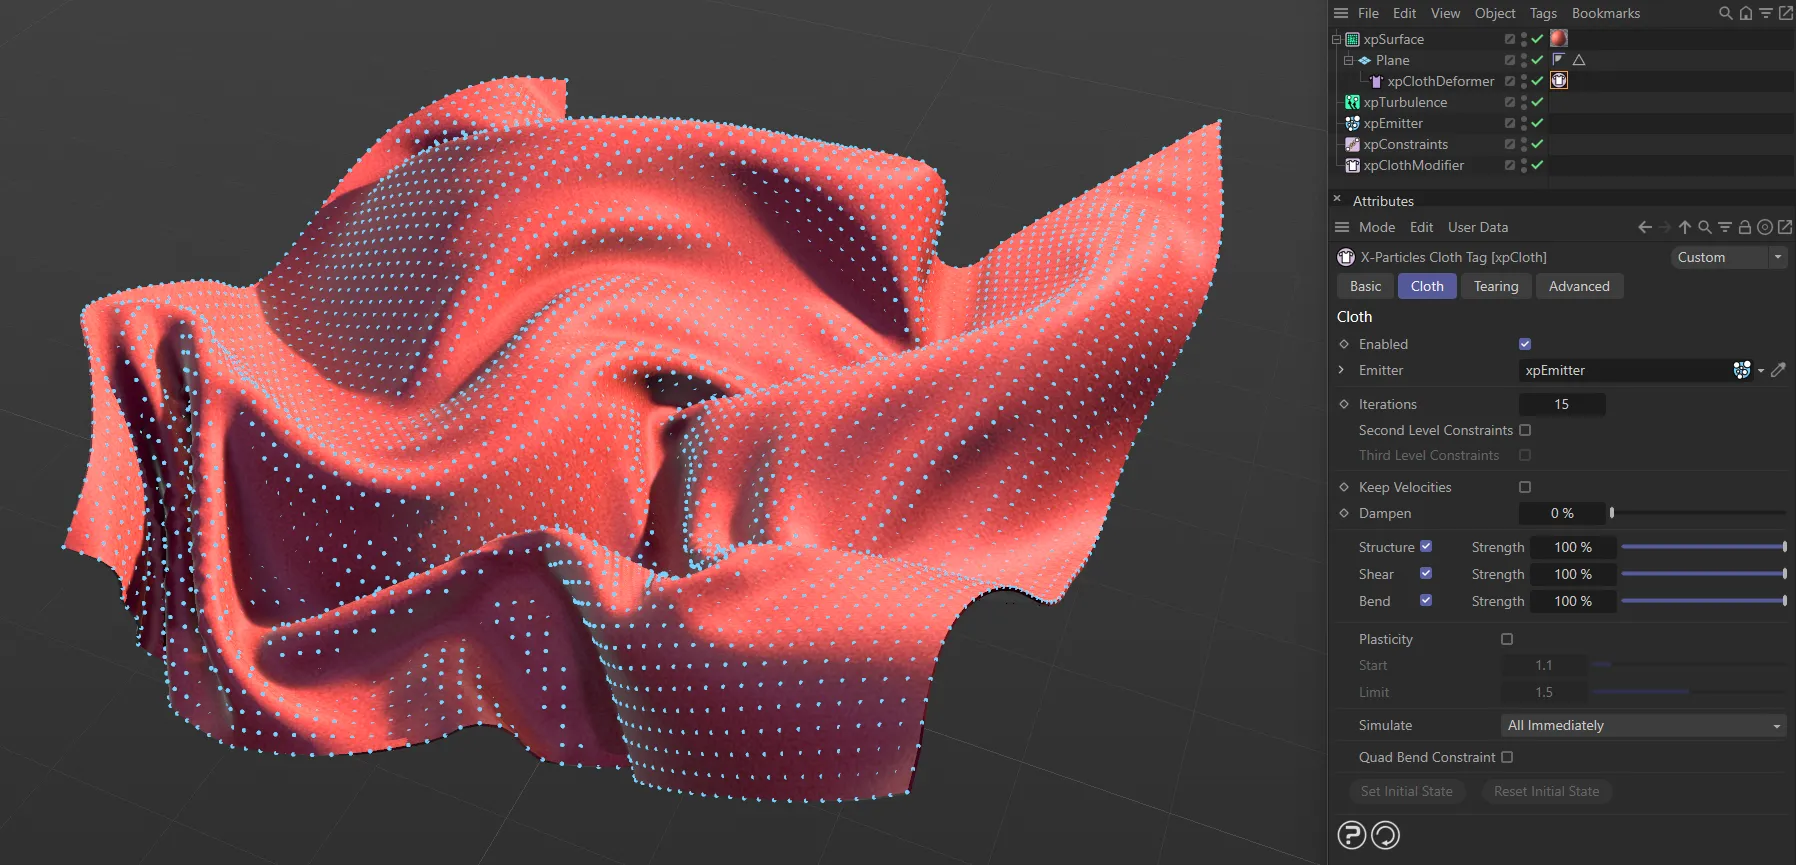
In this scene, xpConstraints is active, with Collisions enabled.
7: Modifiers
Section titled “7: Modifiers”Because Cloth FX is a particle-based system, you can use any X-Particles modifier to affect those particles and drive the cloth simulation.
xpGravity and xpTurbulence are commonly used modifiers, but you can also use more complex ones, such as xpFlowfield.
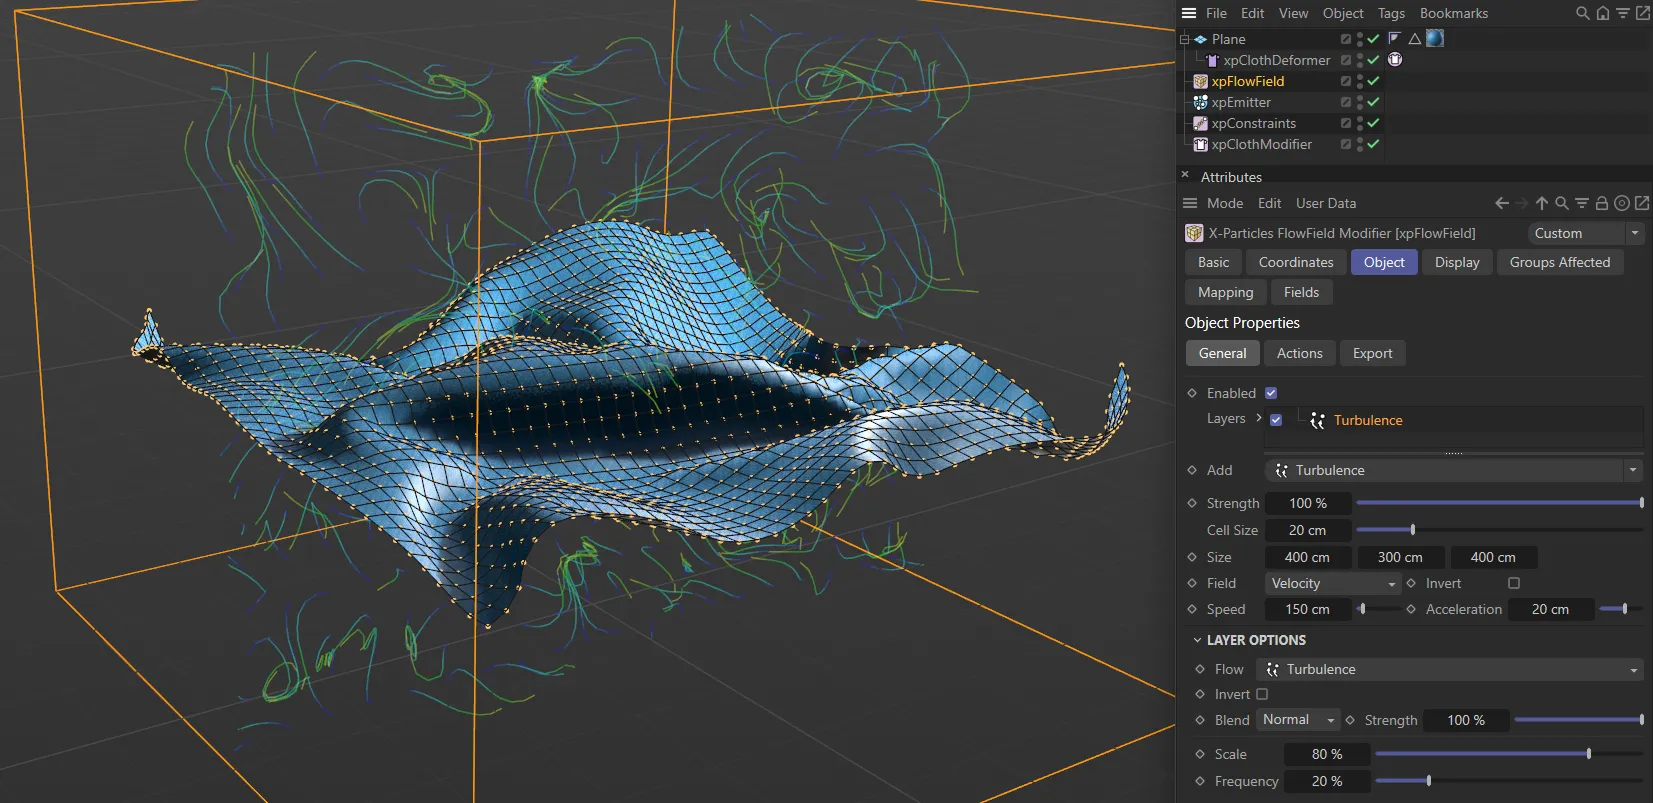
In this image, xpFlowfield is being used in conjunction with xpClothFX to further direct the movement of the cloth.
Simulation Settings and Effects
Section titled “Simulation Settings and Effects”When all of the necessary components are in place, there are two main ways of adjusting the cloth simulation.
The first is to control the cloth particles using modifiers.
You can also create collision objects by simply applying an xpCollider tag to scene geometry.
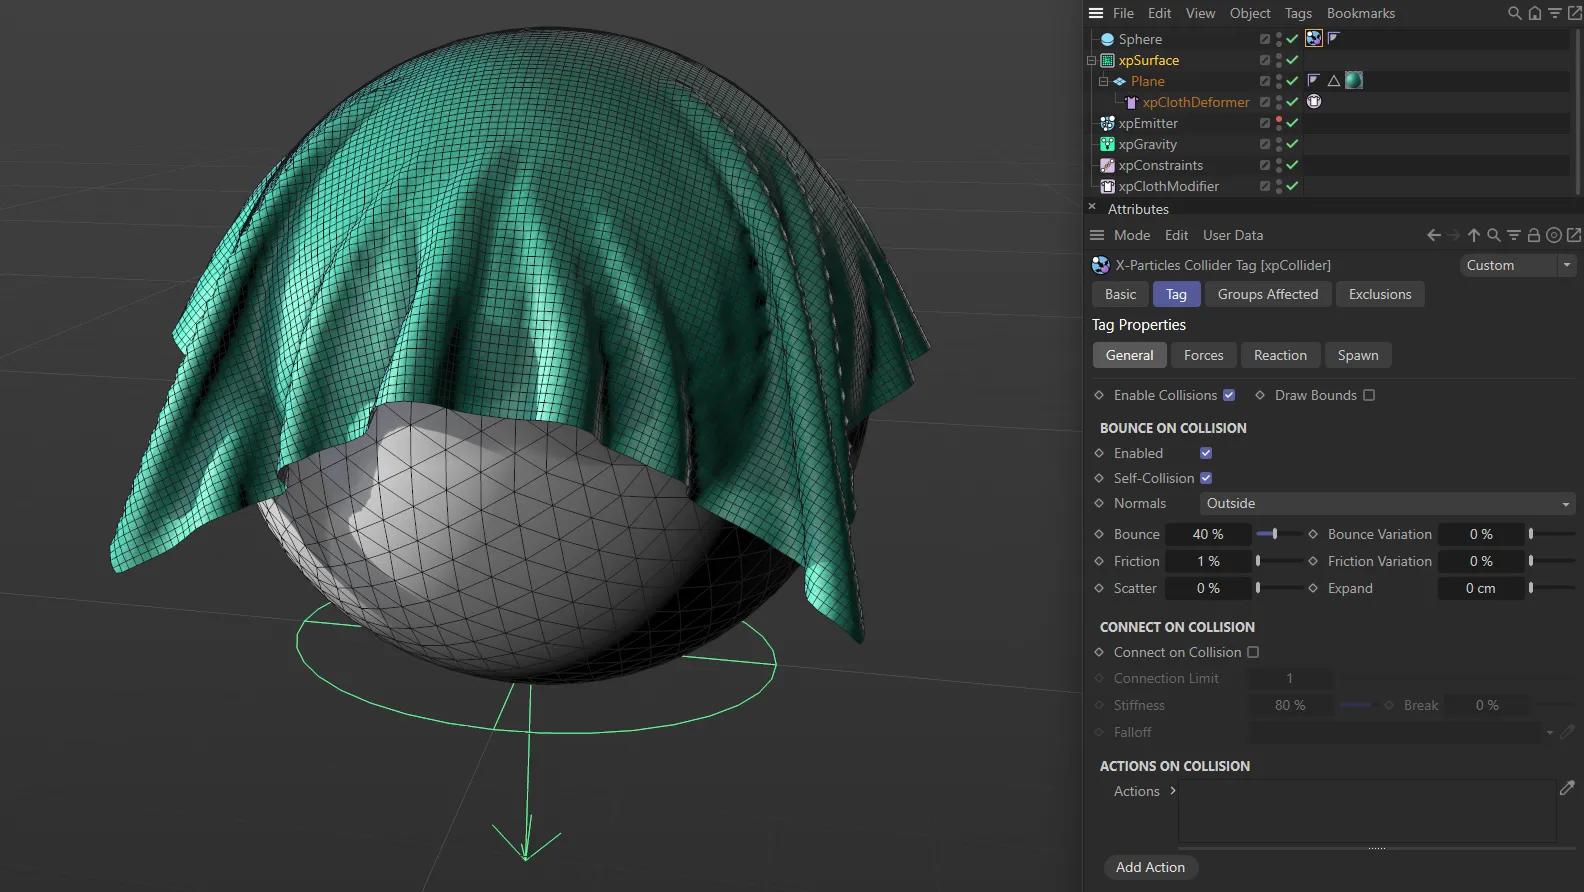
In this image an xpGravity modifier and an xpCollider tag are being used to direct the collision between the cloth object and the Sphere primitive.
The second is to make changes to the cloth properties within the xpCloth tag.
Here you can change the characteristics of the cloth, making it more stretchy for example.
You can also activate cloth tearing and set up basic pinning.
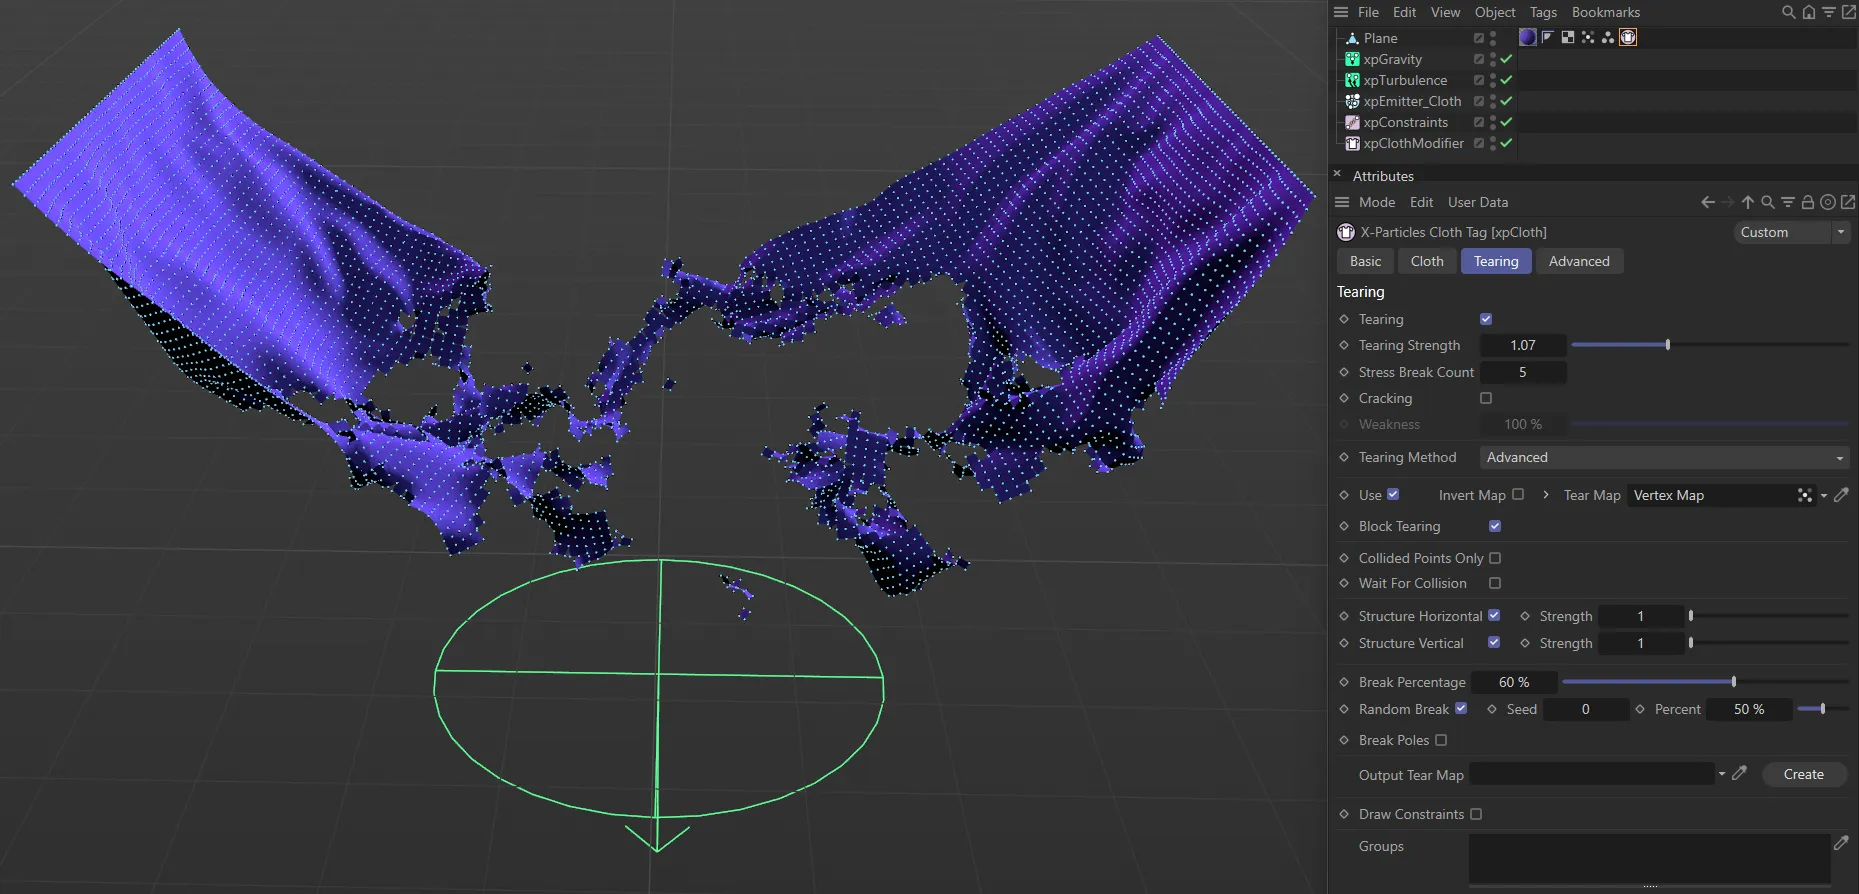
The xpCloth tag can be used to change the characteristics of the cloth, using the Tearing tab to produce tearing sims.
Additional Tools
Section titled “Additional Tools”Further effects can be achieved by using the xpSurface object.
This adds depth and subdivisions to cloth objects.
It also has some settings to enhance tearing effects.
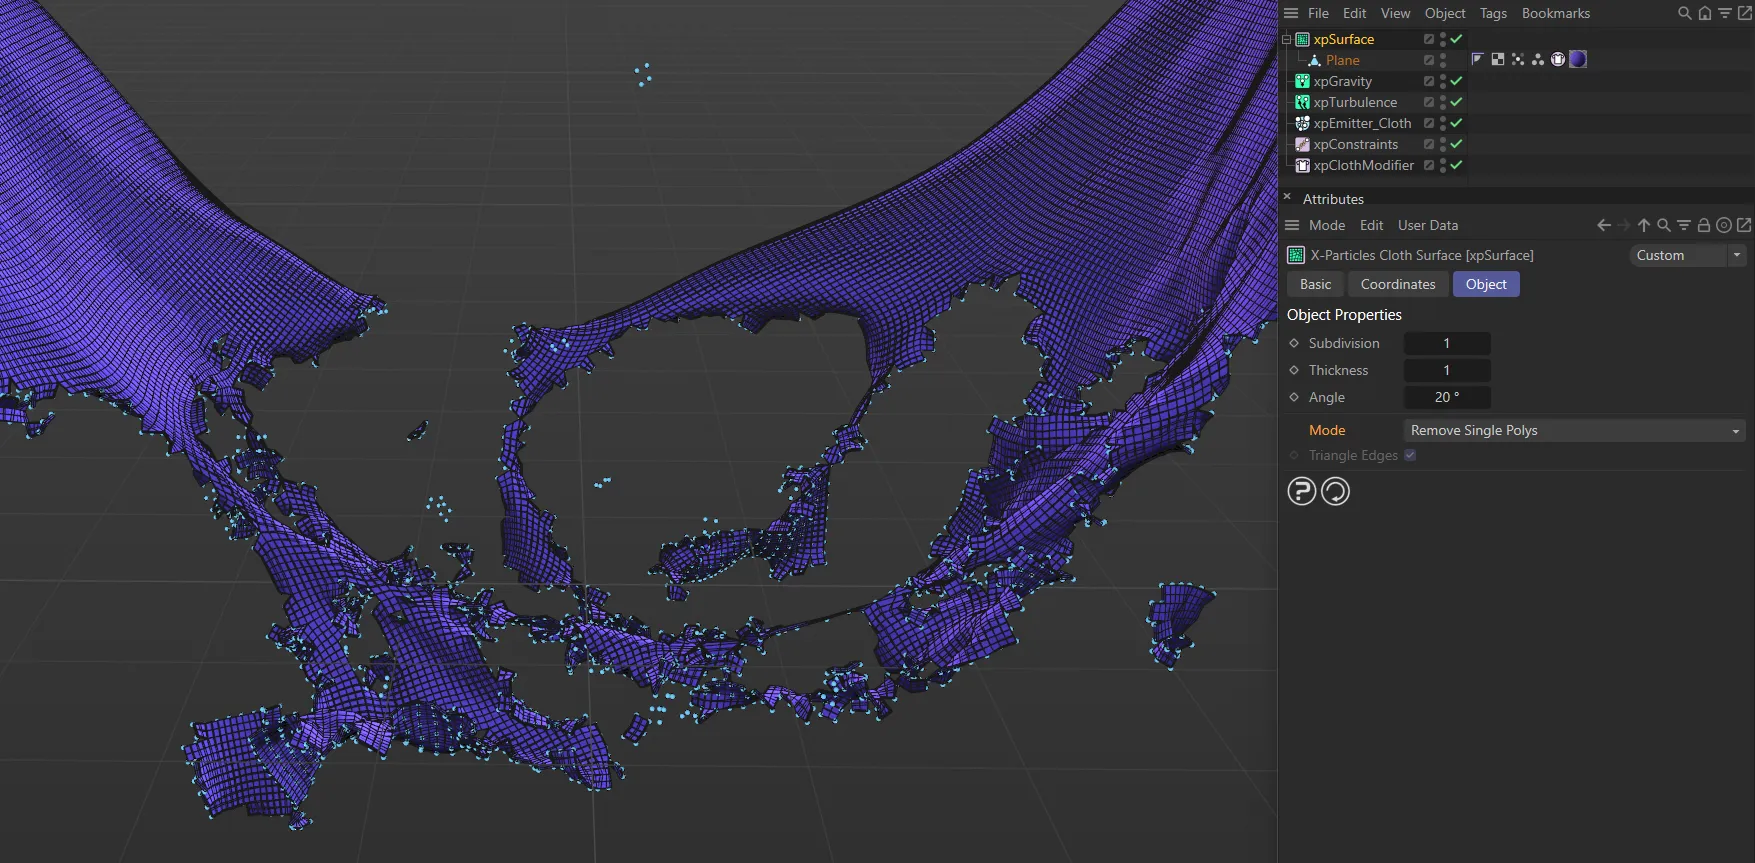
In this image, the xpSurface object is being used to enhance tearing effects.
More advanced cloth pinning can be setup using an xpPin tag.
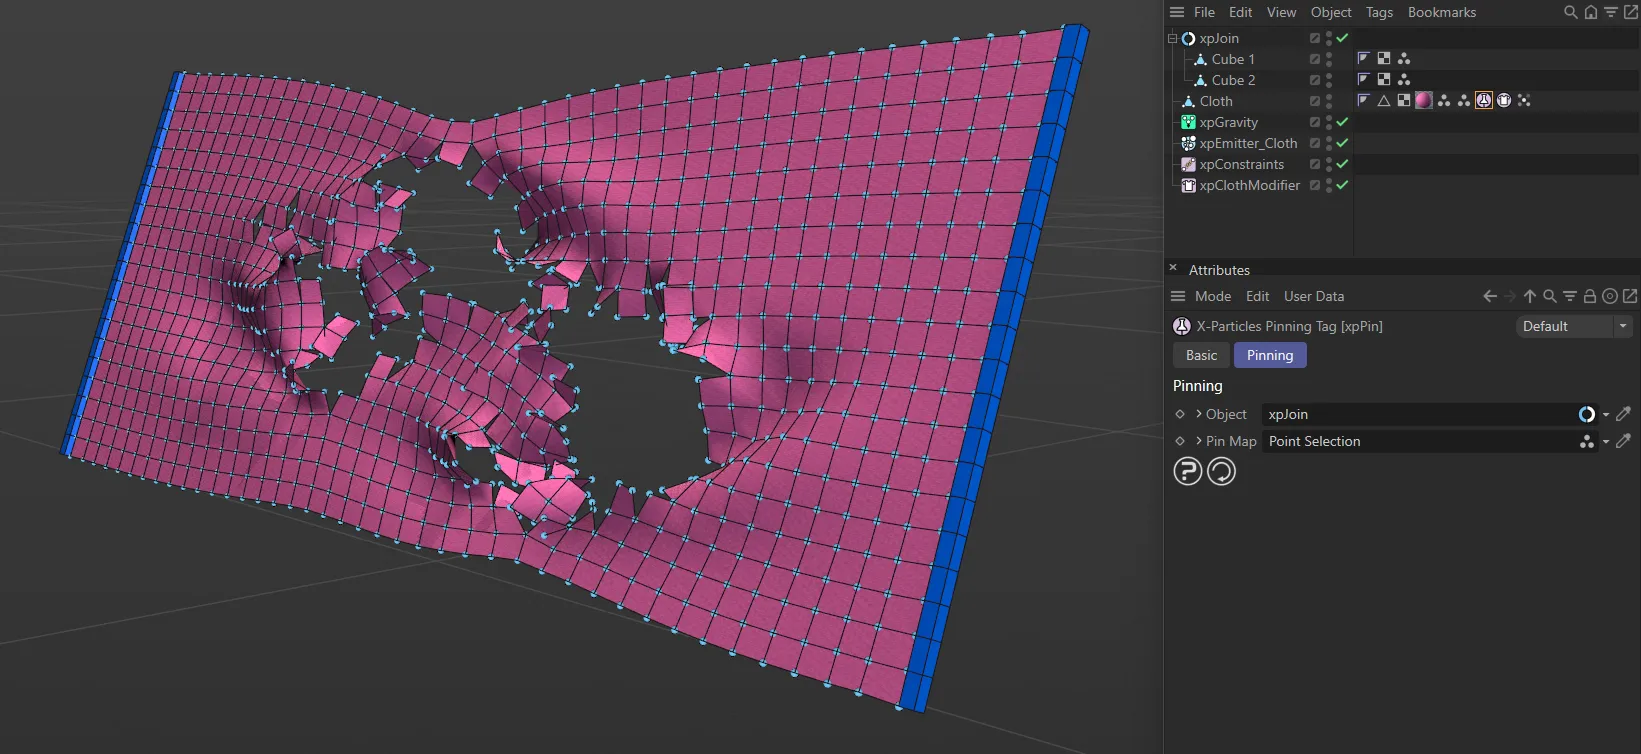
Cloth can be pinned to scene objects, such as the two Cube primitives here, using an xpPin tag.
Simulation Accuracy
Section titled “Simulation Accuracy”You are able to increase the quality of cloth simulations by adjusting the project subframe steps.
This divides each frame into smaller steps, creating a more accurate cloth solve.
This will often give better collisions, but will take longer to process.
These settings can be found in the X-Particles tab of the Cinema 4D Project settings, which can be accessed by pressing ALT+D.
Increasing the subframe steps will also increase the per-frame iterations.
This will have a stiffening effect on your cloth simulation.
To counteract this, you can either reduce the cloth Iterations, or lower the strength of the Structure, Shear and Bend settings, within the xpCloth tag.
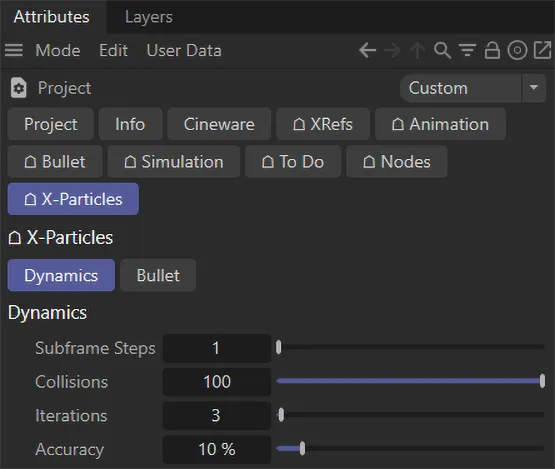
The menu for the X-Particles tab of the Cinema 4D Project settings.
Commands
Section titled “Commands”Objects
Section titled “Objects”Copyright © 2026 INSYDIUM LTD. All rights reserved.