Volume Points
Overview Video
Section titled “Overview Video”The Volume Points tab lets you generate the points, which will be used as attraction points for your branches to grow towards, within your volume.
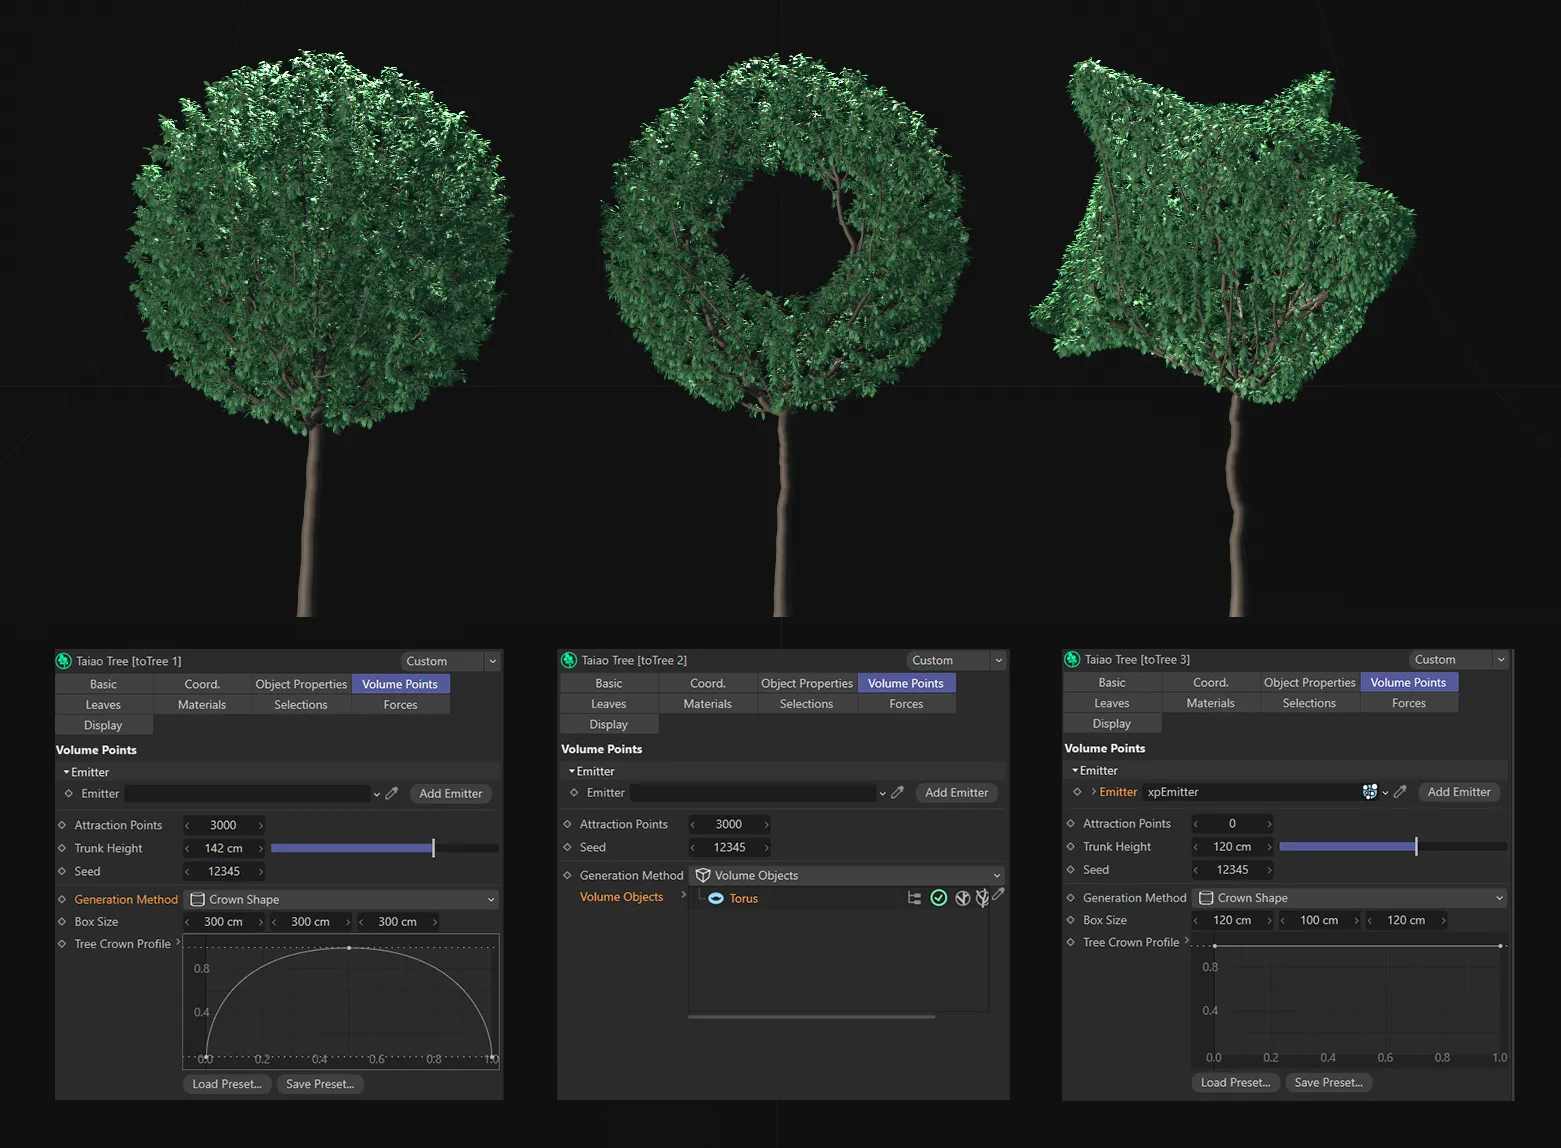
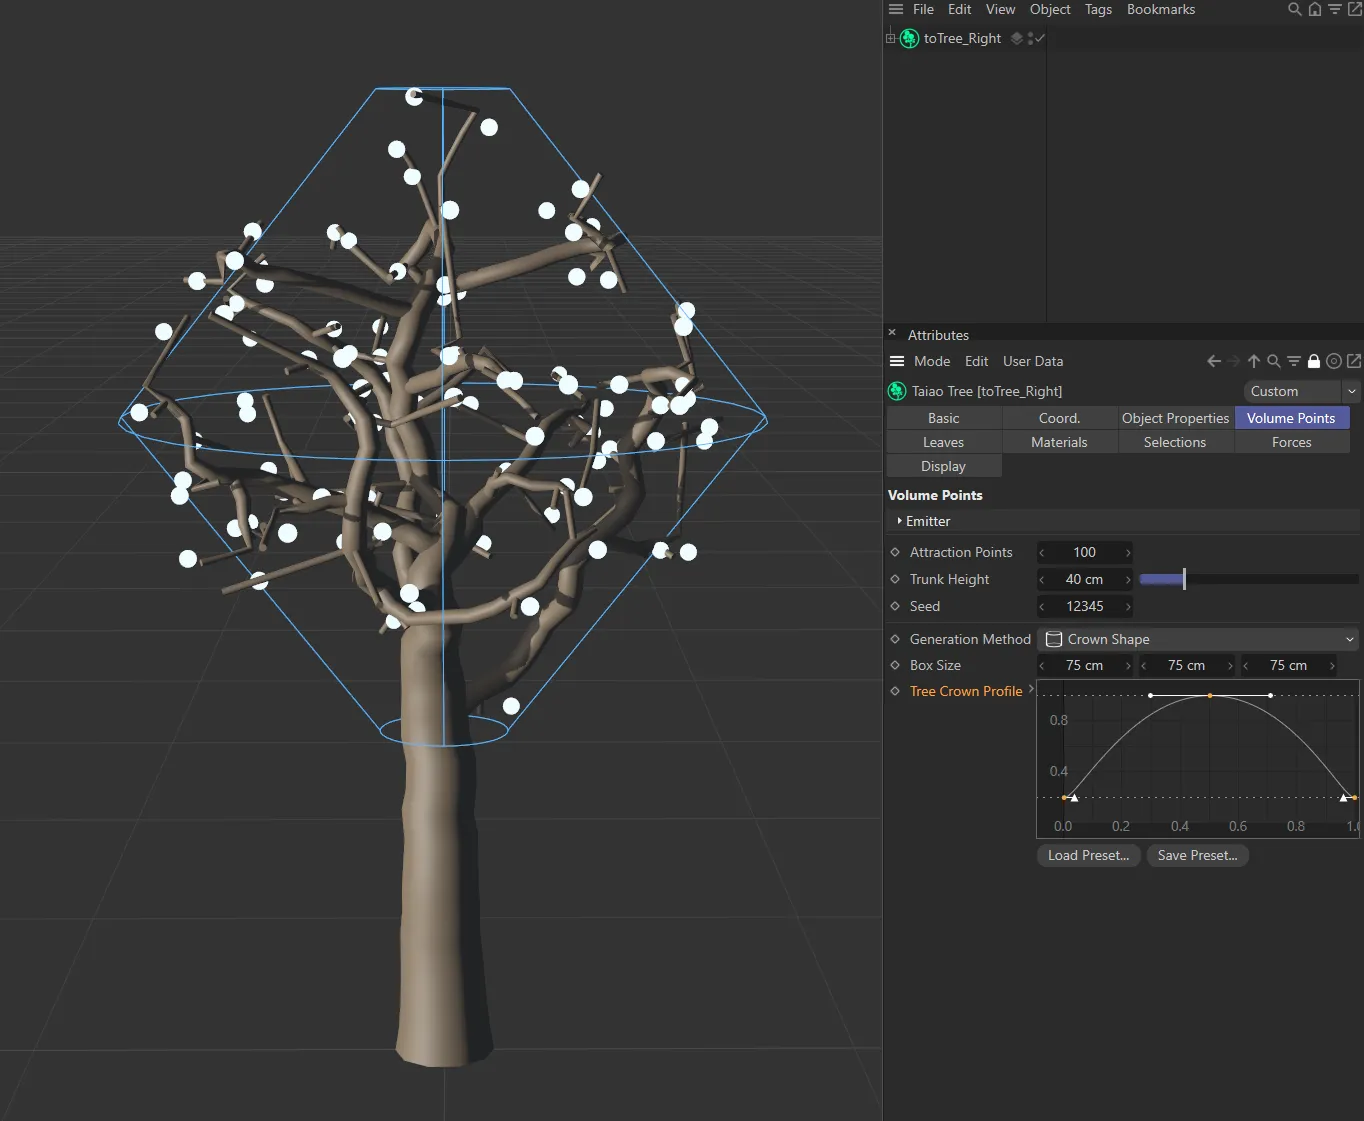
A selection of three trees, created using different settings in the Volume Points tab. The first with a profile generated with the Tree Crown Profile spline, the central one using a Torus primitive as a Volume Object and the one on the right, created using an xpEmitter, with the particle count acting as the toTree’s attraction points.
Emitter
Section titled “Emitter”Emitter
Section titled “Emitter”This setting lets you use particles as attraction points instead of either Generation Method setting, below, by dragging an emitter into the link field.
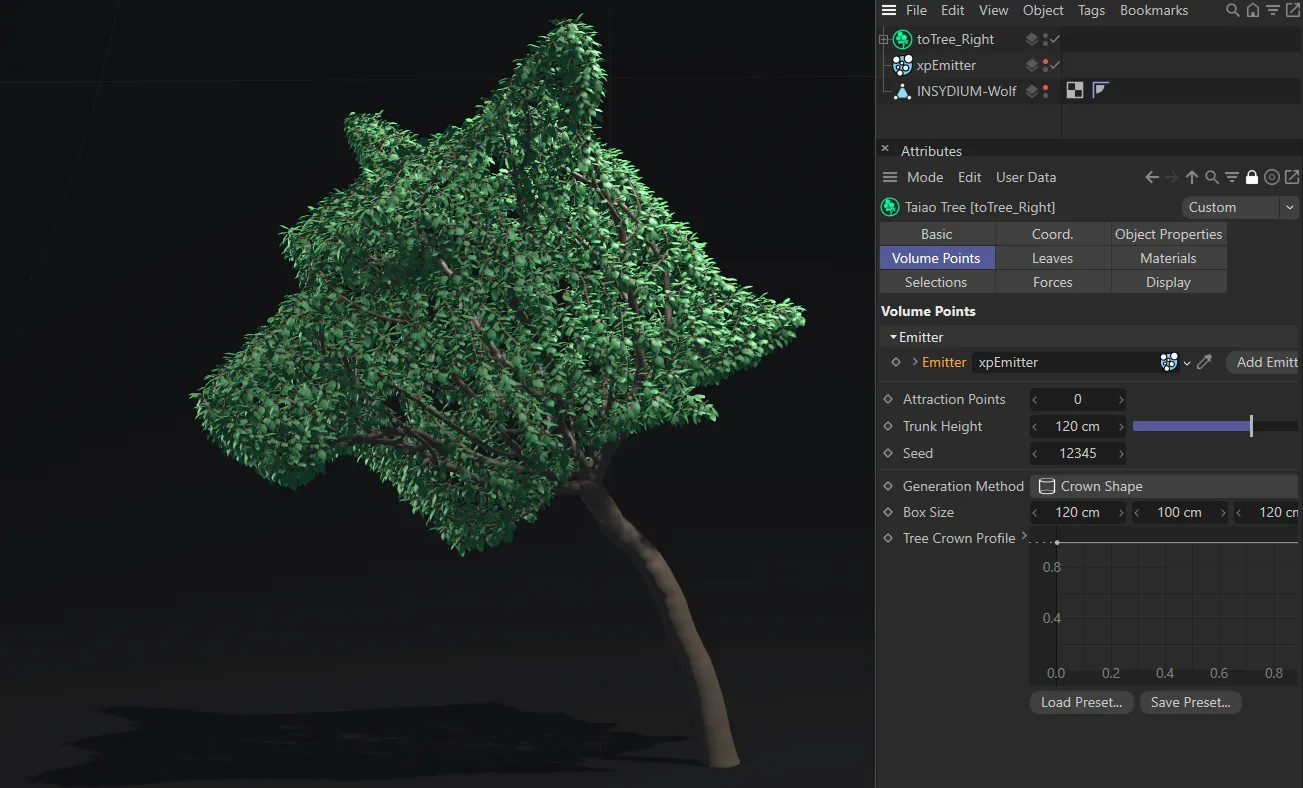
Here, the xpEmitter is set to the Emission mode of Shot with a Shot Count of 10000 particles, linked in toTree as a volume point Emitter object.
The particles are acting as toTree’s attraction points, with a Speed setting of 0 (zero), so that they remain stationary.
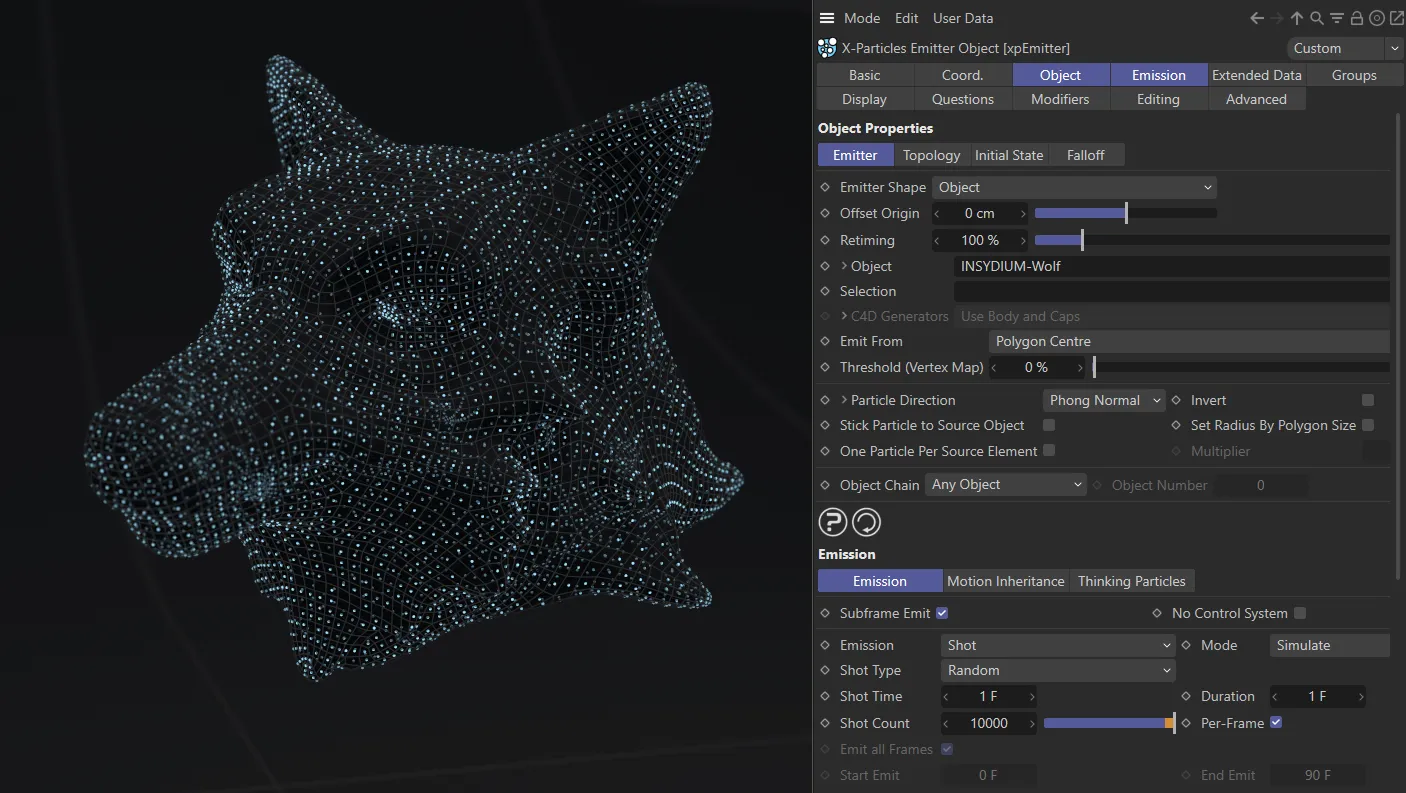
The same image as above, with toTree disabled, clearly shows the particles emitted, together with a closer look at the xpEmitter settings.
Add Emitter
Section titled “Add Emitter”Click this to create a new xpEmitter within your scene.
Attraction Points
Section titled “Attraction Points”Here you can increase or reduce the number of attraction points you have within your specified volume.
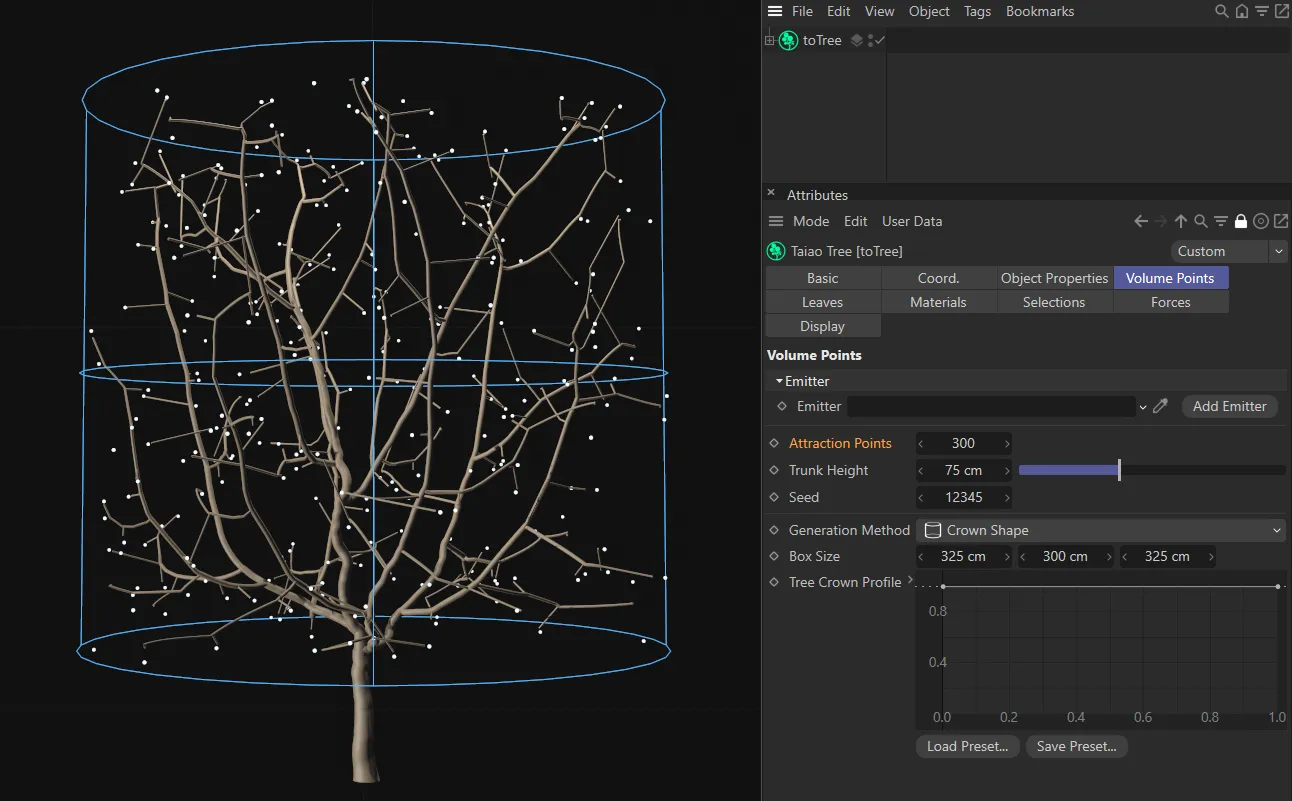
In this image the setting is 300 Attraction Points.
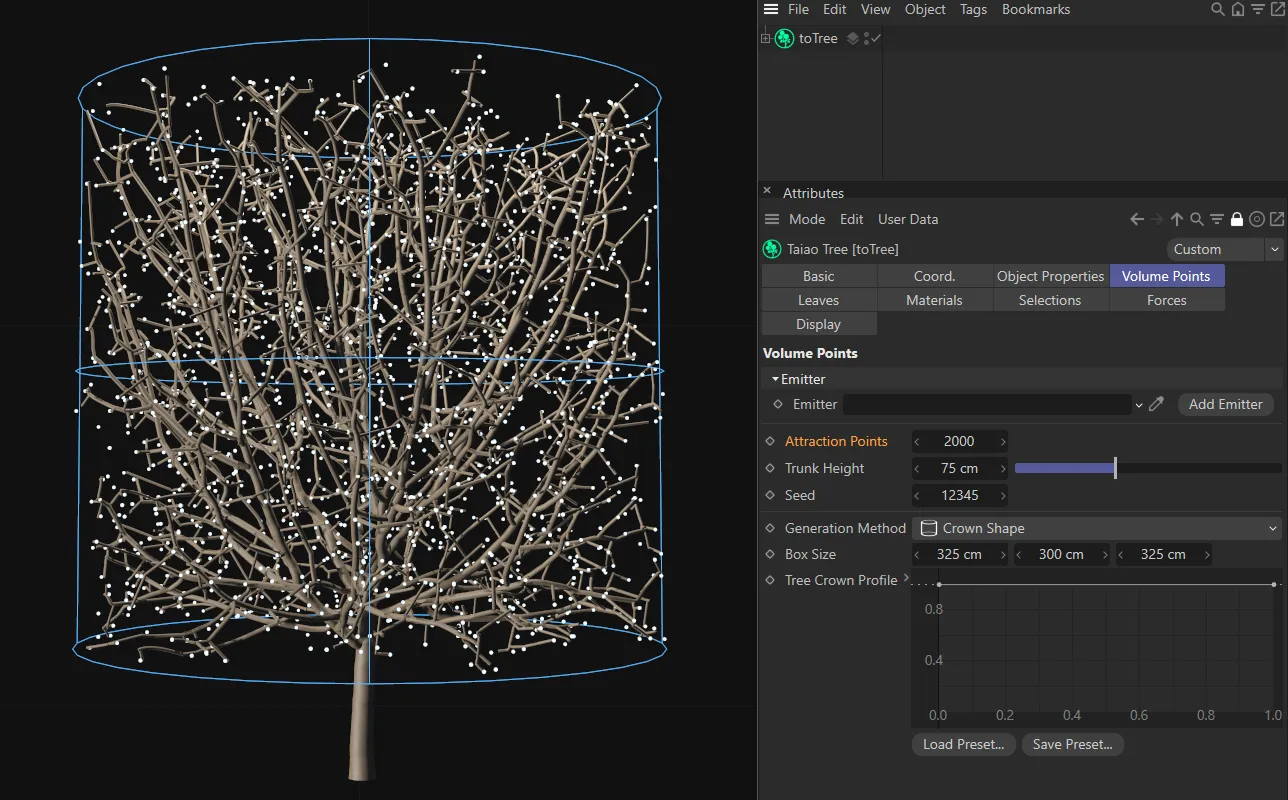
Here, the Attraction Points setting has been raised to 2000.
Trunk Height
Section titled “Trunk Height”This setting adjusts the height of the volume object.
Altering this will give a different, random distribution of points within your volume.
Generation Method
Section titled “Generation Method”There are two methods of generation for the attraction points: Crown Shape and Volume Objects.
Crown Shape mode
Section titled “Crown Shape mode”This is the default setting and is a cylindrical shape, which can be adjusted.
Box Size
Section titled “Box Size”These settings control the size of the shape of your volume.

A Crown Shape setting, with a Box Size of 350 x 280 x 350cm.
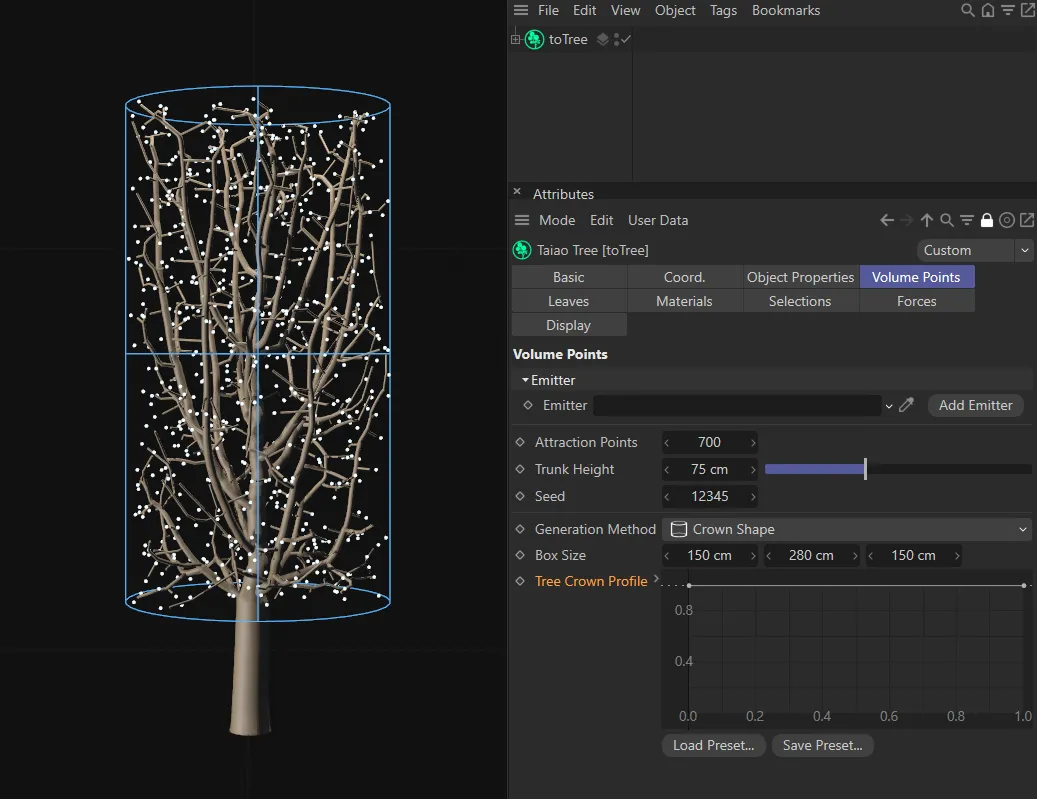
A Crown Shape setting, with a Box Size of 150 x 280 x 150cm.
Tree Crown Profile
Section titled “Tree Crown Profile”You can adjust the profile of your volume, as seen below, by manipulating the spline curve, using (and adding) knots.
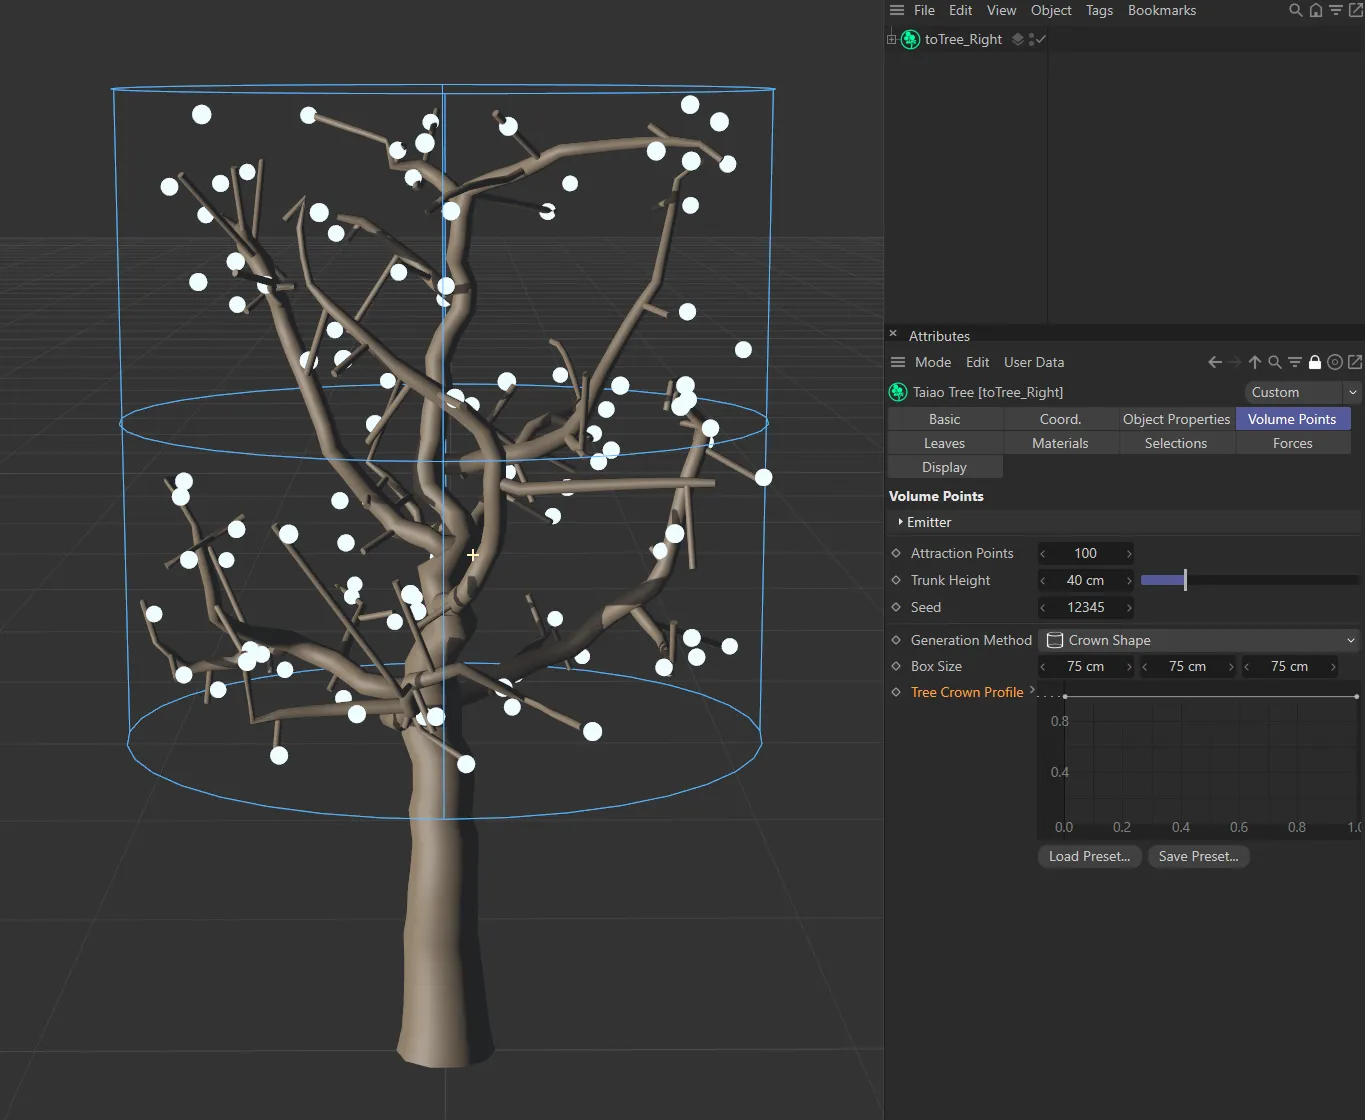
The Crown Shape setting is being driven by the Tree Crown Profile spline curve.
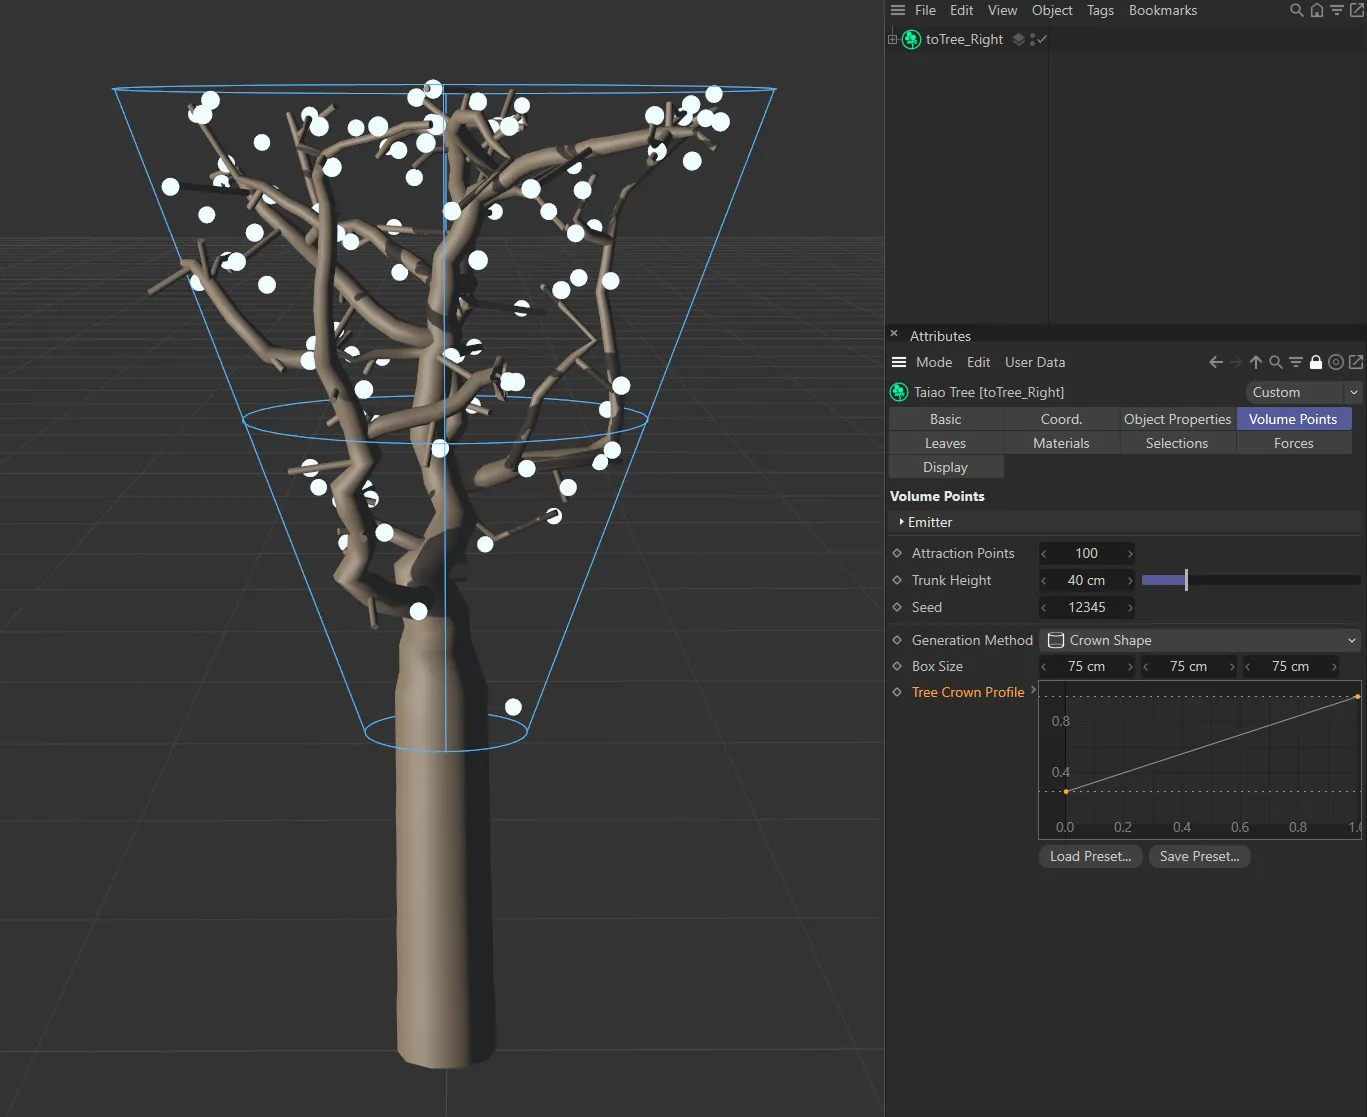
The Crown Shape setting is being driven by the Tree Crown Profile linear rising spline curve.
The Crown Shape setting, above, is driven by the spline curve in the bottom right.
Volume Objects mode
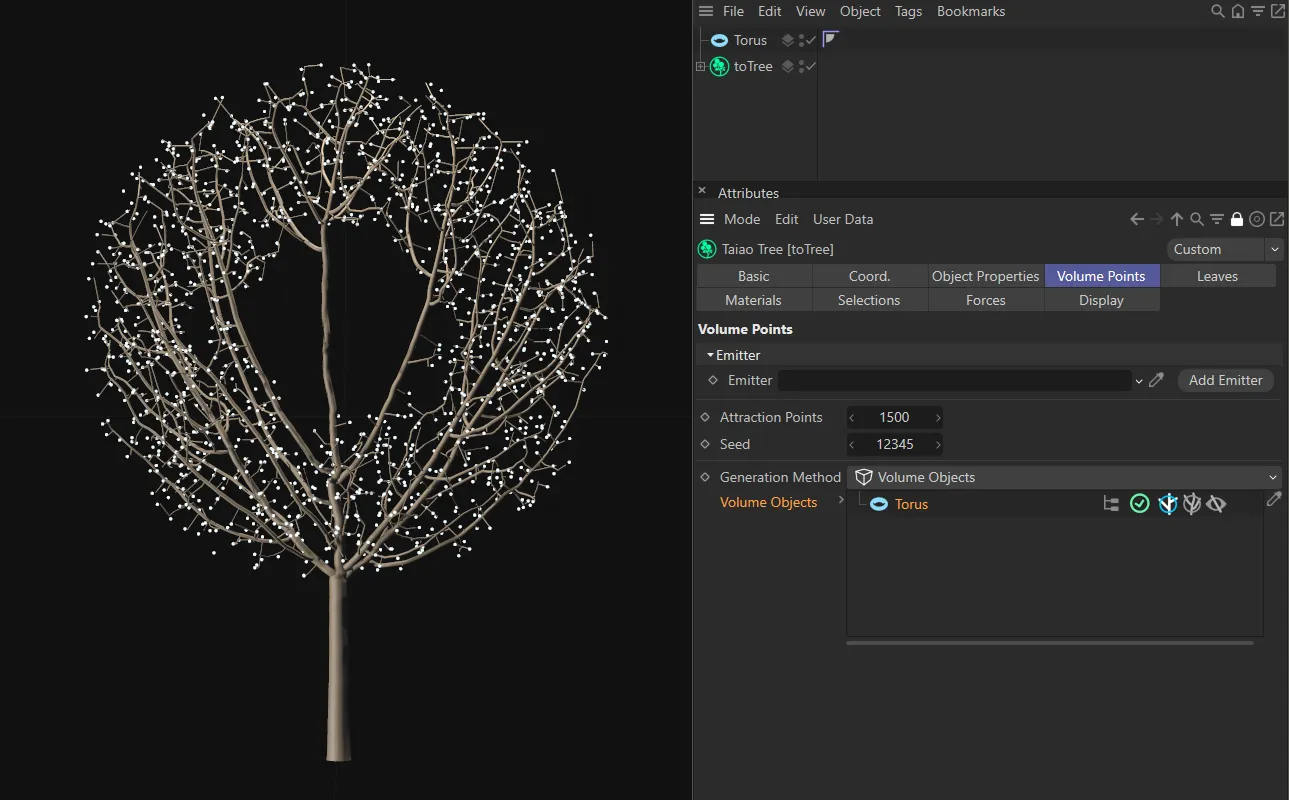
Section titled “Volume Objects mode”Volume Objects
Section titled “Volume Objects”Dragging and dropping an object into the Volume Objects link field will mean that a tree grows within this object shape, which gives you huge opportunities for scene generation.
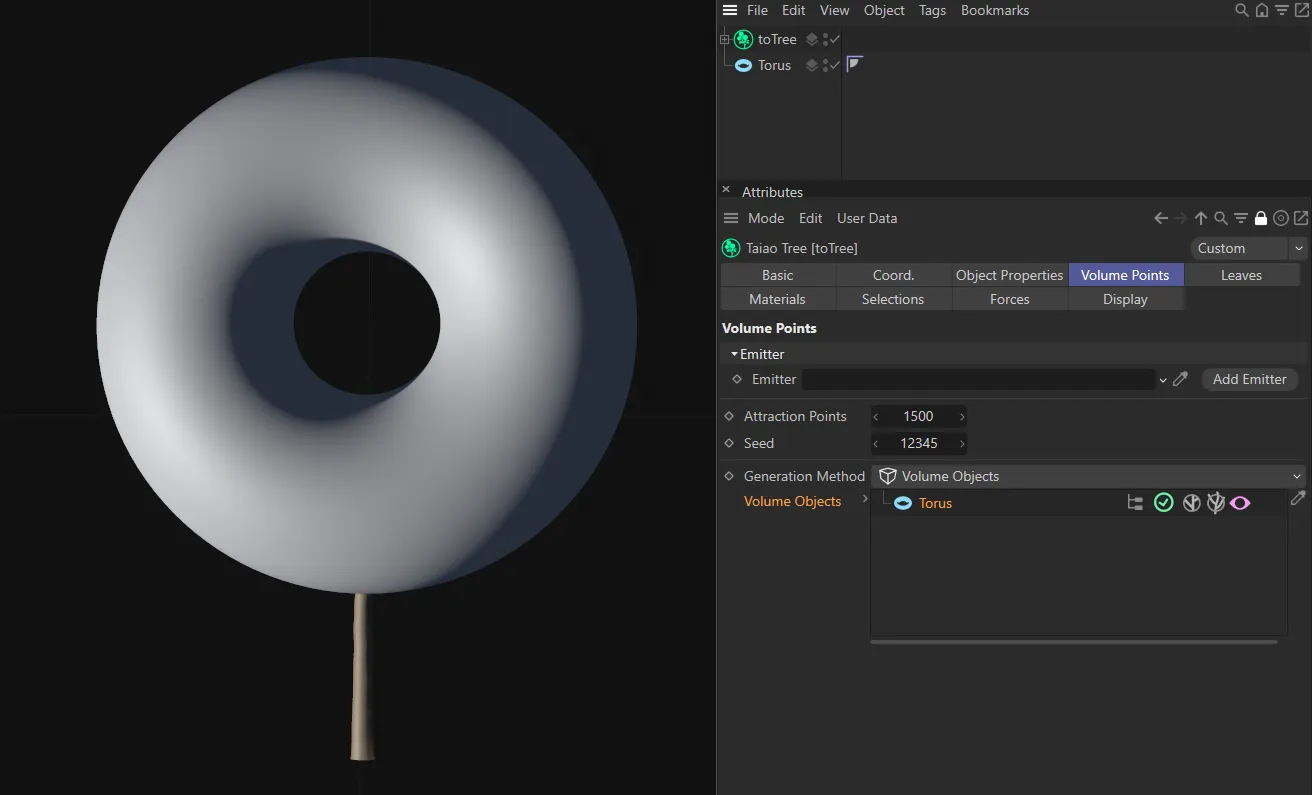
In the scene above, a Torus has been added to the Volume Objects link field and immediately points have been generated on the surface. There is also a trunk automatically attached.
By clicking the pink eye icon, disabling the visibility of the Torus object, we can see, in the image below, the tree that has been generated within the object.
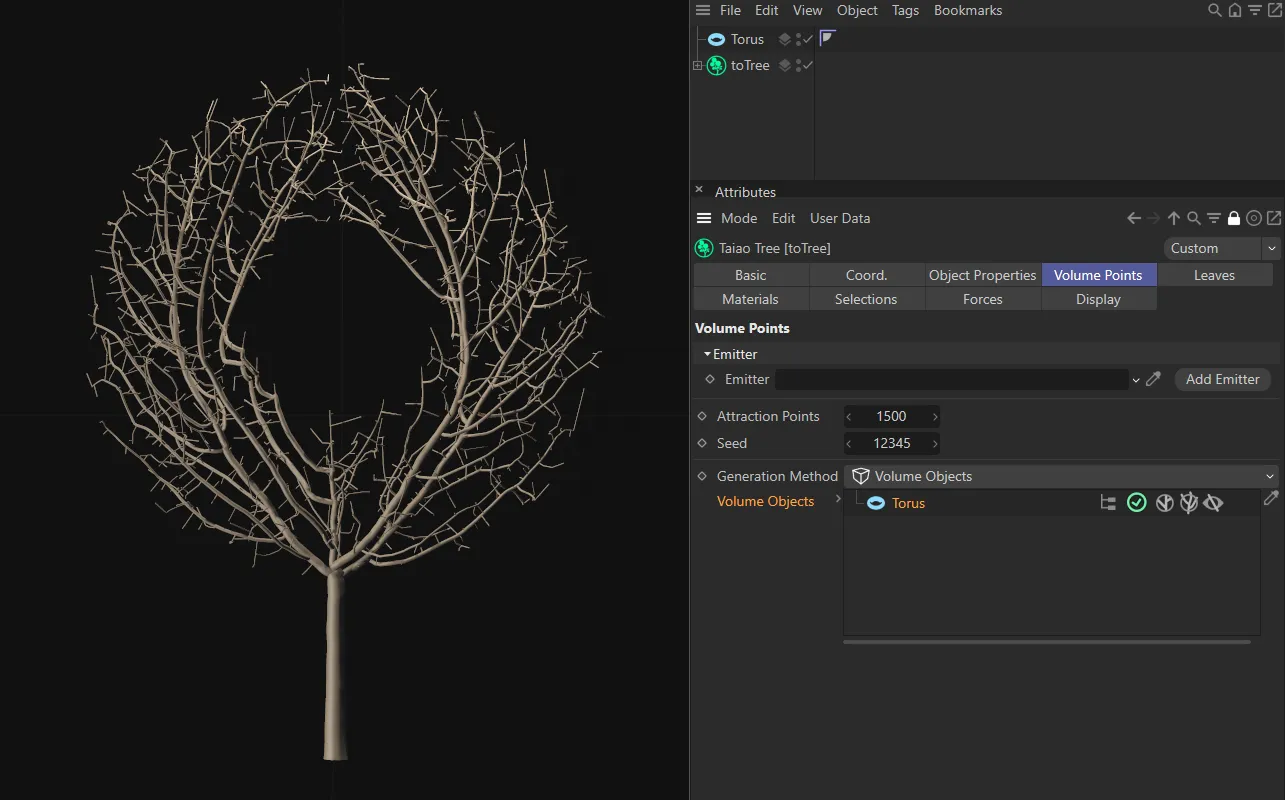
Here the tree has been generated within the Torus shape.
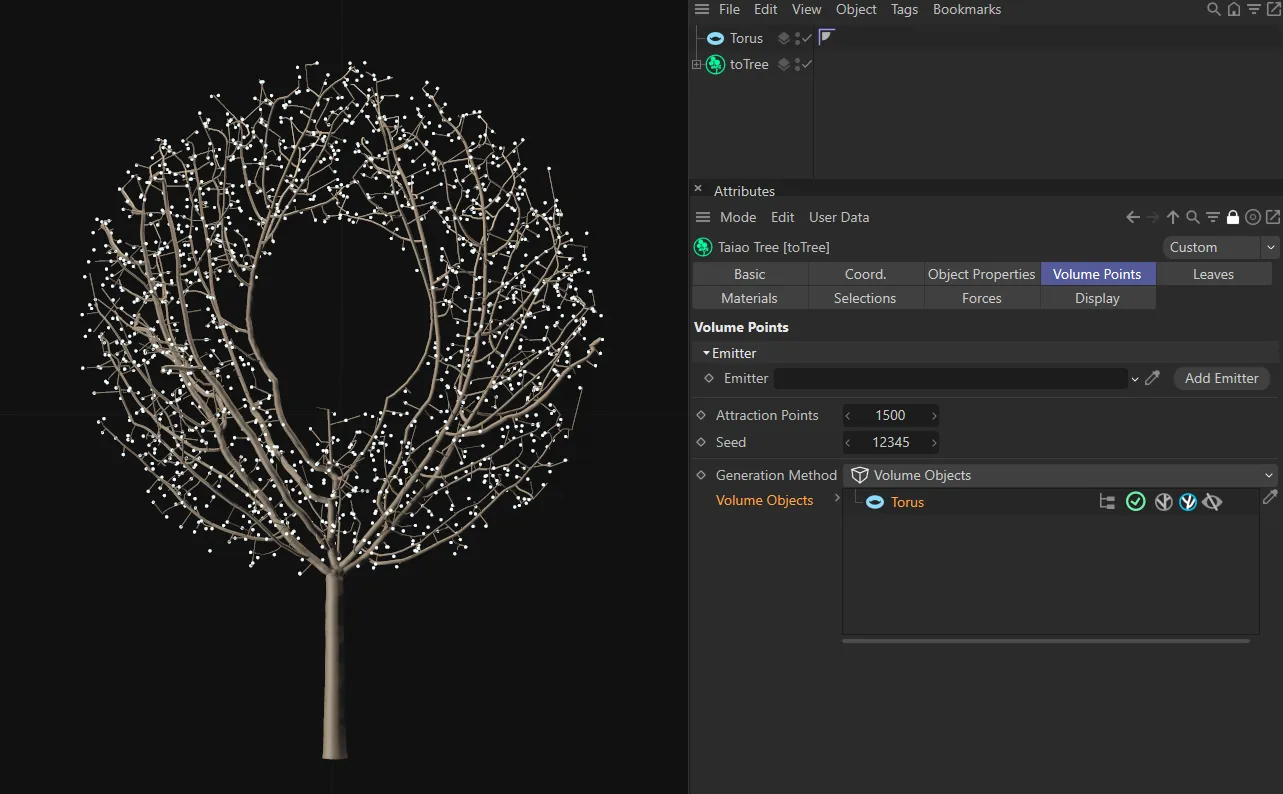
This setting can be changed in the Display tab, by clicking on the Object Wireframe box, to deselect this.
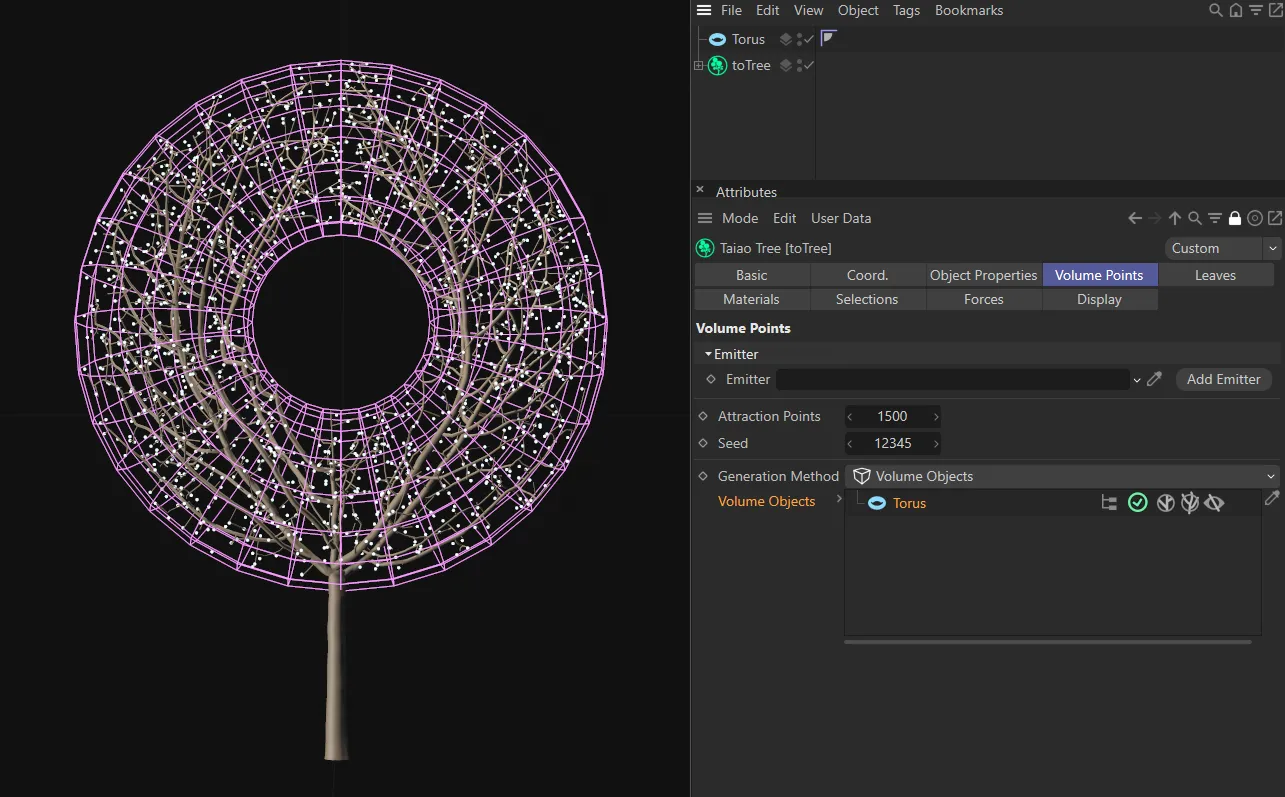
The default setting, pink wireframe, when visibility is disabled. The attraction points are also visible in this image.
There are two additional modes within the Volume Objects setting, in the link field.
By default, the attraction points will be generated within the volume and the branches will not be allowed to leave the volume.
Clicking on the left icon will illuminate it.
Now the attraction points will still be generated within the volume but the branches will be allowed to pass through it, as seen in the image below.
The first mode, with branches able to pass through the scene object, in this case the Torus.
The second setting will only be activated if the first one is disabled.
Clicking on this second icon will then illuminate it and will constrain the volume of the object within the inner surface of the object, as you can see below.
The second mode, constraining the branches within the inner surface of the Torus.
Copyright © 2026 INSYDIUM LTD. All rights reserved.