Global Settings
The Global Settings menu allows you to decide what kind of geometry is generated and how it is generated.
It allows you to make adjustments to the plant as a whole.
Global Settings
Section titled “Global Settings”Object Type
Section titled “Object Type”There are four settings: Polygon Object (the default), Spline Object, Line, and Wireframe.
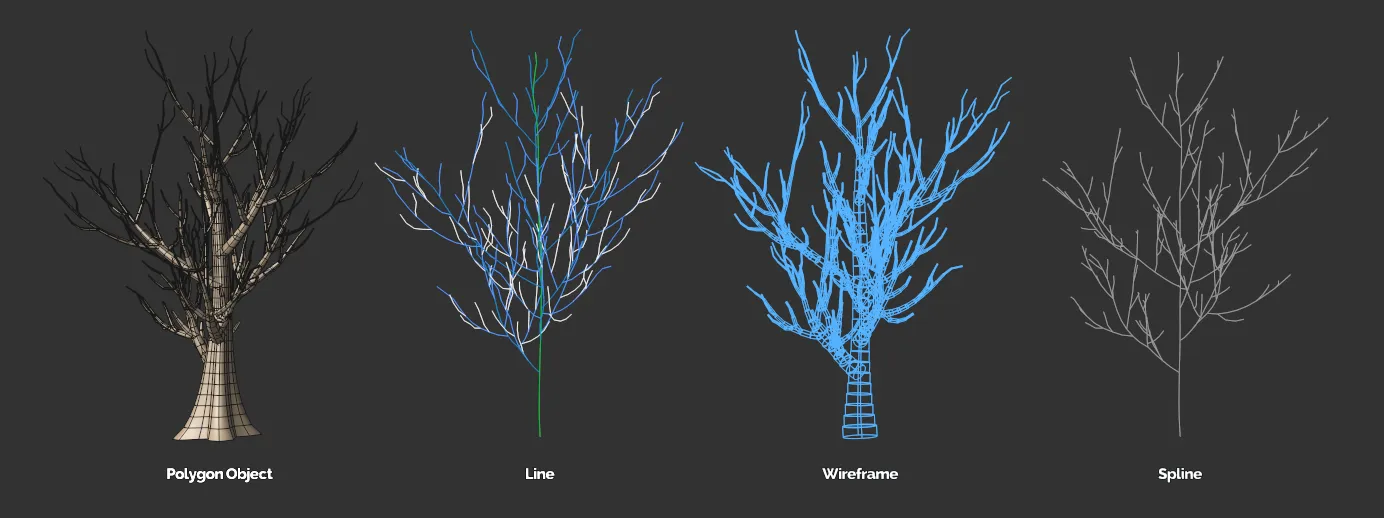
The four Object Type settings: Polygon Object, Line, Wireframe and Spline Object.
Polygon Object setting
Section titled “Polygon Object setting”A polygon object is generated for all layers of the plant.
Meshing Type
Section titled “Meshing Type”Set as Intersect, by default.
The alternative option is Joined.
This selection is only available in the Polygon Object setting.
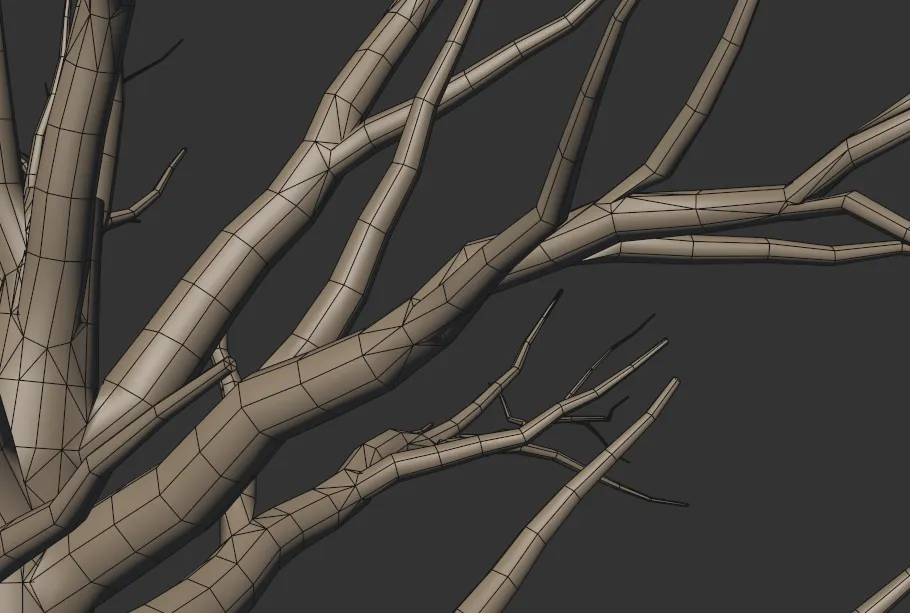
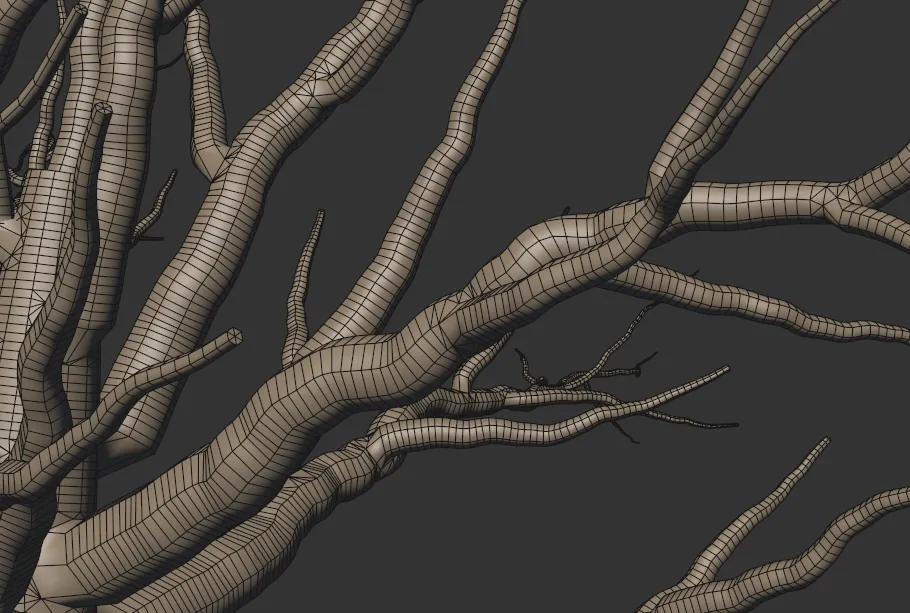
Intersect
Section titled “Intersect”This is the fastest meshing mode.
Each layer (branch) is merely intersecting with the one before it.
Joined
Section titled “Joined”The layers are joining, using more polygons, creating a detailed, cleaner, continuous mesh.
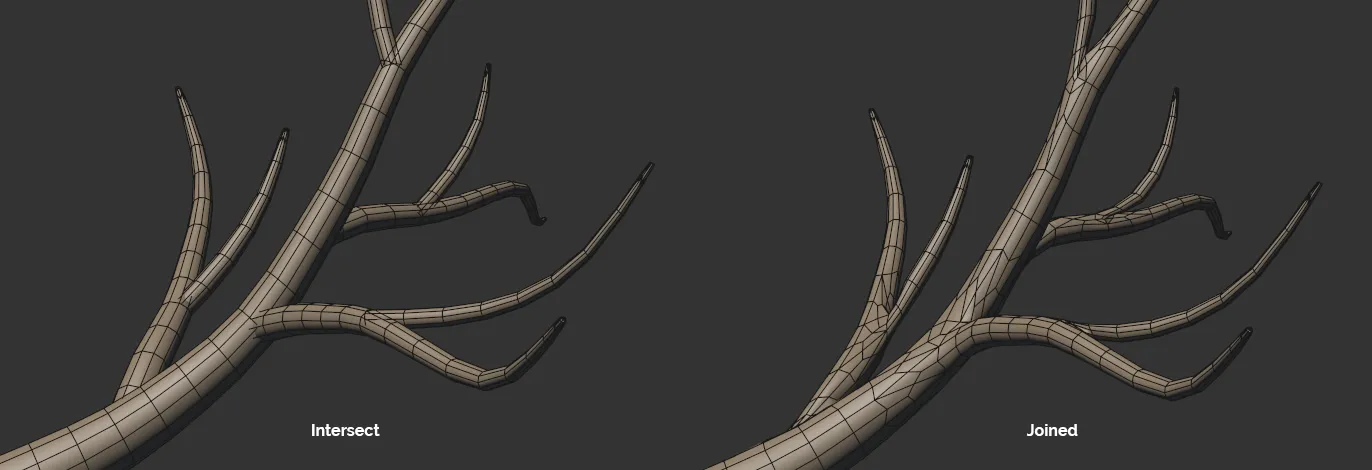
Meshing Type settings of Intersect and Joined.
Line setting
Section titled “Line setting”A display setting type, light in the viewport, giving you a more-responsive viewport performance while you are designing your plant.
This setting cannot be rendered as no actual polygons or splines are being generated.
Wireframe setting
Section titled “Wireframe setting”This is also a display mode, giving you a much better representation of your design and a more-responsive viewport performance while you are designing your plant.
Once again, this cannot be rendered, as no polygons or splines are created.
Spline Object setting
Section titled “Spline Object setting”An additional display mode, which will change the Trunk and Branch layers to a spline.
Again, this will aid viewport performance during plant design.
Subdivisions
Section titled “Subdivisions”Adds subdivisions; the higher the setting, the more subdivisions there will be and the cleaner, and more detailed, the mesh will become, especially where there are joins.
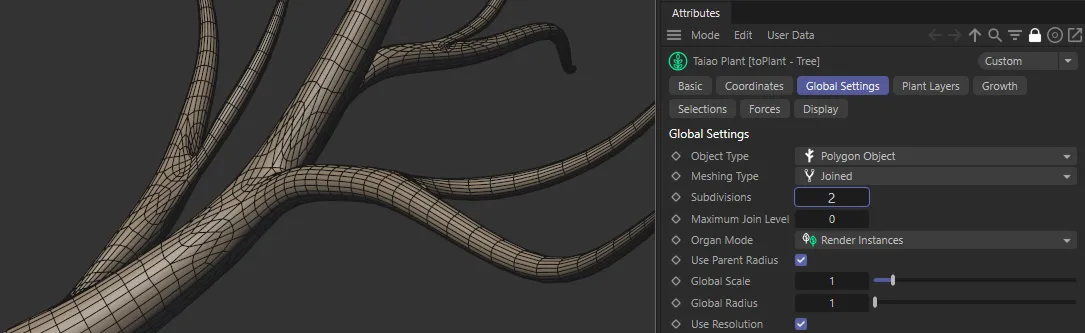
Subdivisions set at 2 in the Joined Meshing Type.
Maximum Join Level
Section titled “Maximum Join Level”The Maximum Join Level option is only available when the Meshing Type is set to Joined.
At the default setting of 0 (zero), every layer of the plant, in the hierarchy in the Plant Layers tab, is set to Joined.
If you change this setting to 1, your first plant layer (the Trunk layer) will be Joined to the next (the Branch layer); the other layers will be left in the Intersect mode.
At level 2, everything will be Joined, up to and including the second level.
At level 3, everything will be Joined, up to and including the third level.
This will continue, dependent on how many levels/layers you have in your plant.
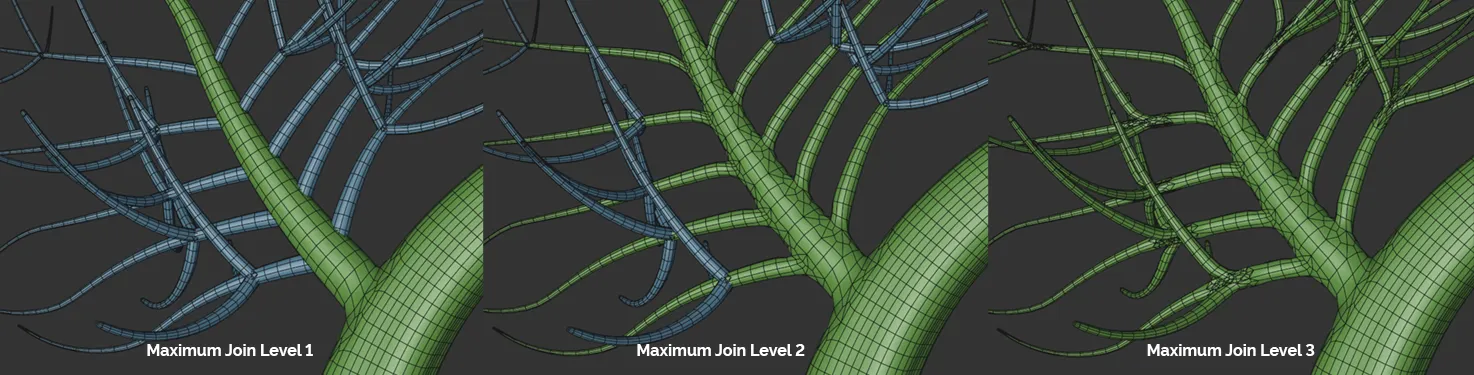
Image to demonstrate the Maximum Join Level settings at level 1, 2 and 3. Because there are only three branch levels on this plant, the level 3 setting is identical to it being set at 0 (zero).
Organ Mode
Section titled “Organ Mode”There are four settings, which dictate how the organs (leaves, fruits, etc) are generated: Render Instances (the default), Polygons, Single Polygon and Multi-Instances.
Polygons
Section titled “Polygons”Generates an individual polygon object for each organ (eg. each individual leaf or fruit) to give you ultimate control and the ability to make each organ unique.
Single Polygon
Section titled “Single Polygon”All of the organs, as a whole, are represented by one polygon object.
Render Instances
Section titled “Render Instances”A much more efficient way of producing the organs, with one polygon object created and all other organs being ‘instances’ of that one object.
Multi-Instances
Section titled “Multi-Instances”Another efficient setting, with one reference object for the organ, then one multi-instance for all of the other organs.
Use Parent Radius
Section titled “Use Parent Radius”Enabled by default, this setting automatically selects the radius for Branch (child) layers proportionally to the radius of the Trunk (the parent) layer of the plant.
If you switch this off, you can change the individual radius settings for the Branch layers in the Plant Layers tab.
These setting options will not be visible with the Use Parent Radius switched on.
Global Scale
Section titled “Global Scale”This slider scales up every part of the plant - globally - in perfect proportion.
Animation to demonstrate the Global Scale slider.
Global Radius
Section titled “Global Radius”The Global Radius slider increases the radius of the trunk and the branches at a global level.
Animation to demonstrate the use of the Global Radius slider.
Use Resolution
Section titled “Use Resolution”Enabled by default, this setting dictates how many length segments the trunk and branches of the plant have, determined by the Segment Resolution size setting, below.
When the Segment Resolution setting is at 10cm, there will be a segment every 10cm.
Switching this off allows you to set the segment sizes individually for each layer of the plant.
These settings will then become available as a Segment Count option in the individual layer for trunk and, similarly, Length Segments options for each branch layer in the Plant Layers tab.
Segment Resolution
Section titled “Segment Resolution”This option is only visible with the Use Resolution box ticked.
You can set the size of the segments globally with this.
The smaller the size, the more segments and, therefore, the higher the resolution.
Use Resolution enabled with a Segment Resolution setting of 15cm, giving a segment every 15cm.
Use Resolution enabled with a Segment Resolution setting of 2cm, giving a segment every 2cm.
Turbulence
Section titled “Turbulence”This parameter is a global multiplier for existing trunk and branch turbulence, increasing or decreasing the level of deformation across the whole plant (ie, not just one layer).

Turbulence value set at 0.5 in this image.

Turbulence setting raised to 3.
Turbulence Scale
Section titled “Turbulence Scale”You can use this slider to increase or decrease the scale of turbulence globally.
Turbulence Scale set to **1.

Turbulence Scale raised to 5.
Furling
Section titled “Furling”This setting will only have an effect if furling levels have already been set on the individual Trunk and Branch layers.
It will then act as a global adjustment to naturally curl the angle of the whole plant, increasing or decreasing the ‘local’ levels set.
Animation to demonstrate the effect of the Furling slider.
This parameter requires the Meshing Type to be set to Intersect, in order to respond.
As with the Furling and Turbulence settings, this slider will only have an effect if twisting levels have been set in the Plant Layers tab.
This slider then operates to globally refine the twisting of the plant.
Animation to demonstrate the effect of the Twist slider.
Phong Options
Section titled “Phong Options”These options allow you to adjust the smooth shading between neighboring polygons.
Smooth shading can be applied across all polygons, or it can be restricted using the Angle Limit and Phong Angle settings. **
Angle Limit
Section titled “Angle Limit”When activated, this will use the Phong Angle value to **restrict where smoothing occurs. **
Phong Angle
Section titled “Phong Angle”You can change this to set the angle limit, up until which the neighboring surfaces will be smoothed.
Randomize
Section titled “Randomize”This option changes all random seeds within the plant layers.
You can use it to create unique copies of a plant that will be similar in structure to the original.
Open Preset Browser
Section titled “Open Preset Browser”All objects now have an Open Preset Browser button to complement the menu option.
This will open the preset browser if it is not already open.
For further information on the Preset Browser, click the link below.
Copyright © 2026 INSYDIUM LTD. All rights reserved.