Object
Overview Videos
Section titled “Overview Videos”toGrass allows you to create realistic grass on terrains, objects and splines.
You can generate splines, polygon blades and even custom objects.
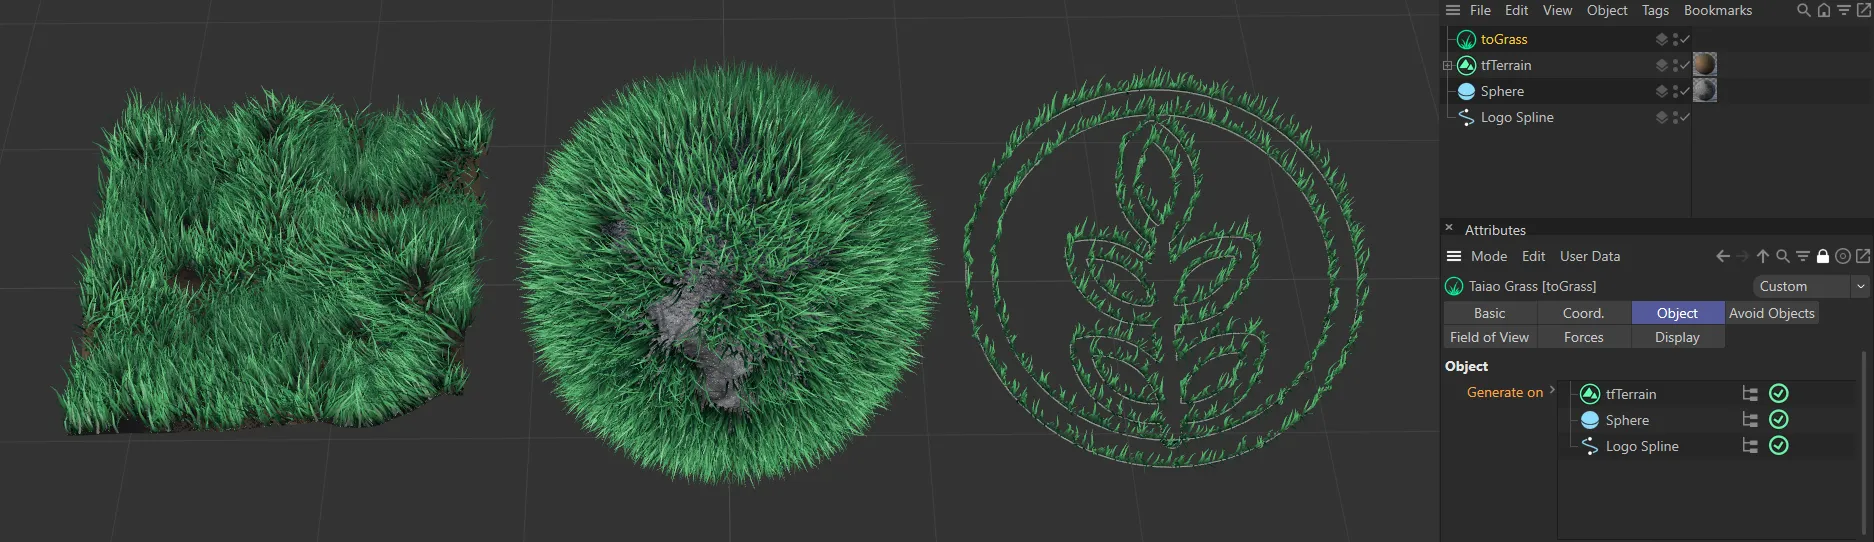
Grass generated on a tfTerrain, a Sphere and a Logo Spline.
Generate on
Section titled “Generate on”Drag the terrain, scene geometry or spline into the Generate on list to create a surface for your grass to grow on.
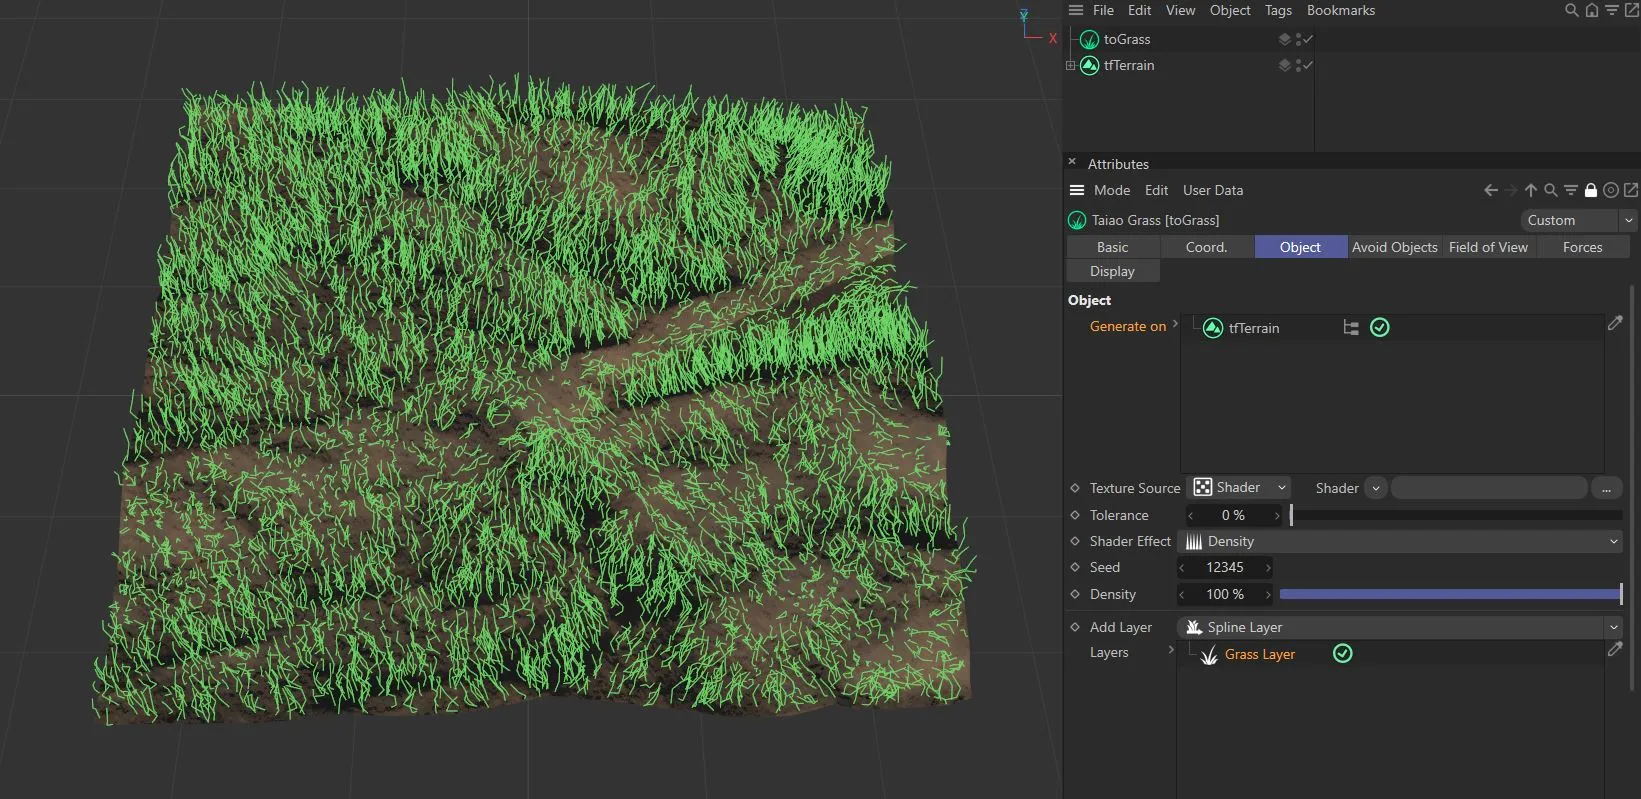
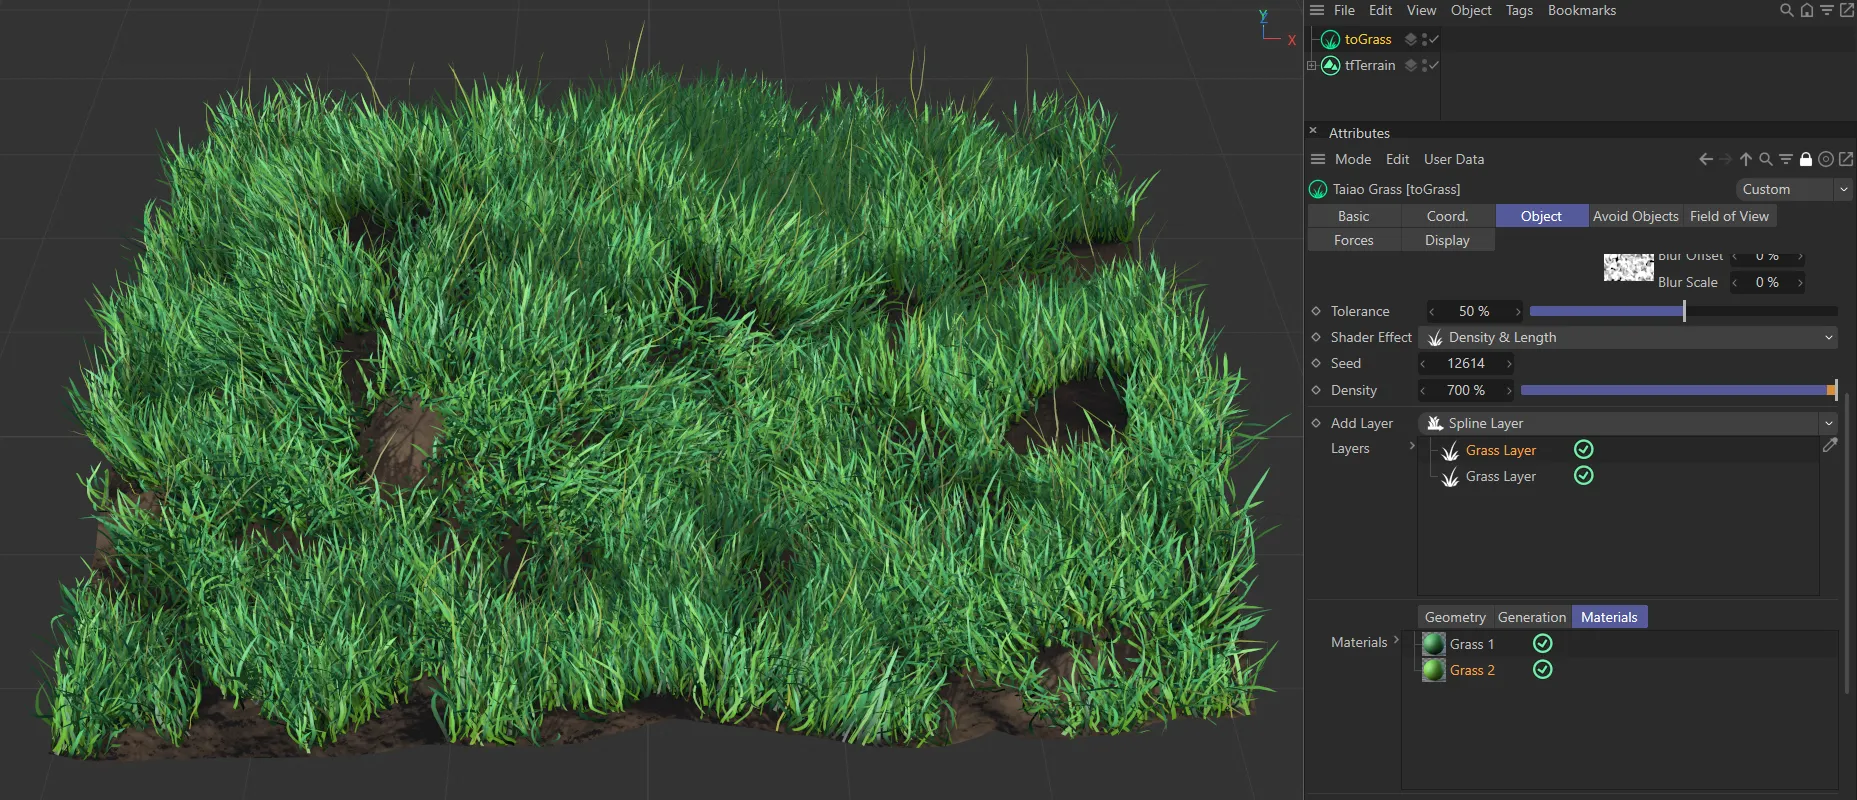
In this image, grass is growing on the tfTerrain, which has been dragged and dropped into the Generate on list.
In the list, there are additional icons: Clicking on the green tick simply deactivates and activates the generation of grass.
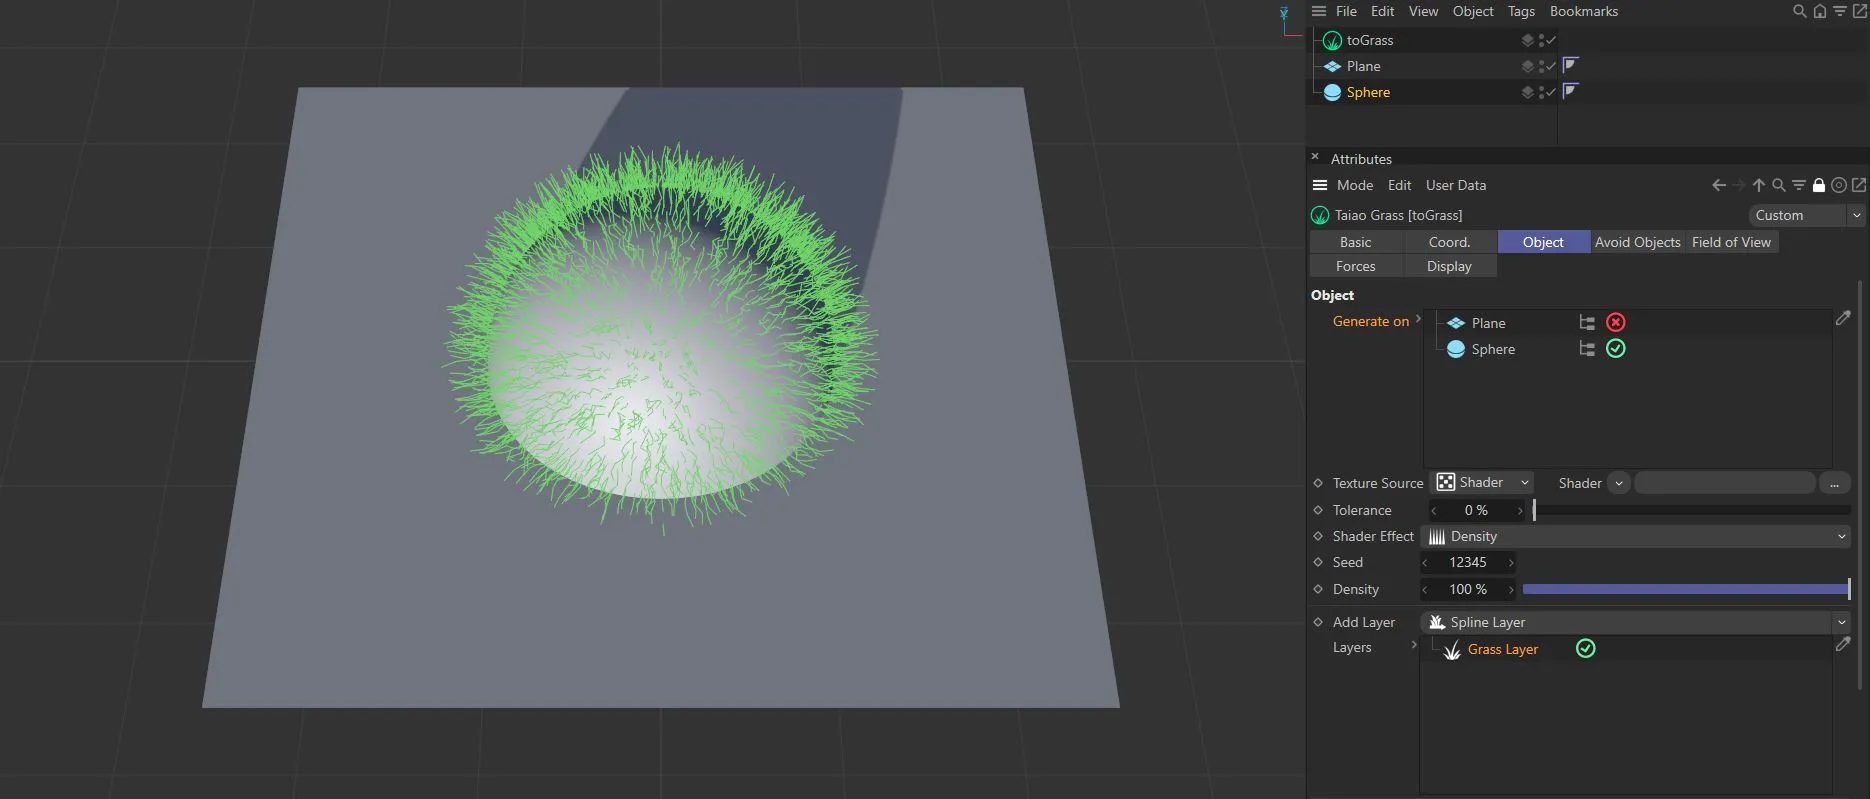
In the image above, the grass is growing on the Sphere, but not on the Plane, which is deactivated in the Generate on list.
You can use the Hierarchy button to control the generation of grass on nested objects.
Grayed out by default, this setting generates grass on all child layers.
If clicked, it will turn red to indicate it is disabled and the grass will only be generated on the object which is in the Generate on list.
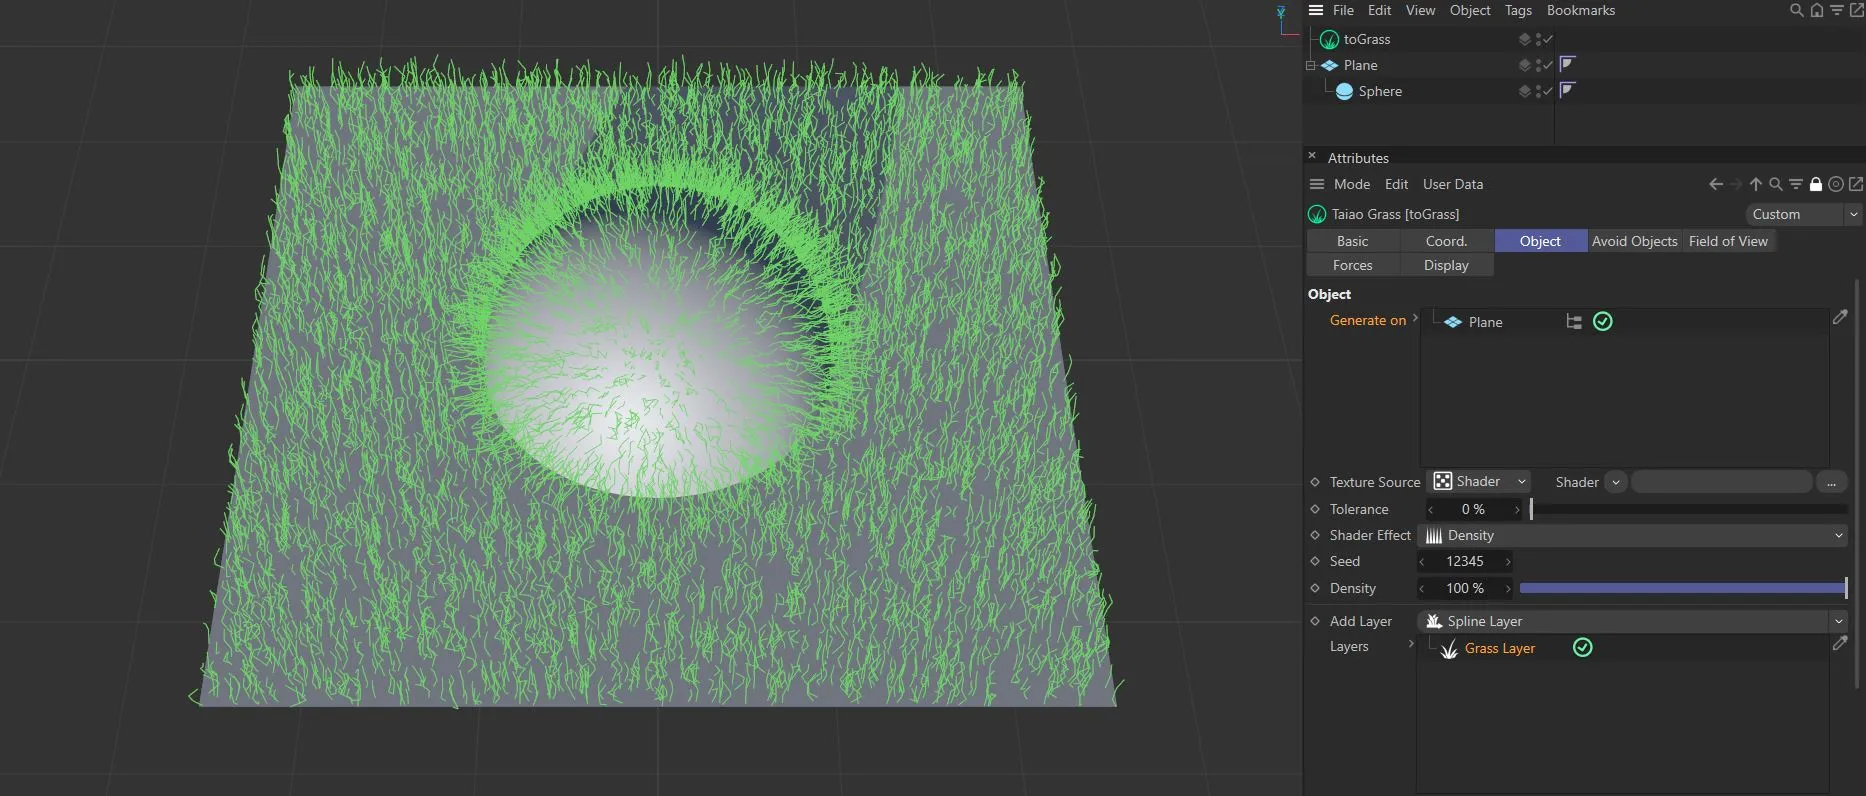
Here, with the Hierarchy option enabled, grass is being generated on both the Sphere and the Plane.
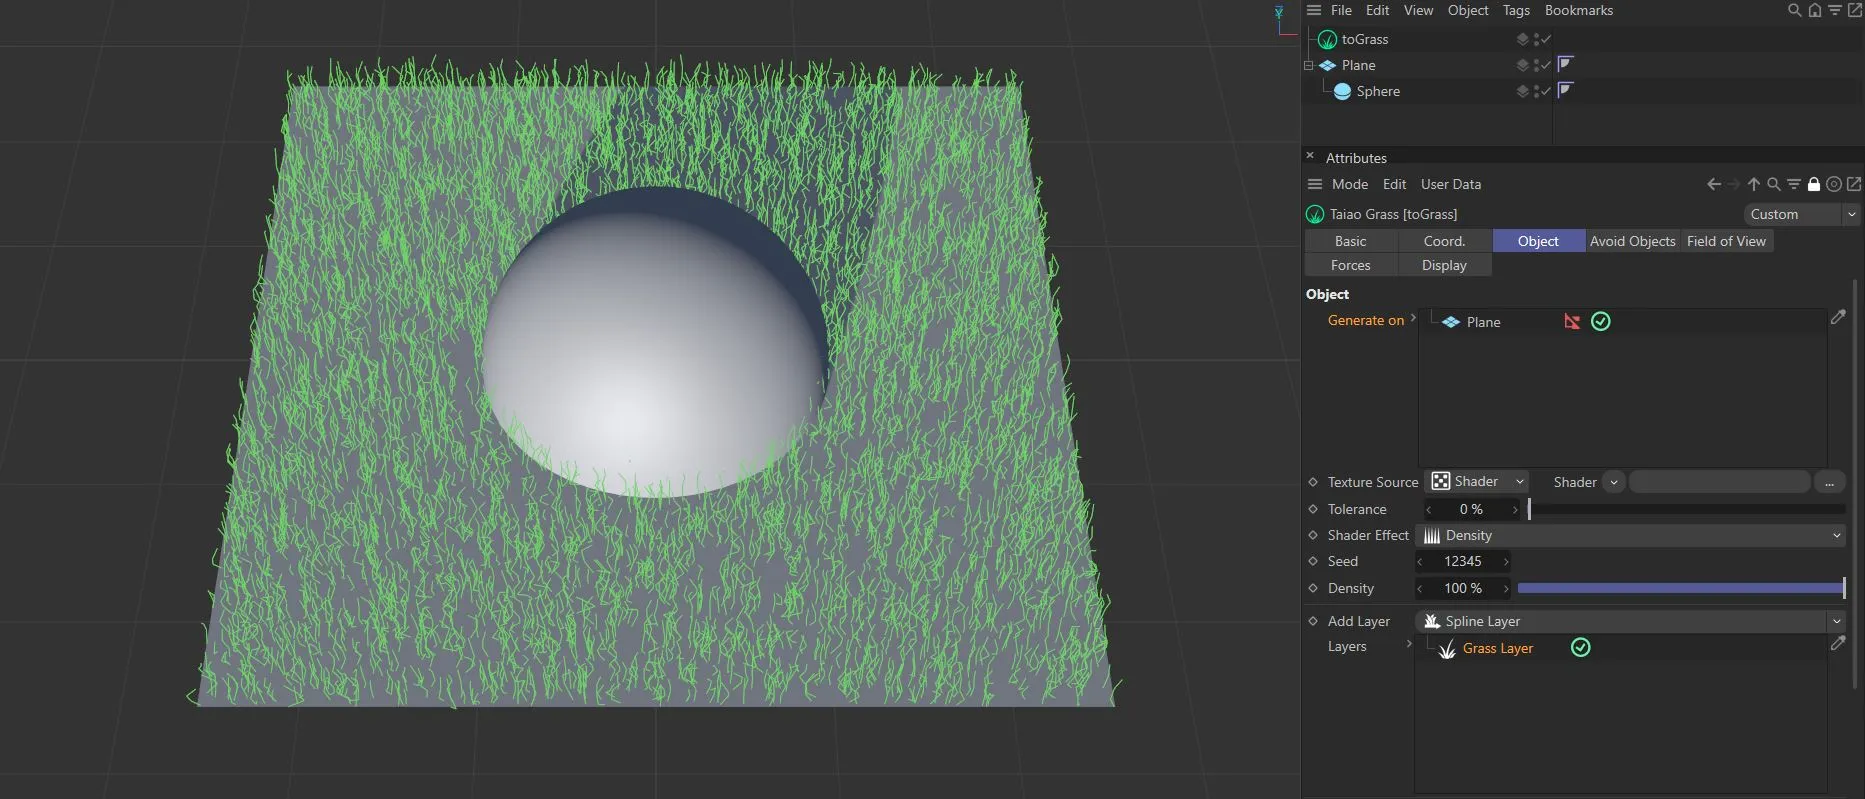
In this image, the Hierarchy option is switched off, with no grass being generated on the Sphere.
Selection Map
Section titled “Selection Map”Highlighting an item in the list will bring up a selection map option.
Selection tags and vertex maps can be dragged and dropped into this link field to create additional generation patterns.
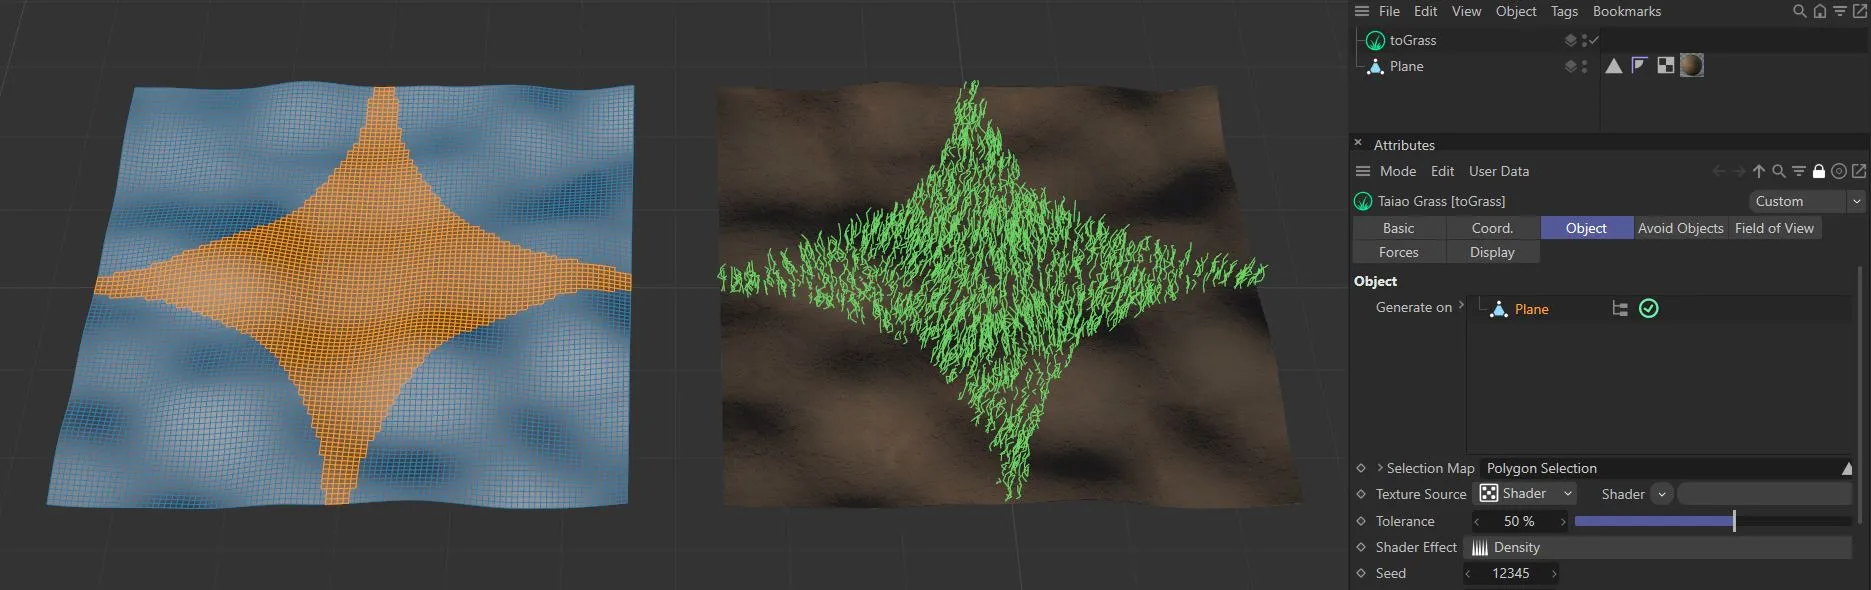
The generation of grass, in the right-hand image, is being driven by the selection tag on the left.
Texture Source
Section titled “Texture Source”Shader
Section titled “Shader”Use the drop-down to select an image, sequence or shader.
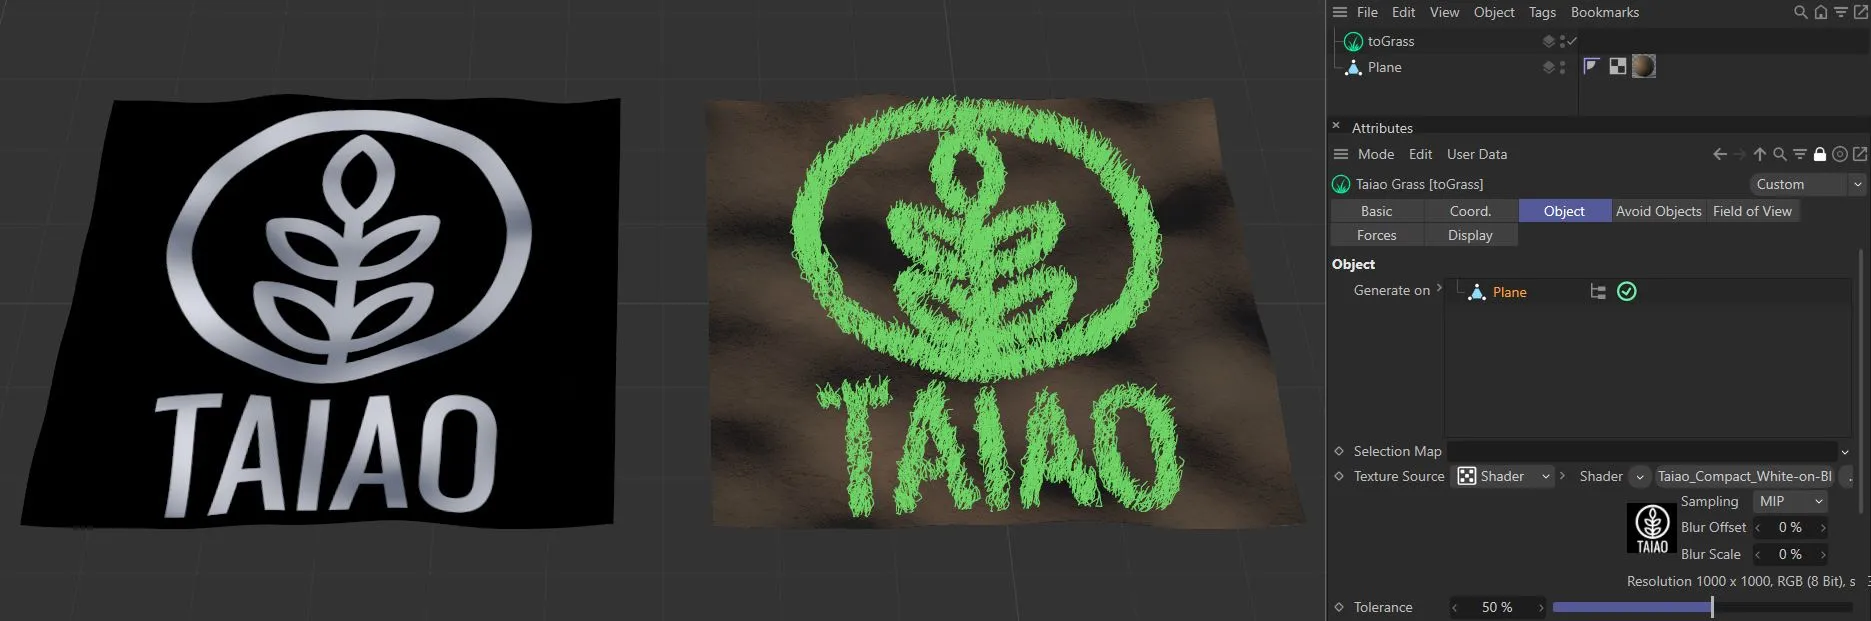
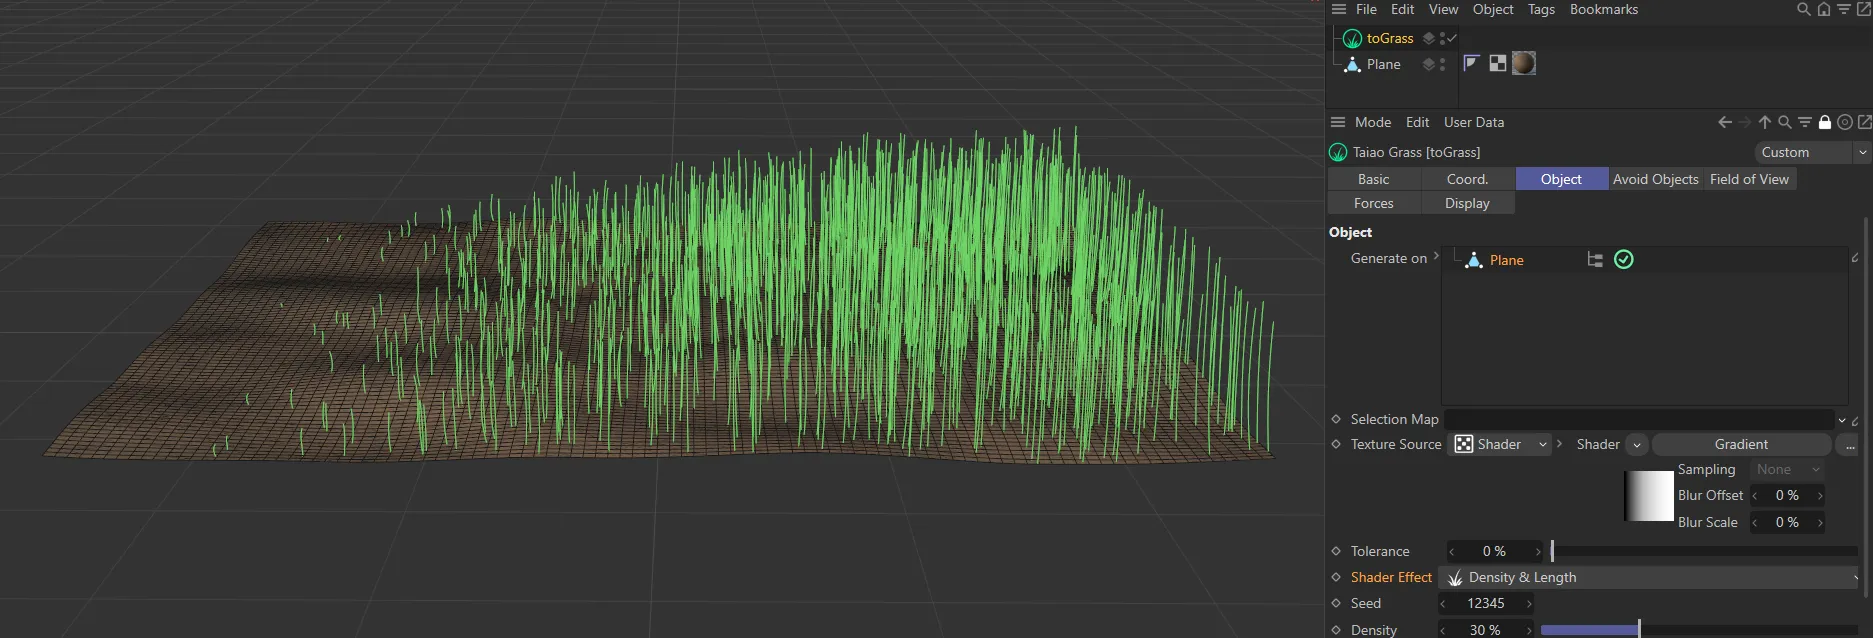
The bitmap shader on the left is driving the generation of grass on the right-hand image.
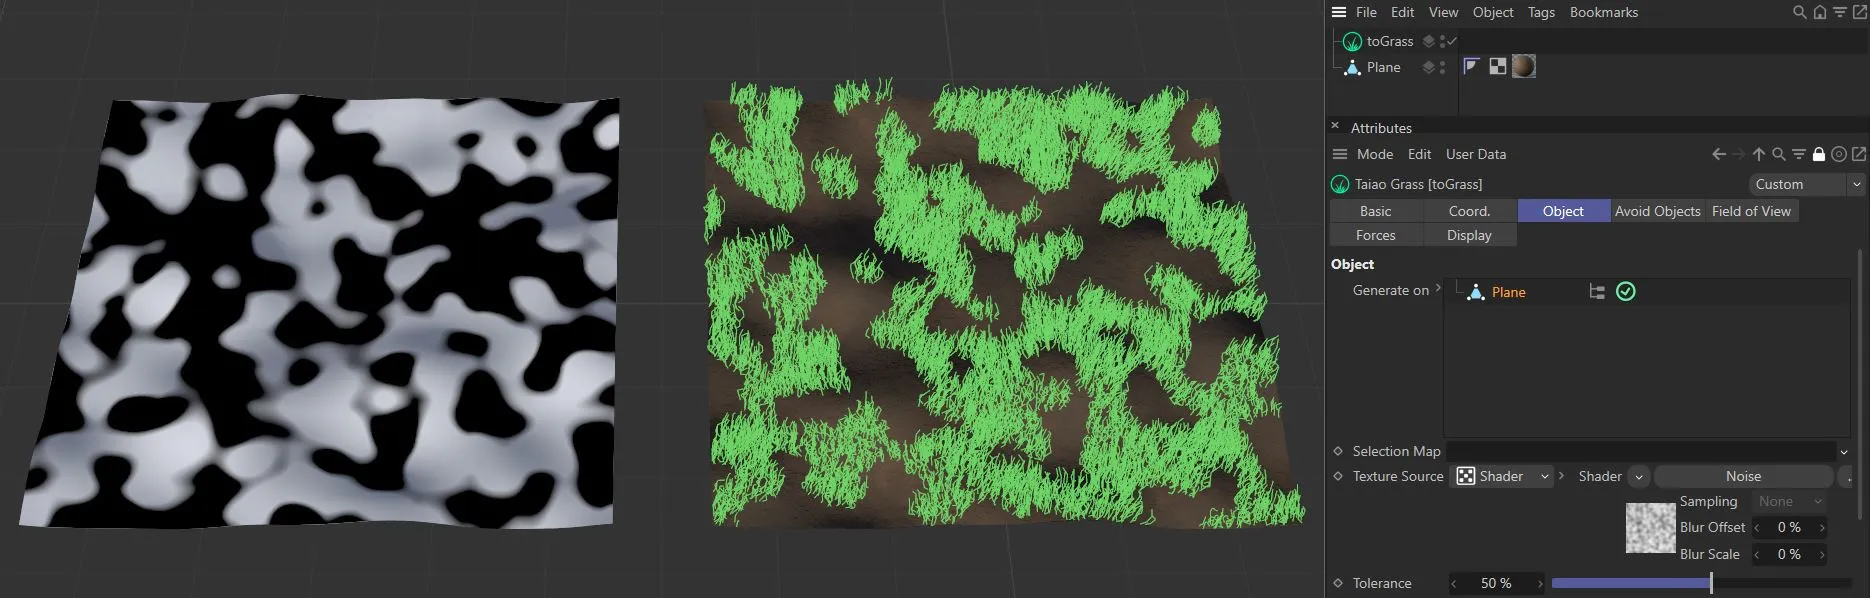
The grass, on the right-hand image, is being generated by the Noise shader on the left.
Texture
Section titled “Texture”If you have selected Texture in the Texture Source option, you will have a link field here, into where you can drag and drop your texture tag.
This option will also give you a Texture Channel setting, which is set at Color, by default, and can be changed to the usual material channels, by using the drop-down arrow.
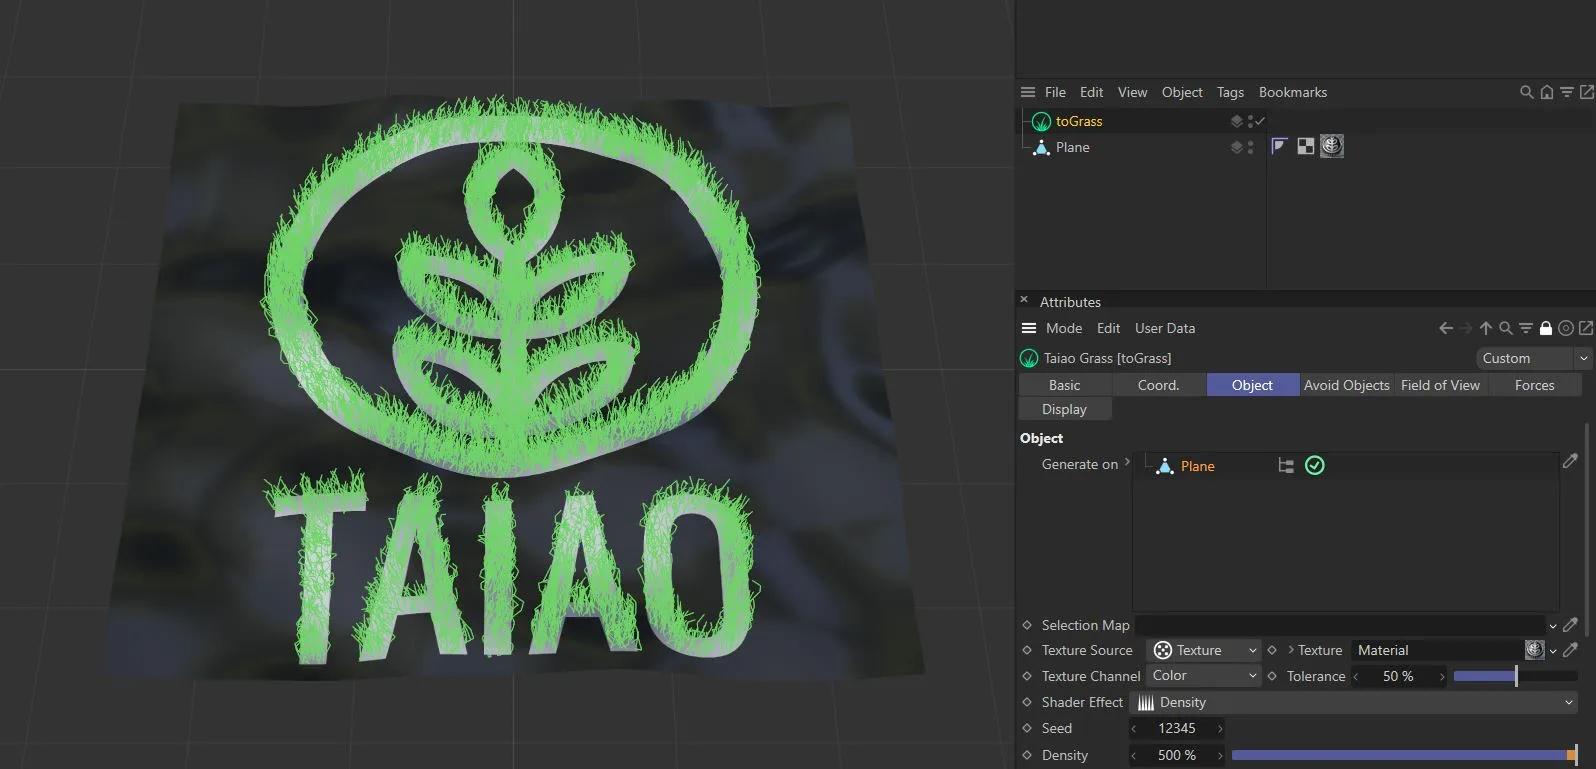
With the Texture Source set as Texture, generation is driven by the color channel in the texture tag.
Texture Channel
Section titled “Texture Channel”This option only presents itself when the Texture Source is set as Texture.
The Texture Channel references where the grass is being generated.
Set at Color, by default, the other material channel options are: Diffusion, Luminance, Transparency, Bump, Alpha and Displacement.
Tolerance
Section titled “Tolerance”The Tolerance setting controls the amount of grass generated, by using the slider.
A high tolerance value will utilize only the brightest areas, generating a low grass count.
At a higher setting, only the lighter parts of the Noise shader are generating grass on this terrain.
Shader Effect
Section titled “Shader Effect”Set as Density, by default, this is affecting the density of the grass generation, but this can be changed to: Length or Density & Length.
If it is changed to the Length setting, this will allow for the same density all along its geometry, but the Shader Effect selection is now driving the length.
Set to Density & Length, the selection will drive both items at the same time, as seen in the image below.
Shader Effect set to Density & Length.
The Seed value is based on your selections in the Grass Layer settings, below, and dictates where each blade of grass is generated.
Change the Seed value to generate a different random grass pattern.
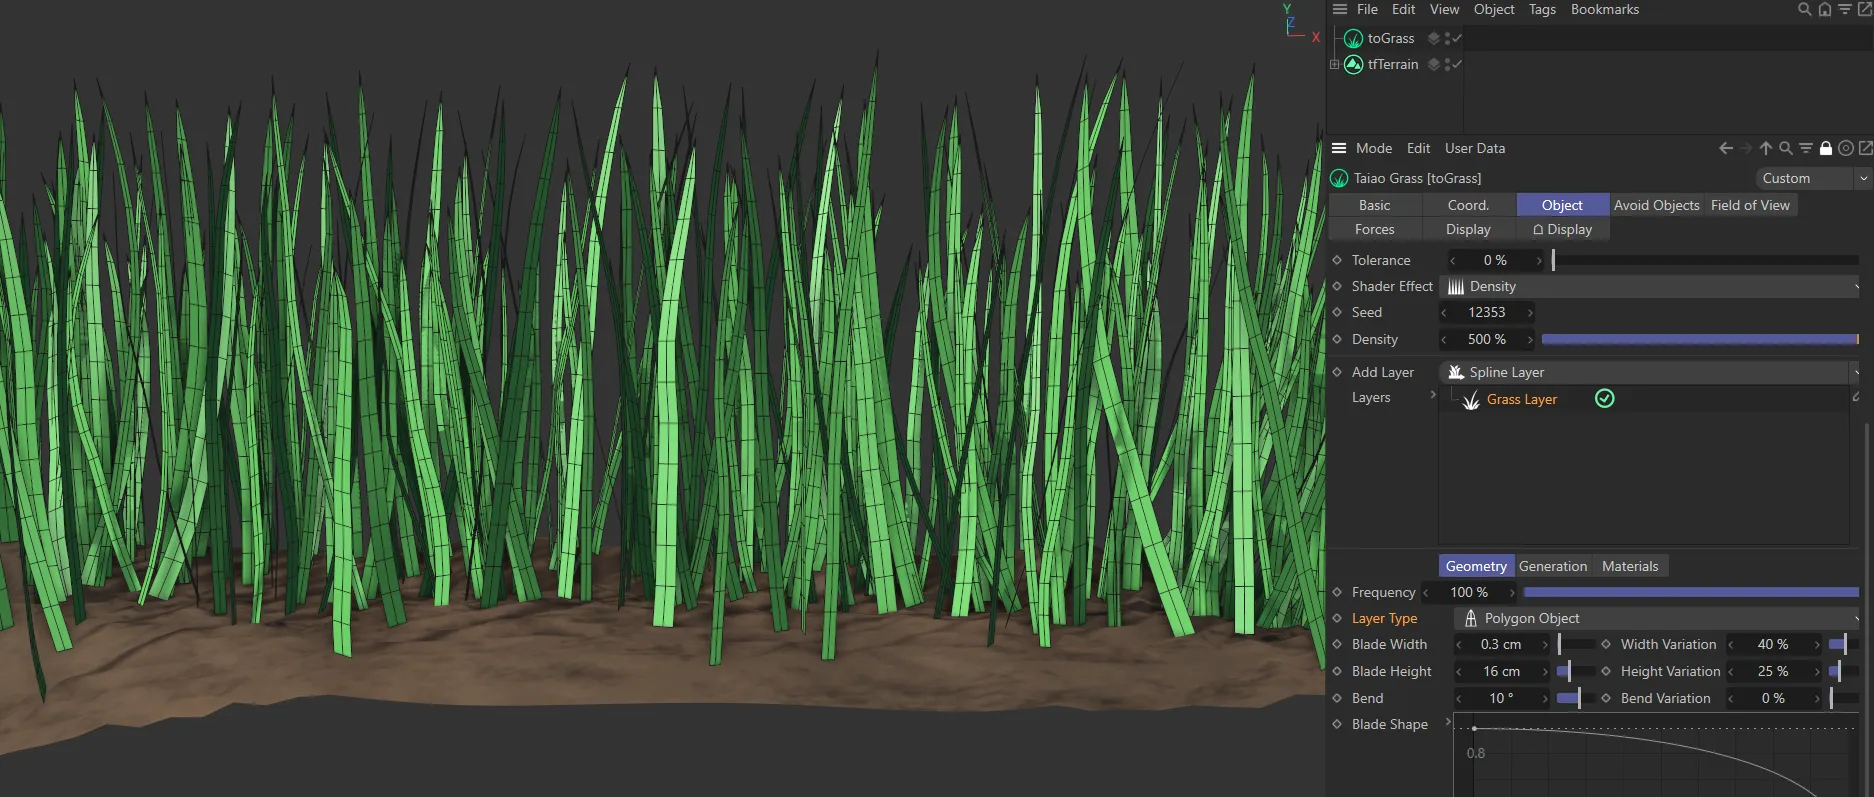
Density
Section titled “Density”This is set at 100%, but can be reduced to thin out your grass, using the slider.
This can also be increased, by manually inputting a value.
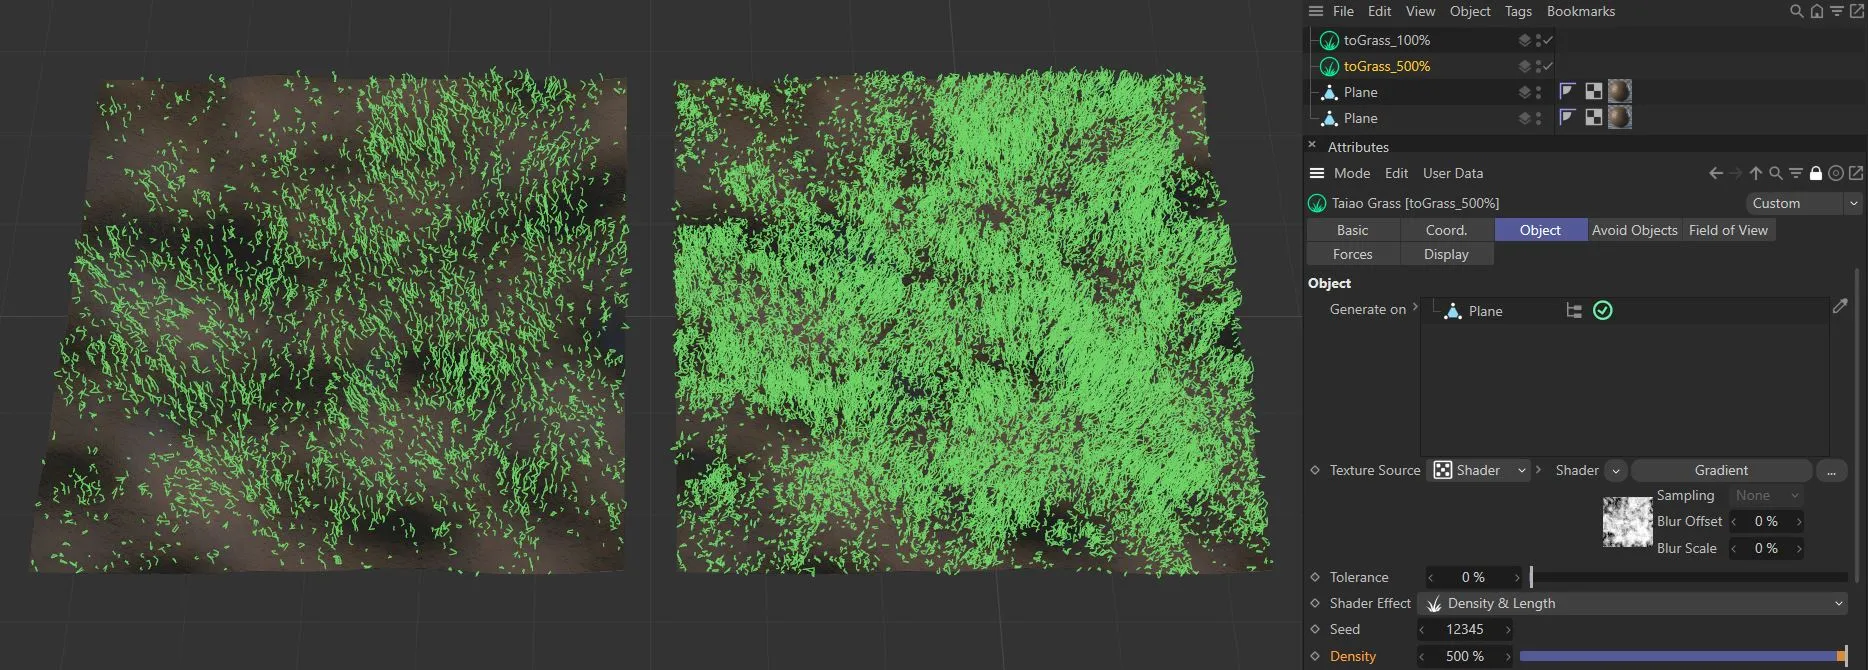
The image on the left has a Density value of 100%, whilst the one on the right is set at 500%, generating five times the amount of grass.
Add Layer
Section titled “Add Layer”By default, this is set as Grass Layer and, when highlighted, will reveal its layer settings below.
You can add as many additional layers as you wish by simply clicking on the drop-down arrow and selecting Spline Layer or Polygon Layer.
Each layer will reveal its individual settings below, when highlighted.
Animation to show the addition of a Grass Layer to the Layers field.
There are three different tabs: Geometry, Generation and Materials.
Geometry tab
Section titled “Geometry tab”Frequency
Section titled “Frequency”This will increase or decrease the amount of grass that is generated by an individual layer.
Animation to demonstrate the effect of the Frequency slider on two layers of grass, with different Blade Height settings (45cm on Grass.Layer.1 and 20cm on Grass.Layer.2).
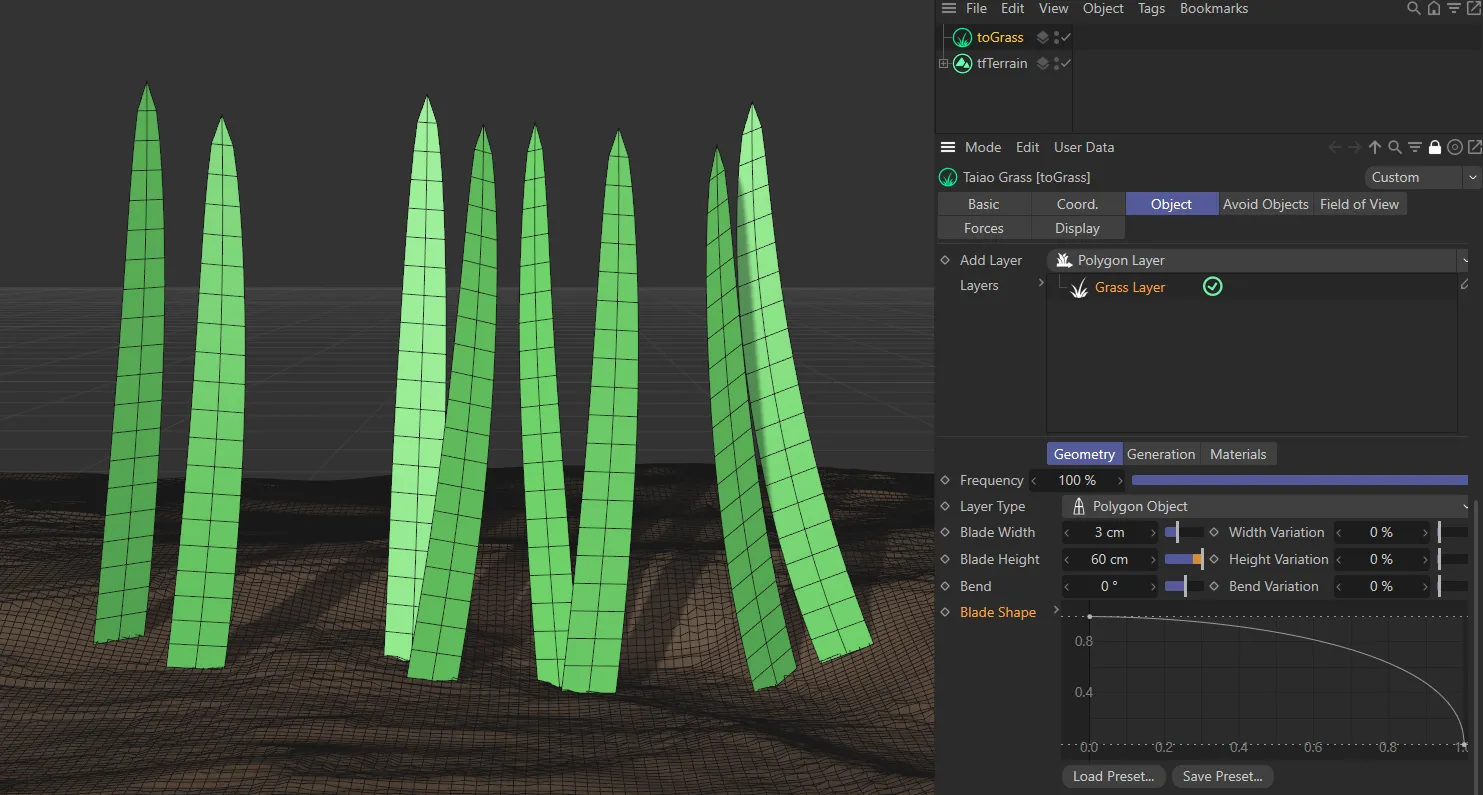
Layer Type
Section titled “Layer Type”There are two options here: Spline Object (set as default) and Polygon Object.
You can select a different setting from the one you chose in Add Layer and that will then change your setting.
Layer Type set as the Spline Object option.
Polygon Object option, with individual blades of grass.
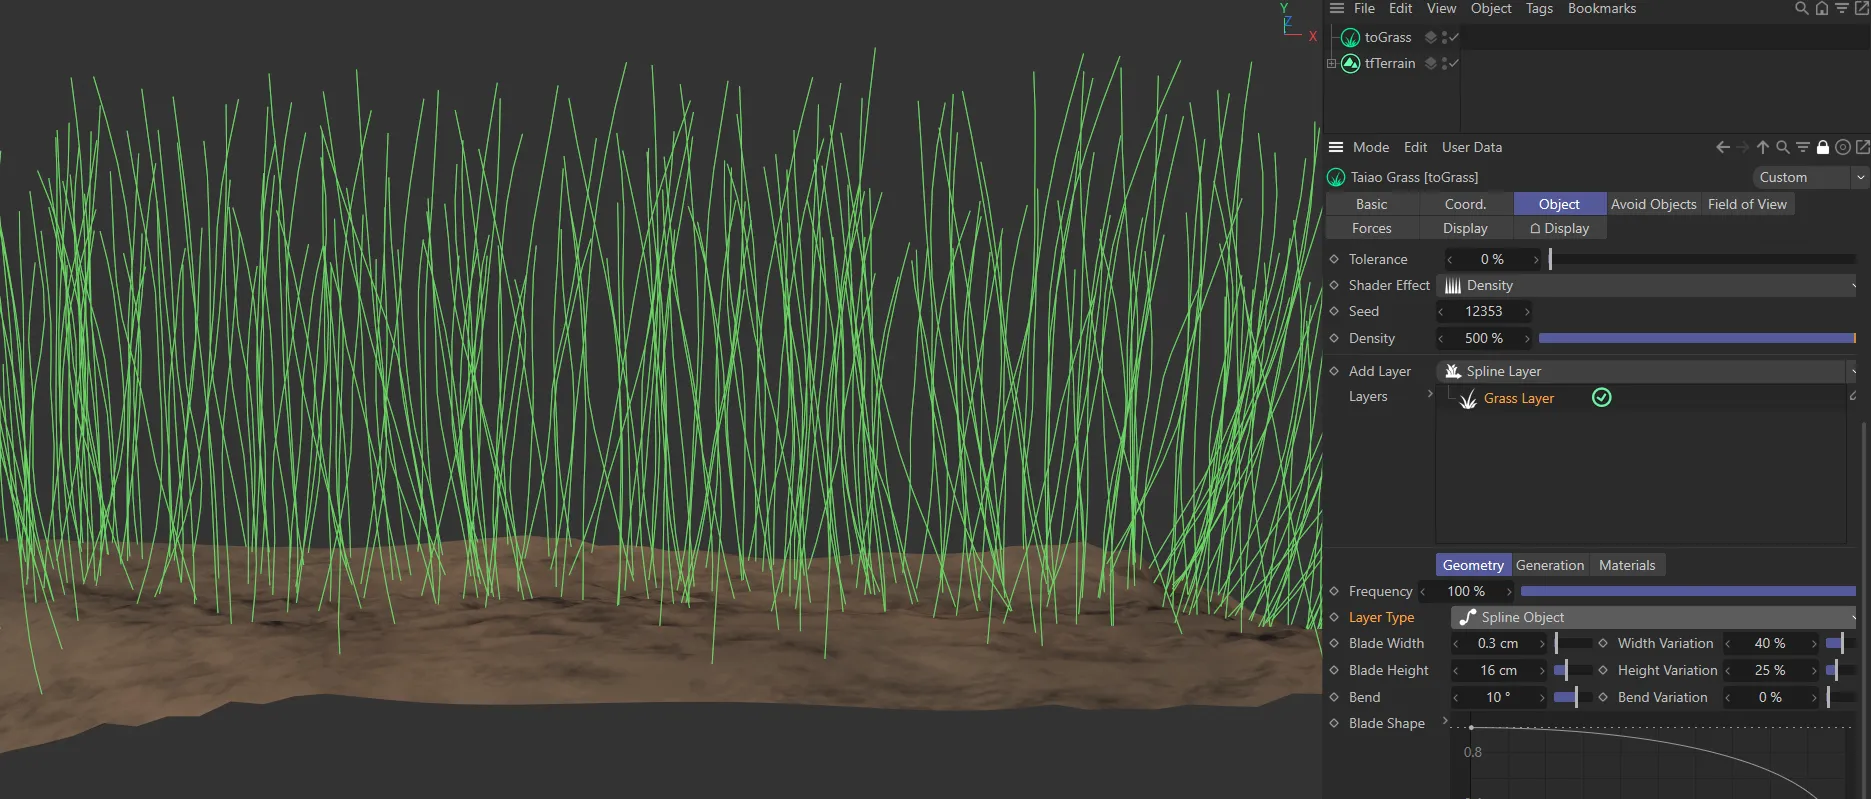
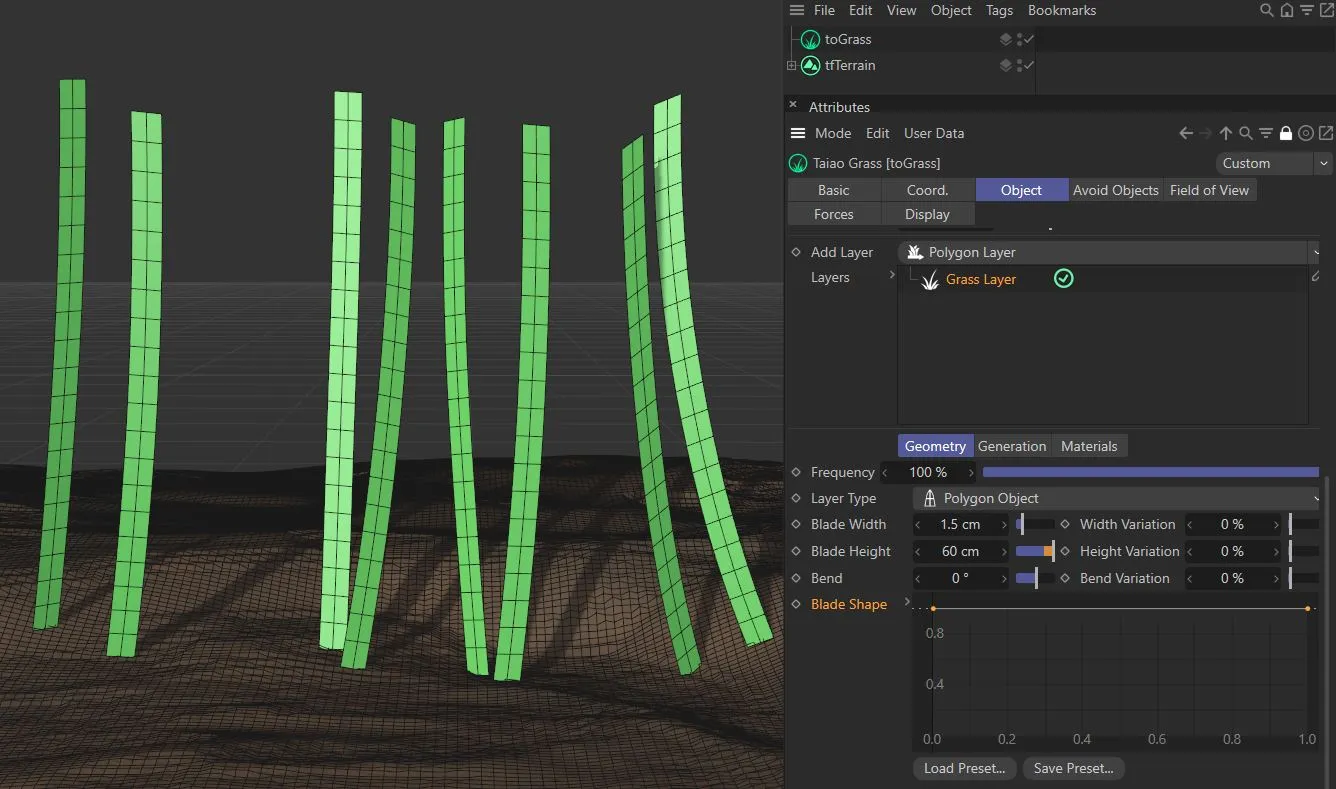
Blade Width
Section titled “Blade Width”Can be increased, to widen, or decreased, to make the blades thinner.
Width Variation
Section titled “Width Variation”The slider will give a percentage value of variation amongst the width of the blades of grass in your scene.
Blade Height
Section titled “Blade Height”Can be increased or decreased.
Height Variation
Section titled “Height Variation”Sets a variation amongst the height of the grasses to make things more organic.
This slider is set at 0 (zero) degrees and can be increased or decreased to bend the blades.
Bend Variation
Section titled “Bend Variation”Sets variation in the different levels of bend in your grass.
Blade Shape
Section titled “Blade Shape”This curve can be adjusted to shape the profile of the blades.
The Blade Shape spline curve drives the shape of the blades, with a drop off towards the end of the blade.
The Blade Shape spline curve is at maximum level throughout, across the length of the X-axis, keeping a uniform width up the length of the blade, which is set by the Blade Width parameter.
Segment Count
Section titled “Segment Count”By default this is set to 3, but can be increased to create more geometry, resulting in a more detailed blade shape and also making the grass more susceptible to turbulence.
Turbulence
Section titled “Turbulence”This slider will give your blades some individual deformation.
Set at 50% by default, this can be increased to add more deformity.
Animation to demonstrate the effect of the Turbulence slider.
The scale is set at 20%, by default.
Reducing the Scale setting will result in a more exaggerated turbulence in the blades.
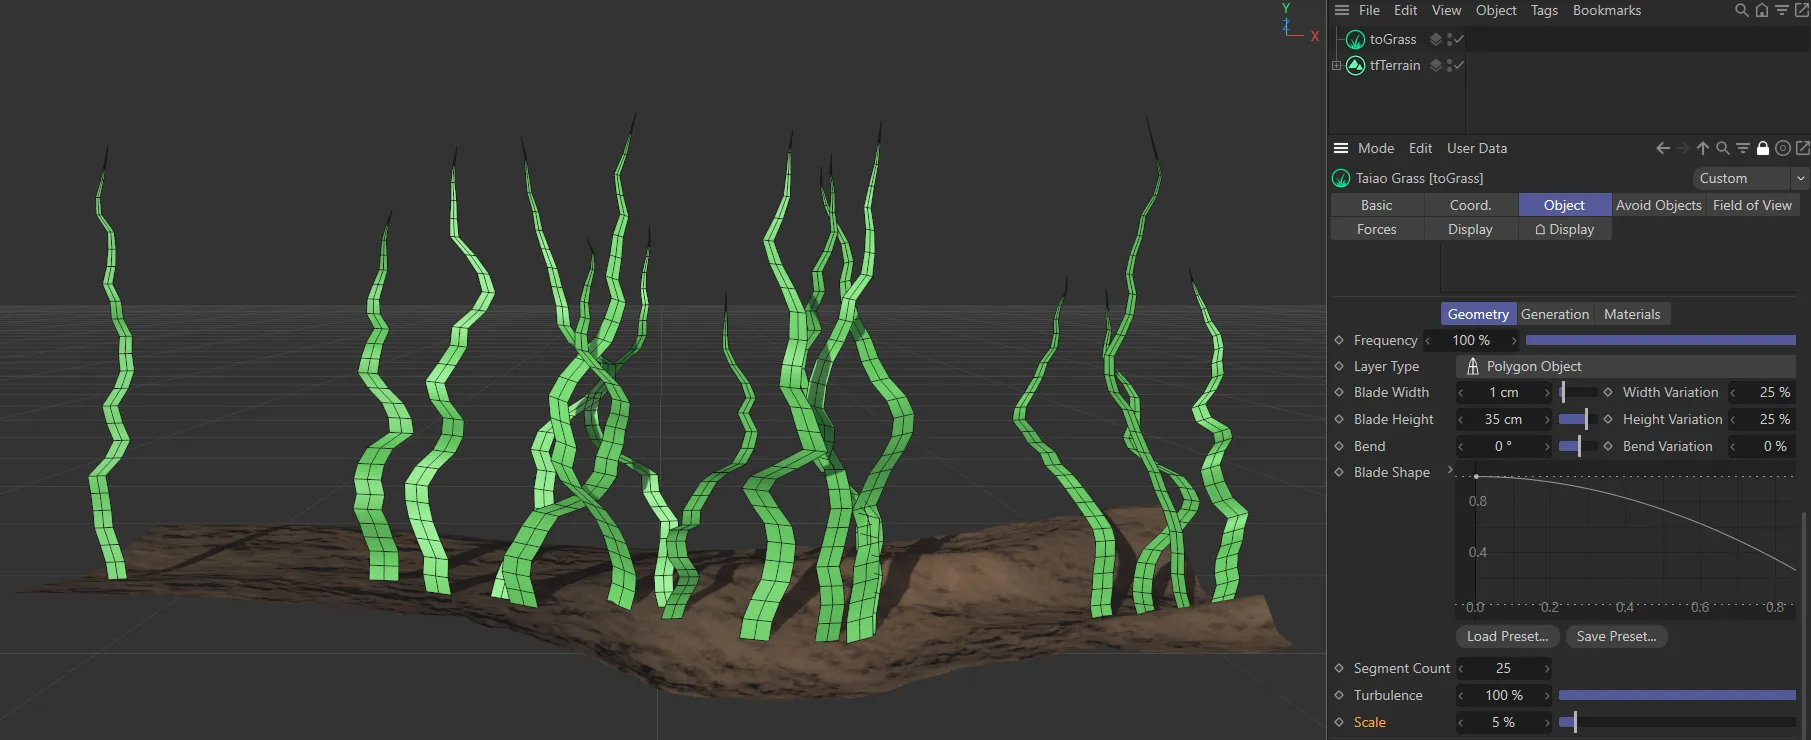
Turbulence set at 100%, with the Scale value at 5%.
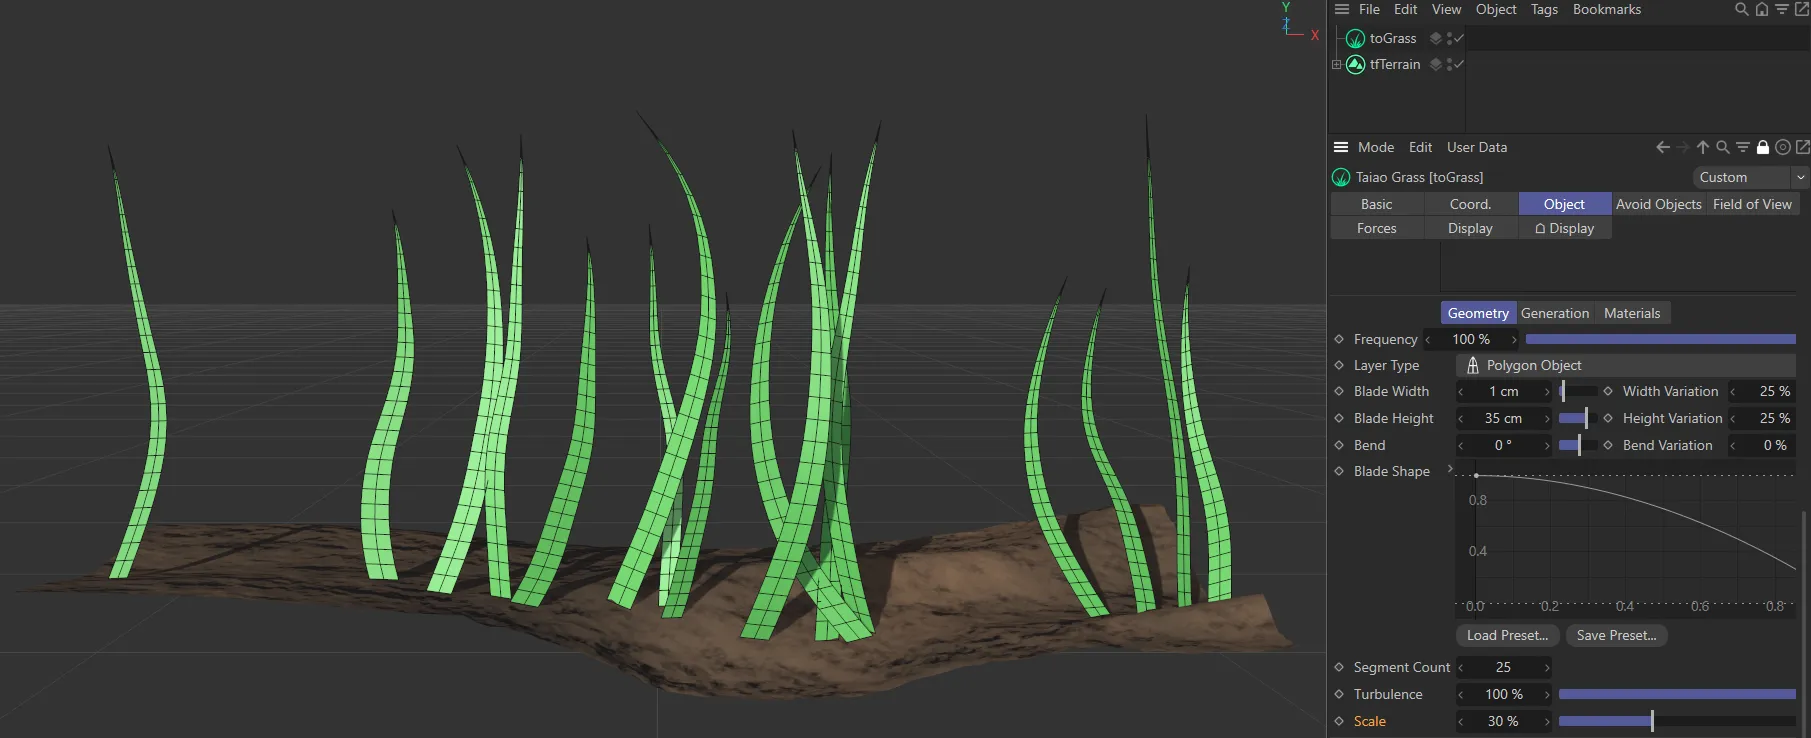
Turbulence set at 100%, with the Scale value at 30%.
Add Layer - other objects
Section titled “Add Layer - other objects”You are also able to drag additional scene objects into this link field and then highlight them to use the same settings.
In the scene below, a tfRock object has been added and some of the Geometry tab settings have been altered.
To adjust the settings, you will need to highlight the object, as normal.
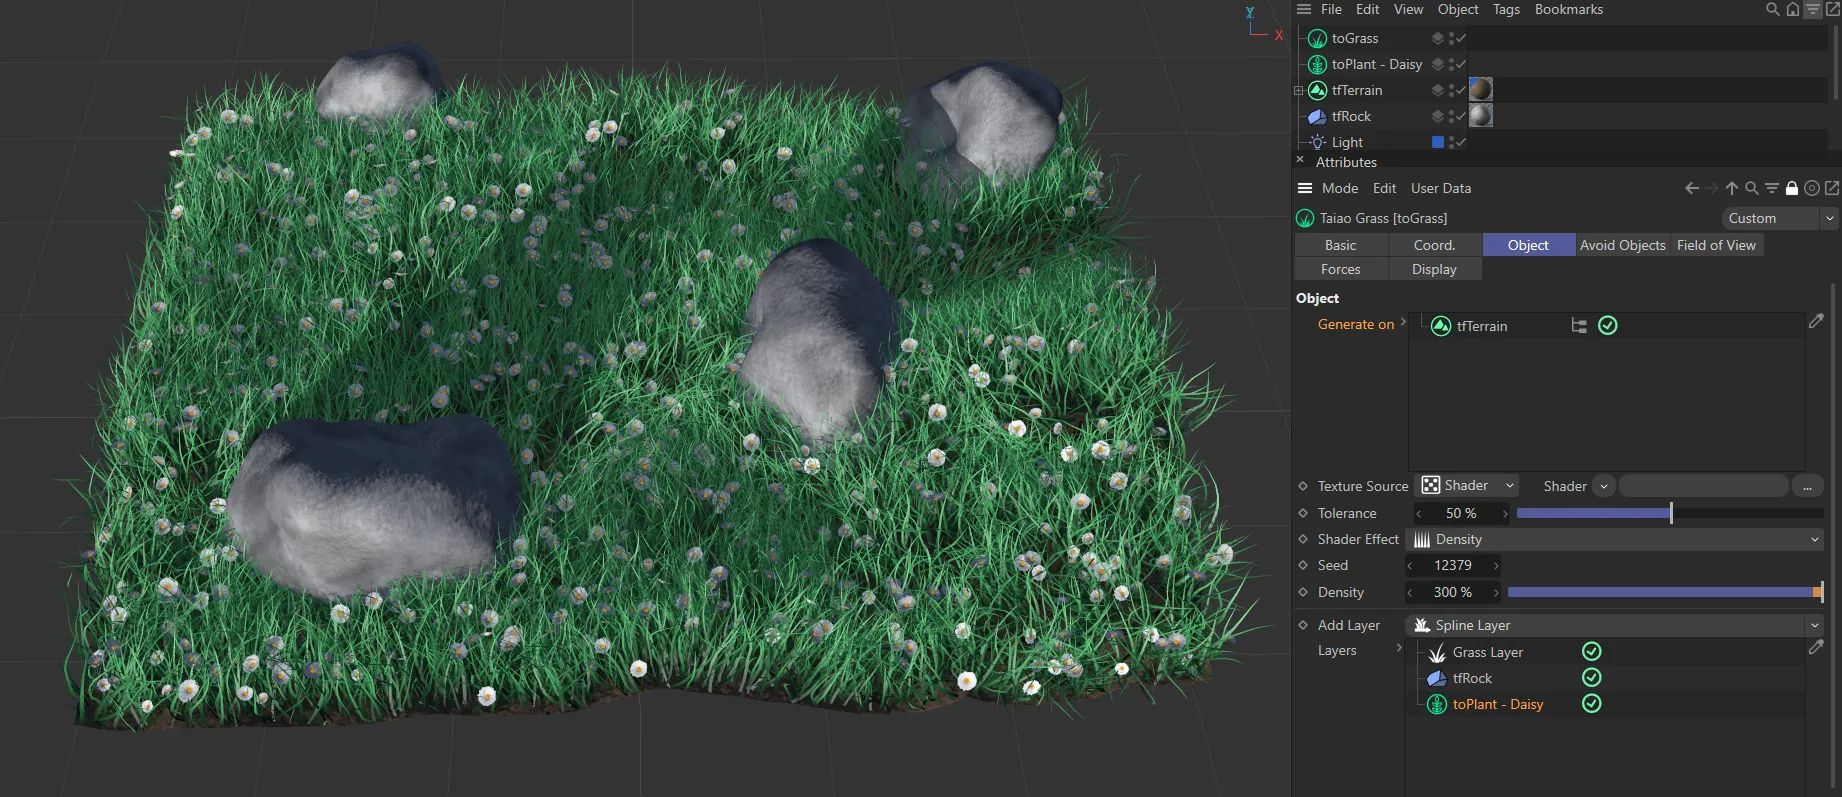
There are three layers in this image: a Grass Layer, tfRock and toPlant - Daisy, all contributing to a very realistic-looking scene.
Object Mode
Section titled “Object Mode”As a default, this is set to Render Instances.
The other modes are: Clones and Multi-Instances.
With the mode set to Clones each copy of the object will have its own geometry; this can offer more control than the other modes, at the cost of processing power.
With the mode set to Render Instances, toGrass generates instances for each copy; this mode will calculate faster than Clones.
With the mode set to Multi-Instances, all of the copies are generated within one instance; this can offer excellent performance.
Object Alignment
Section titled “Object Alignment”This sets how the object is aligned to the surface.
The options are: Normal, Random, Y+(World) and Y+(Object).
Normal alignment
Section titled “Normal alignment”Set to Normal, by default.
This means that the object would sit perpendicular to the surface.
Random alignment
Section titled “Random alignment”This setting has the objects scattered randomly over the surface, sitting at different angles.
Y+(World) alignment
Section titled “Y+(World) alignment”In this setting, the objects will always be facing upwards.
So, even if the terrain is rotated, the objects will all still face upwards, irrespective of the direction the terrain is facing.
Y+(Object) alignment
Section titled “Y+(Object) alignment”Conversely, in this mode, turning the terrain will mean that the objects will turn with it, as they are aligned with the terrain itself and its Y-axis.
Offset
Section titled “Offset”You can offset your objects, moving them up or down in relation to the surface.
Using this will simply make them bigger or smaller.
Scale Variation
Section titled “Scale Variation”Varies the amount of scale among the objects, giving them a more natural, organic look.
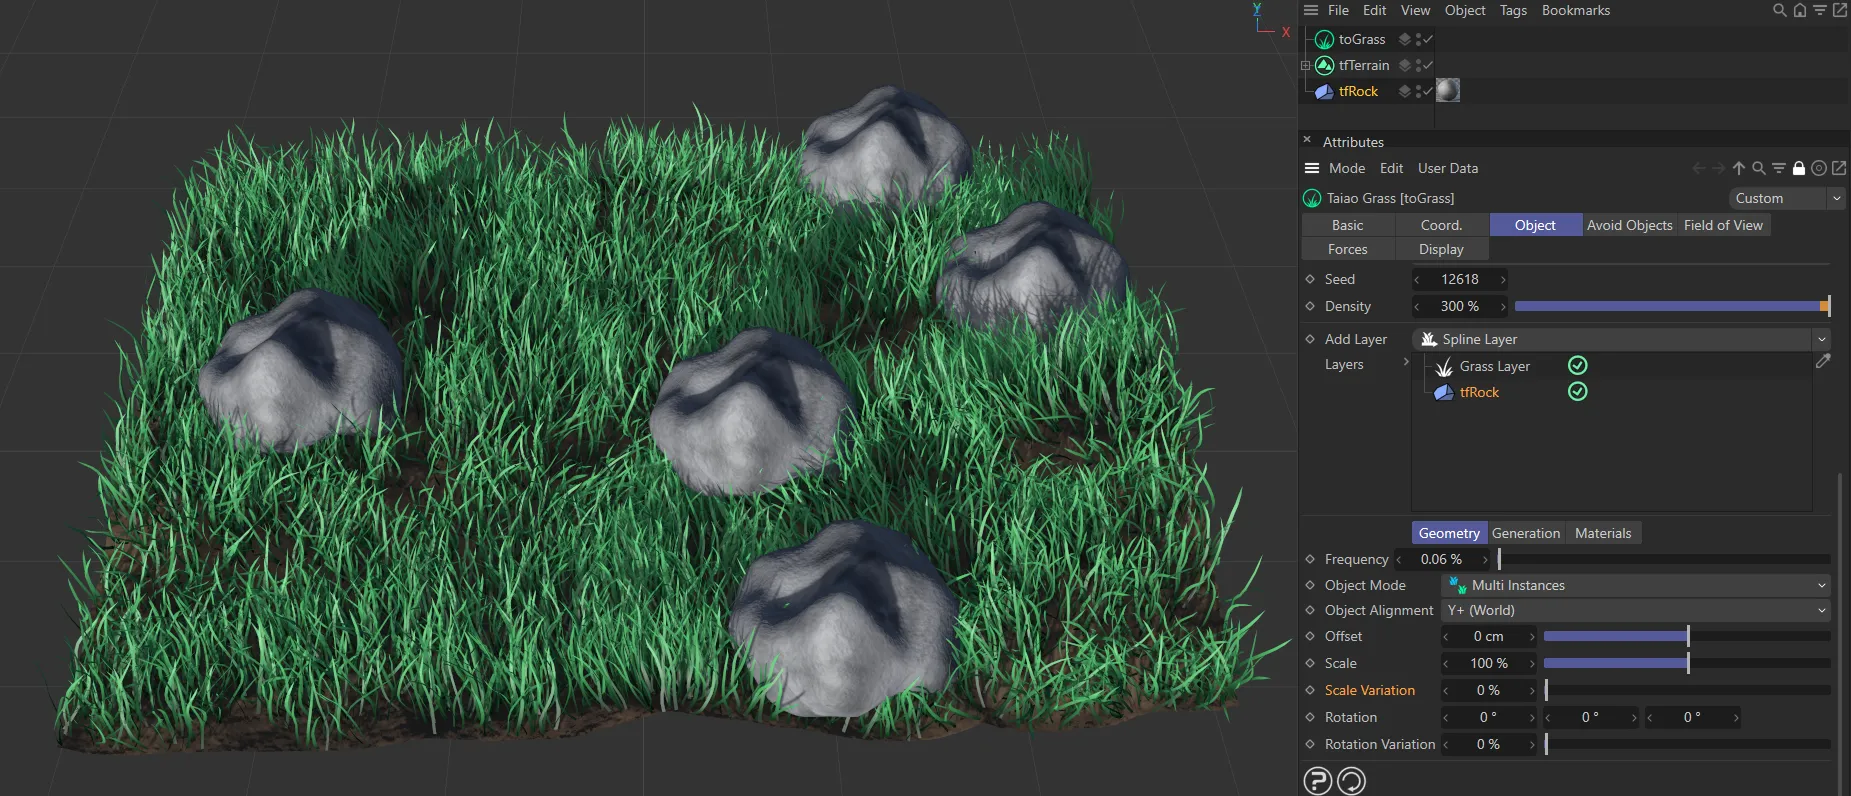
Scale Variation value of 0 (zero) %, with all objects the same size.
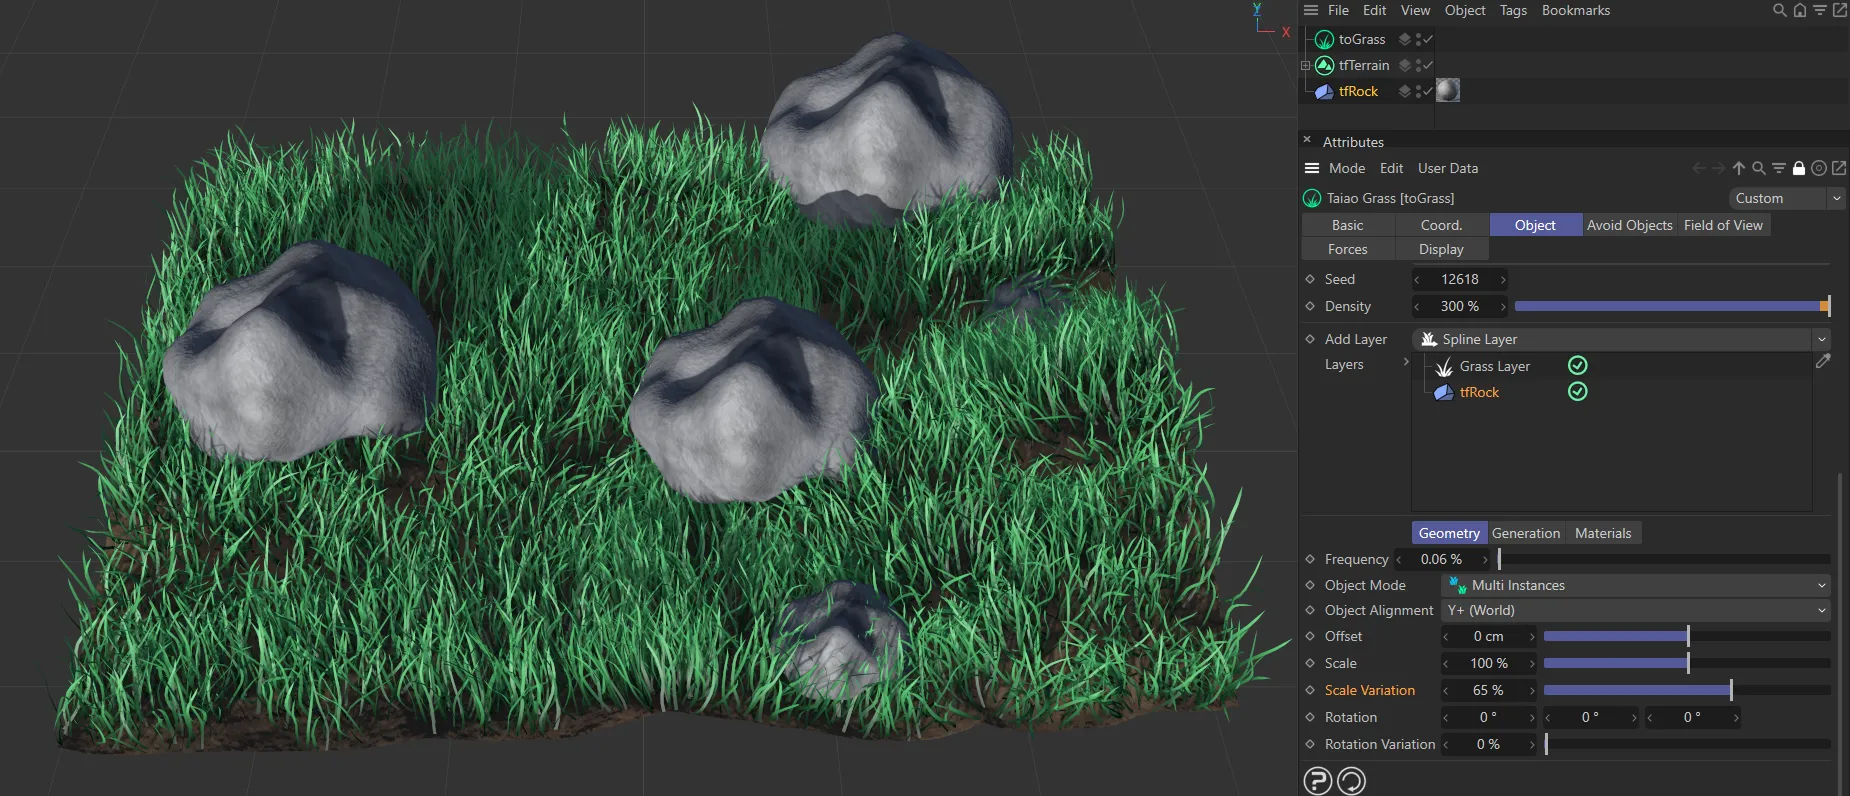
This image shows a Scale Variation value of 65%, driving the different sizes.
Rotation
Section titled “Rotation”You can rotate the objects on all three axes.
Rotation Variation
Section titled “Rotation Variation”Adds some variation to the levels of rotation, so that they all look different.
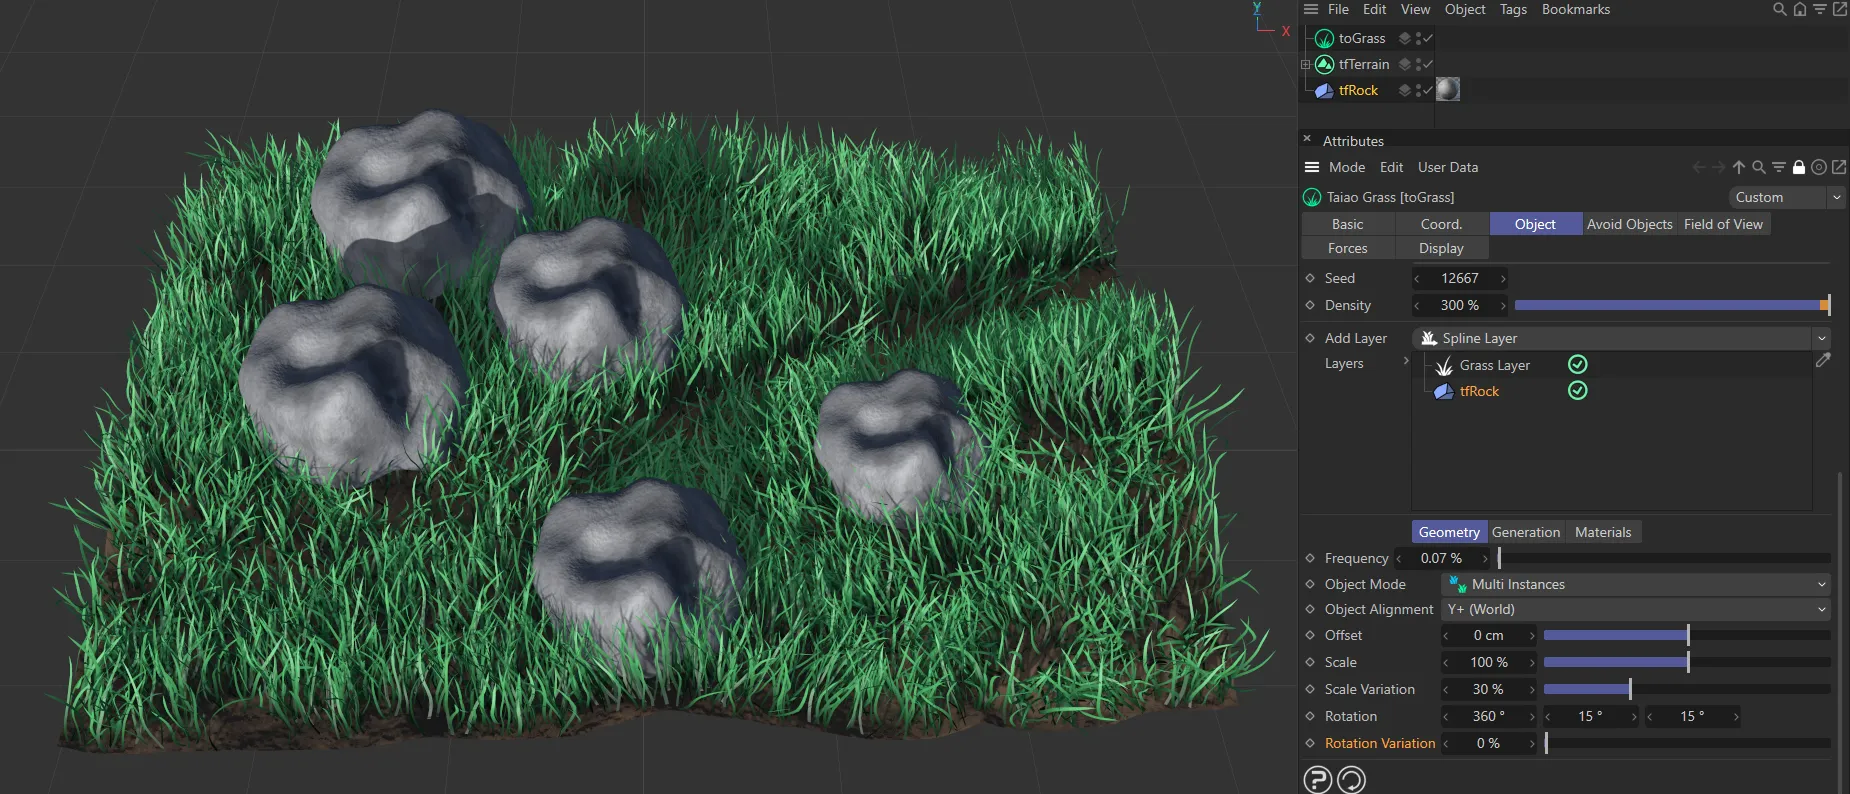
tfRock layer set to Y+ (World) alignment, with no rotational variation.
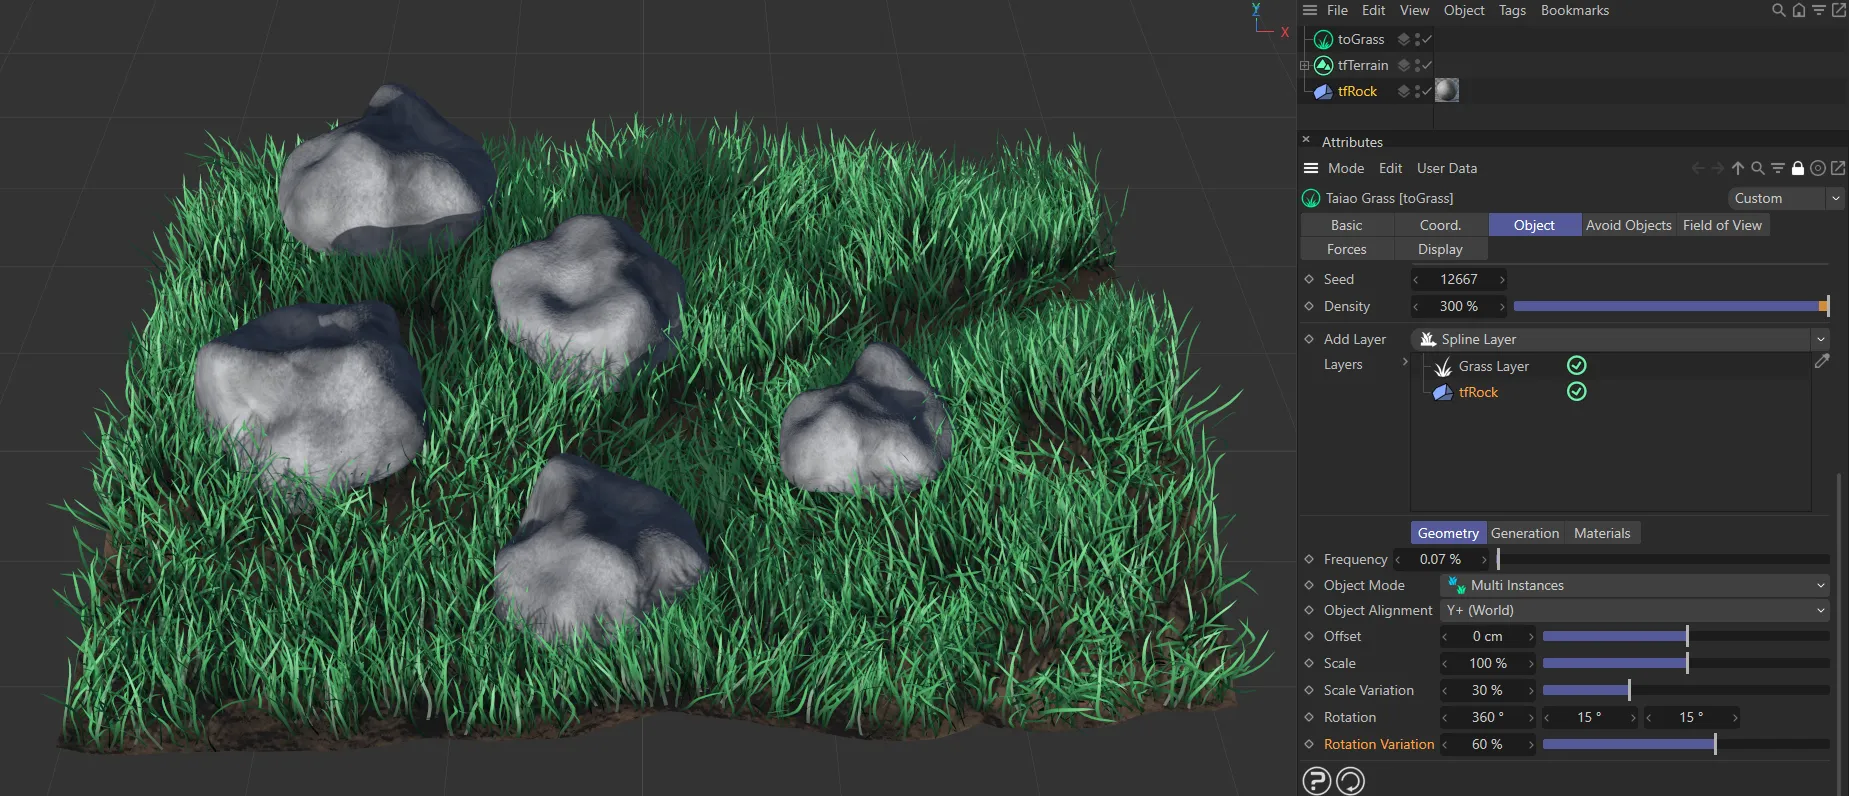
Here all the objects are rotated differently, with a Rotation Variation of 60%.
At this point, it may be worth revisiting the Seed option, to look at different placements of the objects.
Generation tab
Section titled “Generation tab”The Generation tab can further define where the grass is generated on your terrain.
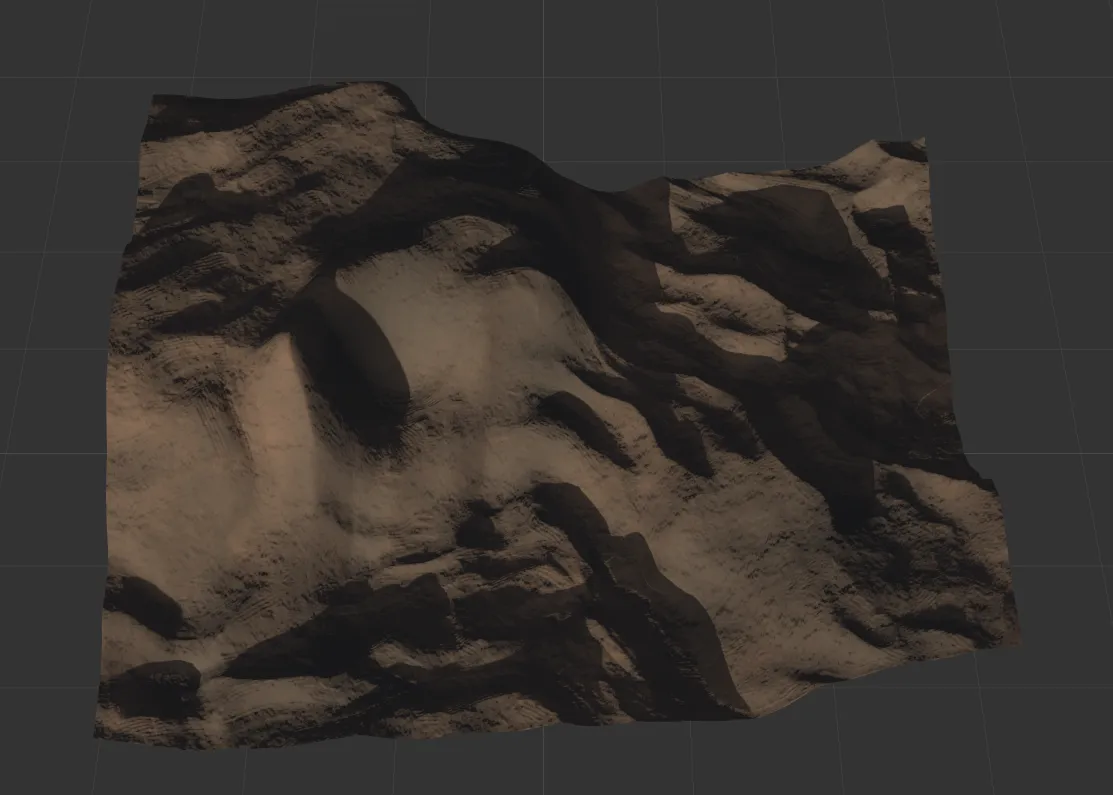
This base tfTerrain includes differences in height and slope gradients and will be used as the terrain for the generation of grass.
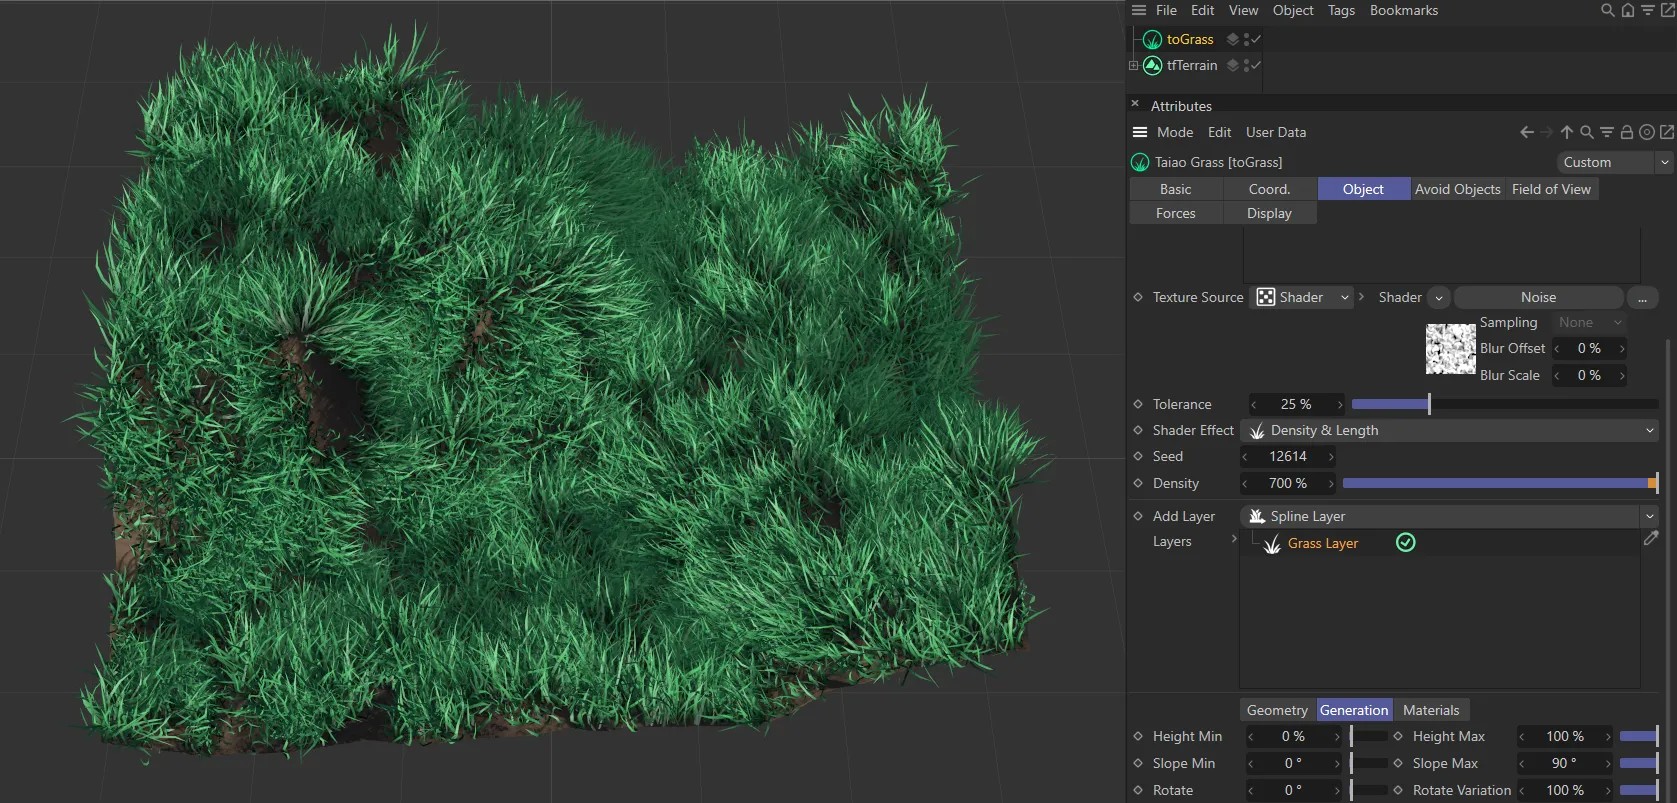
A Grass Layer has been added and toGrass is now generating grass on the terrain. The Generation tab settings are at default, therefore grass is generated uniformly across the terrain.

In this image, settings in the Generation tab have now been applied to the terrain in order to restrict the generation of grass in certain areas.
Height Min, Height Max
Section titled “Height Min, Height Max”The Height Min and Height Max sliders are set at 0 (zero) % and 100% respectively, generating grass all over the terrain.
Changing one, on an uneven surface, has an interesting effect.
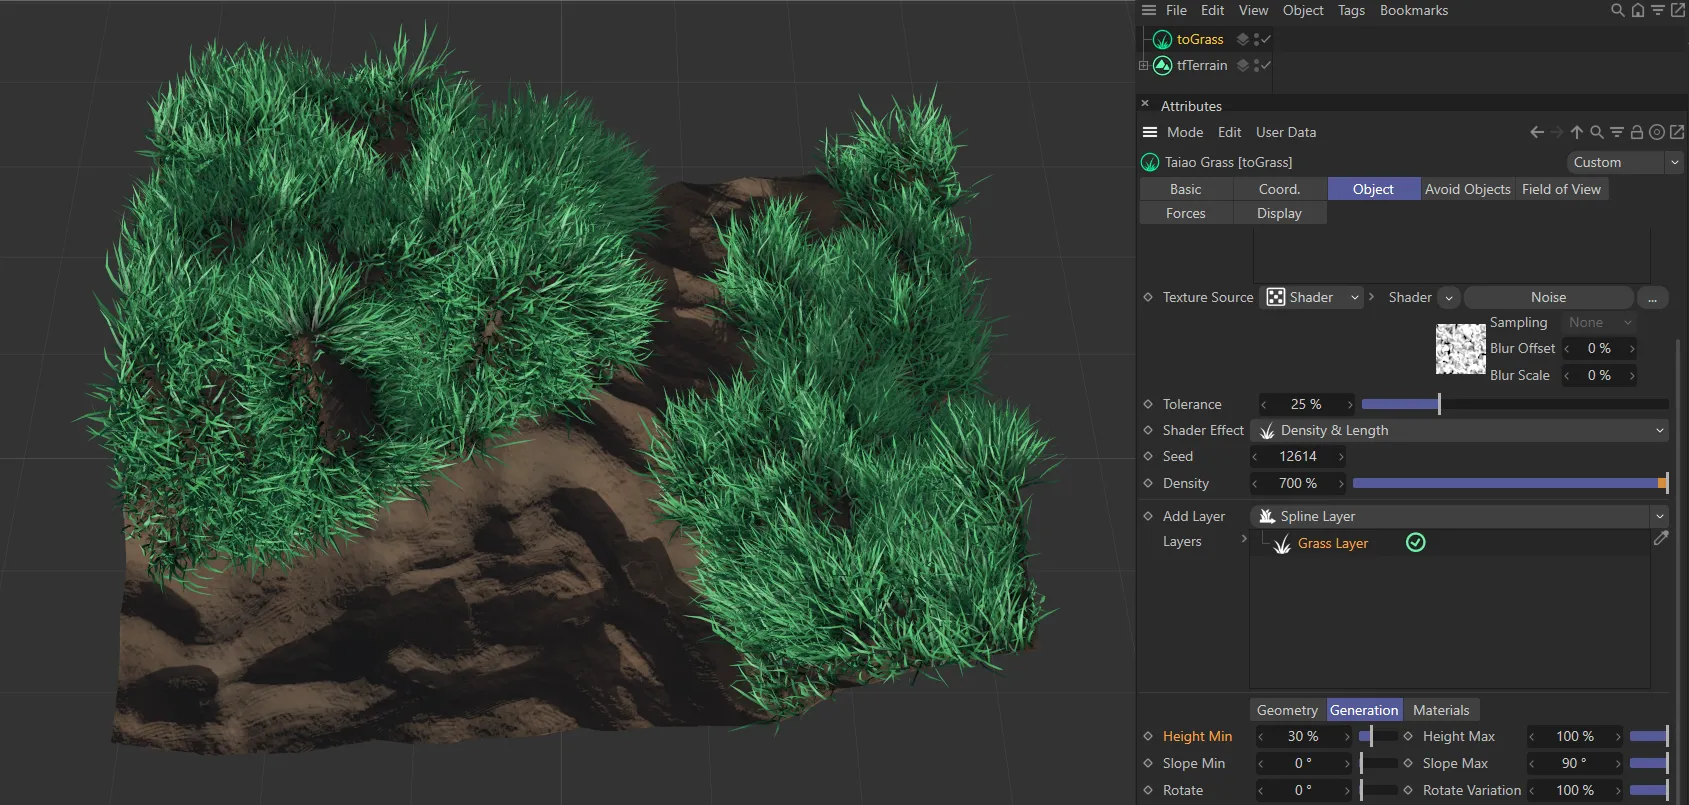
Height Min is set at 30% in this image, with grass not being generated on the lowest 30% of the terrain height.
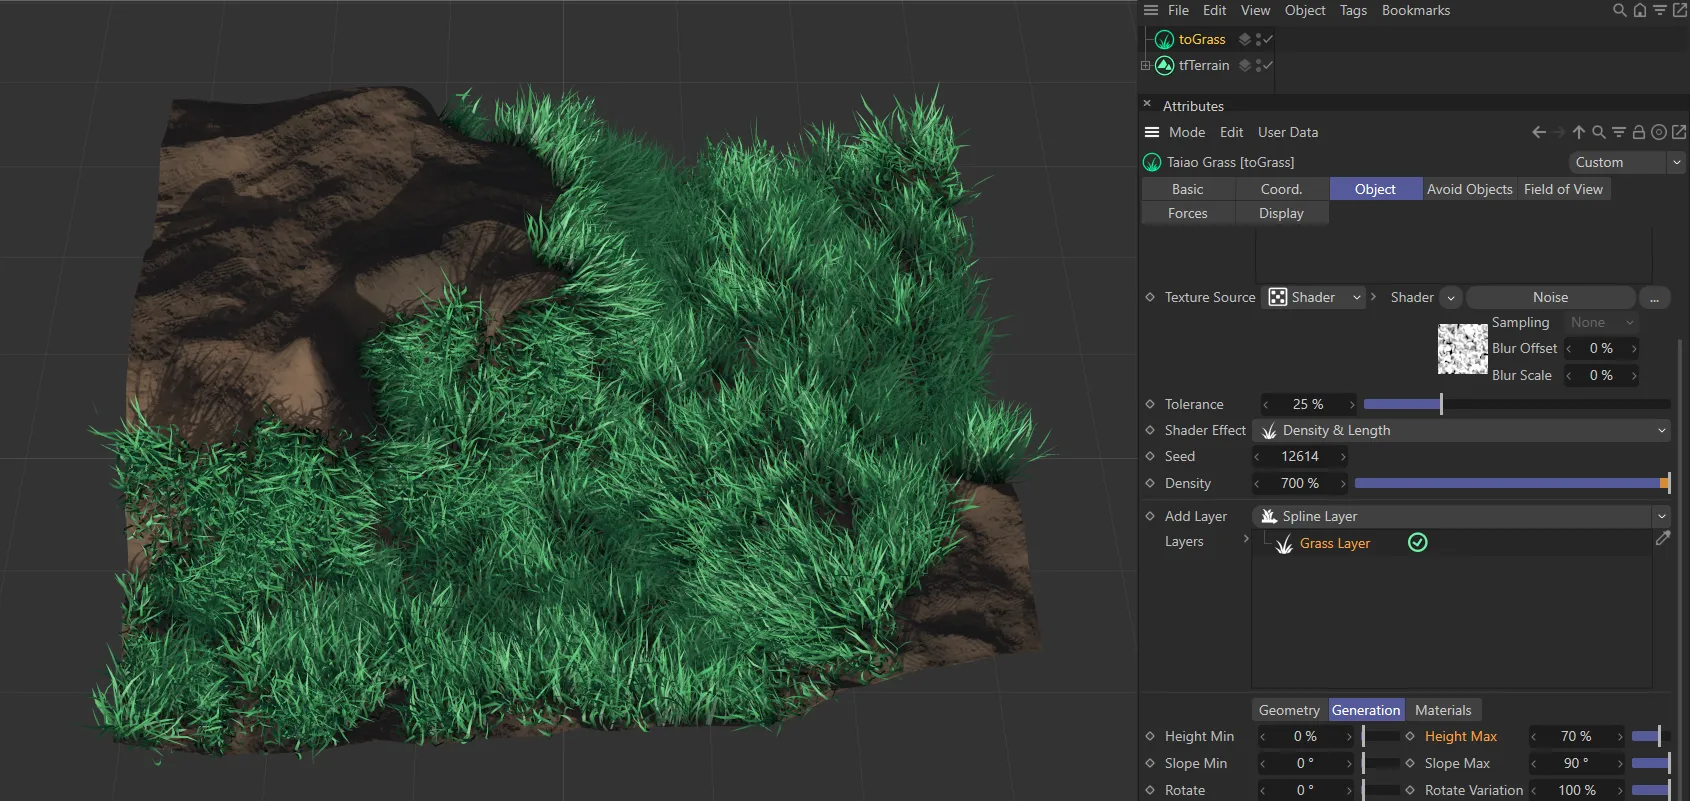
In this scene, the Height Max has been set at 70%, meaning that grass will not be generated on the highest 30% of the terrain’s height.
Slope Min, Slope Max
Section titled “Slope Min, Slope Max”The default is set at 0 (zero) degrees for Slope Min and 90 degrees for Slope Max.
Again, this ensures 100% coverage.
Reducing the Slope Max setting will remove grass from the steeper parts of the terrain, as in the image below.
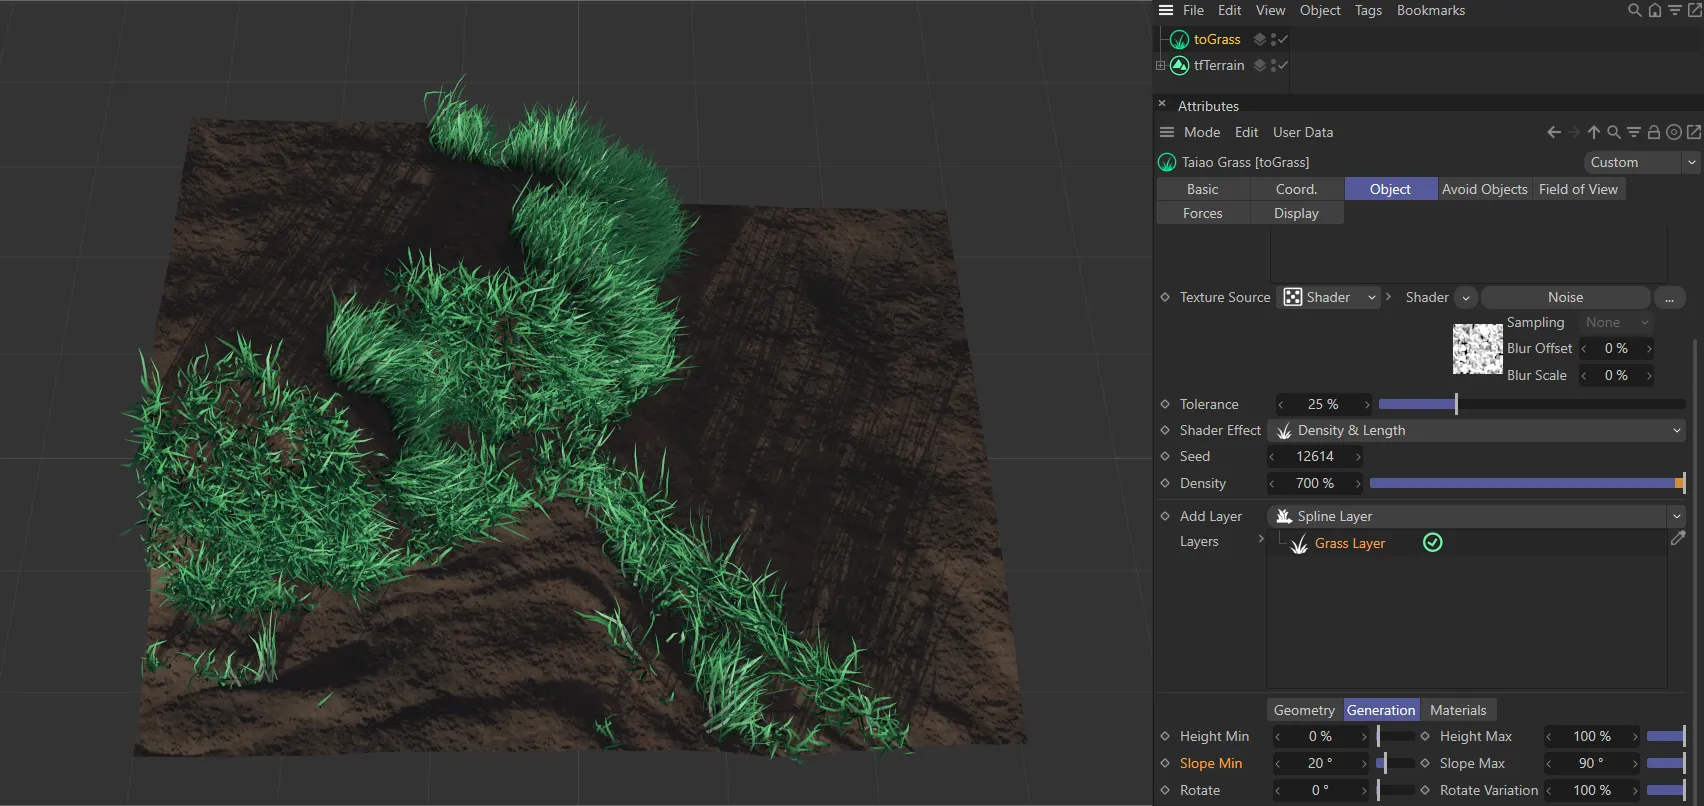
Slope Min set to 20 degrees and Slope Max at 90 degrees, driving grass generation on only the steeper areas.
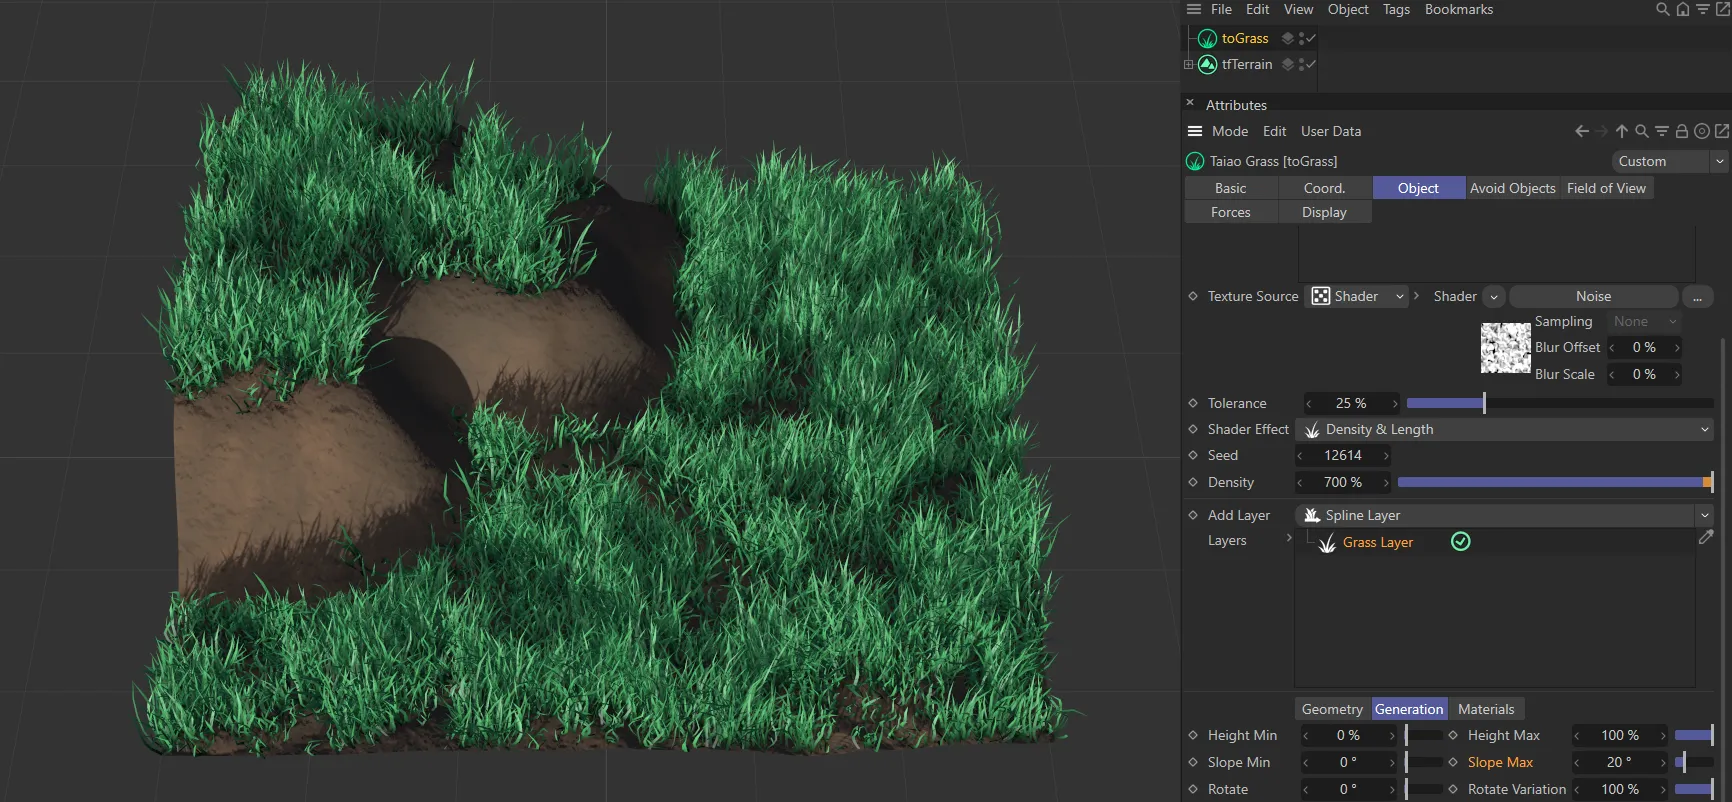
Here the Slope Min is at 0 (zero) degrees and Slope Max is set to 20 degrees. This means that grass is not generated on the steepest areas.
Rotate, Rotate Variation
Section titled “Rotate, Rotate Variation”By default, the Rotate setting is 0 (zero) degrees and Rotate Variation is set at 100%, which gives all of the grass a different rotation value, making it more organic.
Increasing the Rotate value will rotate the blades by up to 360 degrees.
Reducing the Rotate Variation setting adds more alignment to the degree of rotation in the scene.
Use Up Vector
Section titled “Use Up Vector”Activating this, by clicking the box, will have no immediate effect, as the default Up Vector setting is None.
Changing the Up Vector to Y+(World) will instruct all of the grass to have a vector of Y+
Up Vector
Section titled “Up Vector”Set as None, by default.
The alternatives are: Y+(World) and Object.
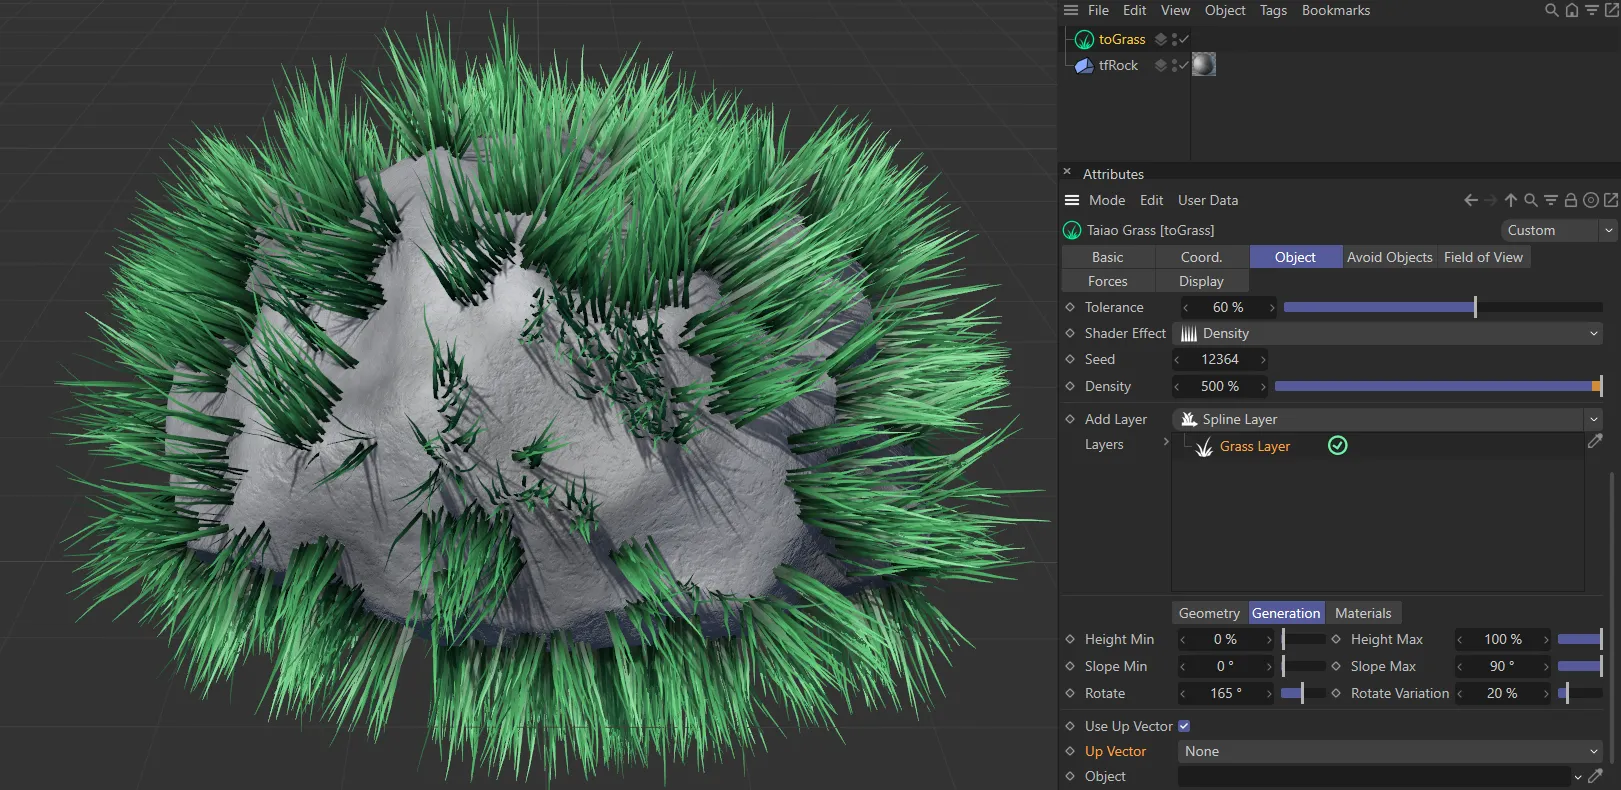
Use Up Vector activated, but Up Vector setting as None.
Object
Section titled “Object”The other option is to use the Object setting in Up Vector, making an object into a target.
Drag the object into the Object link field to activate this.
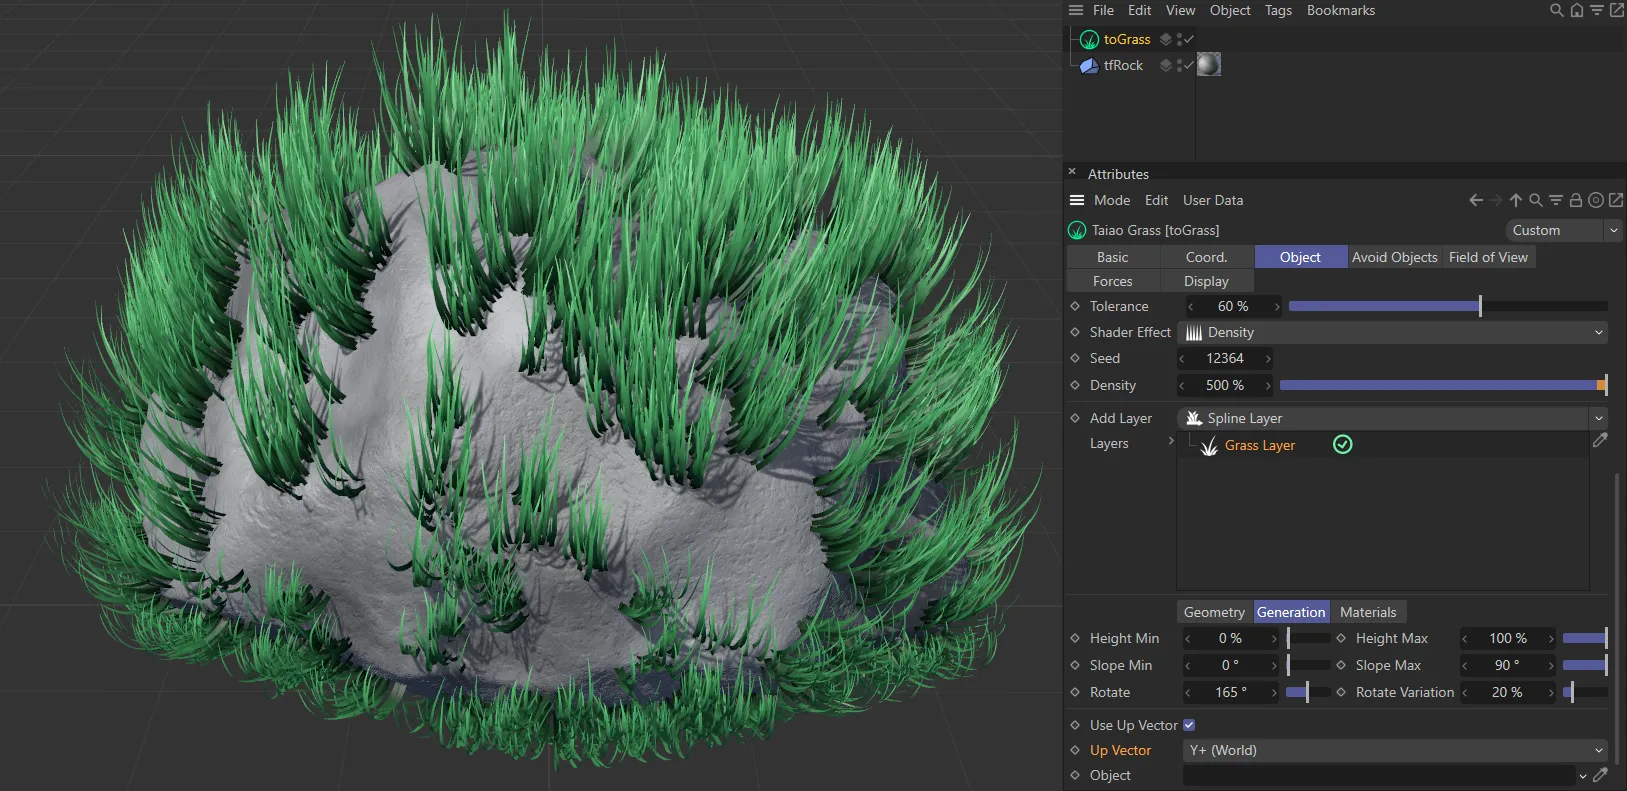
Use Up Vector activated, with Up Vector set at Y+(World), sees all the blades growing vertically.
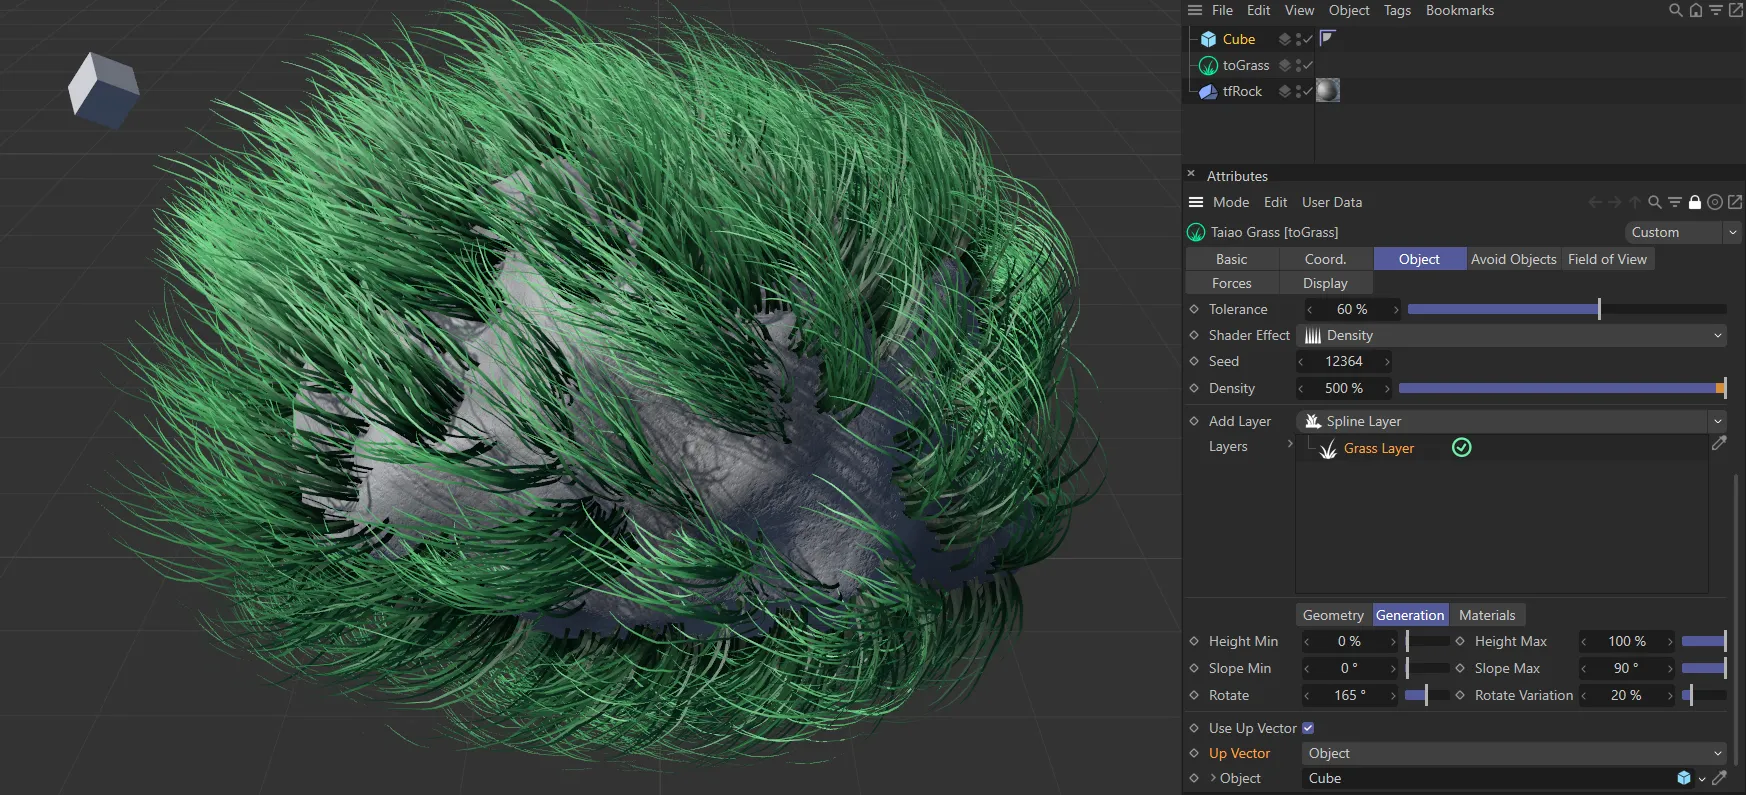
A Cube is used as an object, in with Use Up Vector activated and Up Vector set as Object, with the grass targeting the Cube.
Materials tab
Section titled “Materials tab”To use materials, you must first highlight the layer, that you want to add material to, in the Add Layer link field.
Then, simply drag your material into the Materials link field.
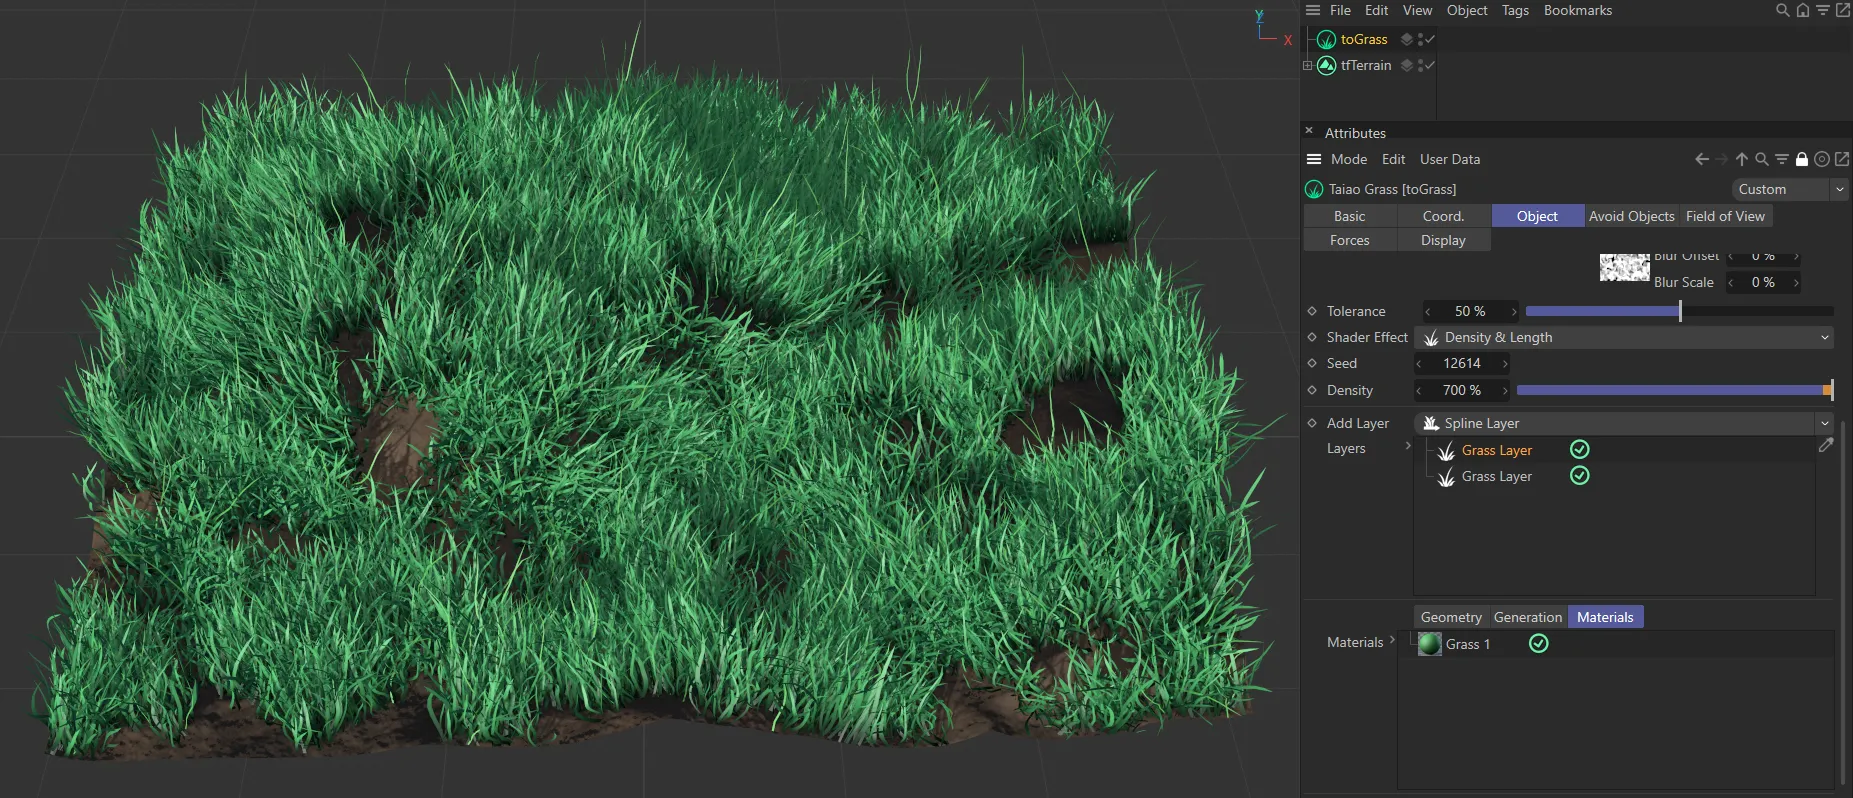
Two grass layers, both with the same Grass 1 material allocated to them.
It is possible to have two different materials for one layer, to add more realism.
Drag another material into the link field and the two materials will be randomly applied.
In this image, there are four grass materials, two being allocated to each of the grass layers, demonstrating the variety that can be employed in order to emulate realism.
Projection Options
Section titled “Projection Options”There are the usual projection options available.
You can use these options to choose the projection mapping of the texture used.
Offset and Length settings allow you to control the global scale and offsets of the material, while the Tile and Repetition values set how many times the image will tile.
Open Preset Browser
Section titled “Open Preset Browser”All objects now have an Open Preset Browser button to complement the menu option.
This will open the preset browser if it is not already open.
For further information on the Preset Browser, click the link below.
Copyright © 2026 INSYDIUM LTD. All rights reserved.