

nxWave
nxWave adds a rolling, noise-driven velocity field to your NeXus particles, so a fluid picks up moving waves.
Add it from Add ▸ INSYDIUM NeXus ▸ nxWave. It arrives as an empty with a box gizmo. The box marks the region the waves act inside, and the arrow on its forward edge shows the direction the waves travel. All of its settings live in Properties ▸ Physics.
nxWave only affects particles that are inside its box. As each particle passes through, nxWave samples a moving noise pattern at that point and pushes the particle along the box’s up axis, so a stream or a fluid surface develops rolling swells. Resize the box with its handles, or set exact dimensions with Size, to cover the area you want to disturb.
A pool of liquid built with nxLiquid Fill, with a slow nxWave rolling gentle swells across its surface. Suzanne sits in the pool as a collider, her face emerging as the waves wash around her.
Object Properties
Section titled “Object Properties”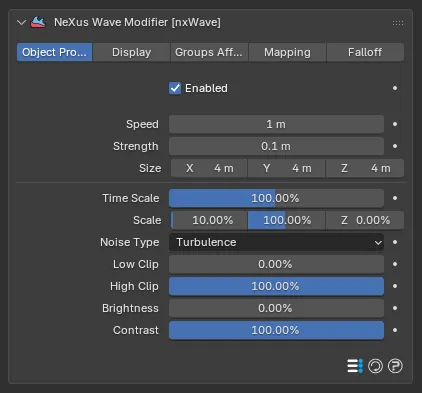
The nxWave panel in Properties ▸ Physics, on the Object Properties tab.
Enabled
Section titled “Enabled”Turns nxWave on or off. Disable it to switch off its motion without deleting it.
Sets how fast the wave pattern travels across the box, in the direction of the box’s arrow. Defaults to 1 m. Raise it for faster, more energetic swells. Set it to 0 and the pattern stops moving.
Strength
Section titled “Strength”Scales the size of the push nxWave adds, which sets the wave height. Defaults to 0.1 m. Raise it for taller, more pronounced waves. Lower it for a gentle ripple.
Sets the dimensions of the solver box along its X, Y and Z axes. Defaults to 4 m on each axis. Only particles inside this box are affected, so use it to confine the waves to the part of your scene you want disturbed.
You can also drag the sizing handles on the box to resize it, if you do not need an exact size.
Time Scale
Section titled “Time Scale”Controls the overall animation speed of the noise that rolls the waves. Defaults to 100%. It works alongside Speed: Speed sets how fast the crests travel in the arrow’s direction, while Time Scale scales the animation rate of the underlying noise.
Set it to 0% and the pattern freezes, so the waves stop moving.
Sets the size of the noise pattern along each axis, as a percentage. Defaults to 10% on X, 100% on Y and 0% on Z.
Lower values stretch the pattern into long, smooth crests along that axis. Higher values pack in finer, choppier detail.
With the defaults, the low X scale draws the crests out long and smooth across the width of the box while the full Y scale cycles them along the direction of travel, giving broad rolling swells. The Z scale controls how the pattern varies through the box’s height, which mainly shows up once you raise Slices on the Display tab.
Noise Type
Section titled “Noise Type”Sets which noise pattern drives the waves. Set as Turbulence, by default. The other options are Simplex, FBM (Fractal Brownian Motion), Wavy Turbulence, Voronoise and Cubic.
Each gives the surface a different character, from the smooth swells of Simplex to the cell-like structure of Voronoise.
Low Clip / High Clip
Section titled “Low Clip / High Clip”These clip the troughs and peaks of the wave, relative to Strength. Low Clip defaults to 0% and High Clip to 100%.
Raising Low Clip flattens the troughs into plateaus. Lowering High Clip flattens the peaks. Move them together to flatten both ends and leave only the mid-range of the pattern.
Brightness
Section titled “Brightness”Shifts the whole sampled pattern up or down, raising or lowering every point of the wave together. Defaults to 0%. Unlike Strength, which scales the waves around their center, this lifts or drops the entire surface.
Contrast
Section titled “Contrast”Sets the difference between the peaks and the troughs. Defaults to 100%.
Lower it to reduce the difference and calm the waves. At 0% the surface is flat and there are no waves at all. Below 0% the pattern inverts, so peaks become troughs.
Display
Section titled “Display”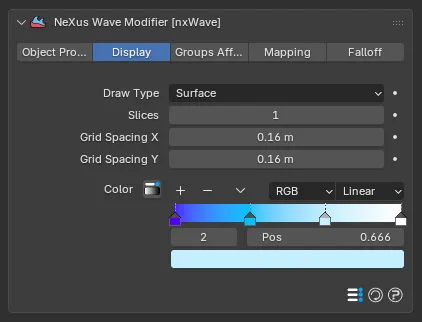
The Display tab controls the preview drawn inside the box in the viewport. These settings are for visualization only. They have no effect on how nxWave moves your particles.
Draw Type
Section titled “Draw Type”Sets how the wave preview is drawn. Set as Surface, by default. The other options are None, Lines, Arrows, Grid and Plane. This changes the viewport preview only. It has no effect on how nxWave moves your particles.
Each preview below is drawn inside the box, with no particles, so you can read what that draw type looks like. The blue box and its red corner markers are shown around it.
No preview is drawn.
A line at each grid point, its length showing how much the wave displaces that point.
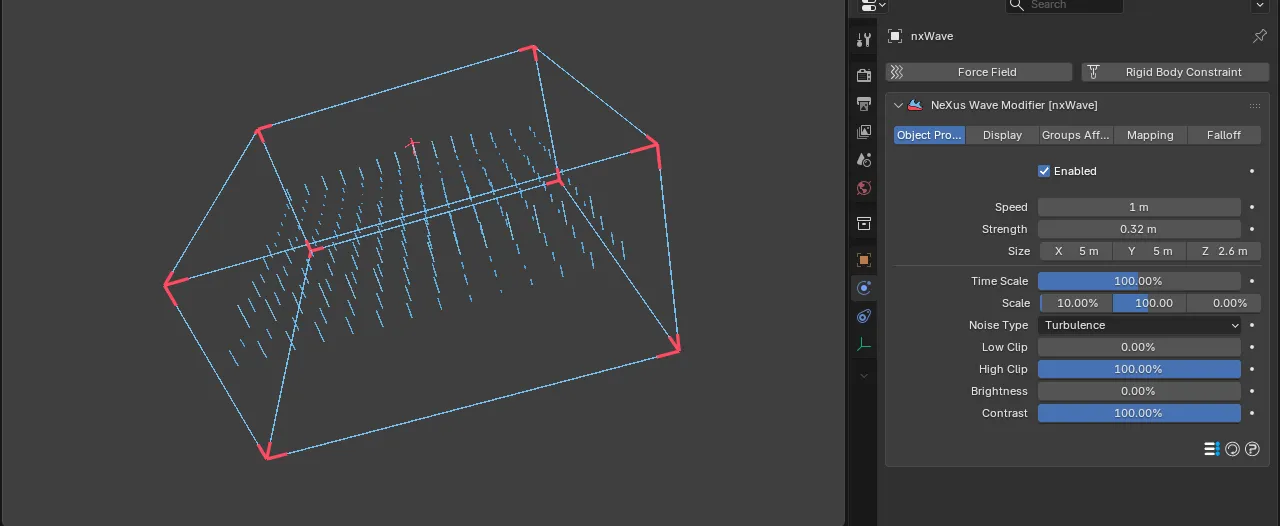
The Lines preview, one line per grid point.
Arrows
Section titled “Arrows”The same as Lines, with an arrow head at each tip that also shows the direction of displacement. The heads are small, so they read most clearly up close.
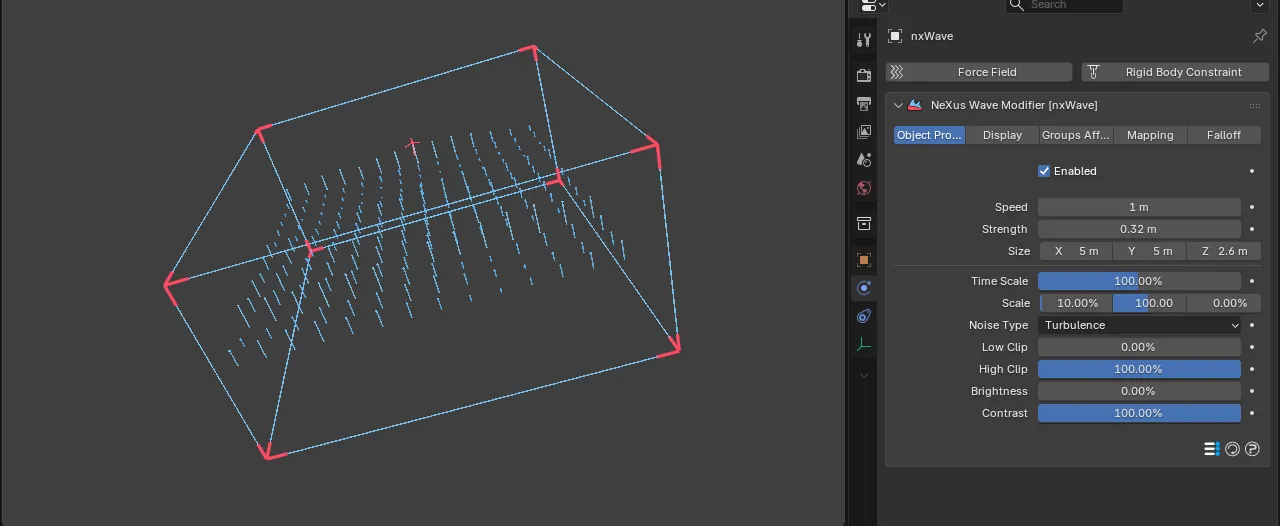
The Arrows preview.
Surface
Section titled “Surface”A solid surface deformed by the wave.
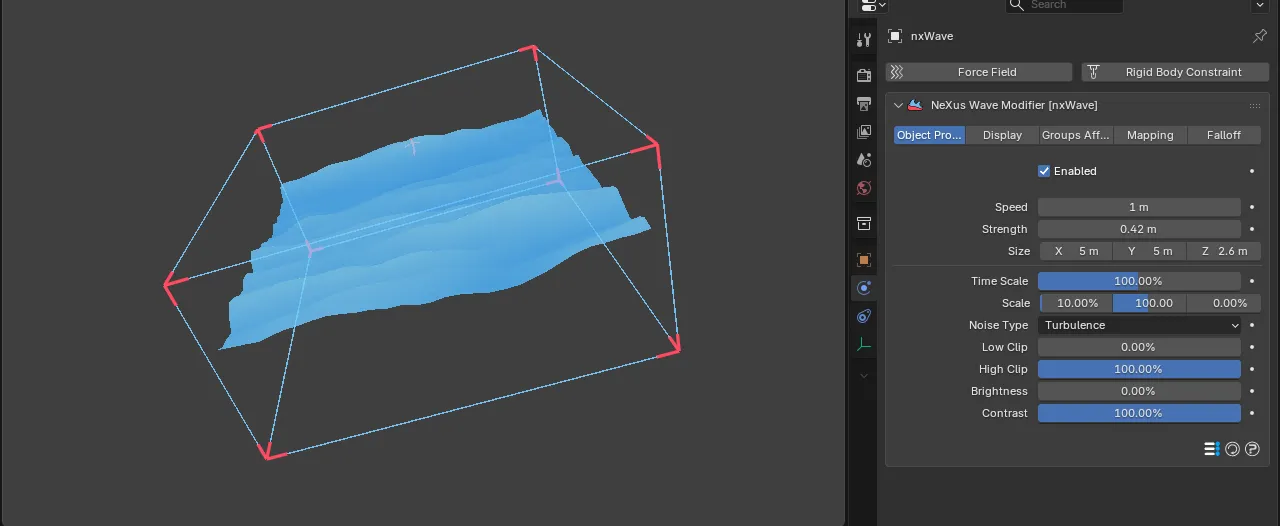
The Surface preview, a solid rolling swell shaded by the Color gradient.
A wireframe grid deformed by the wave, instead of a solid surface.
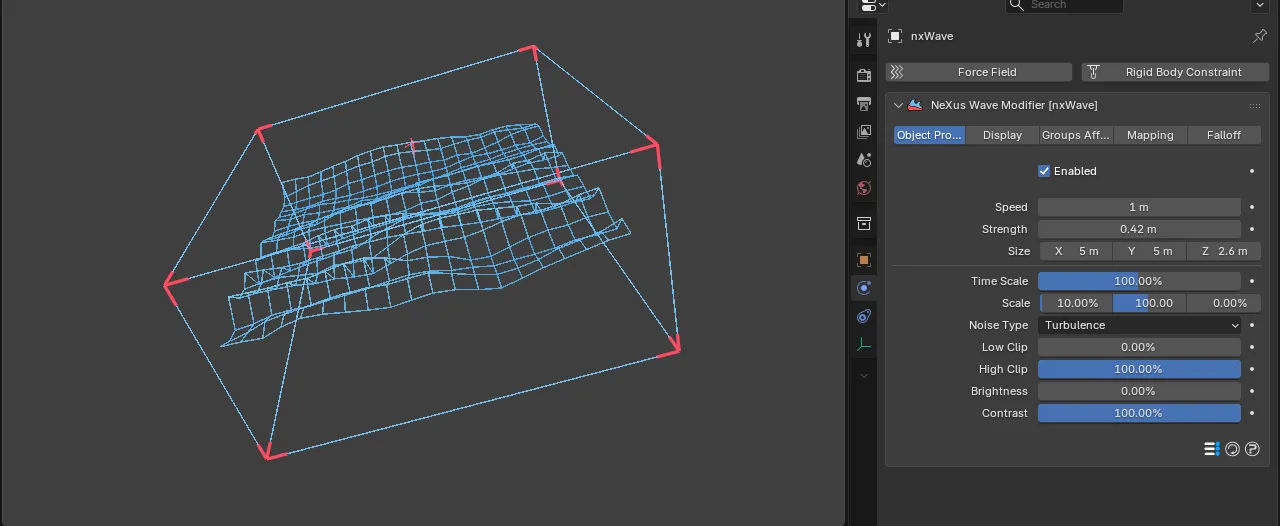
The Grid preview, the same surface drawn as a wireframe.
A flat, undeformed plane that shows the wave as color change only.
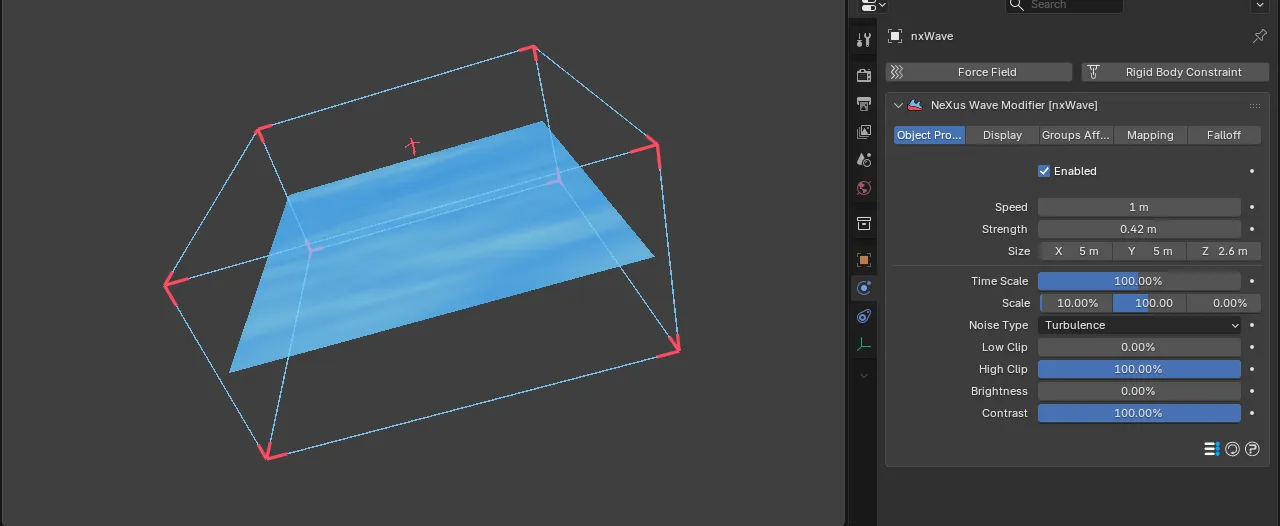
The Plane preview stays flat, mapping wave height to color only.
Slices
Section titled “Slices”Draws multiple stacked copies of the preview surface through the height of the box, so you can read the wave at several levels at once. Defaults to 1. This is a display aid only.
Grid Spacing X, Grid Spacing Y
Section titled “Grid Spacing X, Grid Spacing Y”Set the resolution of the preview grid along each axis, in meters. Both default to 0.16 m. Smaller spacing gives a finer, denser preview. Larger spacing gives a coarser one. This changes the preview only, not the effect on your particles.
The gradient maps wave height to color, so the preview shades from the troughs at the left of the gradient to the peaks at the right. It is drawn for every Draw Type except None.
Groups Affected
Section titled “Groups Affected”Use the Groups Affected tab to restrict nxWave to particles in specific nxGroup groups, rather than affecting every particle inside the box.
Mapping
Section titled “Mapping”Use the Mapping tab to drive nxWave’s settings from particle data instead of fixed values, so a particle’s own attributes can change the waves it feels. See Mapping for how this works.
Falloff
Section titled “Falloff”Use the Falloff tab to limit where nxWave acts. Add one or more nxFalloff objects to the list and blend them, so the waves only affect particles inside the falloff region.
Copyright © 2026 INSYDIUM LTD. All Rights Reserved.