

nxColor
nxColor sets the color of your NeXus particles. It works as a stack of layers, so you can combine several color operations and blend them together.
Add it from Add ▸ INSYDIUM NeXus ▸ nxColor. It arrives as an empty. Add one or more color layers, set each to an operation, then blend them. All of its settings live in Properties ▸ Physics.
A stream of particles colored by how far each has traveled, through a Gradient by Parameter layer, so every particle sweeps from blue at birth through the gradient to red as it crosses Suzanne.
Object Properties
Section titled “Object Properties”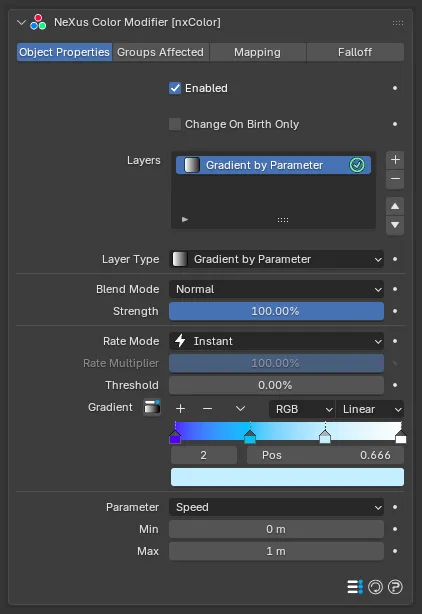
The nxColor panel in Properties ▸ Physics, on the Object Properties tab, showing a Gradient by Parameter layer.
Enabled
Section titled “Enabled”Turns nxColor on or off. Disable it to switch off its coloring without deleting it.
Change On Birth Only
Section titled “Change On Birth Only”Colors each particle once, at birth, and then leaves it alone. Off by default, so the coloring keeps updating every frame for the life of the particle. Turn it on when you want a color fixed at birth, for example a random tint that then stays put.
Layers
Section titled “Layers”The stack of color layers. Use the + button to add a layer, choosing its operation from the menu that appears, and the - button to remove the selected one. The arrows reorder the selected layer. Each layer has an enable toggle on the right of its row, so you can switch a layer on or off without removing it.
Layers are processed from the top of the stack down, each blending with the result of the layers above it. Select a layer to show its settings underneath.
Layer Settings
Section titled “Layer Settings”These settings apply to the layer selected in the Layers list. The top block is shared by every layer. The controls below it change with the Layer Type.
Layer Type
Section titled “Layer Type”Sets the color operation this layer performs. A new nxColor starts with a Gradient by Parameter layer. The options are Gradient by Parameter, Noise, Set Color, Increment/Decrement, Time-Dependent, Distance from Object and Distance from Camera, each described below.
Set Color
Gradient by Parameter
A Set Color layer, on the left, gives every particle the same flat color. A Gradient by Parameter layer keyed to Speed, on the right, colors each particle by how fast it is moving, so the stream reads as a spread of color.
Blend Mode
Section titled “Blend Mode”Sets how this layer combines with the layers above it. Set as Normal, by default. The other options are Min, Subtract, Multiply, Overlay, Max, Add, Screen and Difference.
Strength
Section titled “Strength”Sets how strongly this layer contributes to the blend. Defaults to 100%. Lower it to mix the layer’s color only partway into the result from the layers above.
15%
100%
The same Set Color layer at a Strength of 15%, on the left, and 100%, on the right. At a low strength the set color only tints the particles. At full strength it replaces their color completely.
Rate Mode
Section titled “Rate Mode”Sets how quickly a particle reaches its new color. Set as Instant, by default. The other options are Frame Time and Custom.
- Instant: the color changes at once.
- Frame Time: the color eases toward the target over time, for a gradual fade.
- Custom: the same gradual fade, at a speed set by the Rate Multiplier below.
Rate Multiplier
Section titled “Rate Multiplier”Scales the speed of the Frame Time fade. Available only when Rate Mode is set to Custom. Defaults to 100%.
Threshold
Section titled “Threshold”Introduces a random chance that the color change is skipped for a given particle. Defaults to 0%.
Each time a particle’s color is due to change, a random number is drawn. At 0% the change always happens. At 100% it never happens. Values in between let only some particles take the change, for a scattered result.
Gradient by Parameter
Section titled “Gradient by Parameter”The default operation. It maps a Gradient across a chosen particle parameter, so a particle’s color is driven by its own data.
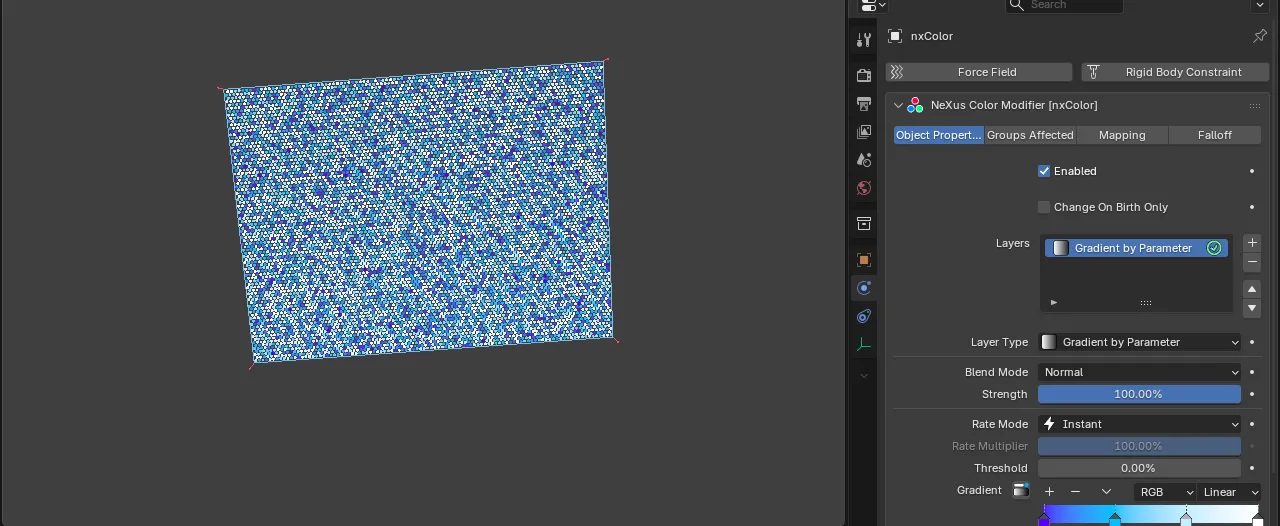
A Gradient by Parameter layer coloring a sheet of particles by a per-particle parameter, so each particle takes its own color from along the ramp.
Gradient
Section titled “Gradient”The color ramp read across the parameter’s range. The parameter’s Min maps to the left of the ramp and its Max to the right.
Parameter
Section titled “Parameter”The particle attribute that drives the gradient. Set as Speed, by default. The other options are Age, Direction, Distance Traveled, Density, Life, Mass, Neighbor, Radius, Falloff, Random, Smoke, Temperature and Fuel.
Smoke, Temperature and Fuel read the advection channels from an nxExplosiaFX simulation.
Min / Max
Section titled “Min / Max”Set the range of the parameter that the gradient is mapped across. A particle at or below Min takes the color at the left of the ramp, and one at or above Max takes the color at the right. The units and defaults follow the chosen parameter: Speed, Radius and Distance Traveled are lengths, while Falloff and Random are percentages.
Neighbor Radius
Section titled “Neighbor Radius”The search radius used to count neighbors, shown only when Parameter is set to Neighbor. Defaults to 0.25m.
Use Fixed Point
Section titled “Use Fixed Point”Shown only when Parameter is set to Random. When on, each particle keeps a fixed random value, so its color stays put. On by default.
Shown only when Parameter is set to Direction. Chooses which axis of the particle’s heading drives the gradient: X (heading), Y (pitch) or Z (bank). Set as X, by default.
Colors the particles from a procedural noise field.
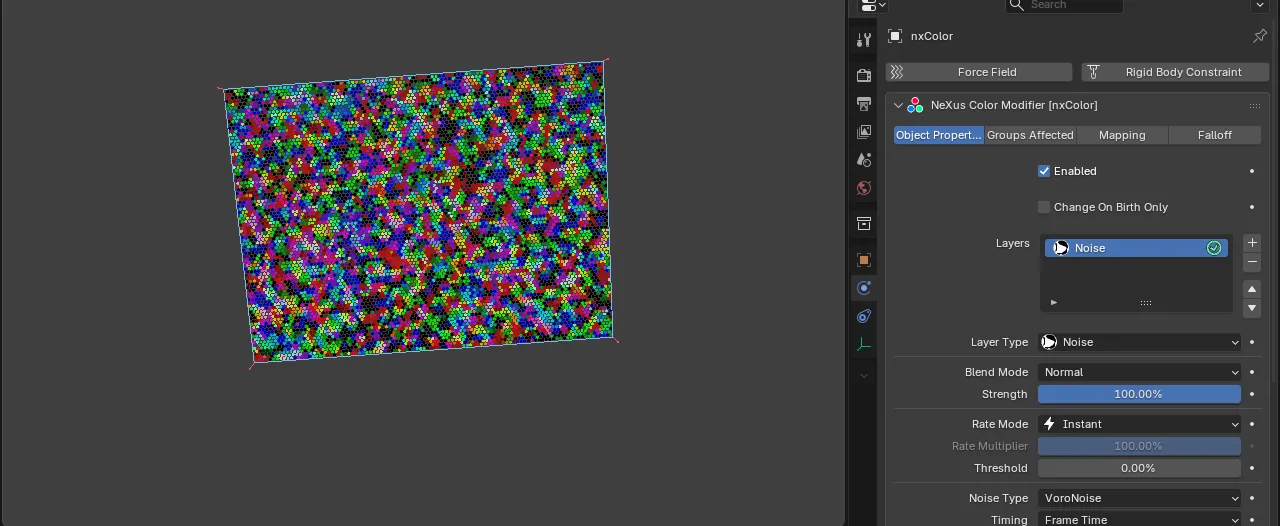
A Noise layer coloring the particles straight from a procedural noise field.
Noise Type
Section titled “Noise Type”The noise pattern for this layer. Set as VoroNoise, by default. The other options are Simplex, Curl, Turbulence, Wavy Turbulence, FBM and Cubic.
Timing
Section titled “Timing”Sets when the noise is sampled. Set as Frame Time, by default. The alternative is Particle Age.
- Frame Time: samples the noise from the current scene frame.
- Particle Age: samples the noise from each particle’s own age.
Color Channel
Section titled “Color Channel”Sets how nxColor turns the noise into color. Set as Gradient, by default. The alternative is Noise.
- Gradient: the noise value drives the position along the Gradient.
- Noise: the noise generates the color channels directly.
Gradient
Section titled “Gradient”The color ramp mapped across the noise values. Shown only when Color Channel is set to Gradient.
Shifts the noise pattern without changing any other setting. Defaults to 1.
The spatial scale of the noise field. Defaults to 100%. Larger scales give broad, smooth variation and smaller scales give finer detail.
Persistence
Section titled “Persistence”Sets how much each successive octave contributes. Defaults to 100%.
Lacunarity
Section titled “Lacunarity”Sets the frequency multiplier between successive octaves. Defaults to 1.
Frequency
Section titled “Frequency”The base frequency of the noise. Defaults to 100%.
Octaves
Section titled “Octaves”The number of noise layers combined for detail. Defaults to 1.
Low Clip
Section titled “Low Clip”Clips the noise output below this value. Defaults to 0%.
High Clip
Section titled “High Clip”Clips the noise output above this value. Defaults to 100%.
Brightness
Section titled “Brightness”Adjusts the brightness of the noise output. Defaults to 0%.
Contrast
Section titled “Contrast”Adjusts the contrast of the noise output. Defaults to 100%.
Set Color
Section titled “Set Color”Sets every affected particle to a single fixed color.
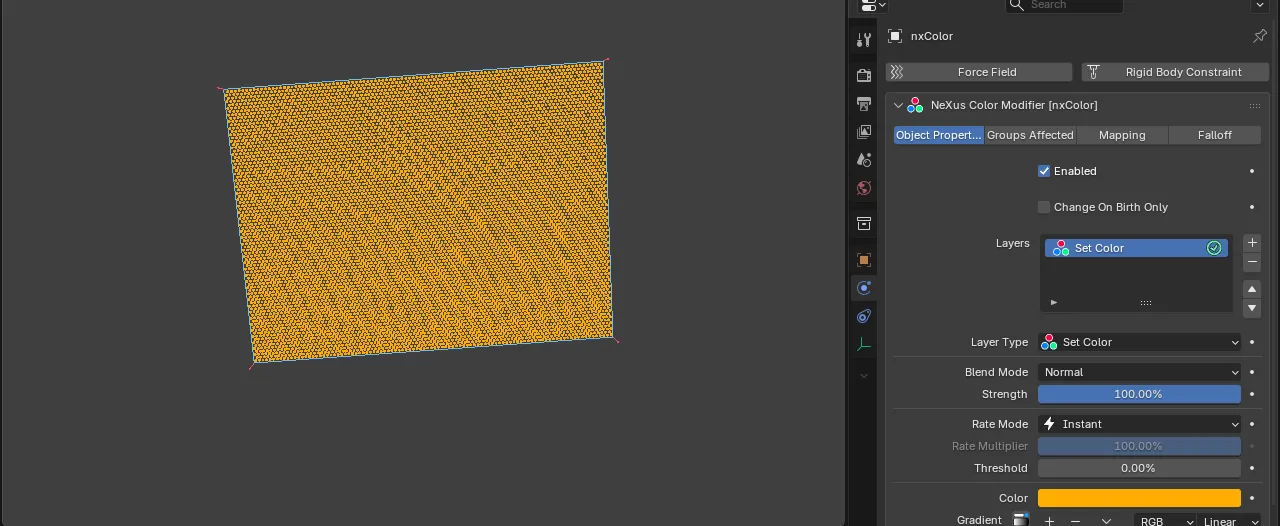
A Set Color layer giving every particle the same flat orange.
The color to apply. Defaults to orange.
Increment/Decrement
Section titled “Increment/Decrement”Shifts each particle’s color by a fixed amount every step, so its color drifts over time.
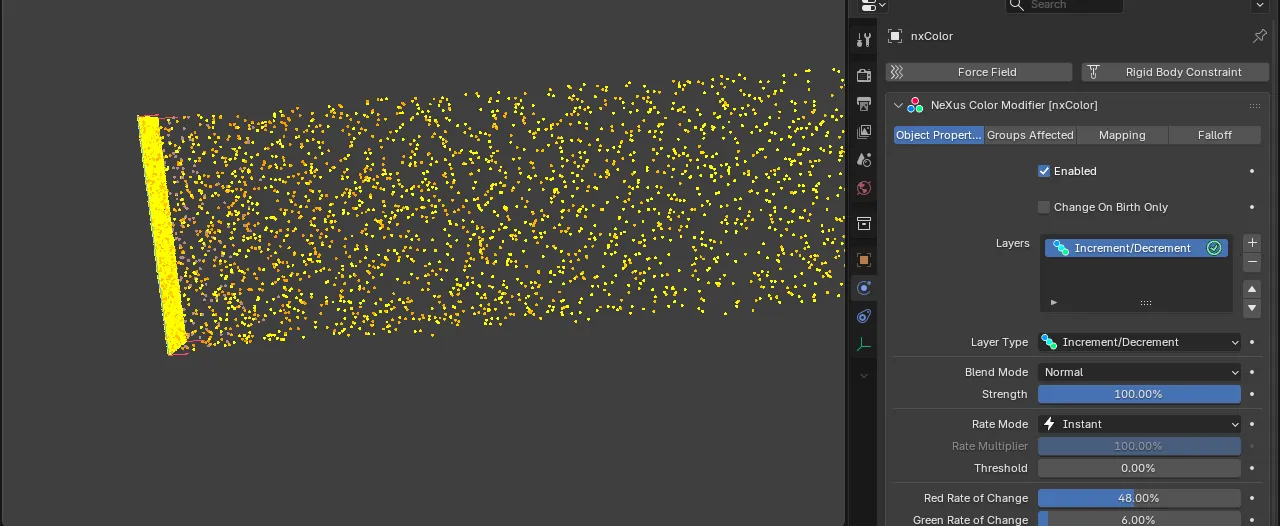
An Increment/Decrement layer raising red and lowering blue each step, so the particles shift to a warm gold as they age along the stream.
Red / Green / Blue Rate of Change
Section titled “Red / Green / Blue Rate of Change”The amount to add to or subtract from each color channel, from -100% to 100%. Each defaults to 0%. Positive values raise the channel and negative values lower it.
Time-Dependent
Section titled “Time-Dependent”Runs a Gradient over time, so the particles change color as the clip plays.
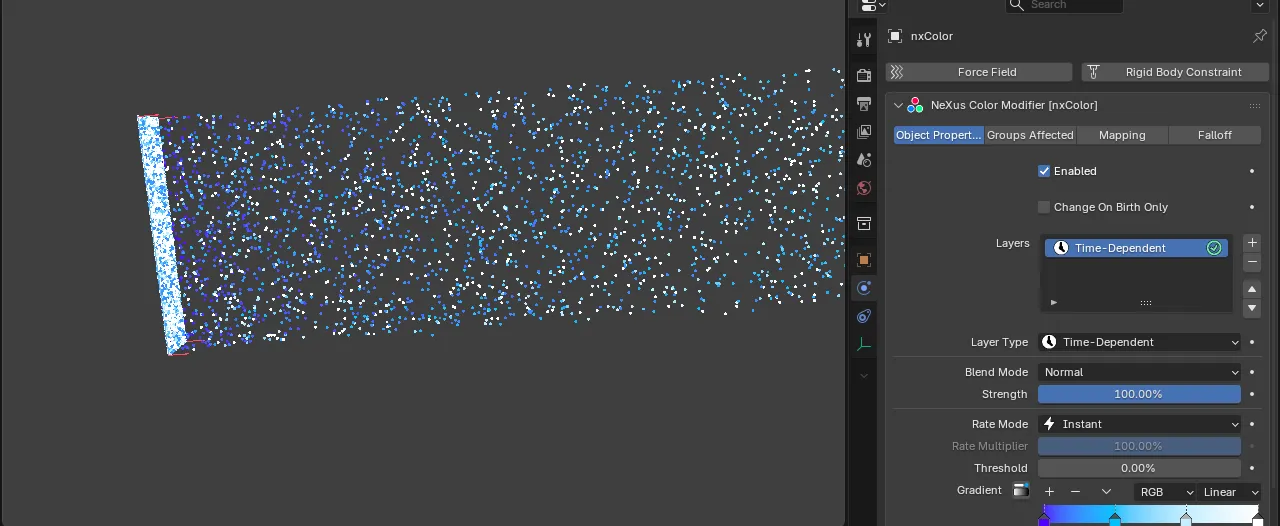
A Time-Dependent layer running the gradient over each particle’s age, so the stream shifts from the start of the ramp at birth to the end as it travels.
Gradient
Section titled “Gradient”The color ramp played across the time span.
Time to Completion
Section titled “Time to Completion”The time the gradient takes to run from start to finish. Defaults to 3s. A clickable f/s toggle switches this between frames and seconds.
On Complete
Section titled “On Complete”Sets what happens once the gradient reaches its end. Set as Do Nothing, by default. The other options are Wrap to Start and Reverse.
- Do Nothing: the color holds at the end of the gradient.
- Wrap to Start: the gradient jumps back to the beginning and runs again.
- Reverse: the gradient runs back toward the beginning.
Distance from Object
Section titled “Distance from Object”Maps a Gradient across a particle’s distance from an object, so particles near the object take one end of the ramp and distant ones take the other.
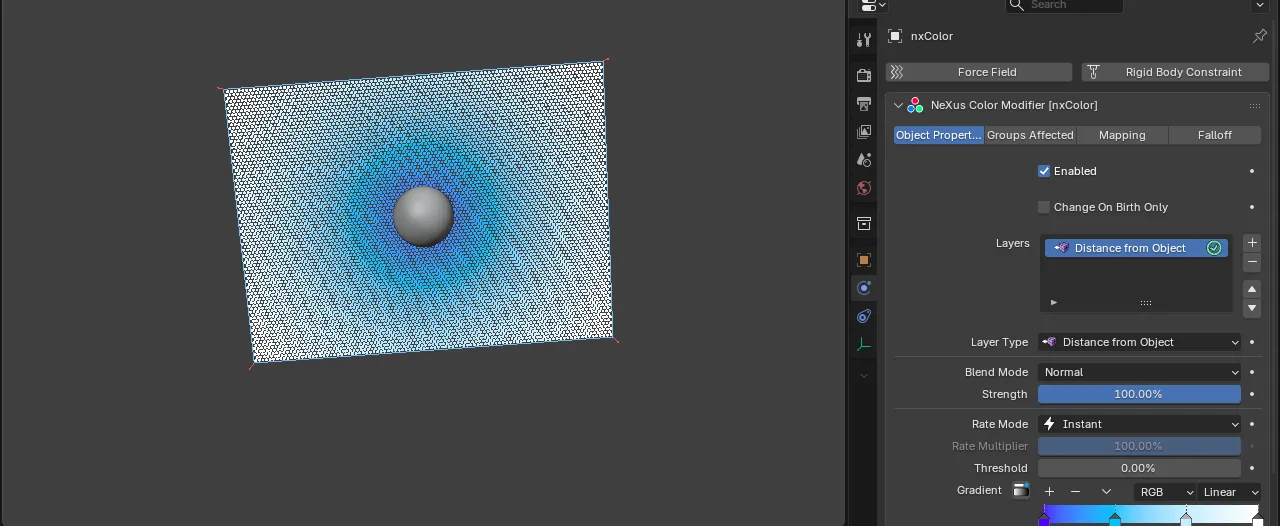
A Distance from Object layer keyed to the central sphere, so particles near it take one end of the ramp and those out at the edges take the other.
Gradient
Section titled “Gradient”The color ramp read across the distance range.
Object
Section titled “Object”The object to measure the distance from. It can be a mesh, curve or hair curves object.
Nearest Distance
Section titled “Nearest Distance”The distance mapped to the start of the gradient. Defaults to 0m.
Furthest Distance
Section titled “Furthest Distance”The distance mapped to the end of the gradient. Defaults to 5m.
Distance from Camera
Section titled “Distance from Camera”Maps a Gradient across a particle’s distance from a camera, for effects like fading color into the distance.
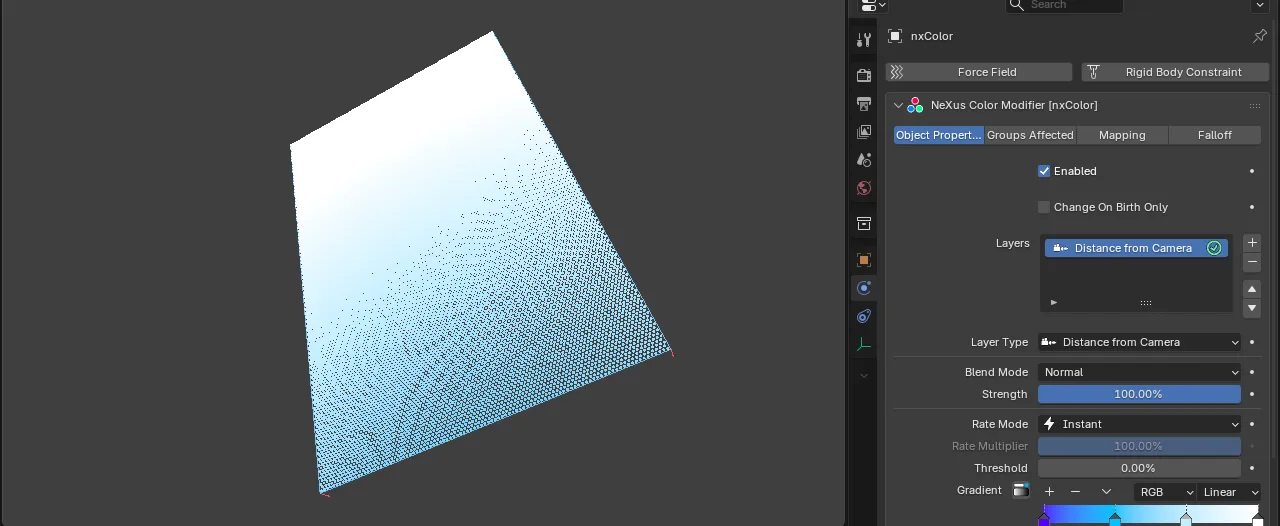
A Distance from Camera layer fading the sheet along its depth, so particles near the camera take one end of the ramp and distant ones take the other.
Gradient
Section titled “Gradient”The color ramp read across the distance range.
Camera
Section titled “Camera”The camera to measure the distance from.
Nearest Distance
Section titled “Nearest Distance”The distance mapped to the start of the gradient. Defaults to 0m.
Furthest Distance
Section titled “Furthest Distance”The distance mapped to the end of the gradient. Defaults to 5m.
When on, the distance is measured within the camera’s field of view. Off by default.
Groups Affected
Section titled “Groups Affected”Use the Groups Affected tab to restrict nxColor to particles in specific nxGroup groups, rather than coloring every particle.
Mapping
Section titled “Mapping”Use the Mapping tab to drive nxColor’s settings from particle data instead of fixed values, so a particle’s own attributes can change the color it receives. See Mapping for how this works.
Falloff
Section titled “Falloff”Use the Falloff tab to limit where nxColor acts. Add one or more nxFalloff objects to the list and blend them, so the coloring only affects particles inside the falloff region.
Copyright © 2026 INSYDIUM LTD. All Rights Reserved.